
With iCloud Photo Sharing, you do not need to worry on one share photos or videos with you anymore. All you need to do is select the people who you wish to share with, and you can let them add their own photos, videos, and comments. What is more, the best part is that the photos don't count toward your iCloud storage; you can save up to 5,000 photos and videos in each album. How amazing! Time to learn how to use iCloud photo sharing.
How to use iCloud photo sharing on iPhone?
Before I show you how to use iCloud photo sharing, you are supposed to update your iPhone to the latest iOS. Then set up iCloud on all of your devices to make sure that you sign in to iCloud with the same Apple ID on all of your devices that you want to use with iCloud Photo Sharing.
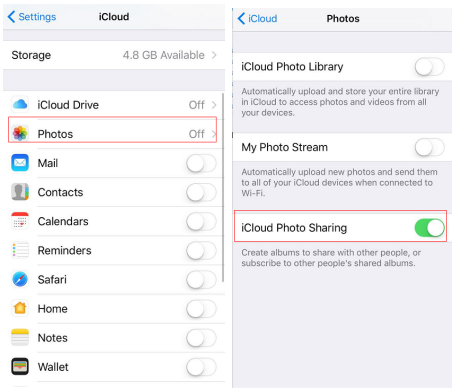
Step 1. Turn on iCloud Photo Sharing.
Tap on phone home screen, go to Settings > iCloud > Photos, then turn on iCloud Photo Sharing.
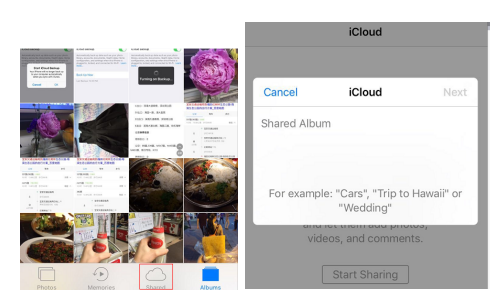
Step 2. Create a new shared album.
Go to the Photos where all your photos and videos are kept and select the Shared icon at the bottom of the screen. Enter the Shared Album Name and click Next.
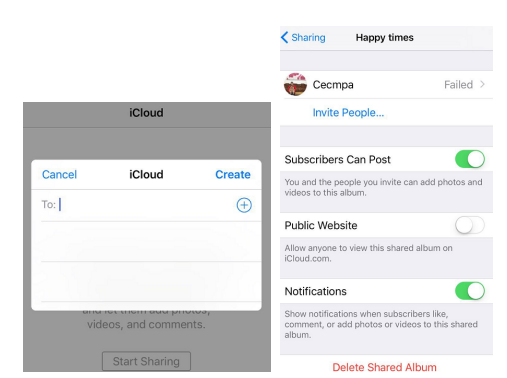
Step 3. Invite the people who you want to share the photos with.
Click the add icon to add the friends to share iCloud photo and videos. You can send invitations through an email address or iMessage phone number.
Note:
You can even share albums with friends and family that don't use iCloud. Just open a shared album that you created, go to the People tab on your iPhone, and turn on Public Website. Then these photos will publish to a website that anyone can see in an up to date web browser.
Step 4. Add photos.
Click the add icon to upload the photos that you want to share with. Now you have an album for you and your friends to drop photos and videos in.

Note:
When you add new photos or videos, the friends you share the album with are notified automatically. Make sure that Subscribers Can Post is turned on so that they can add photos and videos too.
Besides, friends and family that are signed in to iCloud can leave comments, like photos and save photos from your shared album.
How to back up photos in iCloud Photo Sharing to computer
If you have some photos you like in the shared album, you should probably back them up to your computer as it's possible that you could lose them by mistake. If you delete photos on your iPhone when you've signed in iCloud, the photos would also be deleted on iCloud and other devices using the same Apple ID. So to make sure that you won't accidentally lose the photos you like, the safest choice here is to back them up to your computer hard drive.
Here's how you can access photos in iCloud Photo Sharing on Windows and download them to your computer.
1. Download iCloud for Windows, install it in your computer.Open it and sign in with your Apple ID.
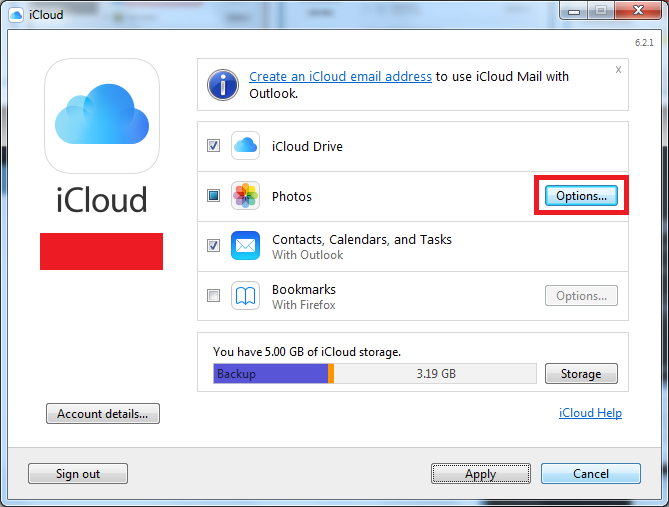
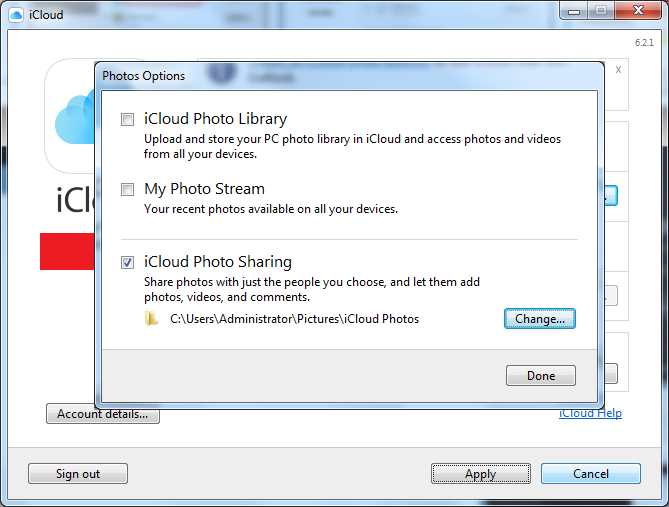
2. On the interface, click on the Options button next to Photos. As we are saving photos from iCloud Photo Sharing, just check iCloud Photo Sharing and uncheck other options. You can change the default directory for the photos from iCloud Photo Sharing by clicking Change button. Click Done to go back to the main interface.
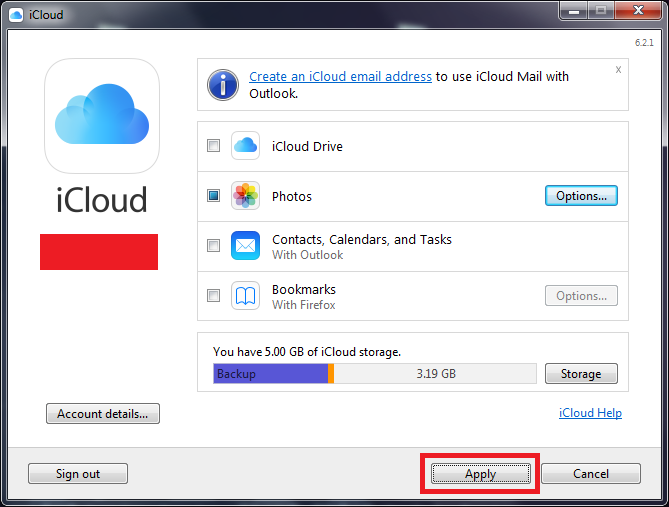
3. On the main interface, uncheck other options except Photos and click Apply.
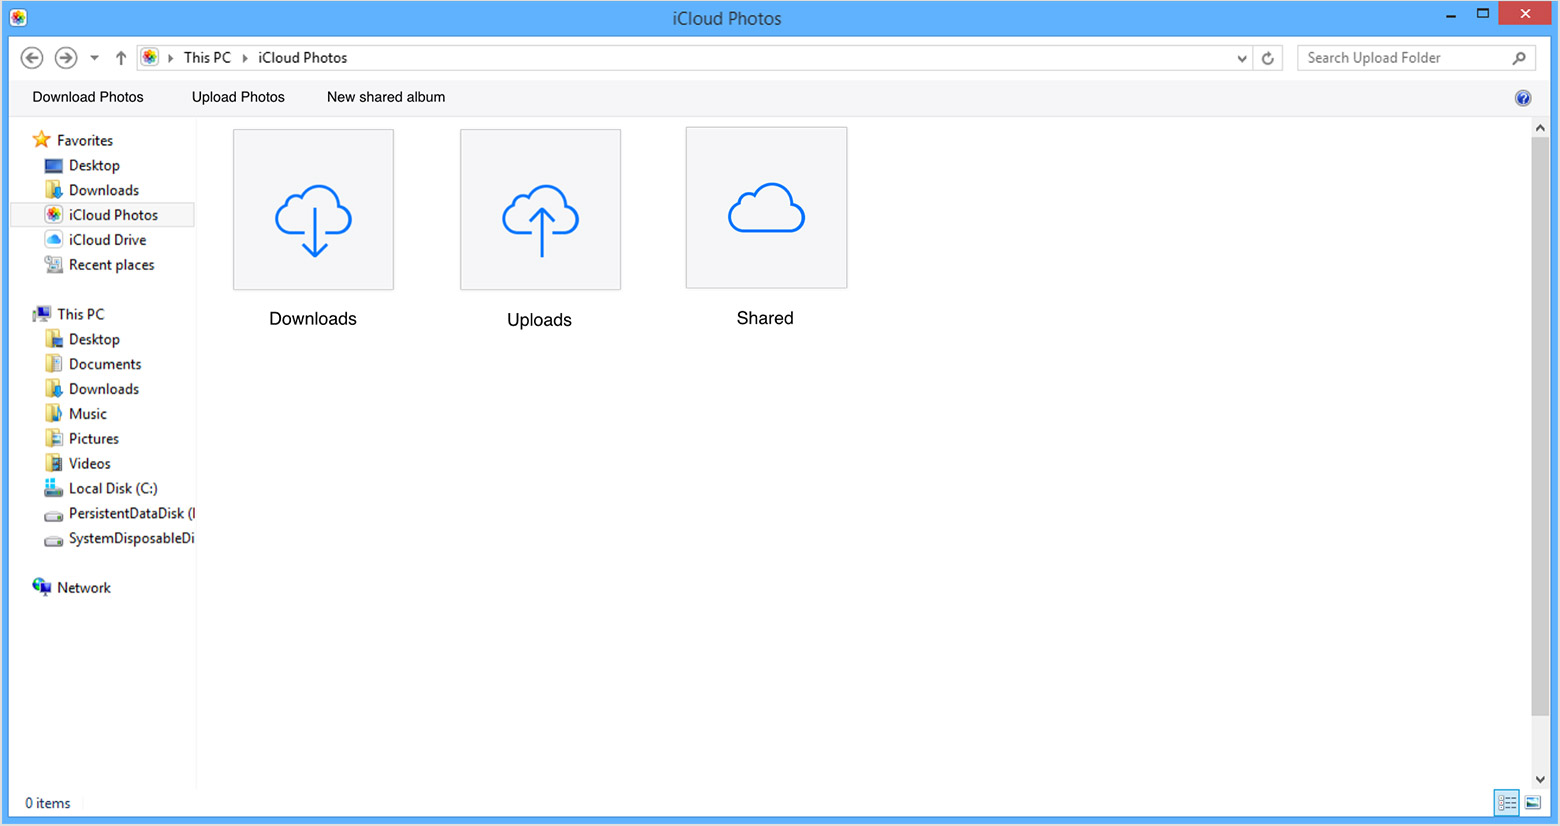
4. The program would download all photos from iCloud Photo Sharing to your computer. You can find the photos in the default folder or the folder you set.
With the instructions above, now you should know how to use iCloud Photo Sharing on iPhone. It's a convenient way to share photos with friends and family and you should probably make good use of it.
 May. 25, 2017 by


 Prof. Media
 Blu-ray Ripper
 Blu-ray Copy
 iOS Data Recovery
 [12/29/23] MAX Downloader V15.0.0
 10,000,000 people are using Leawo!
 All Transactions are protected!
 30-Day Money Back Guarantee!