As is known to all, we can use the built-in camera of iPad to take photos of happy moments with friends and families. What' more, due to iPad's small size compared with PC, we could lie in the sofa with an iPad in our hands to enjoy those beautiful memories comfortably. However, we may want to showcase our iPad photos on PC with a larger screen than iPad for some situations, so we need to figure out some ways to view iPad photos on PC.
Part 1: View iPad Photos on PC via iCloud.com
iCloud is a cloud storage and cloud computing service from Apple. The service provides its users with means to store data such as documents and photos on remote servers for downloading to iOS, macOS or Windows devices, to share and send data to other users. The service also provides the means to wirelessly back up iOS devices directly to iCloud. We can view iPad photos on computer via iCloud.com with ease. The steps are shown as below.
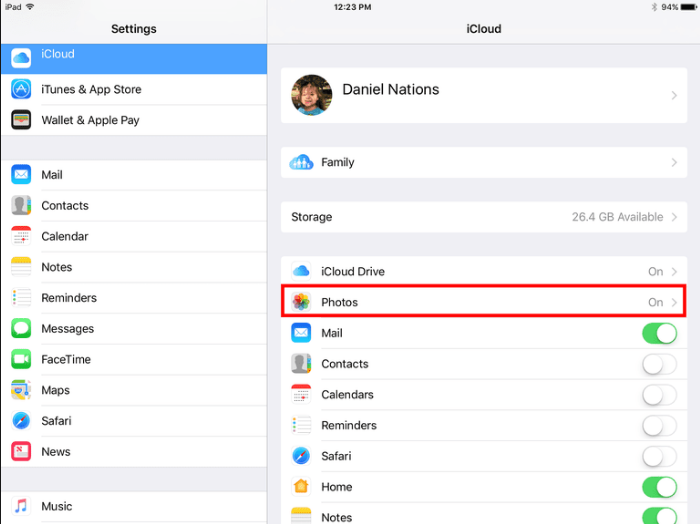
Step 1: Firstly you need to enter the settings panel on your iPad. Then click "iCloud" on the left column. If a login-box pop up, you need to log in first. After the logging, and you will see option "Photos" in the right container. Click "Photos" and then enable the "iCloud Photo Library" to automatically upload the photos from your iPad to iCloud. Make sure your iPad is on WiFi connection, or automatic upload to iCloud will not be available.
Step 2: Visit www.icloud.com on your browser and input your Apple ID and password to sign in to iCloud. Remember to use the same Apple ID as the one you use in your iPad.
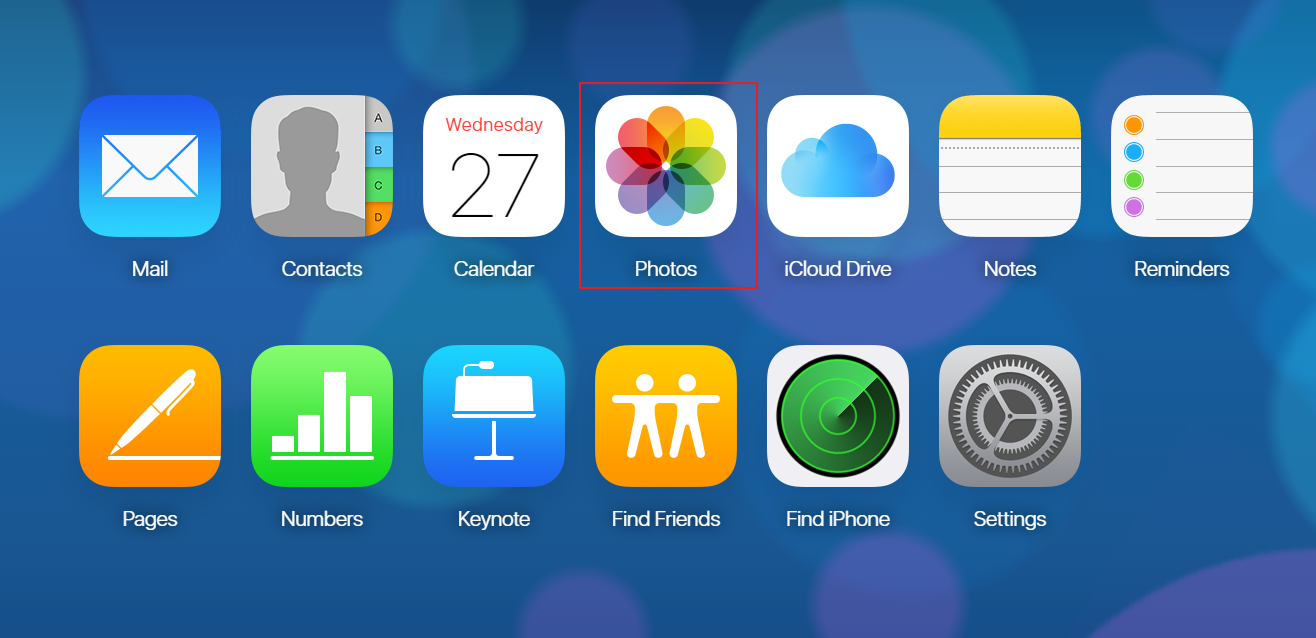
Step 3: After logging in, you will jump to the main webpage of iCloud. Then click "Photos" in the middle of the webpage.
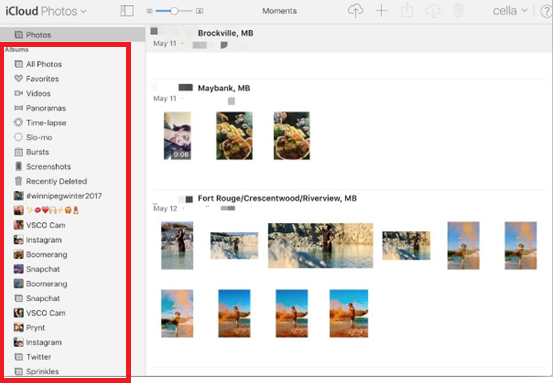
Step 4: After the loading, you will be able to see all your photos in the webpage. You could see all your photos by clicking "All Photos" in the left column and photos which are deleted recently by clicking "Recently Deleted" and so on.
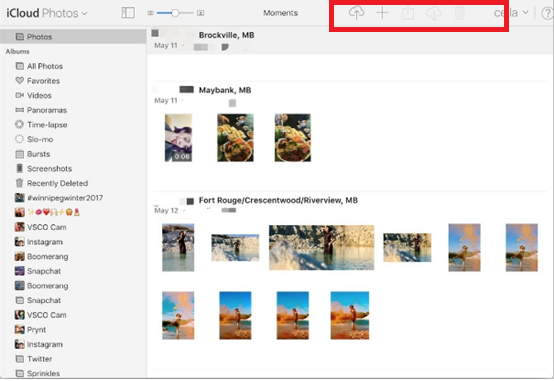
Step 5: The photos in the right container of the frame are all thumbnails. To view full size, double click them. What's more, you can mark them as your favorite, add them to other album, share them to social network, download them to local disk and even delete them by selecting them and then clicking the action buttons in the top right action bar.
Part 2: View iPad Photos on PC with Leawo iTransfer
Leawo iTransfer is a great tool for managing files on an Apple device. We can use it to backup and transfer 12 kinds of files, like apps, photos, music, videos, SMS, contacts, and so on between iOS devices, iTunes and PCs. So it's a piece of cake to send iPad photos to PC via Leawo iTransfer. Following are the steps of how to view iPad photos on PC.
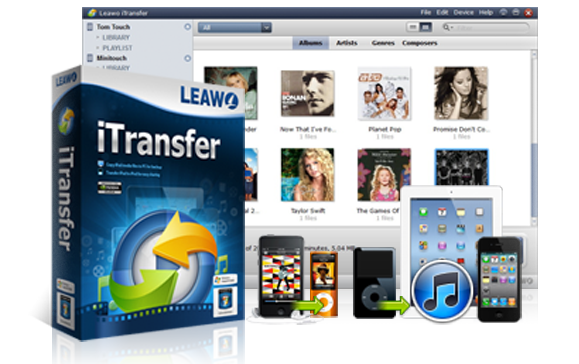
Leawo iTransfer
☉ Transfer files among iOS devices, iTunes and PCs with ease.
☉ Transfer up to 14 kinds of data and files without iTunes.
☉ Support the latest iOS devices like iPhone 7, iPhone 7 Plus, etc.
☉ Play back, view, and delete data and files on iOS devices.
Step 1: Launch iTransfer and connect your iPad to PC
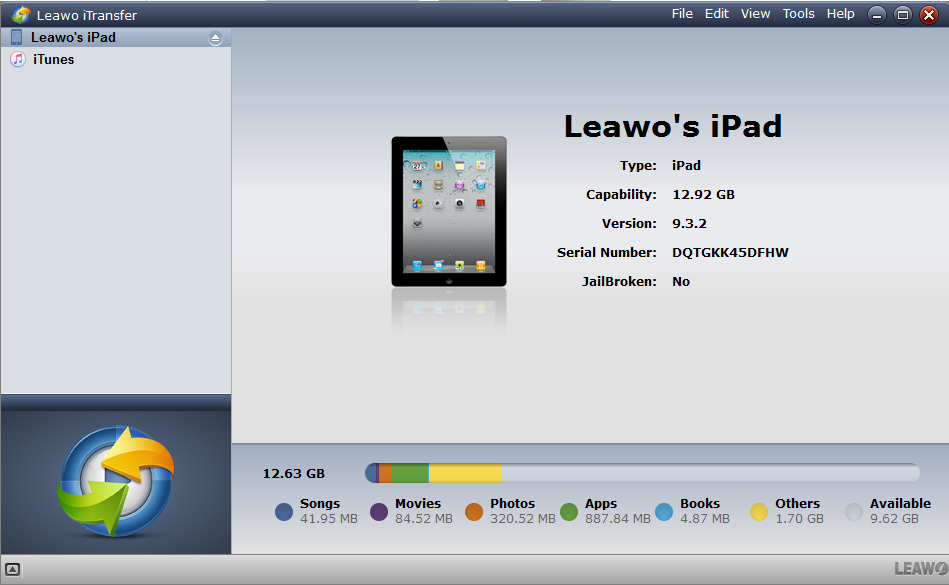
Start iTransfer and connect iPad to Computer with USB cable. When iTransfer detects your device. The basic information of your device will be displayed in the main interface.
Step 2: Find your iPad photos via iTransfer
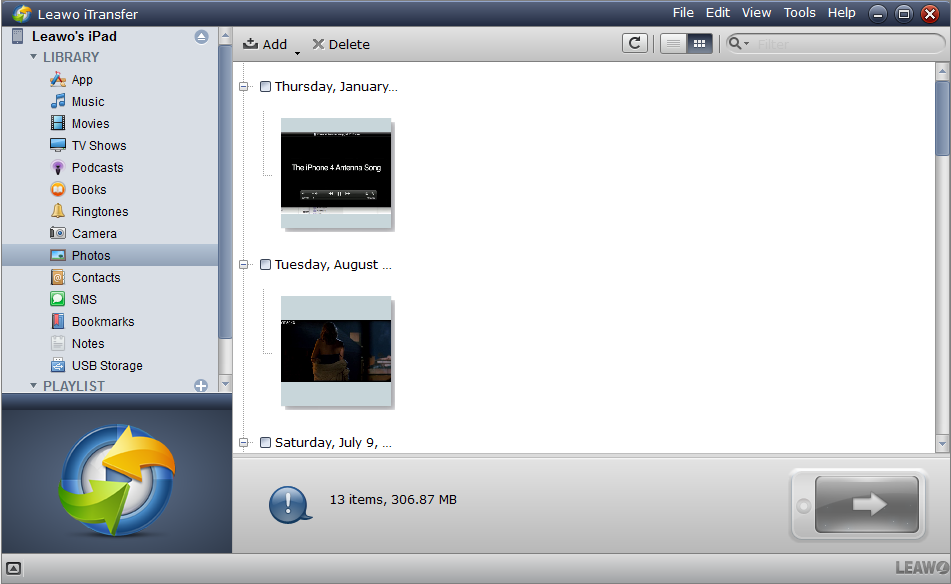
After the software recognizes and detects your device, you will see a library of iPad files in well-organized structure on the left column of the frame. Then click "Photos" on the left column and you will see all the photos in the right container.
Step 3: View iPad Photos on PC by iTransfer
Drag the scroll bar downward and you will see all the photos in your iPad. To view the photos in full size, double-click the thumbnails.
Step 4: Send iPad photos to PC
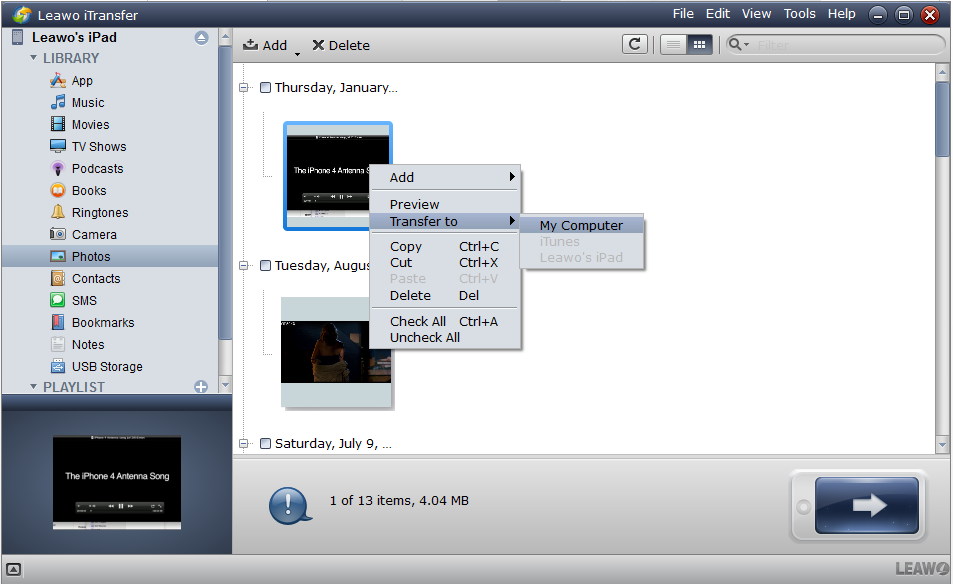
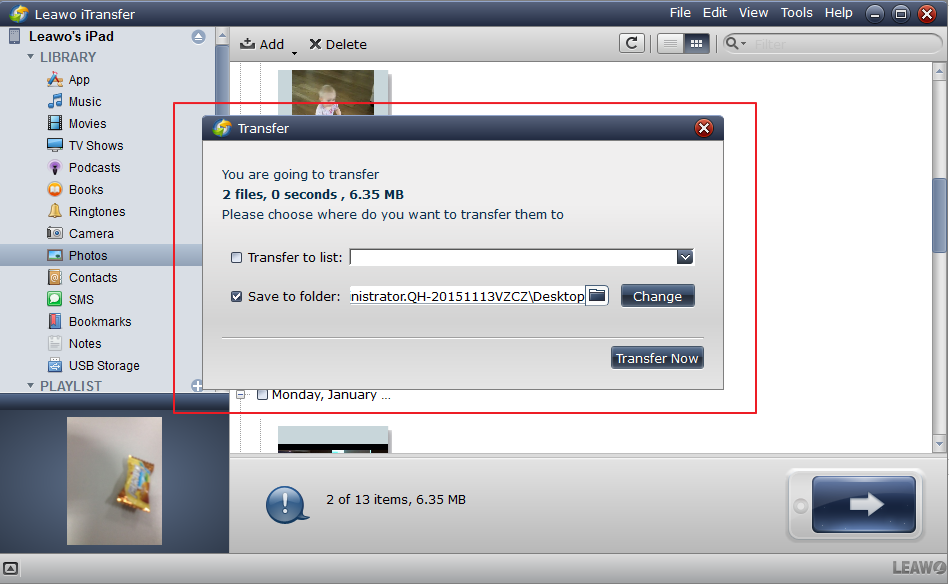
If you want to see the photos on computer at any time, you need to send iPad photos to PC first. Select any of the photos and right click them, then choose "Transfer to > My Computer". A dialog will pop up to let you select a path to save the files. Check "Save to folder" and then click "Change" to browse folders on the computer. Finally, click the transfer button at the bottom right. The photos in your iPad will be saved in your local disk within few seconds.
Part 3: View iPad Photos on PC via Windows Explorer
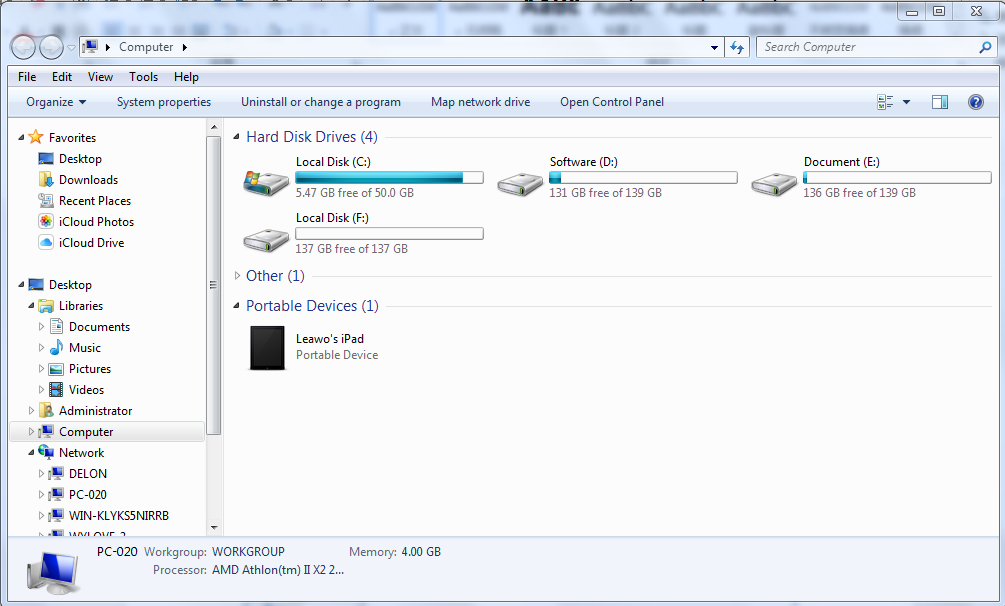
When you connect your iPad to PC, your iPad will be regarded as an external disk by the Windows system. So certainly we could view iPad photos on PC via Windows Explorer.
Step 1: Open your computer and connect your iPad to your PC. You can see the mobile hard disk drive.
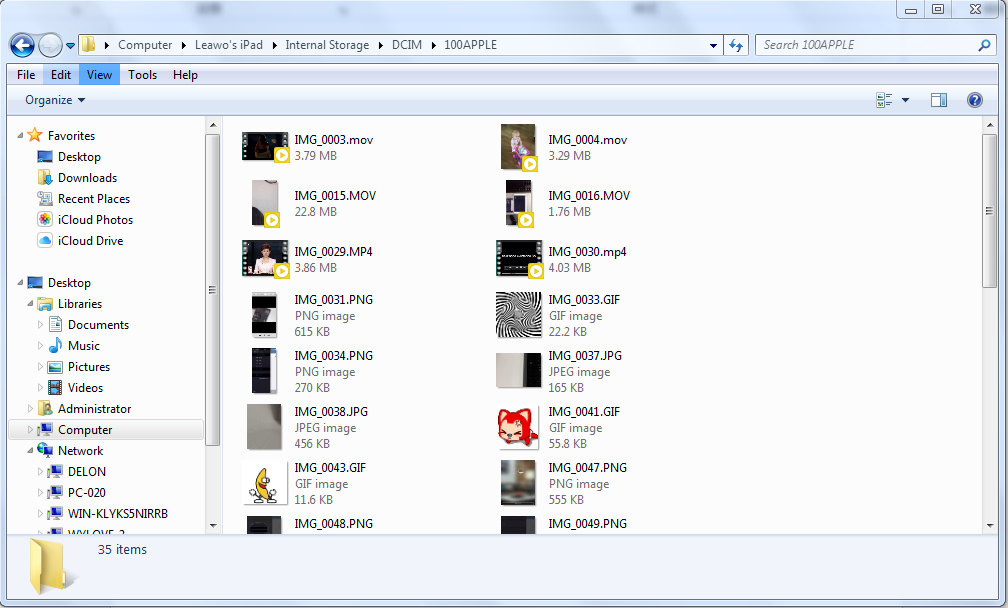
Step 2: Locate the iPad icon and navigate to "Internal Storage > DCIM" where you can find both videos and photos on iPad. Copy the videos you want to backup and paste them to a new folder.
With these three ways above, we can transfer photos from iPad to computer as backups and view them at any time we want. If this guide is helpful for you, don't forget to share it with your friends.

