In some cases, you may desire to know “how to uncheck multiple songs in iTunes” and “why can’t I uncheck songs in iTunes”. This kind of issue may make you feel confused. As a matter of fact, it is not so hard to resolve as think. If you are eager and patient to know the detailed method, this guidance will be quite proper for you to refer to.
Part 1: How to Uncheck Songs in iTunes
As for the matter of how to uncheck songs in iTunes, you can actually make it easily by referring to the steps shown below.
1. Run latest version of iTunes on your computer.
2. Click on one playlist under the menu of “Playlists” in iTunes left sidebar.
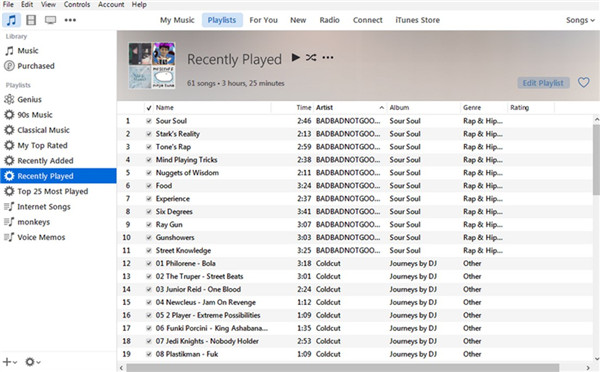
3. In the left part of the iTunes window, you will see all the songs in the playlist. Thus, you can hold down the command key and then hit on the checkbox next to the song name. This can be applied in every playlist.
As you can see, it is quite simple for you to check the songs in iTunes. If you want to uncheck the songs, you just need to click on the checkbox next to the song time once again to get this work done.
Part 2: Why Are Check/Uncheck Songs Sometimes Gone?
After you know how to check/uncheck all songs in iTunes, you may also want to know why are check/unchecked songs sometimes gone. The causes of this problem can be various. Here I would like to tell you some major reasons of it.
1. If you have updated your computer with a new SSD, this issue may occur due to some improper operations.
2. Maybe your iTunes version is out of date and you need to upgrade your iTunes to the latest version on your computer.
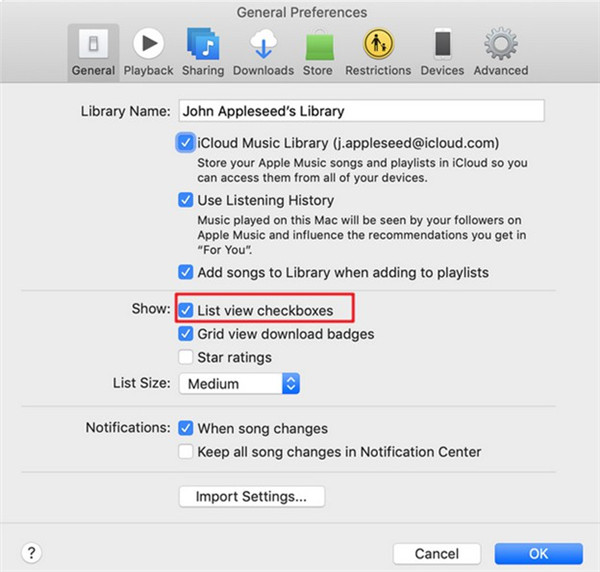
3. When your iTunes settings are improper, the check/unchecked songs may also be gone. You can go to “Edit> Preferences> General” to put a checkmark on the option of “Show: List view checkboxes”.
Try the corresponding method given in the above and you will be able to see your check/unchecked songs in iTunes interface.
Part 3: How to Sync Only Checked Songs in iTunes
When you have a large music library or your iDevice has limited storage space, you may just want to sync only the checked songs in iTunes instead of the whole music library to your iOS device. You can finish this task manually by unchecking songs in iTunes library or via the sync music screen. However, if you have subscribed Apple Music or iTunes Match, you will fail to manage music manually, for the iCloud Music Library is turned on in that case. If not, you can follow the solutions shown in this part to sync only checked music in iTunes.
3.1 Using Options Setting Feature
1. Run iTunes on your computer and make sure the version of it is the latest one.
2. Insert your iDevice into computer and then click on its icon at the top of the sidebar.
3. Click on “Settings> Summary” successively in the left sidebar.
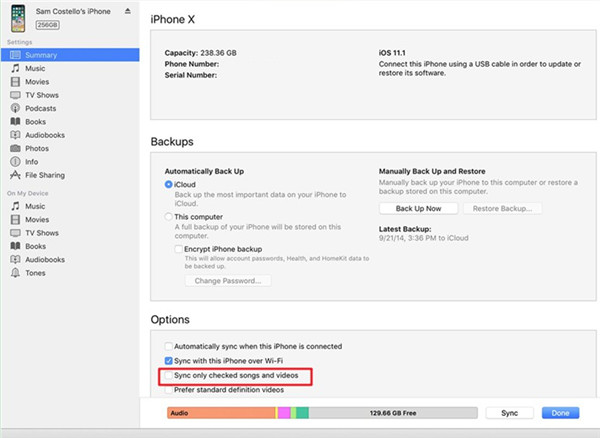
4. In the right part of the iTunes window, you need to put a check mark beside the option of “Sync only checked songs and videos” under the function area of “Options”.
5. Click on “Done” button at the bottom right corner of the interface to confirm your setting.
6. Hit on “Library> Songs” from the sidebar to call out the song list in iTunes library on computer.
7. Check the songs you desire to sync to your iDevice by putting a check mark in the box next to the music name. If you do not want to sync a certain song to your iDevice, you can remove the check mark next to the song name.
8. Hit on the “Sync” button to invoke the syncing process.
Note:
You can select all the songs you desire to uncheck when you have lots of tracks you want to uncheck.
1) For selecting contiguous items, you need to hold down the Shift key on your keyboard. Hit on the track at the beginning of the music group you desire to uncheck and then hit on the track at the end. Thus, all the tracks in between are chosen.
2) For selecting non-contiguous items, you need to hold down the Ctrl key on your keyboard. Click on each track you desire to uncheck. After that, you can click on “Song” tab in iTunes interface and choose “Uncheck Selection” to hit on.
Remember to click on “Sync” button to start the syncing process.
3.2 Using the Sync Music Screen
There is another way for you to sync only checked songs in iTunes. The sync music screen can be made use of to fix this issue properly as well.
1. Run iTunes on computer and then plug your iDevice into computer with matched USB cable.
2. Click on the device icon in the left sidebar of iTunes screen and then hit on “Settings> Summary> Music” successively.
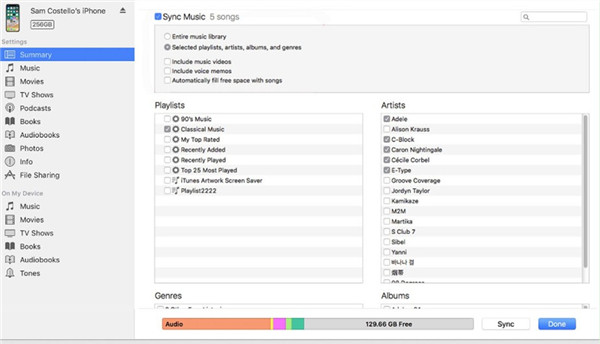
3. Put a check mark in the box next to the option of “Sync Music” by clicking on it.
4. Hit on the tab of “Selected playlists, artists, albums, and genres”.
5. Checking the items that you desire to sync under the options of playlists, artists, genres and albums.
6. Click on “Done> Sync” to begin to sync the chosen items to your iDevice.
The solutions to sync only checked songs in iTunes are not difficult. You just need to operate according to the steps shown above and even beginners can complete this task perfectly.
Bonus Tip: Better Choice to Manage iTunes Songs
You may feel a bit inconvenient to manage iTunes songs sometimes. If this is what you are not content, you can resort to a better choice to manage iTunes music effectively. Leawo iTransfer is the best software for you to take advantage of. It can transfer 12 kinds of data among iTunes, iOS devices, and computer. You can transfer movie from iPhone to computer as well as back up apps in iPhone. This tool is prominent in its transferring features, which can assist you to transfer checked iTunes songs to iDevice and transfer iDevice music to iTunes without any difficulty. If you want to know its powerful features in detail, you can read through the following contents.
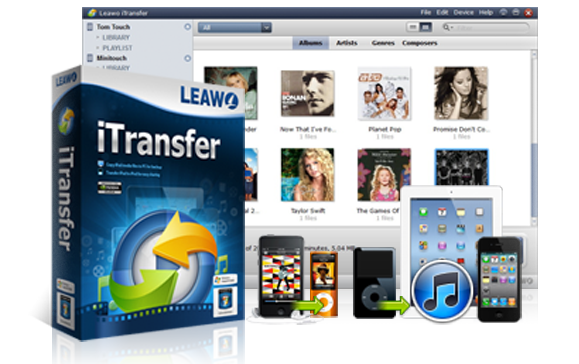
Leawo iTransfer
☉ Transfer up to 14 kinds of data and files without iTunes.
☉ Support the latest iOS devices like iPhone X, iPhone XR, etc.
☉ Play back, view, and delete data and files on iOS devices.
1. Transfer Checked iTunes Songs to iPhone
Since the iTunes sync process may erase the previous songs on your iPhone, you can apply Leawo iTransfer to avoid this shortcoming. The step-by-step instructions to transfer checked iTunes songs to iPhone with Leawo iTransfer are shown below for your reference.
Step 1: Run Leawo iTransfer
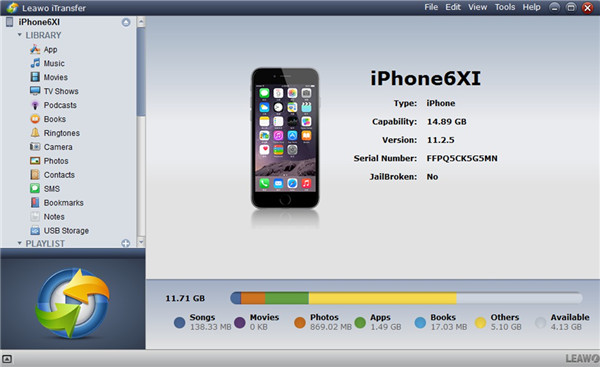
Prepare a suitable USB cable and then use it to connect your iPhone with computer. Kick off Leawo iTransfer on your computer. Your iPhone info will be detected by the software and be shown in the right part of the main screen.
Step 2: View iTunes Songs
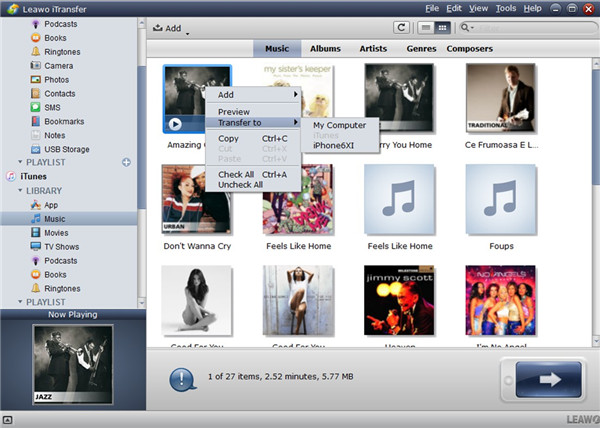
Hit on the iTunes icon in the left sidebar and then click on “LIBRARY> Music” tab successively. Thus, all iTunes tracks will be shown in the right part of the window.
Step 3: Transfer Checked iTunes Songs to iPhone
Choose the iTunes tracks that you desire to transfer to iPhone and then right-click on one of them to bring out a new panel. Hit on “Transfer to > iPhone…”. Thus, the program will immediately transfer the songs you have selected in iTunes to your iPhone device. It will only take you a few seconds to finish the task smoothly.
2. Transfer iPhone Music to iTunes
Leawo iTransfer also allows you to get iPhone songs to iTunes library. As for how to get this work done, please read through the following contents.
Step 1: Run Leawo iTransfer and View iPhone Music
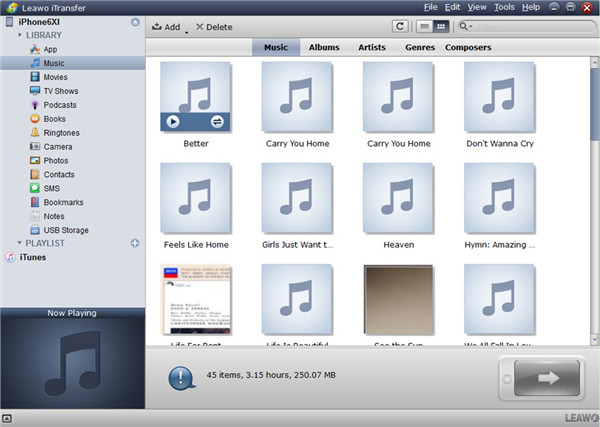
Fire up Leawo iTransfer and connect iPhone with your computer with proper USB cord. After that, you need to click on “iPhone icon> LIBRARY> Music” menu successively to see all iPhone songs in the right part of the window.
Step 2: Transfer Music from iPhone to iTunes
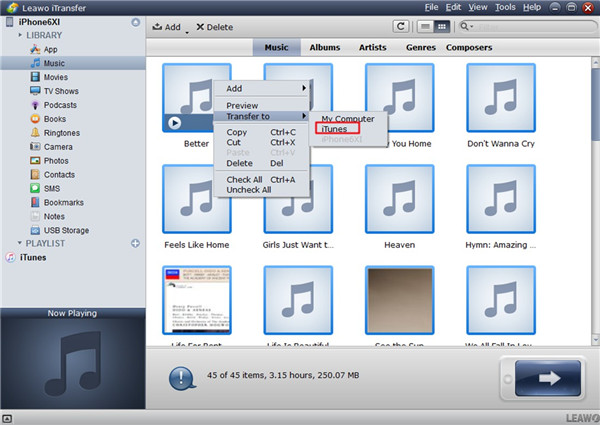
Select the tracks that you desire to add to iTunes library from iPhone and then hit on the transfer button at the bottom right corner on the screen. Click on “Transfer to> iTunes” in the pop-up panel. Thus, the tool will begin to transfer iPhone songs to your iTunes music library right away. A percentage bar will show you the whole transfer process intuitively.
The transfer process is time-saving. You can download and install this software on your computer to have a try. You will fall in love with this excellent transfer tool after you use it for once.
Having discussed so much, you can learn the way to fix how to uncheck all songs in iTunes and the reason why check/unchecked songs sometimes gone. You can also understand how to sync only checked songs in iTunes by iTunes itself and via Leawo iTransfer. By comparing, you will know Leawo iTransfer is one professional transfer tool for you to use to deal with various kinds of transfer issues among iTunes, computers and iOS devices.

