
PowerPoint is a powerful tool used widely by the teachers, office staffs, civil servants and people working in other industries. In order to make the PowerPoint livelier, audio or video is always inserted by the user. However, users are not satisfied with the audio simply inserted into the PowerPoint as there is unwanted part of the audio which they want to get rid of. Then how to trim the audio in the PowerPoint to make it accepted by the user? Follow what the article is about to introduce below.

Outline
Audio File Formats Supported in PowerPoint
Before inserting the audio into the PowerPoint, we should know what audio file formats are supported in PowerPoint.
Even though there are many types of audio formats and most of them seem complicated to identify, as long as we know how to apply the correct format to the PowerPoint, we don’t need to know anything about what it means.
The supported audio formats in PowerPoint can be listed as the table below:
| Supported file format | Extension |
| AIFF Audio file | .aiff |
| AU Audio file | .au |
| MIDI file | .mid or .midi |
| MP3 Audio file | .mp3 |
| Advanced Audio Coding - MPEG-4 Audio file* | .m4a, .mp4 |
| Windows Audio file | .wav |
| Windows Media Audio file | .wma |
Note:
- The above listed audio formats are supported by the PowerPoint version of 2013 or higher version. For the version which is lower than that, maybe you need to install some assistant application like QuickTime.
How to Trim Audio in PowerPoint on Windows?
After determining which are the supported audio formats in PowerPoint, you can select an audio format that you want to trim and import it to the PowerPoint. The steps for trimming the audio file are easy given that you will not jump any of them.
- 1. Select the audio clip on the slide. Slide to the page where the audio clip is inserted in the PowerPoint.
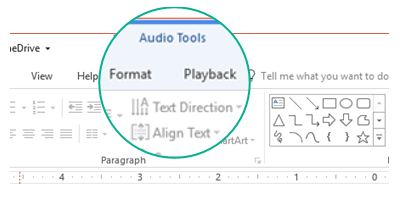
- 2. On the toolbar ribbon in the PowerPoint, there is "audio tools" button. It has two options: Format and Playback. You ought to choose the "Playback" button and click the "Trim Audio".
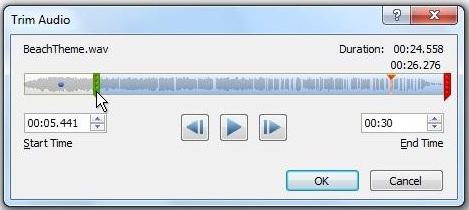
- 3. Click the Play button to determine where you want to trim your audio clip.
- 4. Click the Pause button to locate the starting point of the trimmed part.
- 5. The Green marker can be used to determine the starting point of the trimmed clip and the red marker is used to determine the ending point of the trimmed clip. You can fine-tune the two markers to decide the length of the trimmed clip.
- 6. Once the audio is finished trimming, click the "OK" button to save the trimmed clip.
How to Trim Audio in PowerPoint on macOS?
For macOS users, the steps are similar without too much complicated operations.
- 1. Slide to the page where the inserted audio is.
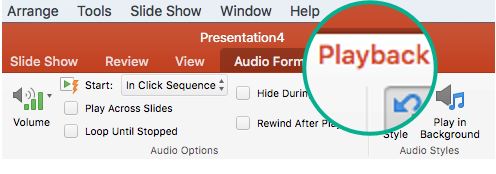
- 2. From the toolbar ribbon select the "Audio tools" button and it has two options to be selected: Format and Playback. Select the Playback tab and click "Trim Audio".
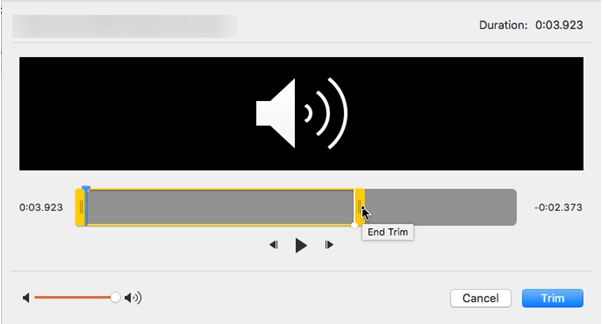
- 3. Click the Play button to play the audio for determining where the trimmed audio clip to start and end.
- 4. Wherever you want the trimmed clip to start, click the Pause button to locate the starting point.
- 5. Once you move the cursor on the yellow marker on the progress bar, you can see they are marked with Start Trim and End Trim respectively. By moving both markers you can set the starting point and ending point of the trimmed clip.
- 6. Once the audio clip is trimmed, click the Trim button to save the file.
How to Save Trimmed Audio?
After trimming the audio clip, it is free to be played in the PowerPoint. If the PowerPoint is not the only location we want the trimmed clip to be, we may need to save the trimmed clip to the other site. To save the trimmed clip to our personal computer, we should compress the media at first.
- 1. Select File > Info.
- 2. Select Compress Media and choose the level of compression which is appropriate.
- 3. After choosing the appropriate compression level, the Compress Media dialog box opens and it begins to compress the audio file.
- 4. When compression is finished, select the media which has been compressed and right-click it to pop up a new interface, select "Save Media as" button to save it.
- 5. Enter a name for the file and choose an output location for it, then select Save.
- 6. The media file is saved in the site you have set and you can check it in the designated location.
How to Trim Audio Other Than in PowerPoint?
The essential point of trimming audio is making the trimmed part accurate and refining the trimming process to be as simple as possible. It has no doubt that both of the essential points are well proved by the PowerPoint. Is there any other trimmer that can cover the PowerPoint in trimming the audio? Here we recommend the Leawo Video Converter. It might be questioned by the user that how is the video converter has something to do with the audio trimming. That is what we are going to introduce today.

-
Leawo Video Converter
- Convert video and audio files between 180+ formats without quality loss
- Support 720P, 1080P and even real 4K video output
- Create photo slideshows from photos stored on camera, computer, camcorder, etc
- Built-in video editor to trim, crop, add watermark, apply special effect, etc
- 2D to 3D converter with 6 different 3D movie effects available
Leawo Video Converter is a powerful converter software for both video and audio conversion. It enables the user to convert video and audio files contained in more than 180 formats including MP4, AVI, MOV, MKV, MTS, FLV as well as the audio files such as MP3, AAC, FLAC, AC3, etc. The app also supports 4k videos and 1080p videos downloading with the paralleled module, video downloader. To download videos from some popular video website such as downloading iFunny video with the video downloader is easy and quick.
Besides video and audio conversion, the program enables the user to edit the video and audio such as trimming, watermarking and cropping. It is compatible with the Android devices and iOS devices such as iPhone, iPad, Windows.
Before starting the audio trimming process, you should download the Leawo Prof. Media which contains 6 modules. The video converter is one of them.
Step 1: run the video converter
After entering the main page of Leawo Prof. Media, click the module of video converter and enter the video converter program.

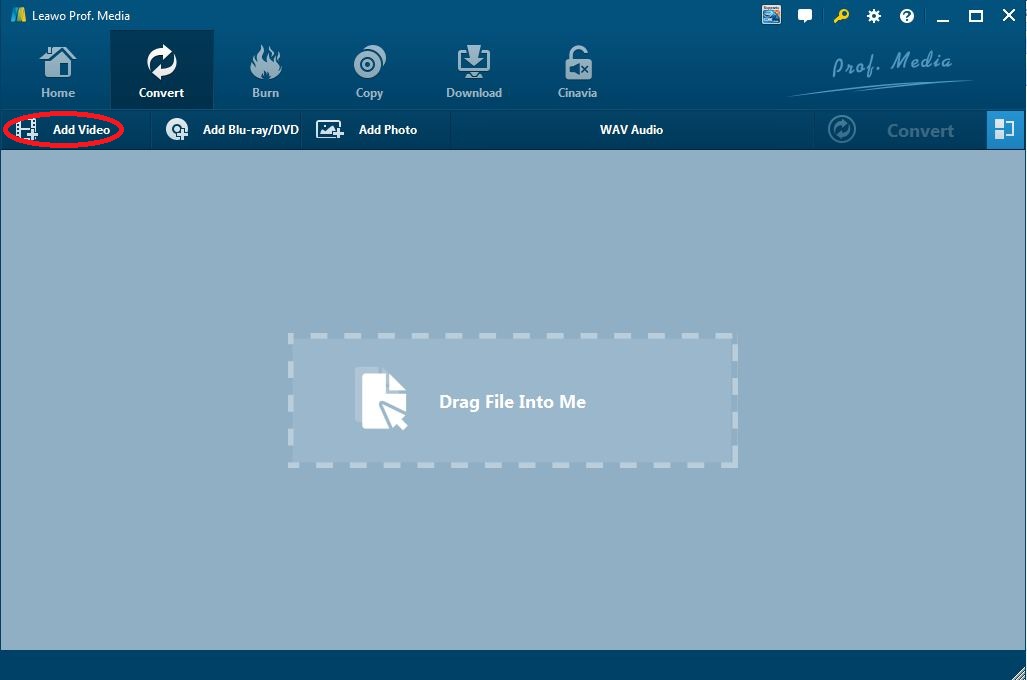
Step 2: add audio source file to the program
Click the "Add Video" button and search for the targeted audio source file from your pc. You are allowed to add a separate file or files in batch. The program enables the user to process one file or batch of files at the same time.
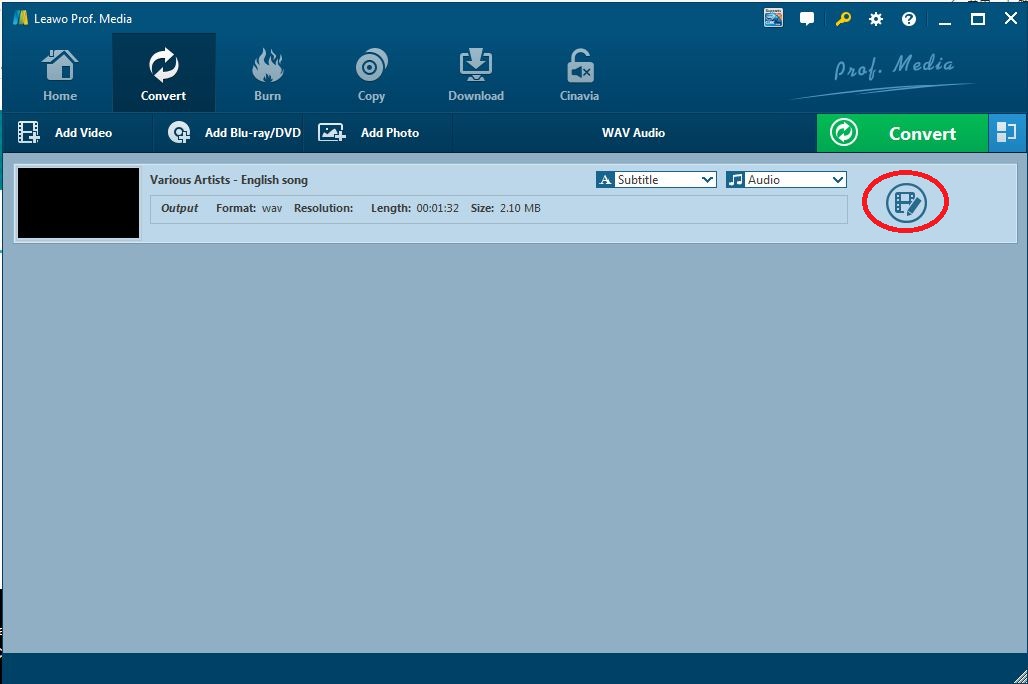
Step 3: start the editing process
After the audio source file is imported into the program, it will be displayed in the interface as the list of tasks. Click the "edit" button to enter the editing panel.
Step 4: trim the audio
When you click the "edit" button, the program will lead you to the editing panel and the audio play automatically. You can press the "pause" button to stop it.
There are two methods to trim the audio.
- 1. Move the green markers in triangle below the progress bar to trim the audio clip. The green marker in the left hand can be used to locate to the starting point of the trimmed clip and the one in the right hand is used to set the ending point. You can reset the trimmed clip by clicking the "reset" button or clicking the button in the shape of square brackets.
- 2. You can also set the start and end time of the trimmed clip by input the parameters of time in the start time box and the end time box. This way will make it more accurate.
After the audio is finished trimming, click the "OK" button to finish.

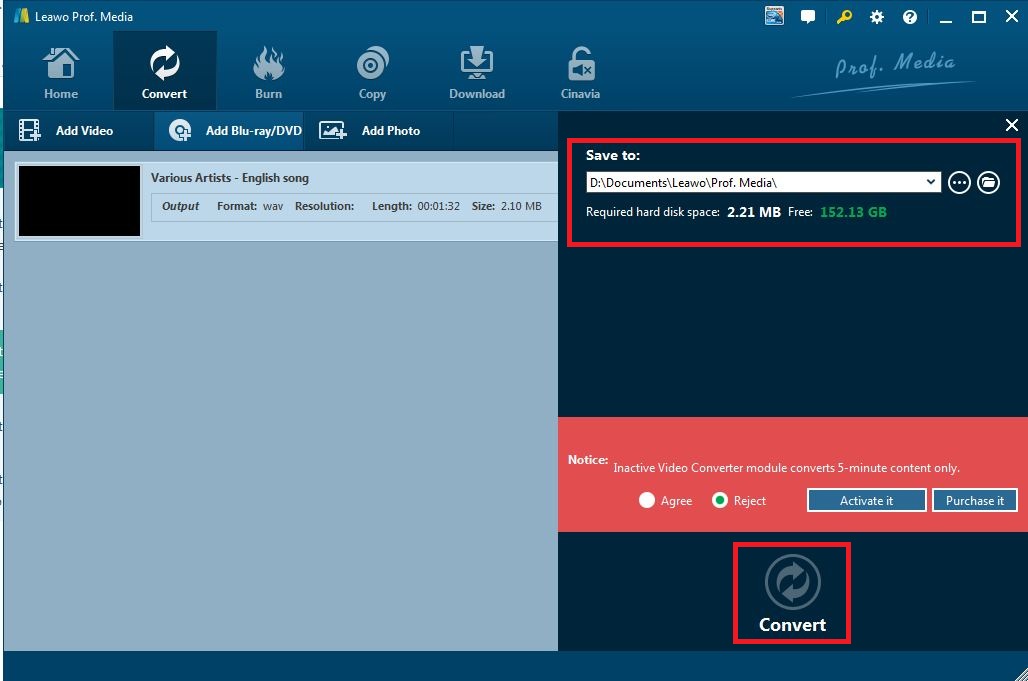
Step 5: set output directory and convert
After you click the "OK" button, the program turns back to the previous interface. Click the big green button "Convert" to pop out a new interface. It is required by the program to confirm the output location before converting the audio clip. Just set an output directory for the audio clip.
The program will ask your permission to operate it or not. Just select "agree" and the "Convert" button is lighted. Click the "Convert" button to start the conversion process.
Notice: inactive video converter only supports conversion for 5-minutes content. You can activate it or purchase it by pressing the corresponding button.
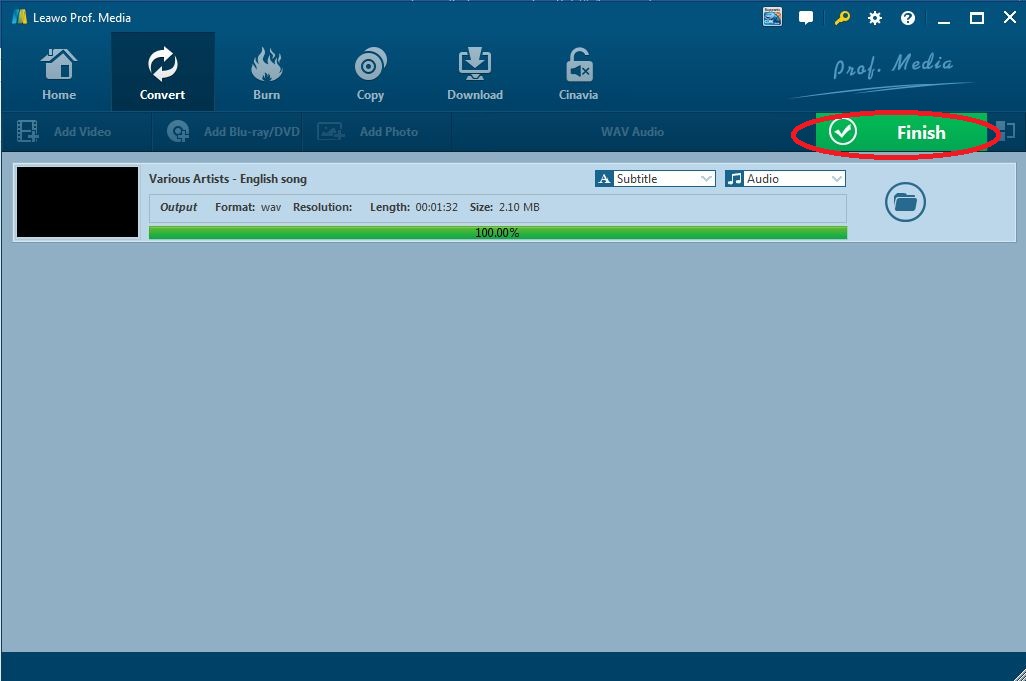
Step 6: conversion finish
After the conversion process is finished, click the "finish" button to complete the whole process. The trimmed clip can be checked in the output directory set in step 5.
Trimming audio is one of the functions in Leawo Video Converter. The main function of the program is converting video or audio from one format to another among the 180+ formats. Not only the common video formats such as M4V to MP4 formats conversion is supported by the program, but also the formats that are not frequently used are also supported by the program.
 Apr. 01, 2021 by


 Prof. Media
 Blu-ray Ripper
 Blu-ray Copy
 iOS Data Recovery
 [12/29/23] MAX Downloader V15.0.0
 10,000,000 people are using Leawo!
 All Transactions are protected!
 30-Day Money Back Guarantee!