If you are using iPhone, you may want to transfer music from iPad to your current iPhone so that you can get your favorite songs in your iPhone Music app without downloading or syncing them again. If you are using iTunes, you are able to transfer the purchased albums back to iTunes Music Library, and then sync to your iPhone again. Syncing files from one iOS device to another with iTunes is a little complicated, and iTunes will erase all the albums and playlists in your iPad when you sync music. Then, how to transfer music from iPad to iPhone efficiently? In today’s post, there are several ways to be mentioned here to solve this problem with accuracy. You would get a lot of useful tips to complete the transferring tasks. If this is what you are looking for, then this will be the place you can stop.
Part 1: How to Transfer Music from iPad to iPhone Wirelessly?
The first method you can turn to would be the most direct since you would not need any third-party programs. Here, what you have to guarantee is that you have got the excellent Wi-Fi connection so that the music files could be transferred from iPad to iPhone wirelessly in an efficient way. If you would adopt this method, then you can complete the transferring task via the following solutions.
Solution 1. How to Transfer Music from iPad to iPhone via AirDrop?
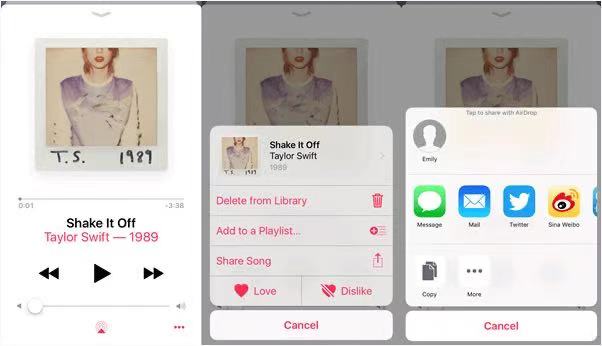
AirDrop is a unique function under Apple's iOS, iPadOS and macOS systems. It is used to share files between multiple devices. What you need to do is drag the file to another iOS device which has been set with another account to perform one-to-one file transfer (similar to wireless network transfer). If you prefer to transfer music from iPad to iPhone wirelessly, then you can make full use of AirDrop music transfer function. However, AirDrop can only applied to transfer music from iPad to iPhone only if you have two different iOS account. By the way, it is also limited in the transfer amount. It is quite convenient to transfer less number of music files instead of batch files at the same time. If you are interested in how to transfer music from iPad to iPhone via Bluetooth or AirDrop, here are the steps you can follow.
Steps:
- First of all, you need to turn on AirDrop on both your iPad and iPhone. Usually, you only need to activate Wi-Fi connection button and Bluetooth button to make sure your iPad and iPhone is working under the same Wi-Fi network.
- Launch the Music app on your source iPad. Then select the music files you prefer to transfer to iPhone.
- Share the targeted music files and click on the icon “Share” at the lower right corner of the Music app interface.
- Find the iPhone’s avatar on iPad’s AirDrop transfer interface. Then, click it to start the transfer progress.
Solution 2. How to Transfer Music from iPad to iPhone with iCloud?
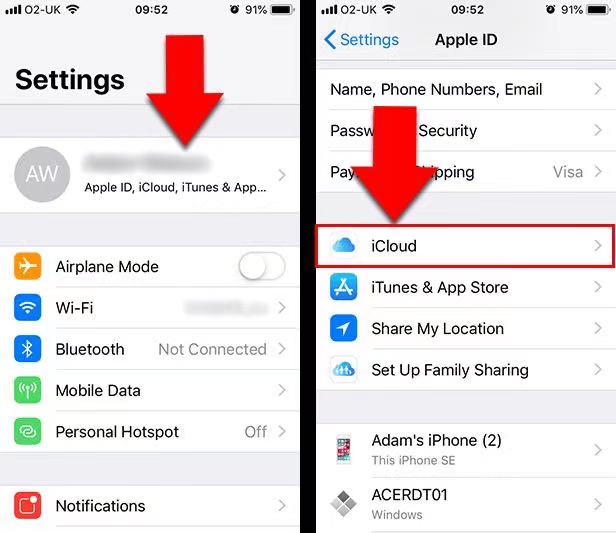
Asides from AirDrop, you can try to transfer music files from iPad to iPhone with iCloud. As the default cloud storage sevice, iCloud allows users to transfer and sync the iOS data free among different devices. But the storage has the size limit which is up to 5GB for free. While, if you prefer to transfer other music files from other third-party music apps, then iCloud would be able to handle with that. Simply speaking, iCloud could only transfer music from iPad to iPhone in the Music App. Then, how to transfer music from iPad to iPhone with iCloud, you can refer to the following steps
Steps:
- Go to iCloud under the Settings on your iPad, and make sure you have logged in your Apple ID on your iPad.
- Sync or back up the music files you would like to transfer on your iPad. Here you can click “Storage & Backup” where you can find all the backup options. Tap “Show all Apps.”
- Under the “Show all Apps” panel, you can find Music app. Choose this option and the Music file would be synced to your iCloud account.
- Sign in the same Apple ID on your iPhone. Then, download the uploaded Music files from iCloud to the local of your iPhone remotely without any programs.
Solution 3. How to Transfer Music from iPad to iPhone with Dropbox?
Besides iCloud, you can also choose other cloud storage service to transfer files under the good Wi-Fi connection. Dropbox can be also used to transfer files. But in comparison, Dropbox would be limited on the upload file size. Therefore if your music files are quite large, you can have to seek for other tools for help. Actually, there are a lot of cloud-based storage services you can refer to. Some are paid and some are free of charge, you can choose the one you prefer most based on your own preferences and needs. Here the tutorial of transferring music from iPad to iPhone with Dropbox would be introduced. If you are interested in DropBox, here are the steps on how to transfer music files from iPad to iPhone via this program.
Steps:
- Download and install Dropbox on your iPad.
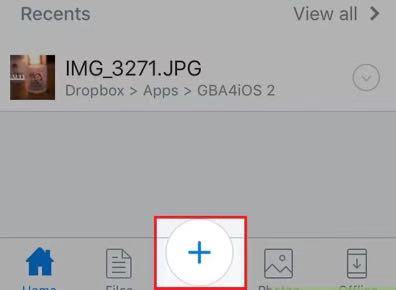
- Upload the music files to the Dropbox on your iPad. Open Dropbox and choose “Files” > “My Files” > “Upload Files” to upload the music files on your iPad to Dropbox.
- Install Dropbox on your iPhone as well.
- Sign in Dropbox with the same account on your iPhone.
- Sync and download the uploaded music files to iPhone. Once you signed in the same account and all the files would be synced on your iPhone and you can see all the loaded music files from your iPad. Then choose the music files and download them to the local of your iPhone.
Part 2: How to Transfer Music from iPad to iPhone Using iTunes?
iTunes is the only official media library application provided by Apple. You can use this software to manage the libraries of their iPhone, iPad and iPod touch. And you are able to transfer music from iPad to iPhone with iTunes.
Step 1:Plug iPad into computer via the USB cable. iTunes will launch automatically, if not, manually start it on your computer.
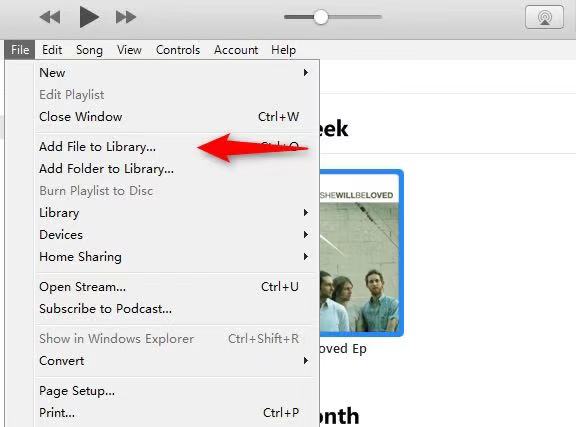
Step 2:Click "File > Add Files to Library" at the upper left corner of the window. Then select the music files on your computer and add them to the library.
Step 3:Click the iPad icon in iTunes and choose Music Library in the left sidebar. Then check Sync Music and click Apply. iTunes will then sync music to your local computer.
Step 4:Connect your iPhone to your computer and open iTunes again.
Step 5:Sync the music files from your computer. Once the music files have been exported to your local computer, here you only need to sync all the music files to your iPhone by adding files to your device immediately.
Part 3: The Simplest Solution to Transfer Music from iPad to iPhone in 2021
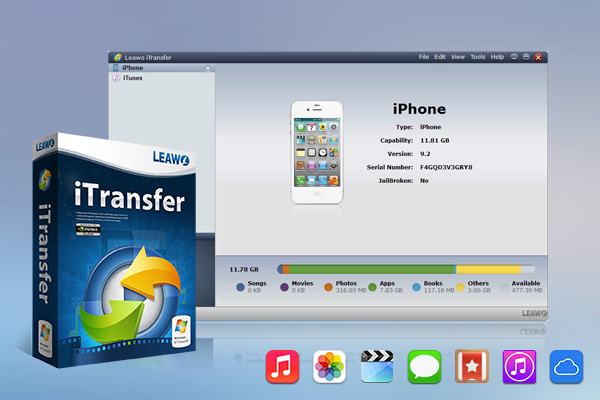
If you want to copy music files from iPad to iPhone directly without iTunes, iCloud or other wireless ways, iPhone users will need a piece of third-party iPhone transfer software to solve this problem. Among all the iPhone transfer programs, Leawo iTransfer supports to transfer files without iTunes. This software is used for transferring files among iOS devices, iTunes and computers, and it can help users to get rid of the sync of iTunes completely. With this software, you don't have to worry about the sync of iTunes and the sizes of your multimedia files, you can transfer all the files you need at one time. The following guidance will show you how to transfer music from iPad to iPhone without iTunes, and you can free download the software to have a try.
Step 1: Download Leawo iTransfer
Click to download and install Leawo iTransfer on your computer. Just choose an appropriate version below.

-
Leawo iTransfer
-Transfer files among iOS devices, iTunes and PCs with ease.
- 6x faster than iTunes
- Transfer up to 14 kinds of data and files without iTunes.
- Support the latest iOS devices like iPhone 12, iPhone 12 Pro, etc.
- Play back, view, and delete data and files on iOS devices.
- Support Windows & Mac OS
Step 2: Connect your iPad and iPhone to computer
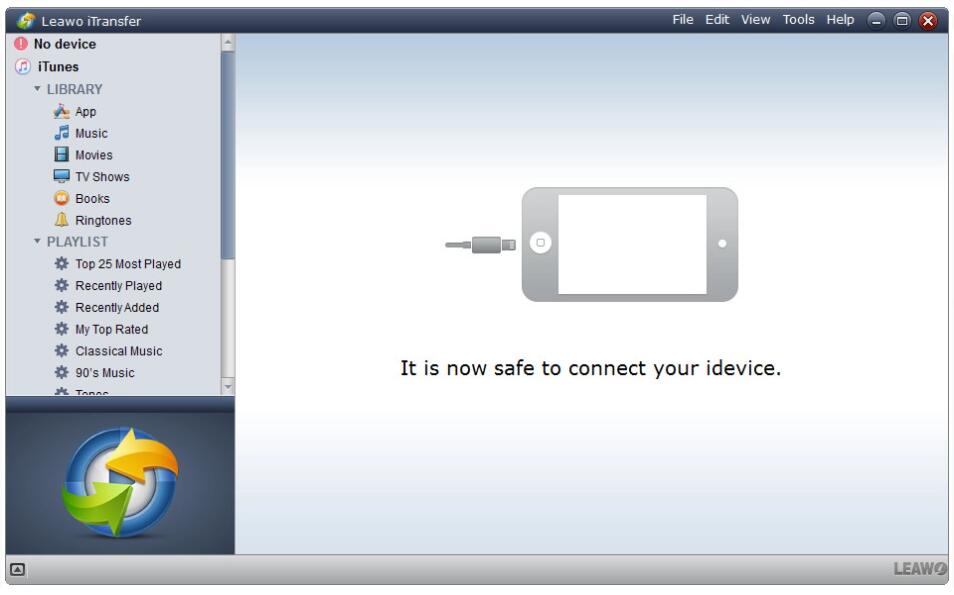
Run Leawo iTransfer and connect both iOS devices to computer with USB cables.
Step 3: Choose Songs
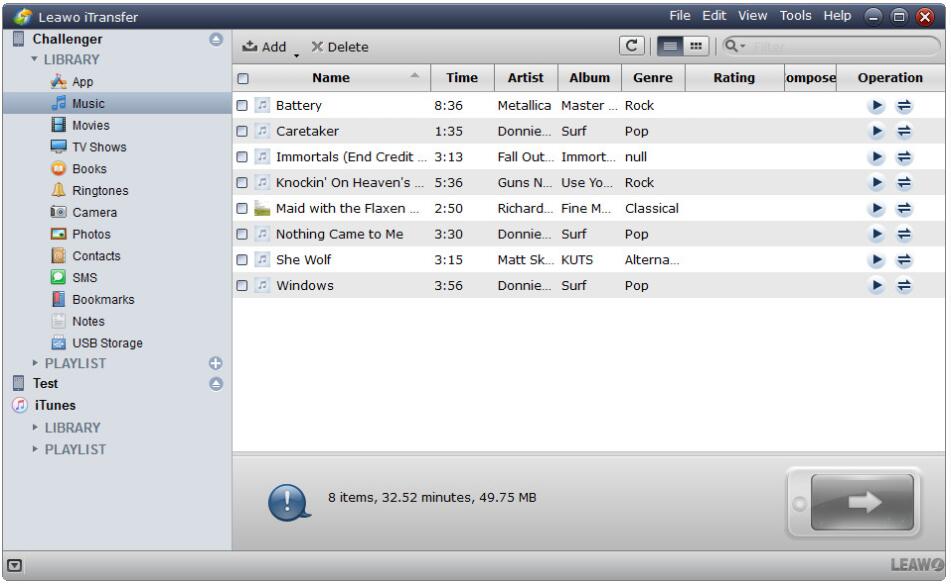
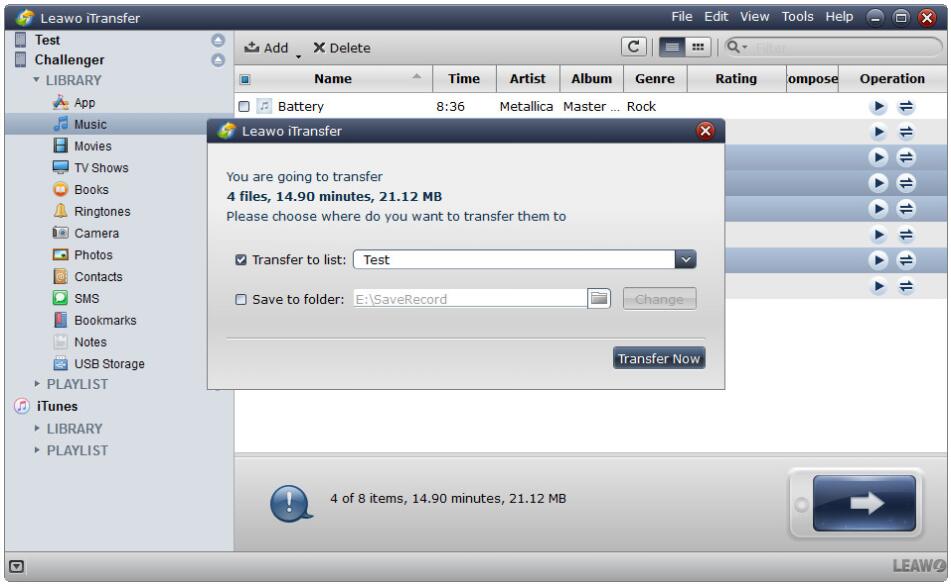
Click the name of iPad and choose Music in the left sidebar. The songs will display in the right part. Click to choose desired.
Step 4: Transfer songs to iPhone
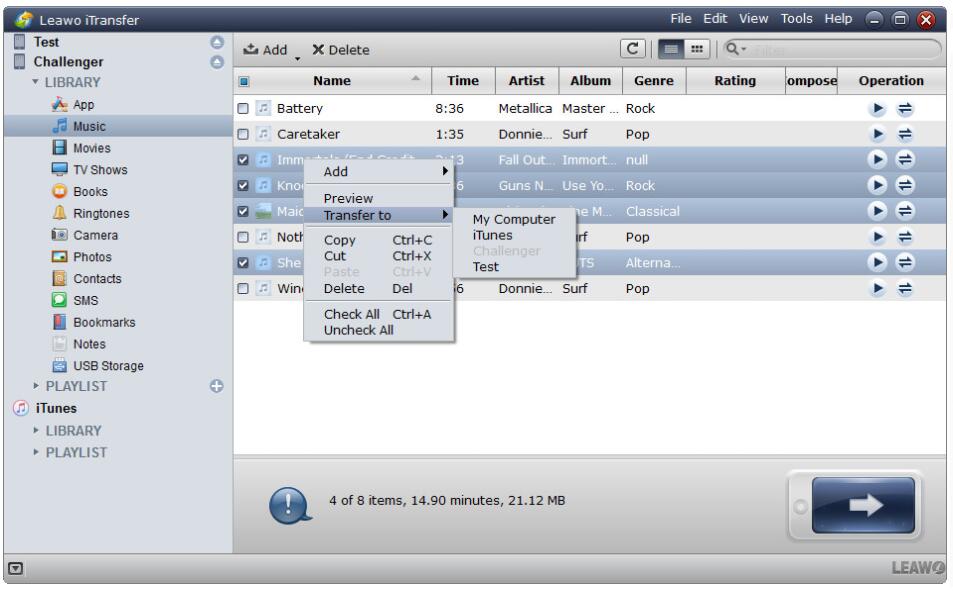
Click the transfer button at the right bottom to transfer all songs. Or hold Ctrl/Shift key to select certain songs, and right-click the selected song, then choose Transfer to > iPhone.
Step 5: Start to transfer
Check Transfer to List and choose iPhone as a target in the pop-up dialog after clicking the transfer button. Then click Transfer Now at the right bottom to start transferring music from iPad to iPhone.
When the transfer finishes, you will get the songs in the iPhone Music app. Leawo iTransfer is also helpful for other data transfers of iPhone, iPad and iPod, for example, you can transfer text messages to new iPhone with the help of this software. If you don’t need the songs or playlists on your iPhone, you can download and install several streaming music apps so that you can enjoy the songs anytime when you have Wi-Fi connected. However, if your Wi-Fi connection is running well and you don’t want to install any further third-party programs on your iPad or iPhone, then some iOS default storage or app would be quite suitable to you, including iCloud, iTunes and so on. However, if you prefer more advanced features and functions of file transfer among different iOS devices, then Leawo iTransfer would much be more powerful to complete the tasks.

