Most people have goals in life, whether it is business, finances, faith, relationships, health or pretty much anything you can think of. Whatever the goals are, you should not neglect self-improvement, educating yourself and also mental growth. For that, one of the things you can turn to is reading, and the amount of reading you will need to help you reach your goal will vary based on what your goal is. Therefore, how to set up reading goals on iPhone? We will explore how to do just that by using the Apple Books app, as well as third-party reading tools. We will also show you how to transfer your ebooks from computer to iPhone, which will help you to read your books on the go.
Part 1: Set a daily goal in Books app on iPhone
Our days are filled with lots and lots of activities such that it is only natural to forget some of them. Thanks to advances in software on our smartphones, particularly the iPhone, setting and adhering to daily goals is now easier than ever before. Kindle, Scribd, BookShout, etc. availability of the iOS platform means there is no shortage of ebook readers. These apps have for long been convenient to their users, thanks to friendly tools packed with them, but what about Apple’s own Books app? When iOS 13 was released, it brought many improvements and changes and the Books app received a fair share. The Apple Books app now lets users set reading goals, which in turn helps them to keep track of how much they read. That could also help encourage them to read more often. Currently, Apple Books has two reading goals, which track how many minutes per day you read, as well as how many books you read per year. If you do not know how to do it, then we will proceed to provide detailed instructions on how to do it. First, we will start with how to set reading goals on a daily basis.
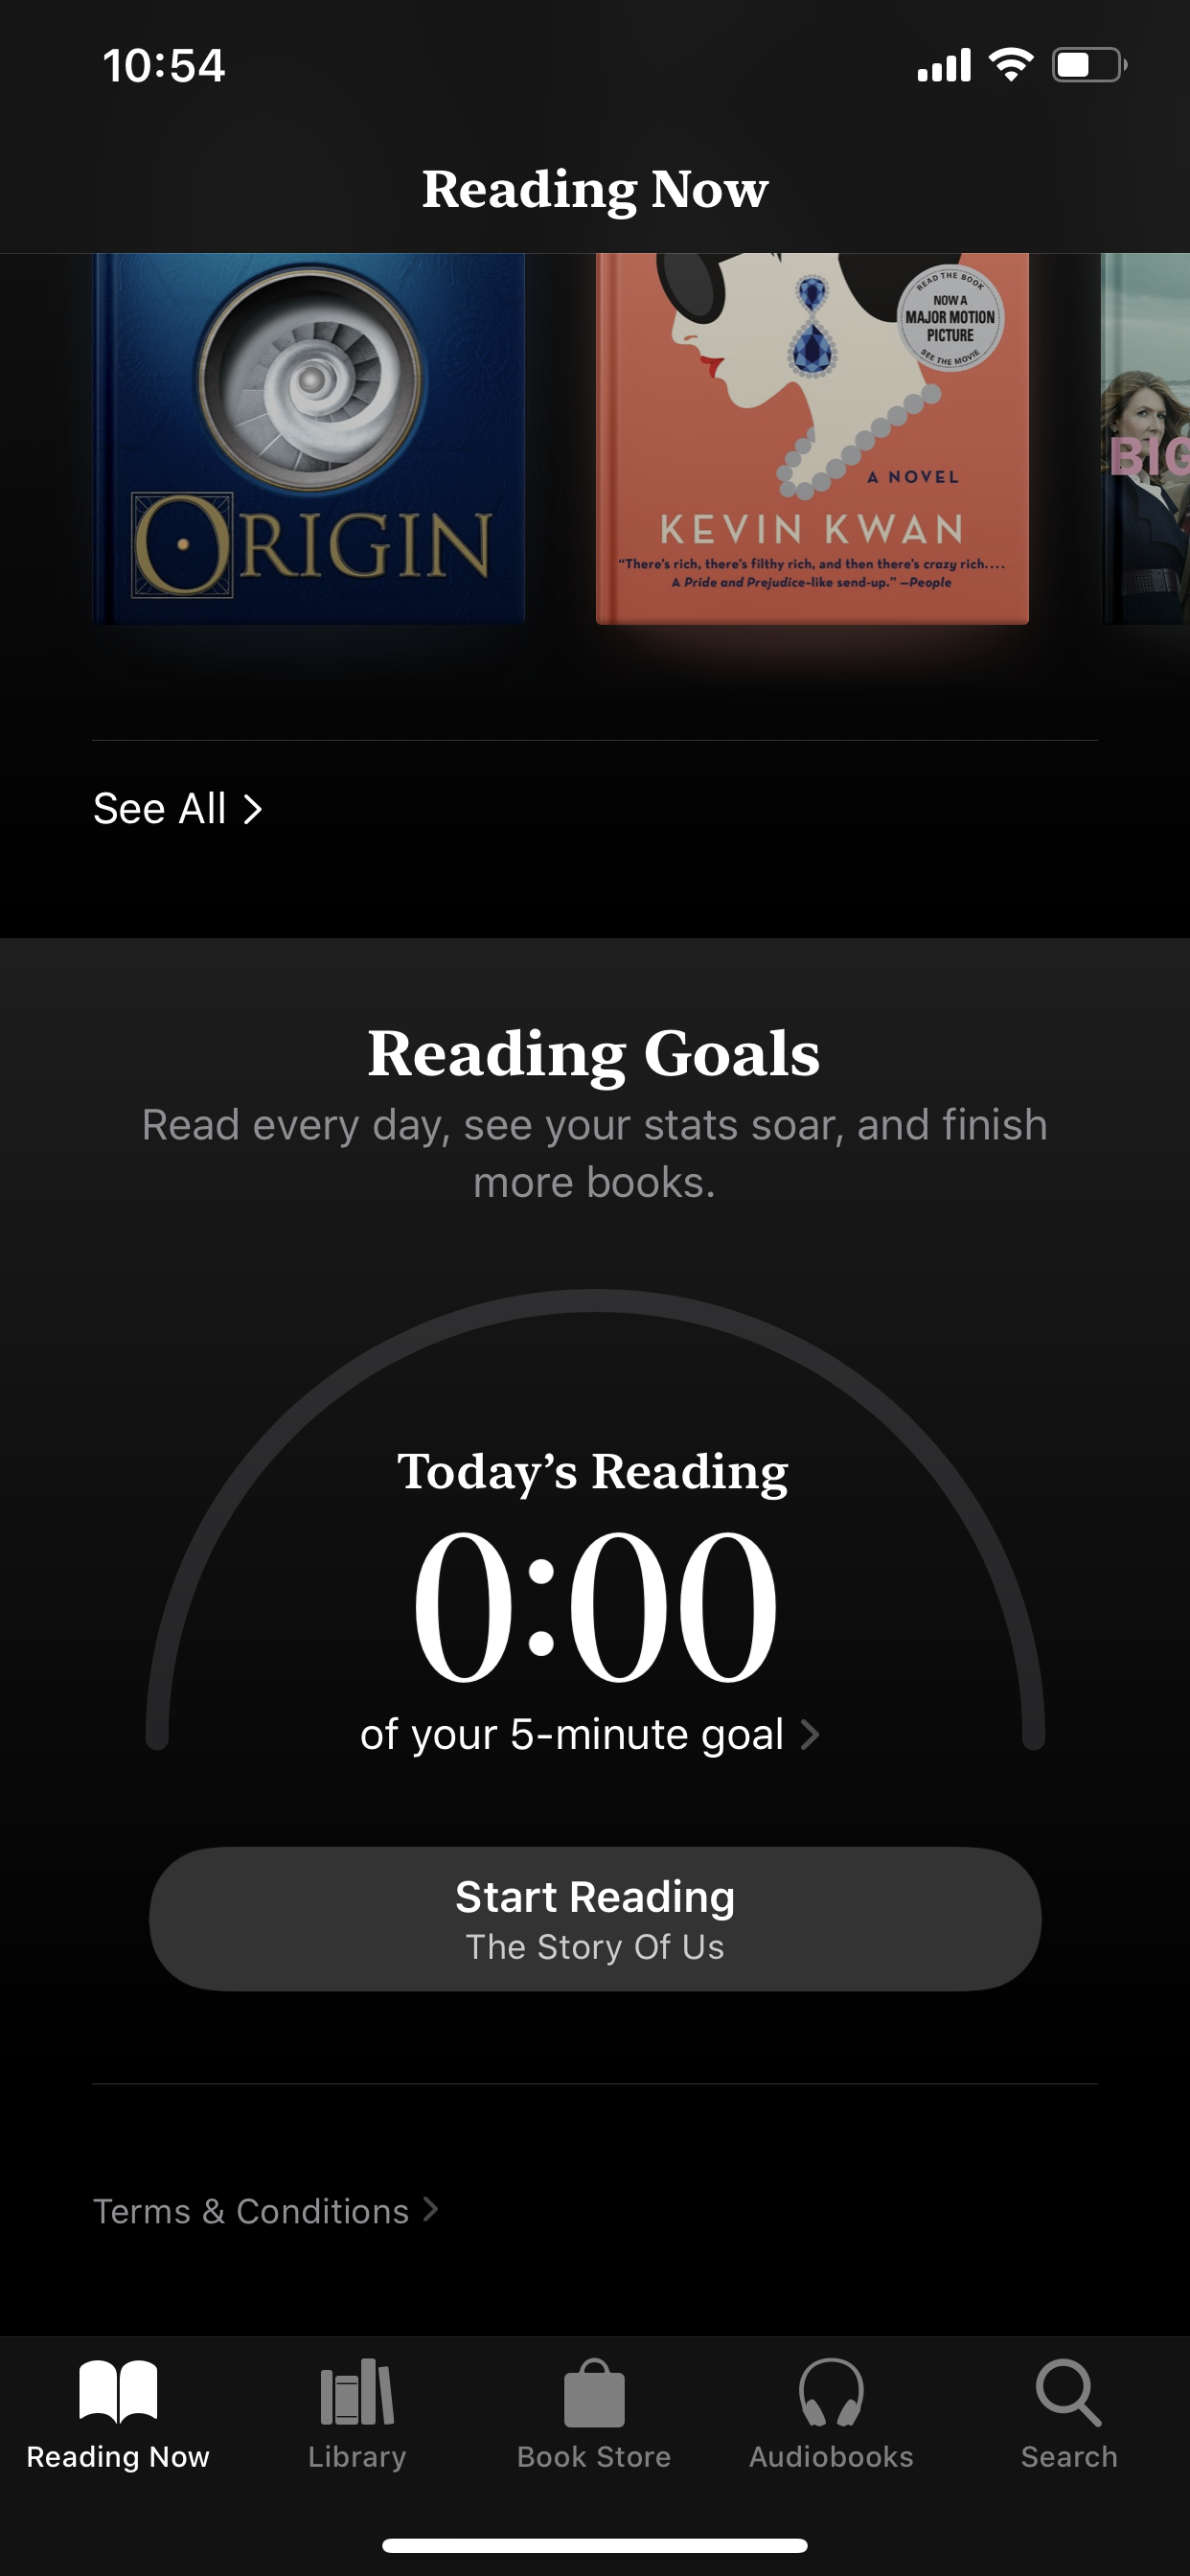
Step 1: Launch the Apple Books app. If it happened that you deleted it, or if it's not installed on your computer, download it from the AppStore. Tap the “Reading Now” tab at the bottom left of the screen.
Step 2: Scroll down to the bottom until you see the “Reading Goals” section. Tap the time displayed under “Today’s Reading” (If you did not read anything, the time displayed will be zero minutes and seconds).
Step 3: Tap “Adjust Goal” at the bottom of the page. When the scroller appears, adjust your reading goals accordingly then tap “Done”.
Step 4: Tap the close button at the top right. Once done, your new daily reading goal will be all set.
Part 2: Set a yearly goal in Books app on iPhone
Since the advent of the television, reading has been on the decline over a couple of last decades. This is despite the global literacy rate exponentially increasing over the last two centuries. Many people will read magazines, newspapers and blogs but leisure reading is at an all-time low. Leisure reading will allow people to immerse themselves in the text, which in turn allows it to impact them. Reading regularly and seriously is paramount to developing self-awareness, staying sharp and educating yourself. Bill Gates, the founder of Microsoft reads at least fifty books a year. Warren Buffett, a billionaire investor allocates 80% of his time to reading. Adhering to daily reading goals is easy, but that might not be the case for yearly reading goals. However, nothing will inspire you more to stick with your new habit than identifying one reason or a set of reasons that truly resonate with you, which could explain why Bill Gates and Warren Buffett have those remarkable reading goals. With iOS 13, Apple did not only introduce daily reading goals, but also yearly reading goals and we will now show you how to set them up.
Step 1: Launch the Apple Books app. If you do not see it on your home screen or deleted it somehow, install it from the AppStore.
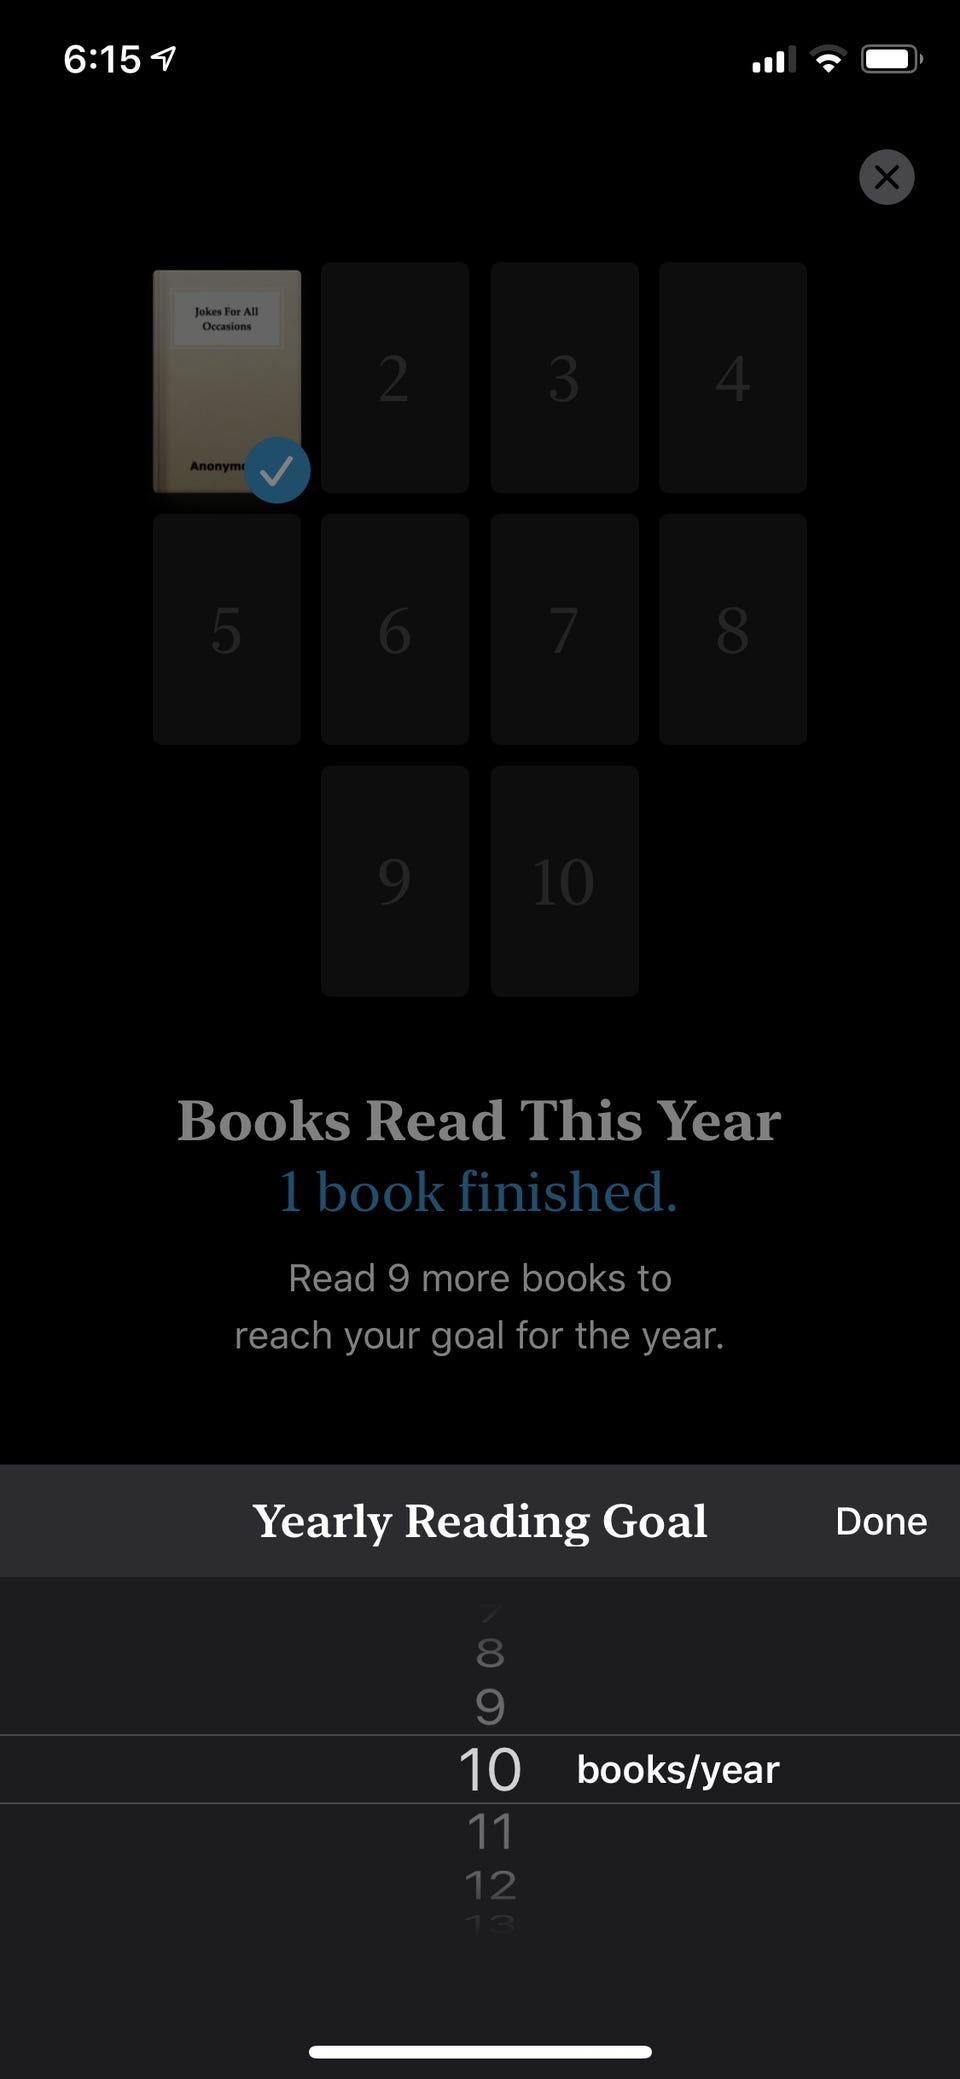
Step 2: Find the “Books Read This Year” section. If you do not see it, it will only appear once you finish your first book.
Step 3: Tap one of the completed books under the “Books Read This Year” section. That should open the yearly goals details page.
Step 4: At the bottom, tap “Adjust Goal”. When the scroller appears, adjust your desired reading goal accordingly then tap “Done”.
Step 5: Tap the close button at the top right. Once done, your yearly reading goal will be all set.
Part 3: How to set a reading goal via a 3rd party tool
The Apple Books app is not the only reading app that will allow you to set a reading goal. BookShout is one of the ebook alternatives, which has been around since its launch in 2010. This service is primarily geared towards publishers, such as Harlequin, a major bookstore which uses BookShout to power their online bookstore. Other ebook giants like McGraw Hill, HarperCollins, Hachette, and Macmillan also use BookShout. You can find over 1.5 million ebooks, and you can also get thousands of freebies which range from classic literature to modern bestsellers. Apart from allowing you to set your reading goals, BookShout will also allow you to customize the font style, font size, line spacing, background themes, column texts, and reading modes tailored to your reading experience. The changes you make across your range of devices will also be in sync. To set up reading goals by using this service, please follow the steps below.
Step 1: Open the website and login to your account. Navigate to the section where you will see your account. From there, click your account profile, find “Your Reading Stats” and open it.
Step 2: Your reading goal should be on the right side of the reading status banner. Click it to activate the drop-down menu.
Step 3: Set the new reading goal accordingly from the drop-down menu. After that, the time it will take to meet the goal will change.
Part 4: How to transfer books from PC to iPhone via iTransfer
If you want to reach your reading goals, then you are going to have to utilize all the devices that you have, that includes your computer and your iPhone. If you read your books on either device, the changes will sync across your range of devices which contain the books. If you happen to be disconnected to the internet for whatever reason, you could also do that offline by using Leawo iTransfer, which has outstanding performance in comparison to iTunes. You might also find that iTunes will not support other types of data, like non-purchased media files which also includes some books, but that is not a problem with Leawo iTransfer. As an outstanding music manager, it can directly manage the playlists of the iOS devices and iTunes within the software. That means your existing music library will not be altered in any way. Although this software packs some of the most advanced technologies, it has a clean and simple user interface to accommodate everyone regardless of computer skills. If you have an iOS device with lots of underutilized storage, you can also use it as USB storage. To transfer your books from PC to iPhone by using Leawo iTransfer, download and install it then follow the few easy steps below.
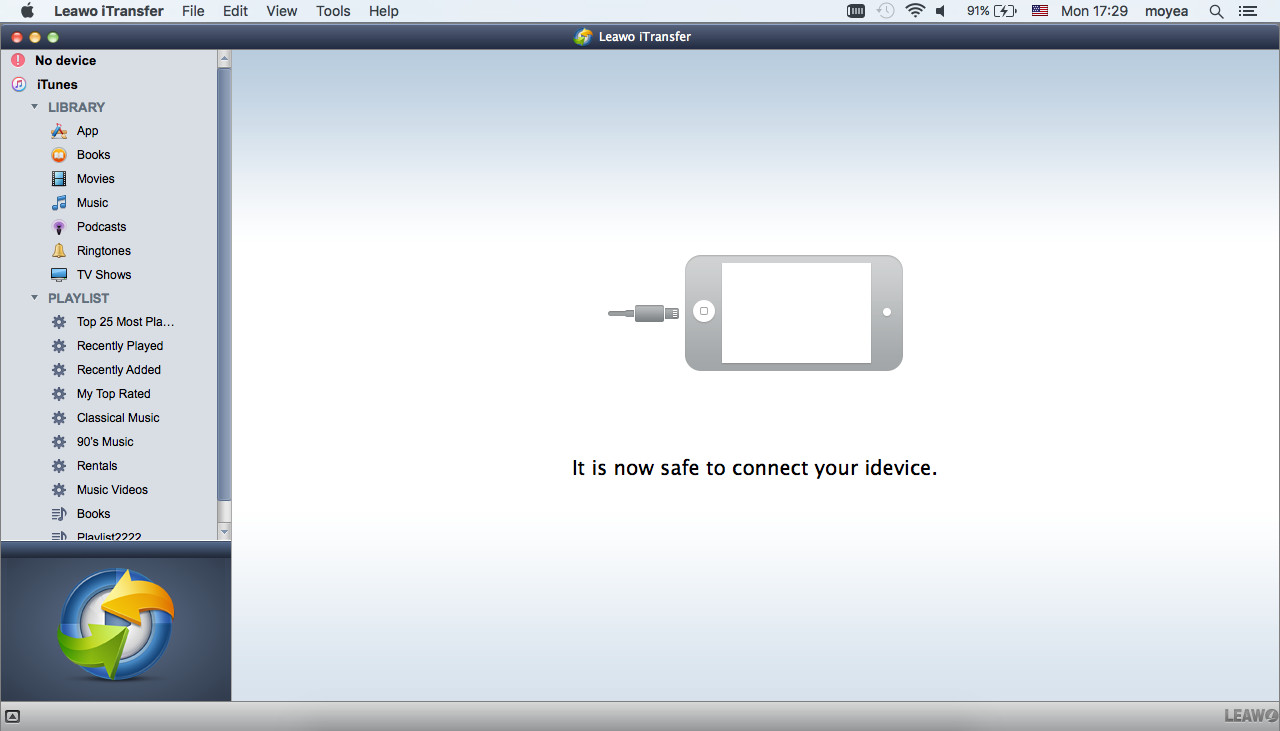
Step 1: Connect your iPhone to your PC with via US
When you launch the software, you should see your iPhone detected by the software. The main window will show you the connected iPhone model, as well as other information about it.
Step 2: Open the Books tab
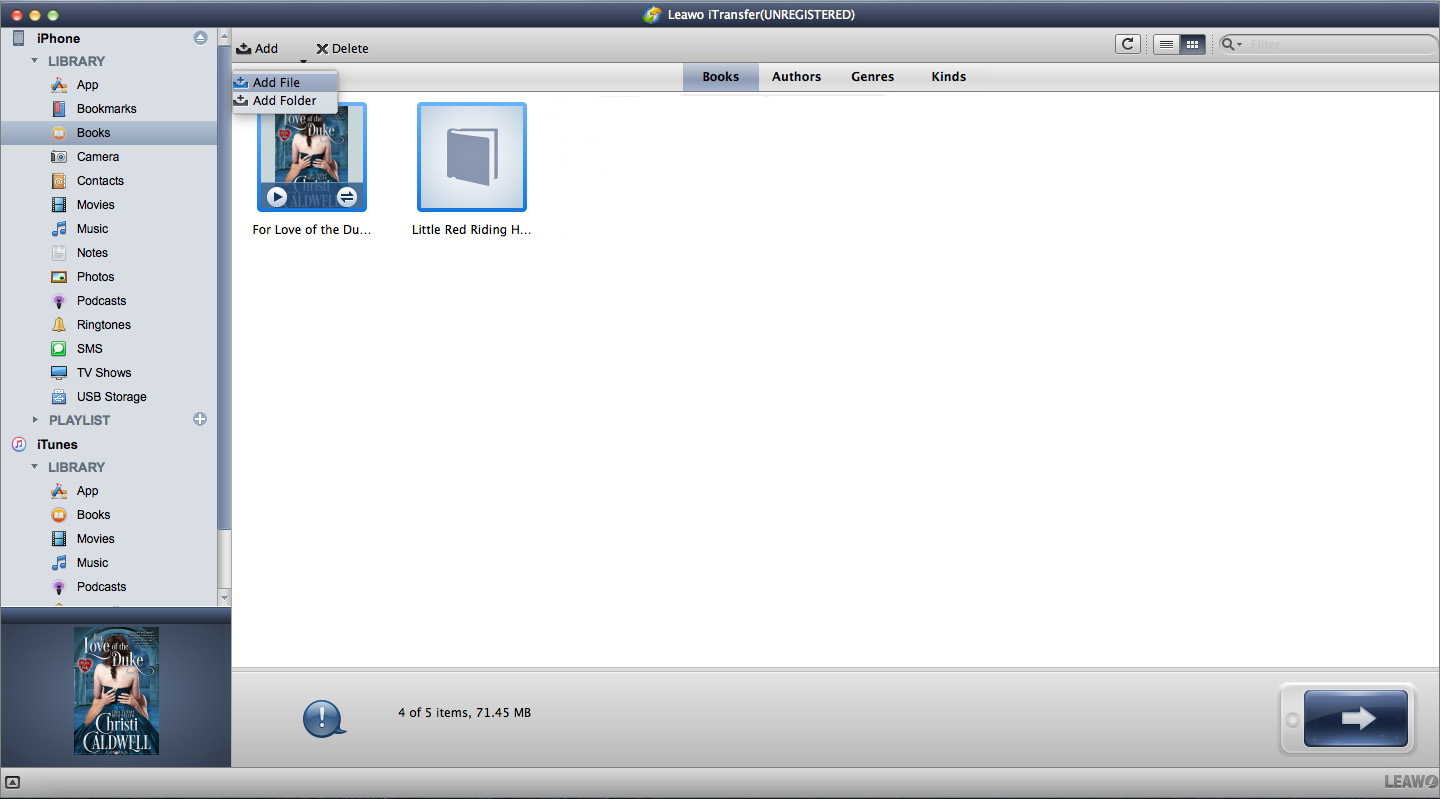
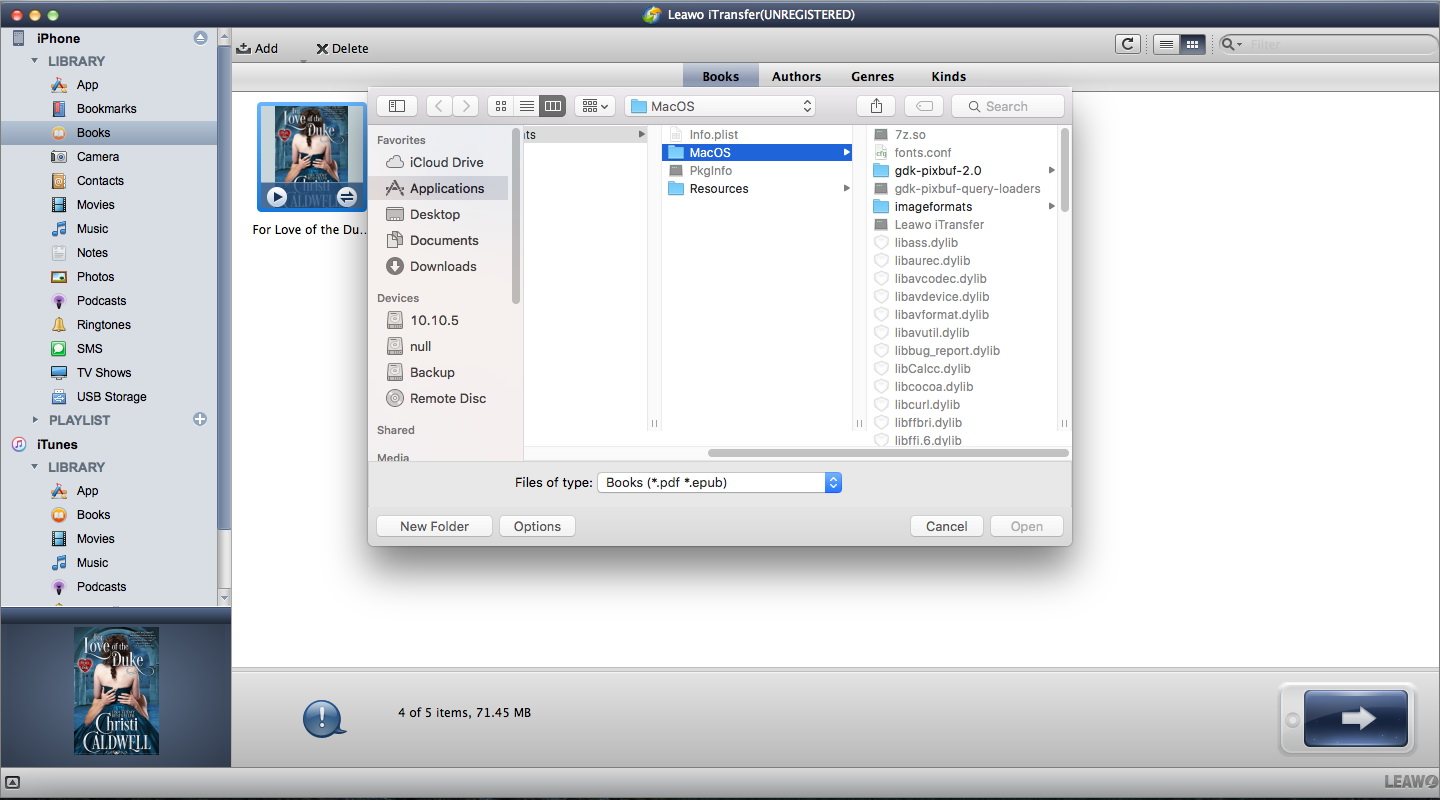
When you have connected your iPhone, open the “Books” tab under “LIBRARY” which should be under “iPhone”. When you open this tab, you should see all the books currently stored on your iPhone.
Step 3: Transfer the books to your iPhone
On the “Books” tab, you should see the “Add” button at the top left. Click it to choose either the “Add File” (if you only want to add one book) or “Add Folder” (if you want to add multiple books contained in a folder) buttons which will open a window for you locate the books contained on your computer.
Step 4: Wait for the transfer to finish
Patiently wait for the software to finish the transfer job, ejecting your iPhone from the computer before completion might corrupt your data or fail to finish the transfer. When you want to cancel, click “Stop”.

