Timer on camera is a great feature as it allows people to take group photos more easily. Usually if you want to take a group photo, you’d have to ask someone to hold the camera and press the button. If you can’t find a person to help you, then someone in the group will have to do it and he/she will not be in the photo. And that’s when camera timer comes in handy, With timer in camera, all you need is a camera holder to put your camera on and you’ll be able to take a group photo without help from others. As the smartphone market is developing rapidly, the camera on smartphones are getting better and better. Altough the camera on smartphones can’t possibly be as good as traditional cameras, they are still good enough for taking photos in a lot of different occasions. iPhone’s camera has always been top-of-the-class among all the smartphones and it’s a great choice for taking group photos. And luckily iPhone’s got the timer for taking group photos. For people who don’t know how to use the timer on iPhone, this post will include detailed instructions for using it to take group photos.
How to set timer on iPhone Camera
Simplicity is one of the most significant features of the camera app on iPhone. Apple tried very hard to make things easier for users. When you open the camera app, you can see that there are only a few buttons on the interface, which is simple and convenient. Only a few taps are needed to set the iPhone camera timer.
Here’s how to turn on iPhone camera timer:
- 1. Launch the Camera app on iPhone. You can do it by tapping the Camera app icon on the Home screen or swiping to the right side from the lock screen.
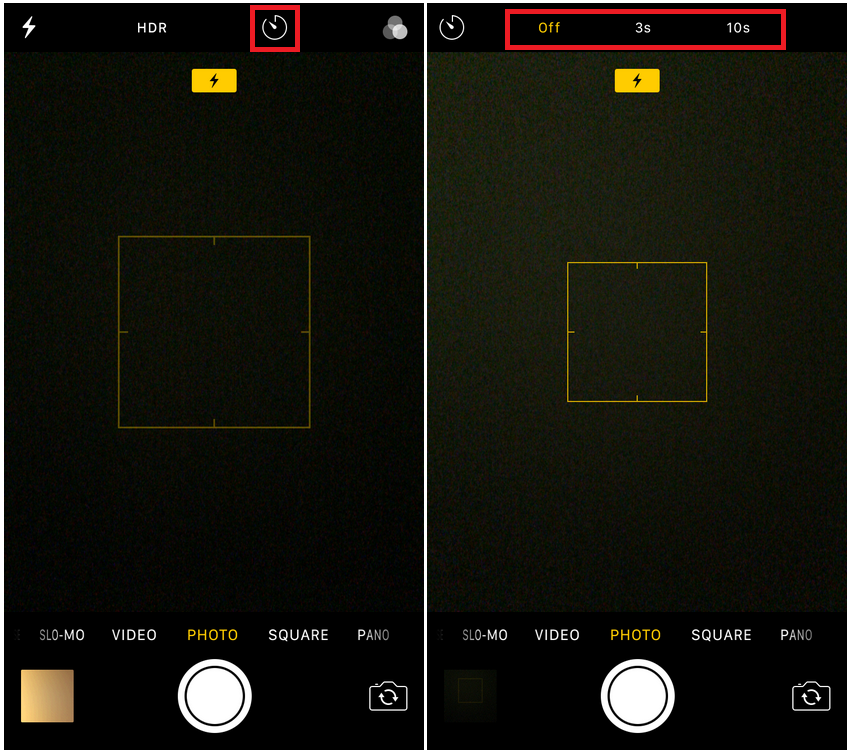
- 2. On the interface of the Camera app, you can see that there are 4 icons at the top, the iPhone camera icon is the third one from the left which looks like a clock.
- 3. Tap on the iPhone camera timer icon and you will see 3 options: Off, 3s and 10s. Choose between taking photos after 3 seconds or 10 seconds of delay after pressing the shooter button.
- 4. After tapping the shooter button,iPhone will start the countdown and take 10 photos at a time for users to choose their favorite ones and save it to the Photos app.
How to back up photos taken with iPhone camera timer
When you use the timer on iPhone camera to assist you to take photos, it will take 10 photos at the same time which allows you to pick the one you think is the best. If you can’t decide which one is better, you can save them all to your iPhone first. After using the timer on iPhone camera to help you take photos, you might find that the photos are taking up a lot of storage space on your iPhone. If that’s what’s happening to you, you’d better have your photos backed up to your computer. The first reason you should do that is that after backing them up, you won’t have to worry about losing them accidentally. The second reason is that you can delete some of them on your iPhone to make more space for new photos after backing them up to your computer.
Try using Leawo iOS Data Recovery to back them up. It’s a powerful data recovery program as well as a practical data backup toolkit. You can use it to back up your photos on your iPhone to your computer and when you accidentally delete a photo that hasn’t been backed up, you can use it to recover the said photo. It’s also capable of recovering other data like contacts, messages, bookmarks and more.
Here’s how to use Leawo iOS Data Recovery to back up the photos you take by utilizing the timer for iPhone camera.
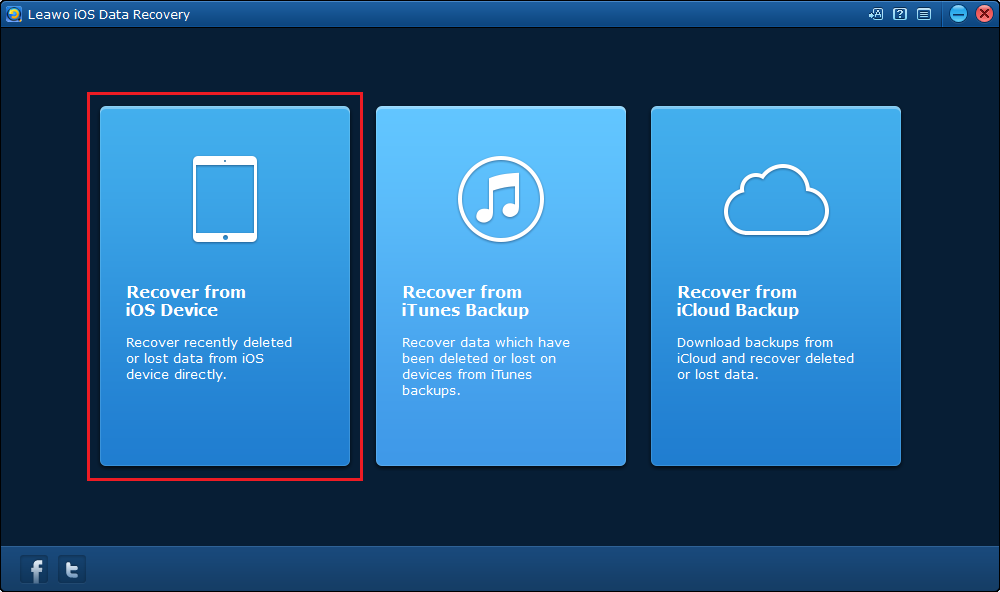
1. Use a USB cable to connect iPhone to PC and then open Leawo iOS Data Recovery. Click on Recover from iOS Device as you see it on the interface.
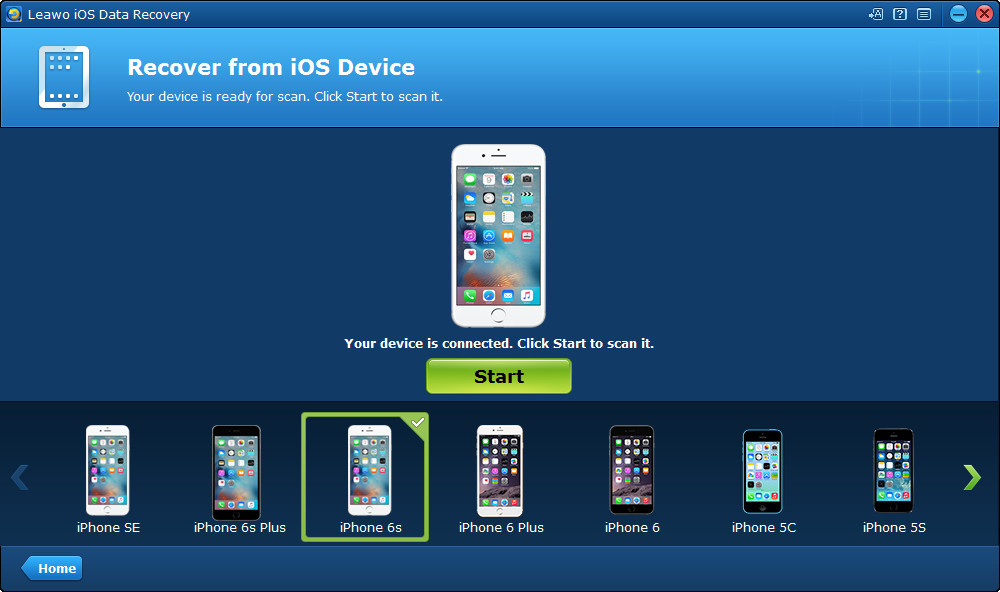
2. When you see the image of your iPhone and a Start button appear in the center of the interface, click on the Start button and the program will start to scan your iPhone for the photos.
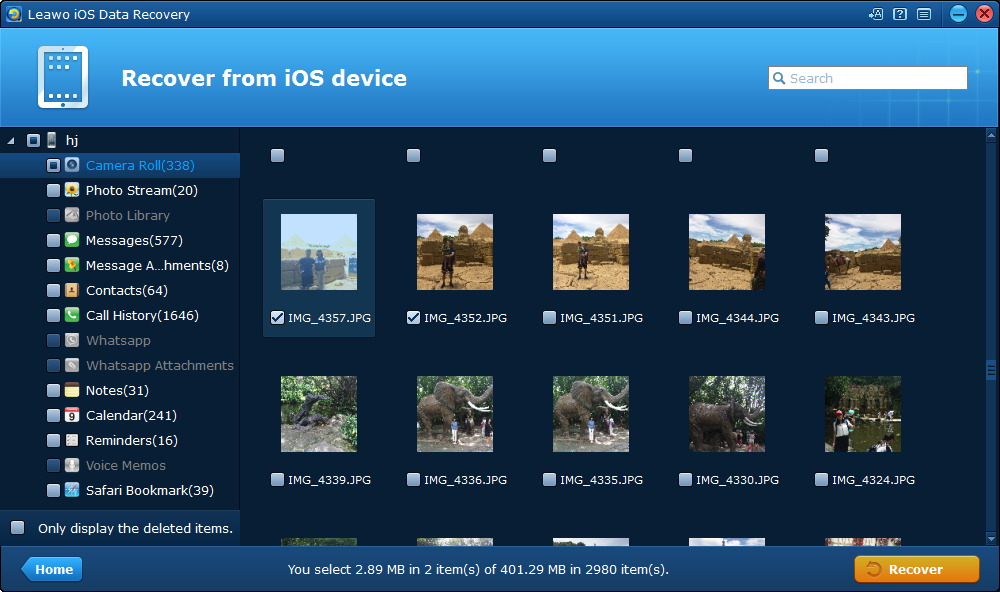
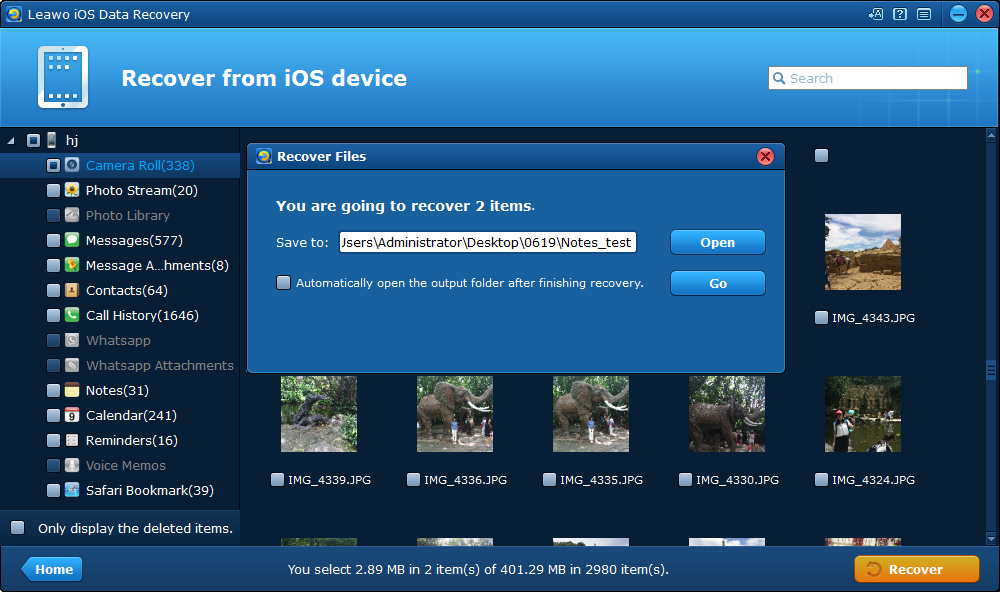
3. When the program is done scanning, click Camera on the list on the left-hand side to see your photos taken with the iPhone camera timer. Check the ones you want to back up to your computer and click Recover.
4. The following window is for you to set the folder to store your photos. Click the Open button to pick a folder to store them and then click Go to initiate the backup process.
If you like taking photos when travelling and you don't want to seek help from strangers, use a stand and make good use of this feature and you would be able to take photos by yourself easily without having to ask other people for help.

