"Since 4 days ago, suddenly I've missed almost all my notes, most of them, very important to me, maybe it happened after an Office for Mac actualization, particularly, an Outlook actualization. I know that it is a common situation, can somebody help me? Thanks in advance. drmenchaca"
If you synced your iPhone notes to iTunes for backup before they're lost, you could recover lost iPhone notes on Mac by using iTunes backup. To do this, you should:
1. Without connecting your phone, open iTunes on your computer and go to Preferences, on the Devices tab check "Prevent...from syncing automatically".
2. Connect your iPhone to your computer, right-click on the name of your phone when it appears in iTunes on the left sidebar and select Restore from Backup, choose your most recent backup to restore from.
3. When this finishes you can go back to iTunes>Prerferences>Devices and re-enable automatic syncing.
This would work when you get iTunes backup of your iPhone notes. However, it has shortages: it recovers not only notes, but also other files in the backup, and you need to make sure you remember to back up your iPhone before you deleted these files. Without iTunes backup, to recover iPhone notes on Mac is impossible with iTunes, but possible with 3rd-party iPhone notes recovery for Mac. Leawo iOS Data Recovery for Mac is a professional Mac iPhone notes recovery software tool to help you. It could help you recover Contacts, Messages (MMS, SMS, iMessages), Call History, Calendar, Notes, Reminders from iPhone (including all iPhone models: iPhone 3GS/4/4S/5/5S/5C) on Mac. Check the below guide to know how to restore iPhone notes on Mac.
Things you need:
1. Download and install Leawo iOS Data Recovery for Mac (If you need to recover notes for iPhone on Windows PC, you need to download and install Leawo iOS Data Recovery.)
2. iPhone, and iPhone USB cable.
3. Mac computer.
How to Recover Notes for iPhone on Mac
Step 1. Connect iPhone to computer
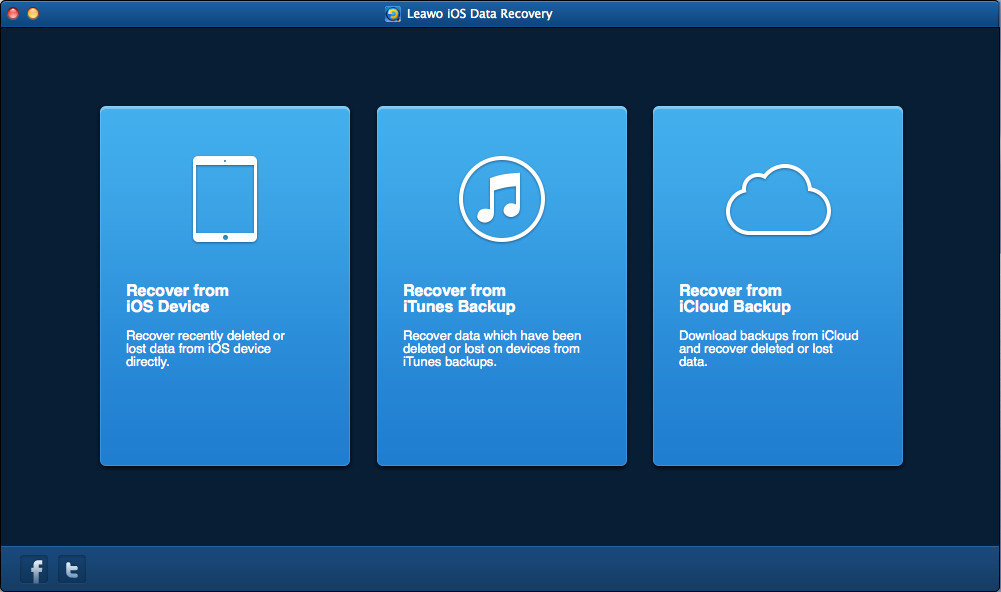
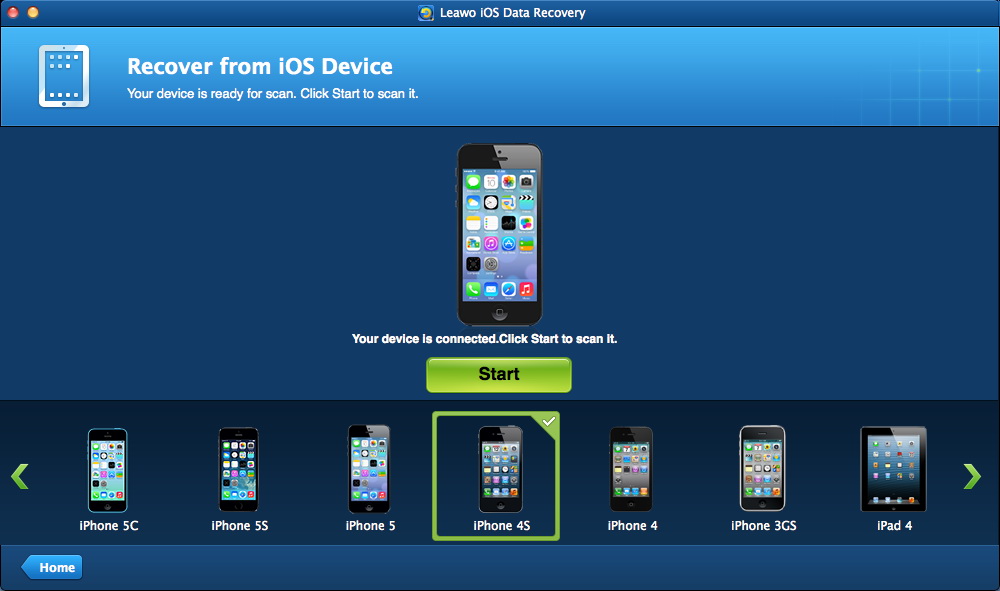
Connect your iPhone to your Mac computer with USB cable. Then open this iPhone notes recovery on Mac computer. On the main program interface, choose "Recover from iOS Device" option. After that, click the "Start" button to let this program scan your iPhone.
Note: If you're connecting iPhone 4 to your Mac computer for notes recovering, this program would ask you to activate DFU mode for data scanning in deeper way. After you activate the DFU mode, you could click the "Start" button to enable this Mac iPhone notes recovery start scanning.
Step 2. Scan data and files
This iPhone data recovery would then scan your iPhone on Mac.
Step 3. Select files for recovering
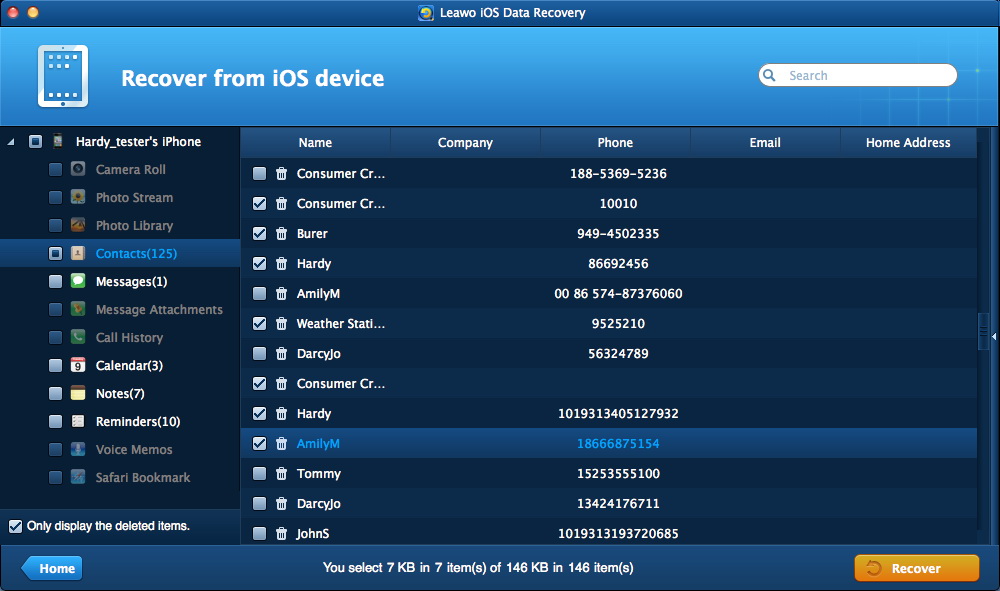
By scanning, this Mac iPhone data recovery would show all the data and files in different categories. You could enter the "Notes" category to preview and then select notes for recovering. Different from iTunes backup, this iOS data recovery tool allows you to recover desired notes only.
Step 4. Start recovering
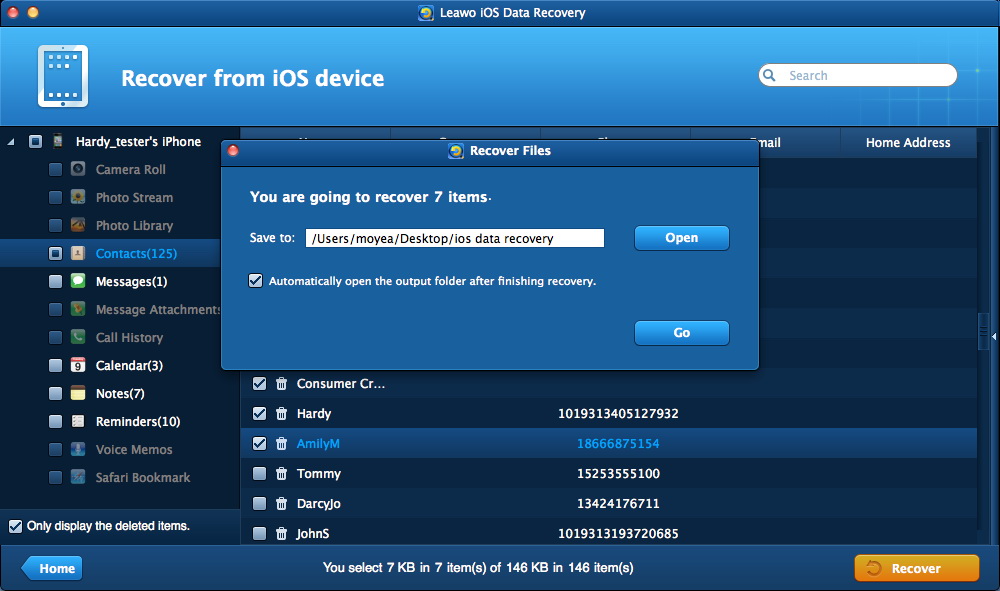
Now, click "Recover" button to invoke the "Recover Files" window, on which you need to set output directory. At last, hit "Go" button to let this Mac iPhone notes recovery start recovering iPhone notes on Mac.


 Feb. 10, 2014 by


