
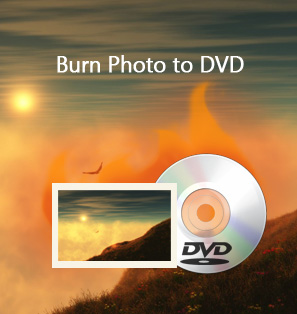
It is definitely true that photos record the precious moments and allow you to share the good memories with your family and friends no matter how long those moments have passed. Normally, your photos will be backed up automatically if you’ve set up the Windows 10 File History. You can also keep photos longer and more safely by copying some photos to a CD or DVD. In this case, the effective photos to disc service would be helpful. In this post, you are going to master skills and methods on how to put photos on a disc for a reliable backup and long-term storage.
Part 1: How to Burn Photos to A Disc with Leawo DVD Creator
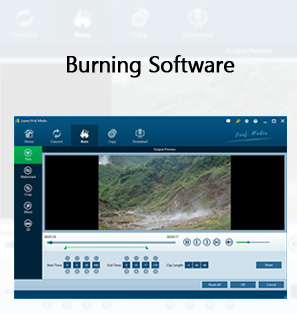
Leawo DVD Creator is an all-inclusive combo program that is designed to burn videos and photos in over 180 formats to DVD movies quickly and easily. It supports almost all the common video formats including: MP4, AVI, MKV, FLV, MOV, etc. and photo formats like PNG, BMP, JPG and JPEG. It enables you to burn DVD disc, folder and ISO image file as you like in BD50, BD25, DVD5 or DVD9. Additionally, it has dozens of preset menu templates available for you to apply. If you want to design your own special menus, it has a built-in menu designer for creating DVD menus by yourself, with which you could add background music, image and video, change the title, adjust text color, size, font, etc. Moreover, it has user-friendly interface so that anyone with no technical background can use this DVD creator to create a photo slideshow and burn them to disc with ease.
You could download and install it on your PC, insert a black disc into the CD-ROM and then follow the forthcoming guide on how to burn photos to a disc easily without any quality loss.
![]()
![]()
Step 1: After installing the program, you will find that DVD creator is one of the powerful programs that composes of Leawo Prof. Media. Now you can launch Leawo Prof. Media, click the Blu-ray/DVD Creator tab to enter the DVD creator module.

Step 2: Click “Add Photo” button to import photos or photo folder to the program. All the loaded photos would generate a photo slideshow video. You can click the edit button to enter the video section to customize the photo slideshow video.

Step 3: In the Video section, you can add more photos to the slideshow video, or move your mouse onto a photo and then you can rotate the photo or remove the photo from the video. Besides, it enables you to set the output video effect, including photo duration, transition duration and transition effect settings.

Step 4: Enter the Audio Section, click Add Music button to add your favorite songs from your computer to the program as the background music of the slideshow video. And then, you can also import more songs, delete unwanted songs, and set the sound effect of Fade in, Fade out or Loop play.

Step 5: When all the slideshow video settings are finished, you go back to the main interface where you can burn to BD-50, BD-25, DVD-9 or DVD-5, choose the aspect ratio of the video between 4:3 and 16:9, and set quality to “Fit to disc” to fit the video best. And then you click the green Burn button to pop up a sidebar where you can rename the disc label and choose an output destination path to save the burned video. Finally, click the Burn button on the sidebar to start burning and finish the process very soon.

Part 2: How to Burn Photos to A Disc with ImgBurn
ImgBurn is a free lightweight burning application for burning photos or images, files and video folders to CD, DVD, HD DVD and Blu-ray. It has several working modes for different tasks. It can read a disc to an image file, write image files directly to a disc and verify that a disc is 100% readable, and so on. In addition to the standard ISO format, ImgBurn supports a wide variety of selectable disc image formats including BIN, CUE, DI, DVD, GI, IMG, MDS, NRG and PDI. It is quite easy to use photos to disc service software that everyone can use it simply. This post exemplifies how to burn photos to a disc with this free DVD burning software ImgBurn.
After downloading and installing ImgBurn on your personal computer, start the burning application and click the “Write image file to disc” or “Write files/folders to disc” option in the launch wizard. And then follow the steps below to burn photos to a disc:
Step 1: Click File option on the menu bar to browse for a source file or a source folder to add photos or photo folders to the program. Or you can click the folder icon for source photo folder importing.

Step 2: You could insert a blank disc into the PC. When ImgBurn detects it, you click the calculator icon to see the size of the imported project, and then click the Device tab where you can set the max Writing speed.

Step 3: You can also set the Options including data type and file system. You can also change Label your DVD will have. Then click the DVD burning icon to start burning the imported photos to disc. Confirm that all the burning information is fine and then click OK to start the burning process. It will finish burning in a few minutes later.

Part 3: How to Burn Photos to A Disc with Freemake Video Converter
Except the two burning applications mentioned above, you can also take advantage of Freemake Video Converter for burning photos to disc service. This photo burning program enables you to create photo slideshow by adding multiple photos all together and burn beautiful photo slideshow to DVD absolutely free. Besides, it allows you to import a music track to that slideshow, select a DVD menu or add your picture as custom DVD background. Freemake converter tool can also convert more than 125 video formats including MP4, MOV, AVI, FLV, 3GP etc. And it converts audio files as well.
This multi-functional software is totally free of charge and simple to use burning program. Now you can download it and install it on your PC, and then you can follow the guide on how to put photos on a disc with this burning software.
Step 1: Launch Free Video Converter and click on the “+Photo” button to add photos you want to use in the slideshow.

Step 2: Click on the slideshow option to open a window where you can edit the photo slideshow settings. You can click the image icon to open a window for importing more photos, delete unwanted photos and reorder them as you like. Besides, you can add a music track to the photo slideshow by clicking the audio track and choose the interval time there. Once setup is done, click OK.

Step 3: Click on “to DVD” button at the bottom of the main interface, select a DVD menu or add your favorite picture as the background image of the DVD. And then choose the destination for the DVD and click “Burn” to start burning. Or you can also create an ISO file and burn your slideshow to DVD later. The burning process will be finished soon.

Part 4: Pros and Cons of the Three Products
The three burning applications are all helpful photos to disc service software, easy to use and effective. They have their own pros and cons when burning photos to disc for you. Thus, you should distinguish the advantages and disadvantages of them so as to choose the most proper one.
Leawo DVD Creator
pros:
>Support a variety of input files including images, photo slideshows, video files, ISO files.
>Burn image/photo slideshow/video to DVD/Blu-ray content
>With 40+ menu templates preset and allow users to create disc menus with internal menu designer
>An internal video editor which can customize the imported video
>Work at high speed without any quality loss.
>User-friendly interface so that everyone can use it easily
>Support almost all Windows and Mac OS
cons:
>Don’t support burning audio to disc directly
ImgBurn
pros:
>Create/read/write ISO image files
>Burn ISO files in rewritable CD/DVD
>Support a variety of image file formats such as BIN, CCD, CDI, CUE, etc.
cons:
>Cannot write ISO image files in USB drive
>Poor user interface
>Take a lot of time to burn a disc
Freemake Video Converter
pros:
>A user-friendly interface which is easy to use
>Create photo slideshows and burn DVDs/Blu-ray/ISO files
>Modify and edit video clips
cons:
>Cost a lot time
>Free version has some limitations
Anyway, when you don’t know how to put photos and videos on a disc, just choose a powerful and proper DVD burning application. Any one of the three burning applications mentioned above has its own pros and cons. The most multi-functional and powerful Leawo DVD Creator or the other two free burning applications can all help you to quite an extent.
 Sep. 16, 2019 by


 Prof. Media
 Blu-ray Ripper
 Blu-ray Copy
 iOS Data Recovery
 [12/29/23] MAX Downloader V15.0.0
 10,000,000 people are using Leawo!
 All Transactions are protected!
 30-Day Money Back Guarantee!