People are always reminiscent, especially when they get old. Many songs may remind them of happiness and sorrows in old days. I believe everyone has a music list that you are unwilling to delete and would like to keep it long enough. However, as time flies, some old audio quality isn't as good as before, even the music is full of sizzles. At the time, you must look for a solution for fixing the problem. How to improve audio quality so as to make old MP3 recordings a high quality audio source? You are really so lucky, for this article will provide you a detailed introduction to how to improve audio quality.
Solution 1: How to improve audio quality with Audacity
Audacity is a powerful free audio editing & recording software to improve audio quality. This software to improve audio quality enjoys a great range of functions that allow one to record sound and edit audio. Here are detailed steps for how to improve audio quality with Audacity.
1. Recording the audio
Click on the record button to start recording. Please ensure your microphone is inserted. To ensure the performance of the device, you can have a test before you record in a real sense.
2. Clear background noise
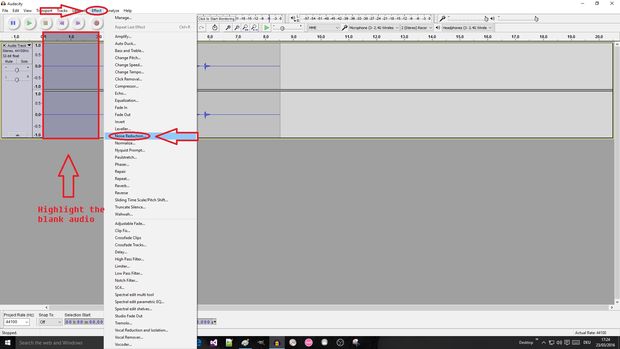
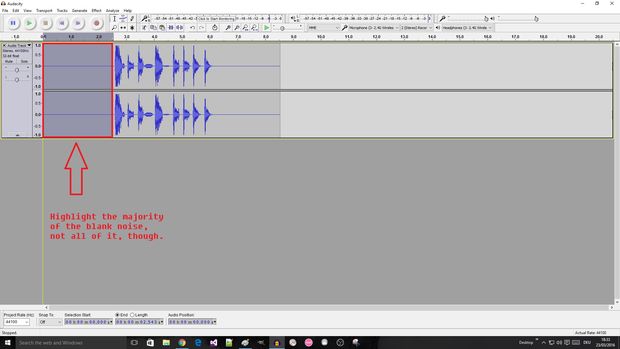
Mark the blank audio at the beginning of the recording, buzzing sound might appear at the beginning. Click Effect > Noise Reduction > Get Noise Profile. You can repeat this action to reduce noise. Remember to select the whole track before you repeat noise reduction.
3. Compress audio files
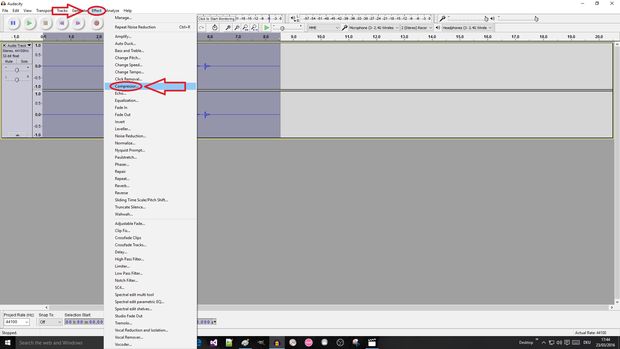
Go Effects > Compressor and set the parameters as the following show:
Threshold = -18db
Noise Floor = -40db
Ratio = 2.5:1
Attack Time = 1.81 secs
Release Time = 11.1 secs
4. Bass and Treble boost
Go to Effects > Equalisation to select Bass Boost from the dropdown box and click OK. Keep the setting as 9db. Repeat the step but select Treble Boost this time.
5. Limiter
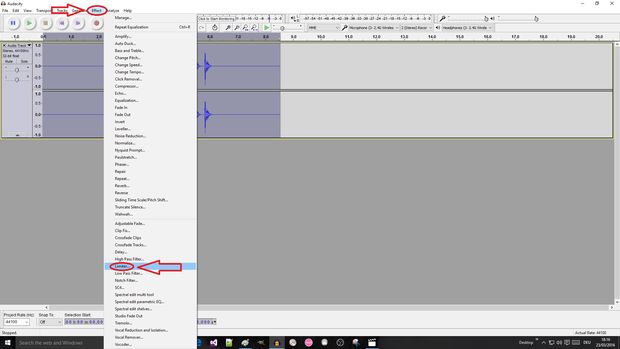
Go to Effects > Limiter to select Hard Limiter from the dropdown box. You can choose the maximum db rating as 3.00db.
6. Normalise
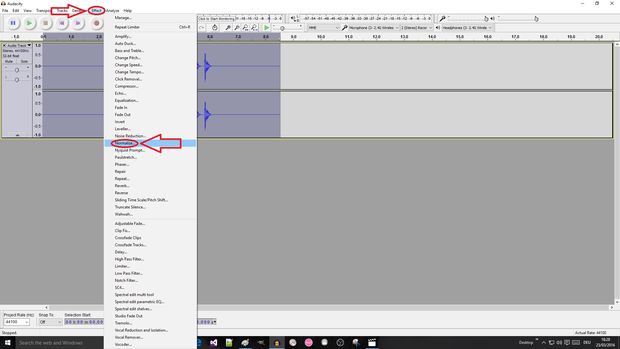
Go to Effects > Normalise and keep it as default.
7. Remove Blank Audio
In this way, you can easily add background footage. Here I advise you not to delete it, for you might mistakenly delete audio files.
8. Enjoy high quality audio
With the help of this software to improve audio quality, now you can enjoy clear and high quality sound files.
Solution 2: How to improve audio quality with Leawo Music Recorder
As for how to improve audio quality, Leawo Music Recorder is no doubt the best software to improve sound quality in the easiest steps. It is strong and creative software that provides various kinds of basic settings as Task Scheduler, Audio source, and Output format to allow you to customize and improve your music. Leawo Music Recorder enables you to set the parameters of recording, including audio format, bit rate and sample rate. You can follow these steps to learn how to improve audio quality.
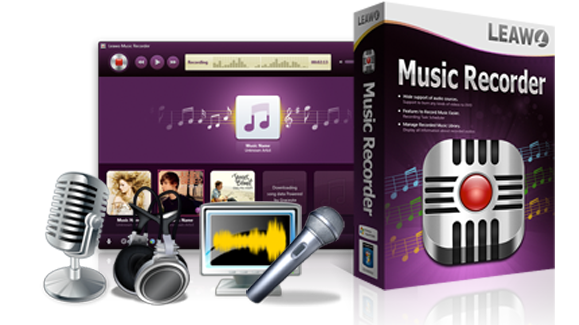
Leawo Music Recorder
☉ Record any music file from computer stream audio and built-in input audio.
☉ Record music from 1000+ music sites like YouTube, Facebook, Veoh, VEVO, etc.
☉ Schedule music recording via the internal recording task scheduler.
☉ Automatically/manually add and complete music tags like artist, album, cover, genre, etc.
With this voice recorder and playback software, you could easily record any sound into audio file for multiple uses. Want to know how to record your voice with this voice recorder software? The below steps would show you in detail. But beforehand you need to download and install it on your computer via the links above.
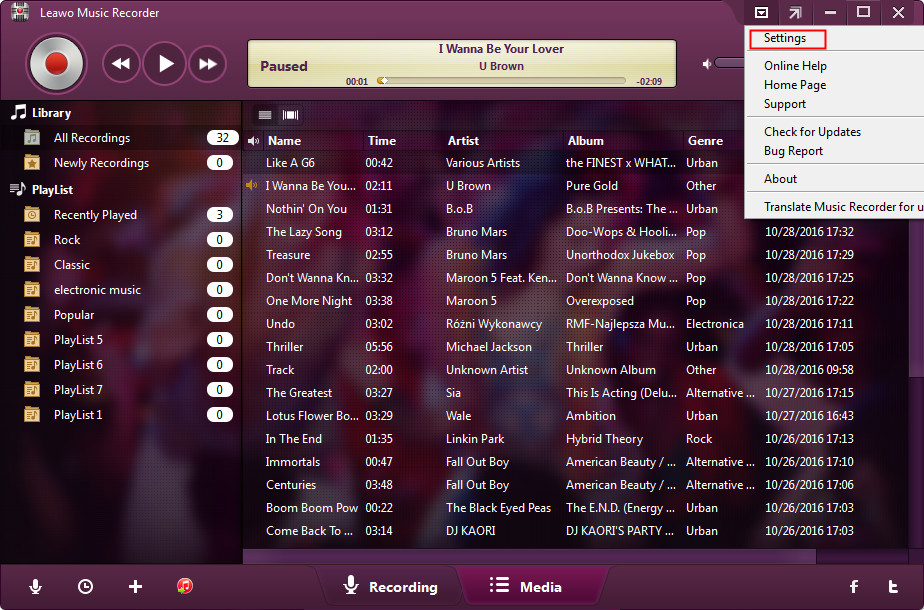
Step 1: Open the Settings panel
Find the setting icon on the right-top of interface and click the icon to open the setting panel.
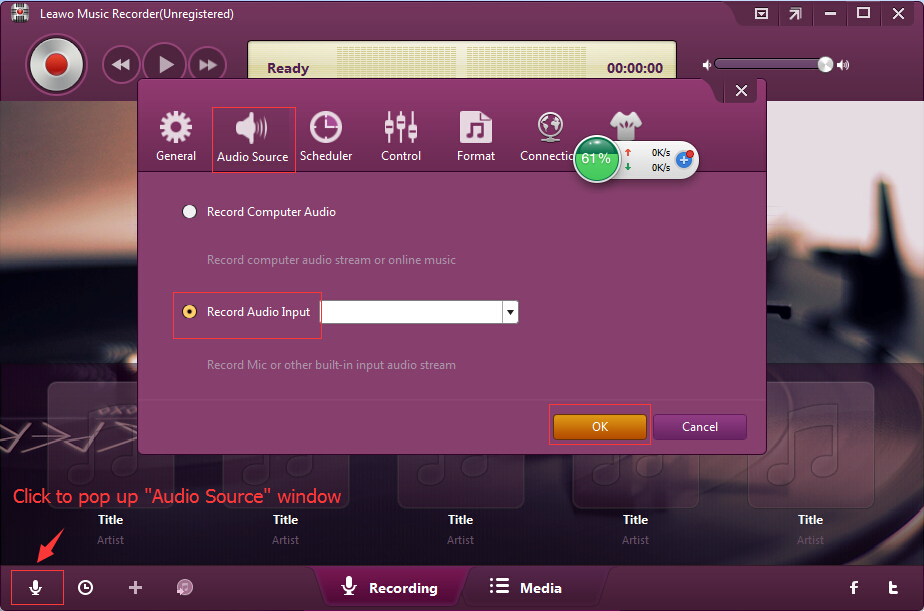
Step 2: Select audio source
According to your actual situation, select "Audio Source" on the main interface. Two sections are available: Record Computer Audio and Record Audio Input. Choose one according to your own needs.
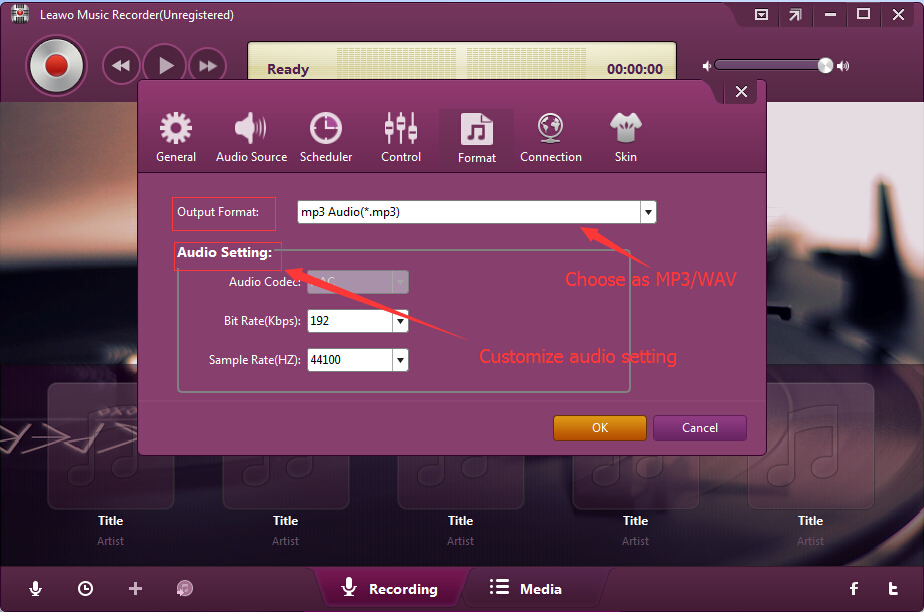
Step 3: Set the output format, then adjust Bit Rate and Sample Rate
Go to Settings > Format to choose .wav as the output format, for WAV enjoys better sound quality, then adjust Bit Rate and Sample Rate. You can increase the Bit Rate and Sample Rate to improve the sound quality. After adjusting the rates, you can listen to the audio and test whether the sound quality is OK. Pay attention! It is important to implement this step to improve audio quality.
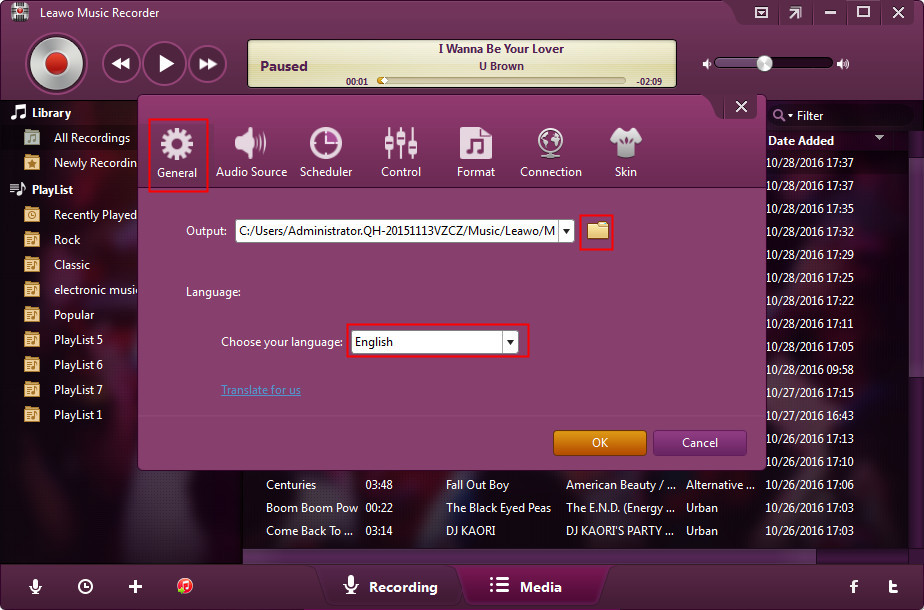
Step 4: Set output directory
You can go Settings >General to choose your target Output directory. Click the file icon to browse the target disk you would like to save.
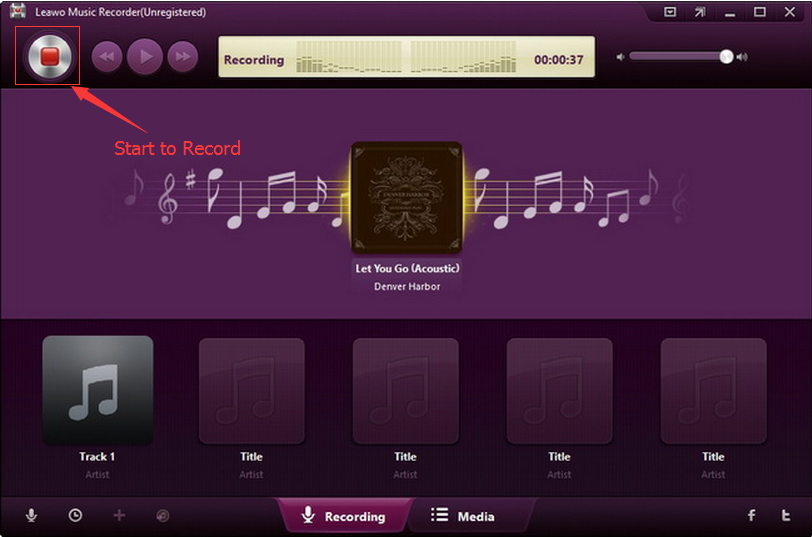
Step 5: Start recording
Start music recorder by click red "Start" button and click "Play" to play the source audio. Start recording before playing your source audio.
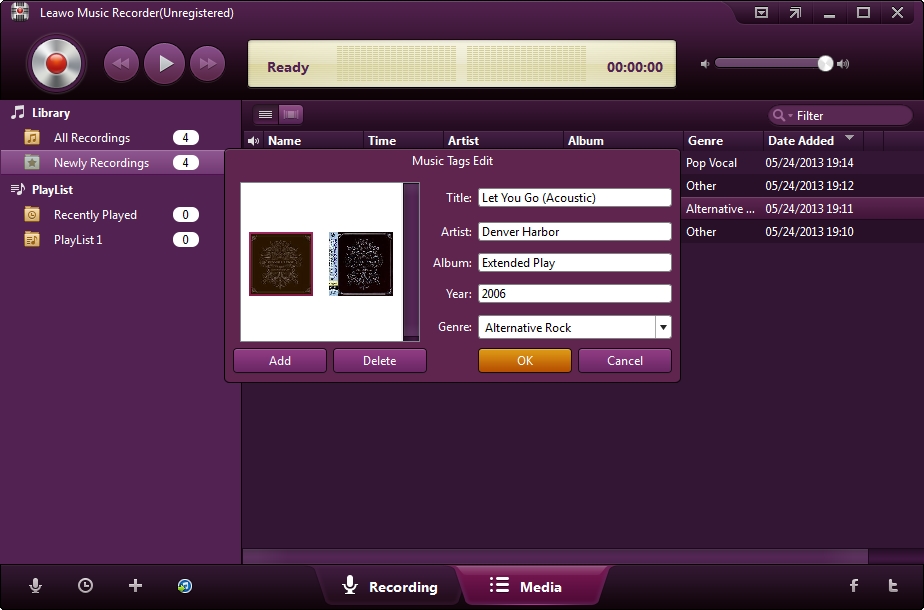
Step 6: Start recording
Leawo Music Recorder is able to automatically download and add music tags to your recordings. But you can also manually change music tags by going to Media > Library. Select the target recording and right click it, then edit tags by choosing "Edit music tags".
Leawo Music Recorder is effective in improving sound quality. It is easy to operate and the interface is simple and clear. Audacity offers more options but it is really complicated. You could then freely select the one that meets your needs most.



 May. 20, 2017 by