In order to obtain a high quality photo for some professional photographers, especially for some digital images, the sensor of a DSLR camera would determine the output quality of the picture. In other words, you have to know that the picture quality would be affected by the pixels whose sized would depend on the resolution of the output display. If you have ever tried to resize your photos, and you would obtain the blurry pictures which would be a bit frustrating. Why does this happen? This could be caused by the pixilation phenomenon which portrays the bitmap region of the photos in the large size pixels. In today’s post, let’s focus on pixelated pictures and some efficient methods would be provided to fix them.
Menu
Part 1: What Causes Pixelated Pictures?
The picture is a bitmap to represent the image, the unit is "pixels/inch". The colloquial term is "dot/inch". The resolution determines the clarity of the picture. The resolution is fixed at the time of shooting, it can only be lowered and cannot be improved. When you enlarge the size of the picture, the pixels will not increase, but each pixel will be enlarged. So it seems that the clarity has dropped. This is the same as the photos taken on film, the sharpness will be reduced after zooming in. The greater the zoom, the worse the definition. When zooming out some portrait photos, as long as the resolution is not reduced, the sharpness will not be reduced. Then in such a case, we call this phenomenon pixilation. In such a way, you would obtain a pixelated picture.
The effective pixel number refers to the pixel value that actually participates in photosensitive imaging. The value of the highest pixel is the real pixel of the photosensitive device. This data usually includes the non-imaging part of the photosensitive device, and the effective pixel is the value converted under the zoom magnification of the lens. Digital pictures are generally stored in pixels (Pixel), and each pixel is the smallest unit in the digital picture. The larger the pixel, the larger the area of the picture. To increase the area size of a picture, if there is no more light entering the photosensitive device, the only way is to increase the area of the pixels, which may affect the sharpness and clarity of the picture. But take it easy, if your pictures have been pixelated, there are several efficient ways to fix the problem.
Part 2: How to Fix Pixelated Pictures in Photoshop?
We have to say that PS is really a powerful image processing tool. We all know that sometimes changing the pixel size of a picture will change the quality of the picture. If you change a small picture to a large picture, the quality will also decrease. Photoshop mainly deals with digital images composed of pixels. Using its numerous editing and drawing tools, you can effectively edit pictures. PS has many functions, which are involved in image, graphics, text, video, publishing and other aspects. Adobe Photoshop is an ideal choice for professionals in the fields of film, video, and multimedia, graphics and web designers using 3D and animation, and professionals in engineering and science. Is there any way to fix pixelated pictures in Photoshop? The answer would be positive. Here are the detailed steps.
Step 1: Open Photoshop on your computer. And add the pixelated picture you would like to fix to the program.
Step 2: Enter the main interface of Photoshop and select Filter >> Blur options. Then, on the Blur panel, select Gaussion Blur option and confirm your own preferred pixel level. Next, click OK button.
Step 3: Return to the main menu screen and click Filter >> Sharpen option. Then you can find Unsharp Mark under the Sharpen menu. Here also find the acceptable level by using the slider. Click OK to confirm the change.
Step 4: Finally, click the main menu and choose Save option to finally save the image. Then you can view the final image which has been much clearer than before.
Part 3: How to Fix Pixelated Pictures in PhotoIns?
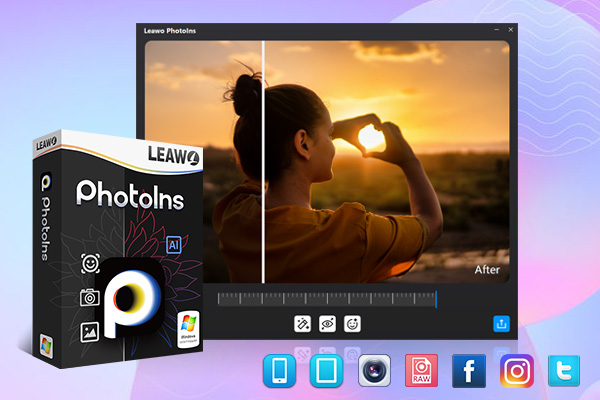
For some beginner users, Photoshop would be a little complicated and the options vary, which could not be an easy task. Instead, you can also turn asides to some third-party powerful photo enhancers to achieve your goal. Here, Leawo PhotoIns would be the perfect Photoshop alternatives you can trust. This tool is powerful as an AI photo enhancer, which can optimize your pictures immediately. Its features are comprehensive, which includes enhancing images, intelligently retouching skin, removing freckles, reducing noise, enhancing eyes, adjusting lighting automatically and so on. Here are the detailed steps to fix pixelated pictures in PhotoIns.
Step 1. Download and install Leawo PhotoIns
Go to the official site and download Leawo PhotoIns for free. Install the program on your computer in minutes.
-
Leawo PhotoIns
- Enhance portrait photos easily with advanced AI technology
- Fix photo exposure and white balance issues automatically
- Optimize photo colors and perfect photo tints
- Make photos perfectly clear with smart dehaze
- Boost photo lighting and color quality
- Process RAW and JPG files
Step 2. Import source pictures to Leawo PhotoIns
Enter the main interface of Leawo PhotoIns and you can load photos into the program by clicking the option “Add Photo”. Or you can simply drag and drop your photos to this program directly.
Step 3. Start to enhance pixelated pictures
After loading your pixelated photos to the tool, then you can start to enhance the photos. You can click the AI Enhance tab to choose the features, including "Automatic Lens Correction", "Face Enhance" and "Enlarge Eyes". Furthermore, you can find an effect adjuster bar right below the previewer which could allow you to set the degree of each effect. Once you applied AI Enhance function, the picture could be automatically fixed.
Step 4. Set output parameters
Once you have chosen your effects and you have applied the AI Enhancer to your chosen pixelated pictures, now you need to click the bottom right output icon to proceed for output settings. On the Output Setting panel, you can complete the following things: “Save to” route, “Format”, “Quality”, “Naming”, “Resizing” and so on. Finally click “Output” to export the enhanced photo to your computer.
Part 4: How to Fix Pixelated Pictures with Online Photo Enhancer?
Asides from the independent tools to fix pixelated pictures, you can also try some online photo enhancers. These online tools can easily allow users to do some important tasks without downloading or installing any further third-party programs. Instead, you can simply work on a phone or a tablet. As well, this online photo enhancers have the powerful photo editing features and functions which could carry out image editing and manipulation. If you are looking for a proper online photo enhancer to effectively fix pixelated pictures, here you can try Pixenate and Fotor which are both free tools you can use to simply fix the problem.
Here, let’s take Fotor as the example to fix pixelated pictures. Fotor is one of most professional image processing software which has the most powerful functions including, image editing, puzzles, design tools, massive amounts of material, and daily delivery. It is the first-class software for image processing and you can adopt it as your first choice to use as an online photo enhancer. Fotor has all the basic functions of photo editing software. Especially it is good at picture special effects enhancement, artistic border addition and picture clip removal and other functions. With the simple-to-use interface, Fotor can achieve the best results. Here are the detailed steps.
Step 1: Go to Fotor website and then upload your preferred photo to the site.
Step 2: Select Effect from the left menu and scroll to Pixelate option.
Step 3: Based on your own requirements, use the scroll bar to confirm the minimize pixilation. Finally, click Apply option to confirm the change. You photo has been fixed successfully.
Part 5: How to Fix Pixelated Pictures in Paint.NET?
For some users, they may regard Photoshop too expensive to edit some common photos in their daily life. In such a case, you can refer to some free alternative programs. Here, Paint.net could be another respectable choice you can make. You can take a try on this simple photo enhancer to fix pixelated pictures. Here are the detailed steps to fix your pixelated images.
Steps:
- Download and install Paint.Net on your computer.
- Open the program and open the pixelate picture you would like to fix to the program.
- Go to select Effects and locate the Blur >> Gaussian Blur options to enter the fix steps.
- Use the slider to scroll the pixel effect parameter to your preferred location. Then, return to the main screen and click Effects >> Photo and Sharpen.
- Use the slider to get the proper level for the particular effect. Finally, click the save button to confirm the change of the pixelated picture.
All the steps showed above are quite simple and easy. Users can take some time getting familiarizing with the arrays of online and independent photo enhancers to fix the pixelated pictures with ease and accuracy.


