
VCR was so popular back in the day. Whatever happens in our daily lives, we can record it with the little camcorder and save the footage in a cassette tape. When we want to review the footage, we can just play the tape in a machine. With the super-fast development of media technology, VCR has been long obsolete and gone far away from our lives. Now we can just record anything we want with a single cell phone. However, I believe a lot of you still have some VCR tapes or VHS cassettes in your home. In the new era like we are living in right now, how do we deal with these tapes or cassettes? Do we just pack them up and leave them in the dust? Well, the best solution is to convert the VCR to DVD. That way you can preserve your memories in a good way and can view them anytime you want. But the question is, how? How can we convert VCR to DVD? Now that's what we are going to talk about today. In today's post, you will learn the detailed steps on how to convert your VCR to DVD in the easiest way. Without further ado, let's get started.
Part 1: About VCR
Before you really try to convert your VCR to DVD, you need to have a full understanding of what VCR really is. You need to make sure that you really know. what you are dealing with. So, before everything, let's learn something about the VCR first.
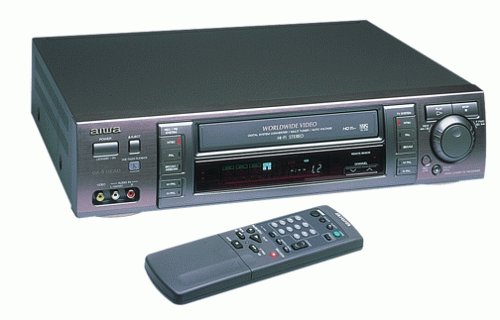
VCR is short for videocassette recorder. It is an electromechanical device for recording and playing back full-motion audio-visual programming on cassettes containing magnetic tape. Most videocassettes have tape measuring 1/2 inch (1.27 cm) in width. The most common application of the VCR is its use by consumers for the purpose of playing and recording television (TV) programs and for creating home video recordings. A TV camera equipped with a VCR is called a camcorder. The abbreviation VCR can also stand for videocassette recording. The world's first commercially successful VCR was introduced by Ampex as the Ampex VRX-1000 in 1956, which made use two-inch tapes, and the Quadruplex videotape professional broadcast standard format. The first home VCR was called the Telcan and was produced in 1963 by the UK Nottingham Electric Valve Company for £60, which today is roughly equivalent to $1500.
In the late 1980s and early 1990s, the VHS and Betamax formats became competitive. For complex legal reasons, VHS captured the home video recording and reproduction market. By 1993, Betamax was essentially obsolete among consumers in the United States. In recent years, the use of video tape has become less common because of the widespread availability and popularity of DVD technology. Now that's the exact reason why today we need to know how to convert VCR footages to DVD in order to preserve our memories in a better way.
Part 2: Convert VCR to DVD with DVD creator
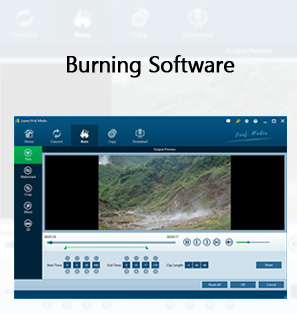
To convert VCR to DVD with DVD creator, you need a good DVD Creator software to finish the job. The one that I would recommend here is called Leawo DVD Creator. Leawo DVD Creator is a professional DVD burning program that can easily burn all kinds of videos to a DVD disc. The program is easy to use, and can deliver a stable performance when burning any video to a DVD disc or ISO files or folder. Now I'll show you how to convert VCR to a DVD disc with Leawo DVD Creator
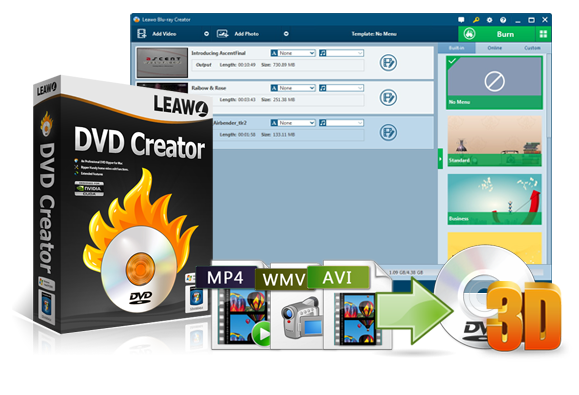
DVD Creator
☉ Convert videos like MP4, AVI, MKV to DVD format fast.
☉ Create DVD-5, DVD-9 disc, folder or ISO image without quality loss.
☉ 1-click operation to create photo slideshows and burn to DVD.
☉ Easily editable effects, 2D to 3D conversion support.
☉ Built-in menu templates and edit disc menu with personal preferences.
![]()
![]()
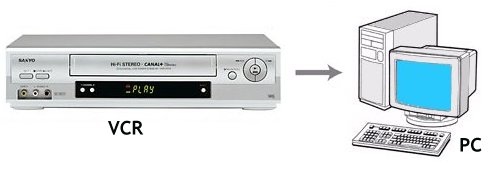
Step 1: Connect the VCR to the computer
This is where the analog-to-digital converter comes into play. At the very least, one end will be USB and the other end will have a red, white, and yellow RCA cables. Connect the red, white, and yellow cables to the corresponding colored outputs on the VCR and insert the USB to the USB port on your computer.
Step 2: Insert the tape
Before you insert the VHS tape into the VCR, you'll want to make sure the heads are clean. Insert the DVD-R or DVD-RW disc into the DVD burner. Then open the software on your computer. Many analog-to-digital converters will come with software that will transfer the VHS tape to the computer. Open it and get the digital video in the VCR.
Step 3: Import the video to DVD Creator
Download and install Leawo DVD Creator. After you have downloaded it, launch it and import the video by clicking the "Add Video" button or directly drag and drop the video to the program.

Step 4: Edit and menu
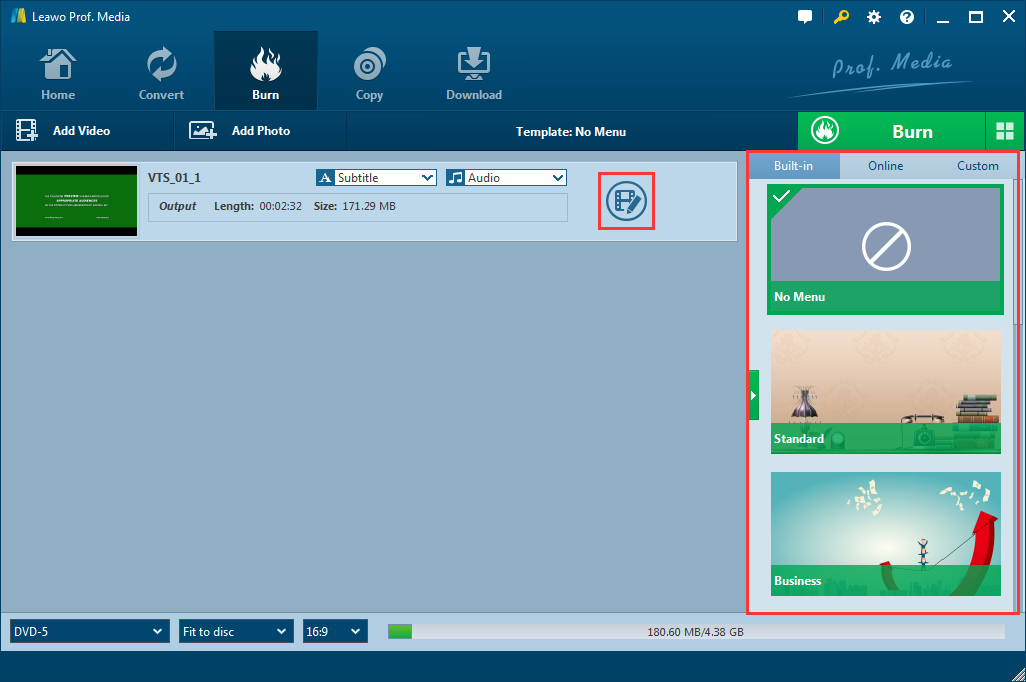
Leawo DVD Creator provides some additional functions for you to burn a more personalized DVD disc. If you want to do some further edits to your video, click the edit button on the video, you can trim, crop, add special effects, add watermarks, or turn 2D video to 3D in the built-in video editor. You can also create a DVD menu based on the beautiful DVD menu templates.
Step 5: Start burning
Finally, click the green "Burn" button to call out the burning setting panel, where you can set output format, whether you want to create an ISO file or folder, or you want to burn your video to an optical DVD disc. Then set an output directory. When you have set all of that, click the burn icon below to start burning. How long the burning process will take depends on the speed you have chosen in the third step. You can choose to shut down your PC when it's finished if you don't want to wait.

Video guide on Leawo DVD Creator
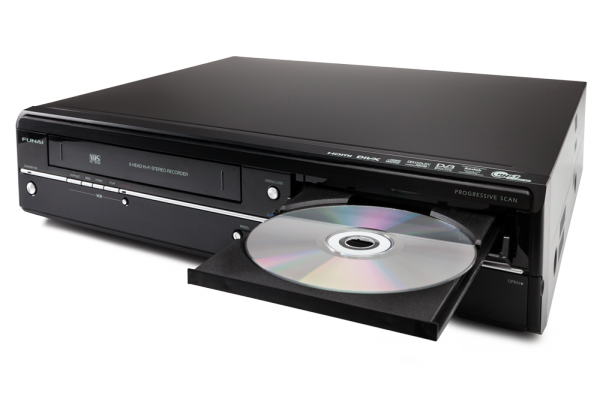
Part 3: Convert VCR to DVD with a DVD Recorder
To convert VCR to DVD with a DVD Recorder, the only other piece of equipment you'll need for this method is an RCA cable. You probably don't need to run out and buy one of these cables. You may already have one that came with your cable box, DVD player, or even TV.
Step 1: You need to connect the VCR to a DVD recorder. That's where the RCA cable comes into play. The cable is color-coded yellow, red, and white. This is what's used to transfer the video and full audio. You'll want to plug the cable into the corresponding color outputs on your VCR and then plug the other end of the cable to the corresponding color-coded inputs on the DVD.
Step 2:Once you've made sure that the video heads in the VCR are clean, insert your family VHS tape and play it. Again, if you don't want to record the entire tape, set it to the point in the tape where you want it to start recording. At this point, you'll also want to insert a blank DVD-R or DVD-RW disc into the DVD recorder.
Step 3:When you're ready to start recording, press play on the VCR and record on the DVD player. This should be a seamless process, but you may want to check your DVD recorder manual in case there's an extra step or two needed.
Part 4: Convert VCR to DVD with retail conversion services
For those who'd rather forgo the technical hands-on process, many big-name retail corporations offer VHS-to-DVD (and in some cases VHS-to-digital) conversion services through their photo departments. Most of them use a very similar service — in some cases, the exact service — and typically require a three-week waiting period between tape drop-off and DVD pickup, but there's no extra work on your end.
Available transfer formats include everything from VHS to Betamax, and most services will allow you to transfer up to two tapes to a single DVD before charging you extra. Alternatively, there are a couple of great websites that offer the same service for a more affordable price if you feel comfortable shipping the VHS tapes yourself.

While a fair number of retailers including Costco, Target, Walmart, and Sam's Club offer VHS to DVD conversion services, many of them use the same company for their conversion: YesVideo. If you head to the YesVideo website, you'll find conversion services starting from $26 per tape, but the price you pay in-store could be lower. These prices have been trending upward in recent years, so if you've been waiting to get your tapes converted, you might want to get on it.

 Jun. 17, 2017 by


 Prof. Media
 Blu-ray Ripper
 Blu-ray Copy
 iOS Data Recovery
 [12/29/23] MAX Downloader V15.0.0
 10,000,000 people are using Leawo!
 All Transactions are protected!
 30-Day Money Back Guarantee!