"How do I import movie files into imovie that are .mov files saved in my iphoto? When I open the .mov file, the movie will only play in my quicktime viewer. How do I change the format so it is compatible with imovie? imovie will not let me import these files or drag & drop them into the program." - question from Apple Support Center.
Part 1: Convert MOV to iMovie with MOV to iMovie Converter
Apparently, an MOV to iMovie converter is necessary. Leawo Video Converter for Mac offers practical MOV to iMovie conversion solution for Mac users. It could easily convert MOV videos and videos in other formats like AVI, FLV, MKV, MPEG, etc. to iMovie compatible videos on iMac or Macbook in clicks. Download and install this Mac MOV to iMovie converter on your computer before you check the guide below to convert MOV to iMovie on Mac.
Download and install this Mac MOV to iMovie converter on your computer before you check the guide below to convert MOV to iMovie on Mac.
Guide on how to convert MOV to iMovie on Mac:
Step 1: Import source MOV files
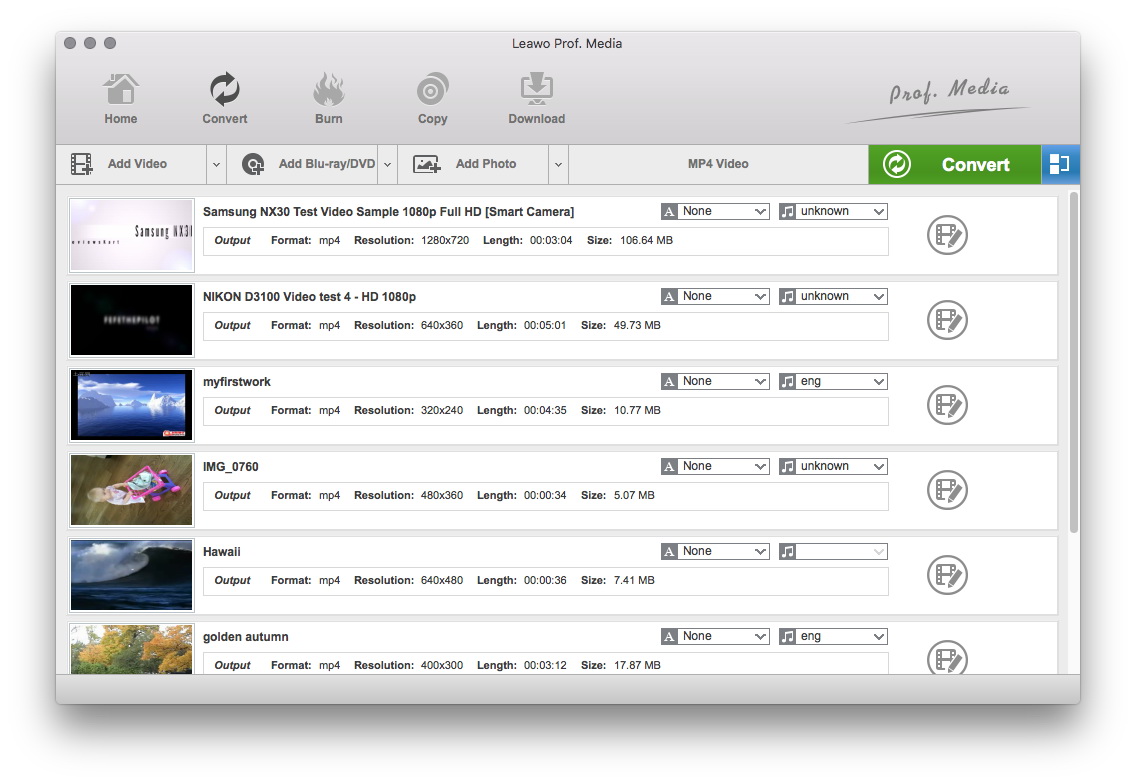
Launch Leawo Video Converter for Mac to enter the main interface. Under the "Convert" module, click the "Add Video" button to browse and choose source MOV files or directlry drag and drop source MOV video files into this MOV to iMovie converter Mac.
Step 2: Set iMovie video as output format
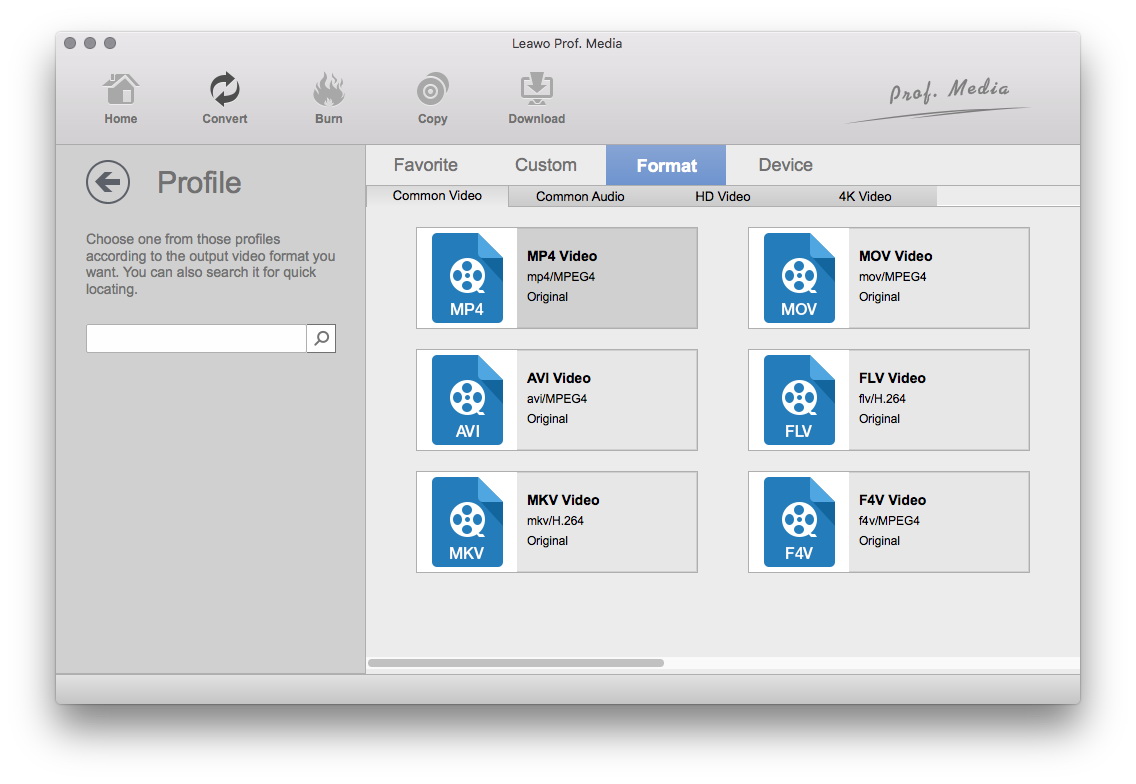
After importing source MOV files, click the drop-down box before the big green "Convert" button and then select "Change" option to enter the Profile window for output format setting. As iMovie recognizes MOV format, you could just select MOV as output format from"Format > Common Video" group. Of course, you need to make sure the video and audio codecs of output MOV files are exactly what iMovie could recognize.
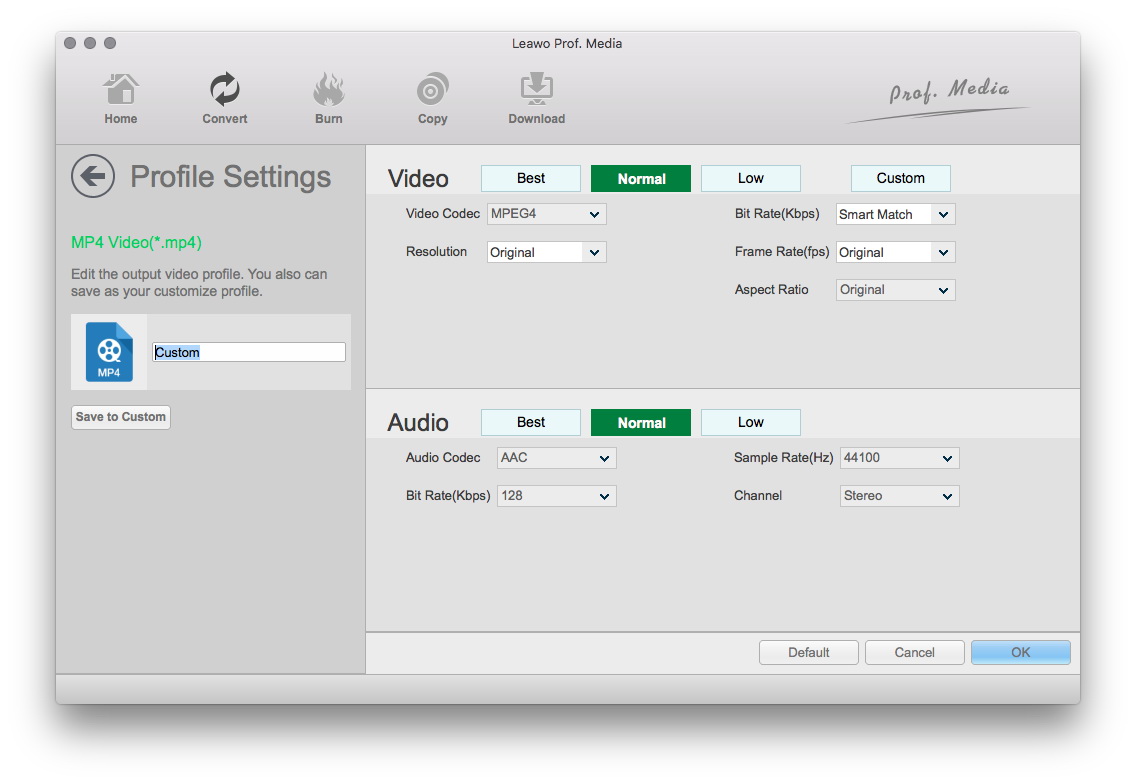
Optional: Re-open the drop-down box and then select "Edit" option to enter the Profile Settings panel. On the Profile Setting panel, you could freely set video and audio parameters in detail (video codec, bit rate, aspect ratio, quality, frame rate, audio codec, audio quality, audio bit rate, sample rate and channel) to meet iMovie standard.
Step 3: Set output directory
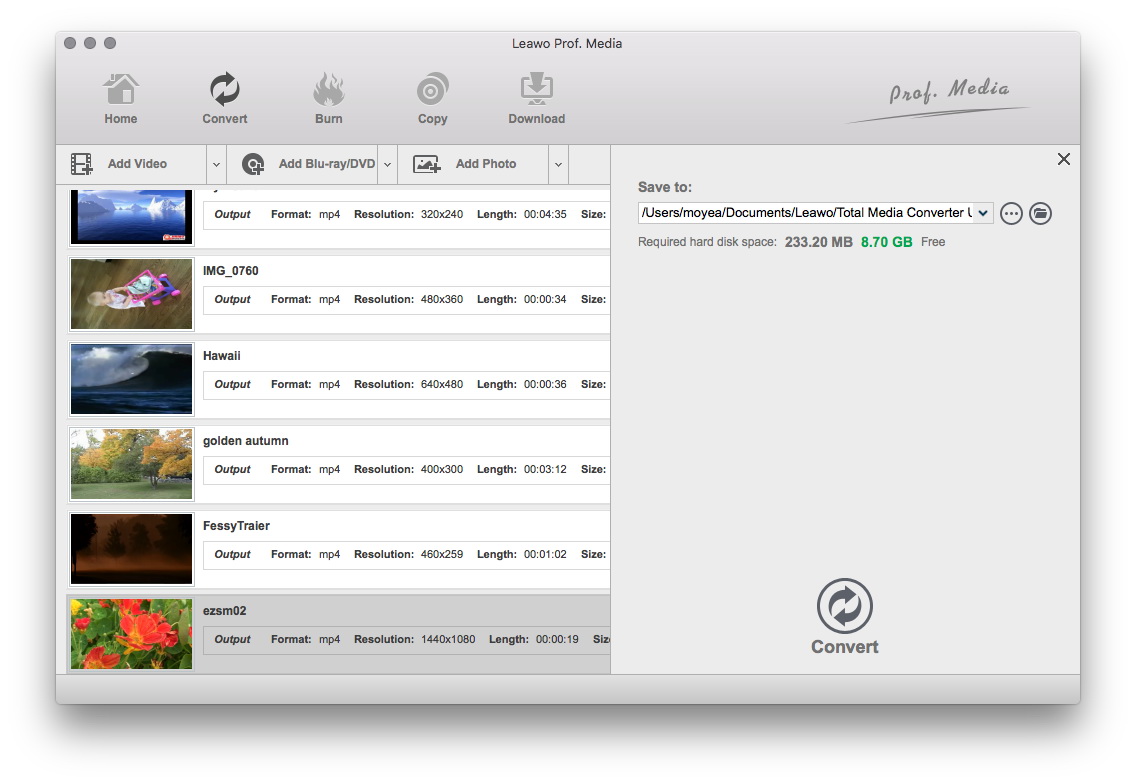
When all the format settings are finished, save the settings and return to the main interface. Click the big green "Convert" button on the main interface to set output directory on the popup sidebar. You could open "Save to" box to browse desired folder as output directory.
Step 4: Convert MOV to iMovie on Mac
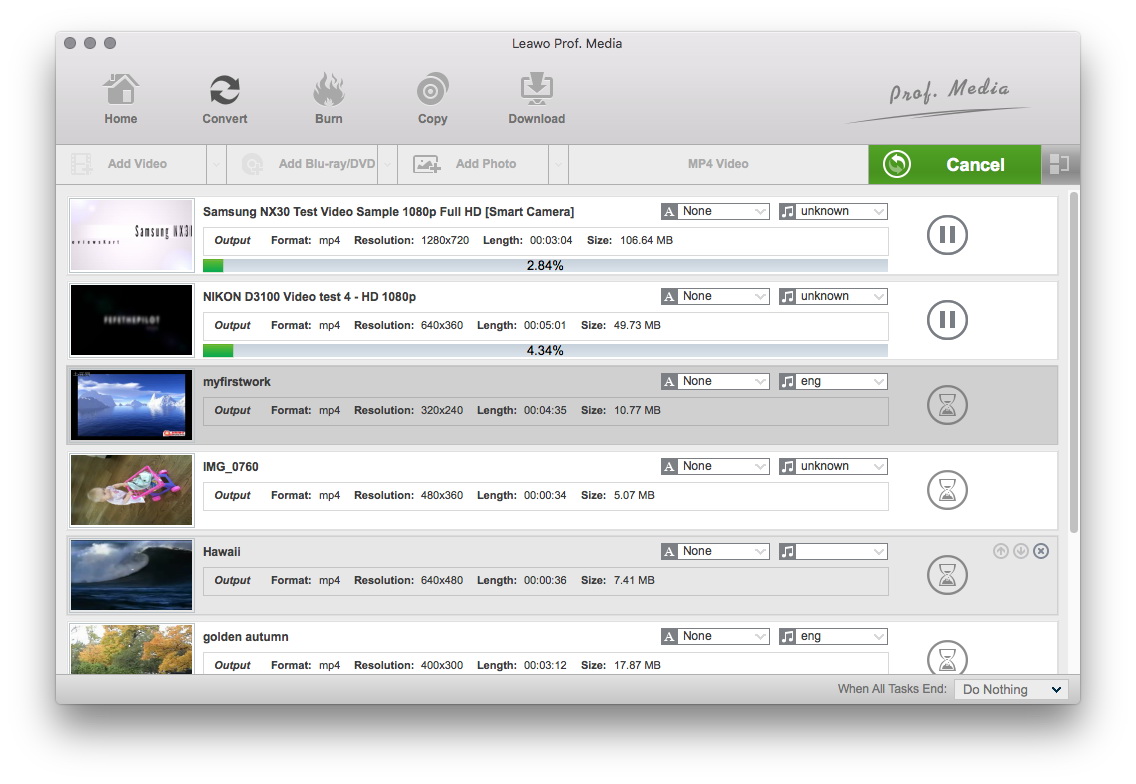
At last, start to convert MOV to iMovie on Mac by clicking the bottom "Convert" button on the sidebar. The conversion will take a few minutes, depending on the file size of your MOV files and your computer performance. When the conversion finishes, you could then import the converted MOV files to your iMovie for editing.
Part 2: Edit MOV Files with Video Editor Built in Leawo Video Converter
Actually, Leawo Video Converter comes with a built in video editor that allows you to edit MOV movies before you convert MOV files to iMovie on Mac. This built-in video editor allows you to trim video length of MOV file, crop MOV video size, add image or text watermark, adjust MOV video effect, apply 3D effect, etc. The below content would show you how to edit MOV movies within the built in video editor of Leawo Video Converter.
After you load source MOV videos into this Mac Video Converter, you could then see a pencil icon in each loaded MOV file title, by clicking which you could enter the video editing panel. Then, you could edit MOV videos via the built in video editor.
Trim video length
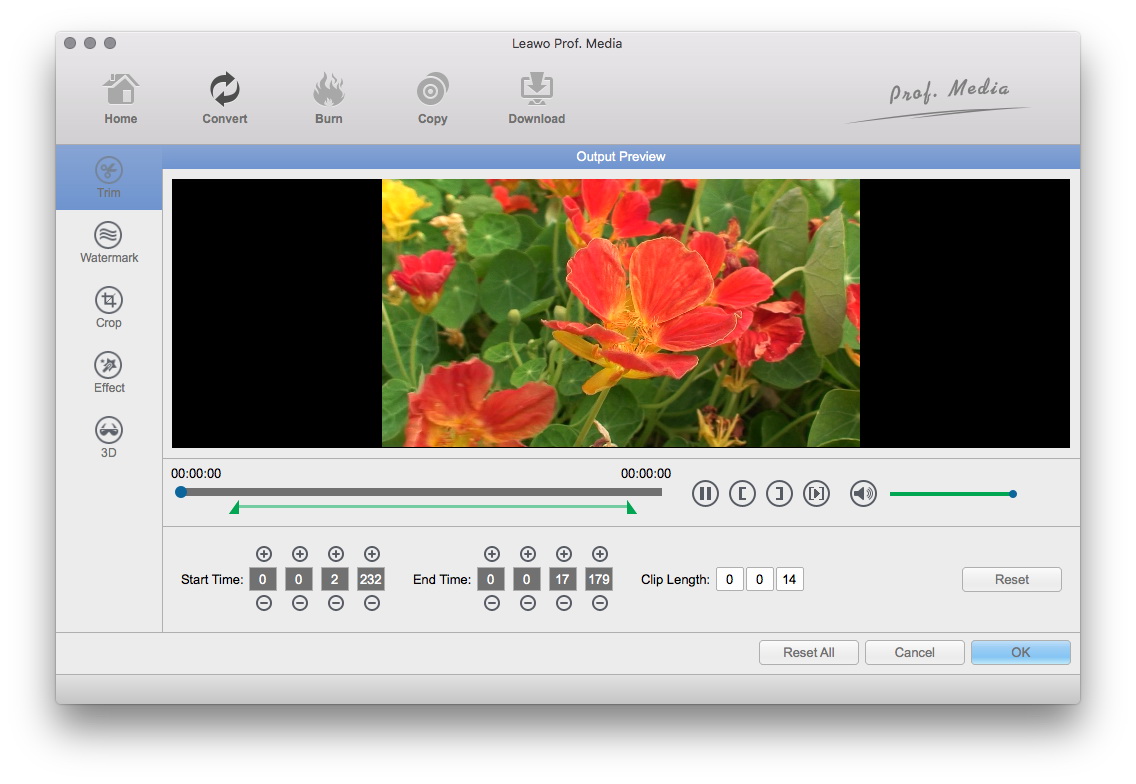
Under the "Trim" tab, you could set the values of "Start Time" and "End Time" to determine which video clip of your source MOV files would be retained. Or you could drag the 2 limiters on the play-bar to trim video length. The Clip Length will show you how long the output video will be. You could click the "Reset" button to undo all settings and re-trim video length.
Add image or text watermark
Open the "Watermark" tab and then you could choose to add either image or text as watermark to output MOV files. Firstly, slide the "Watermark" switch to green, and then switch either Text or Image to green to add corresponding watermark as you like. When you try to add text watermark, you could adjust the text content, font and color. When you choose to add image as watermark, you could browse and load image from your local drive. No matter what you want to add as watermark, you could adjust the watermark position, transparency, size, etc.
Crop video size
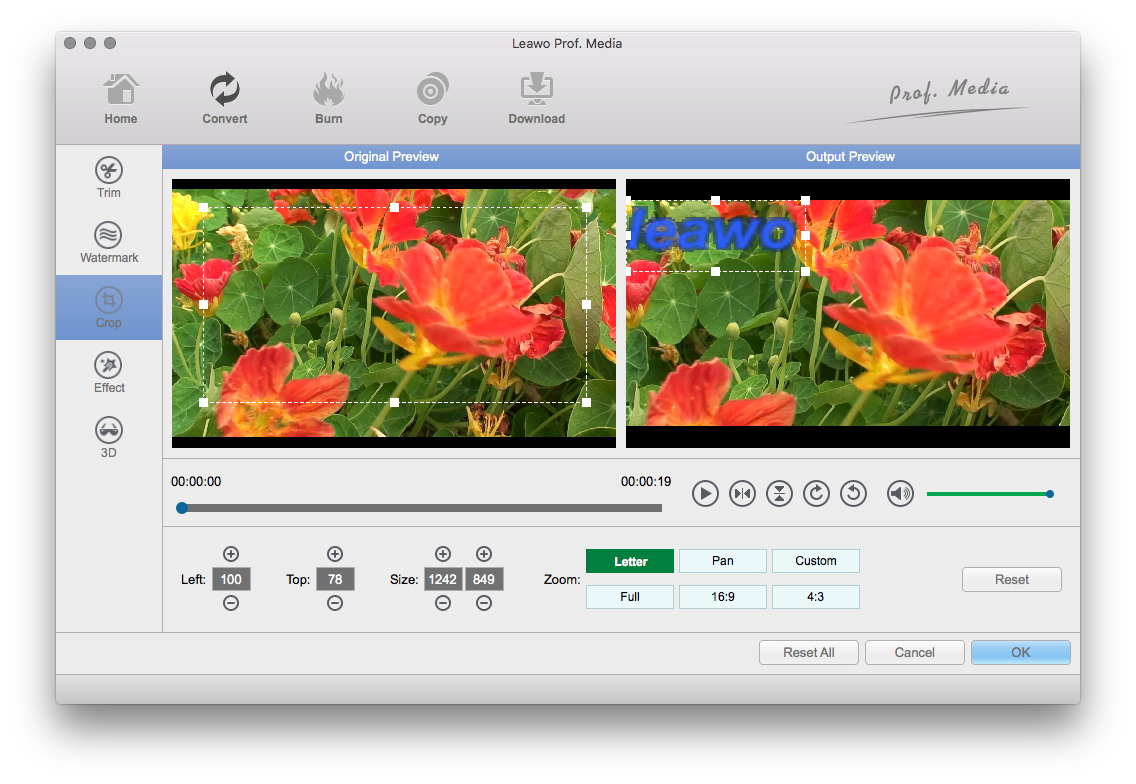
You could remove black margin of MOV videos under the "Crop" tab. Directly drag and drop the dot frame on the left preview window to set the size of output MOV video. An instant preview will be available on the right output window. You could also crop video size by setting the values of "Left" and "Top". Or, to make it simple, you could directly choose a Zoom type here and get instant preview. On the "Crop" tab, you could even rotate the video for a special angle of view, like in horizontal view or vertical view.
Adjust video effect
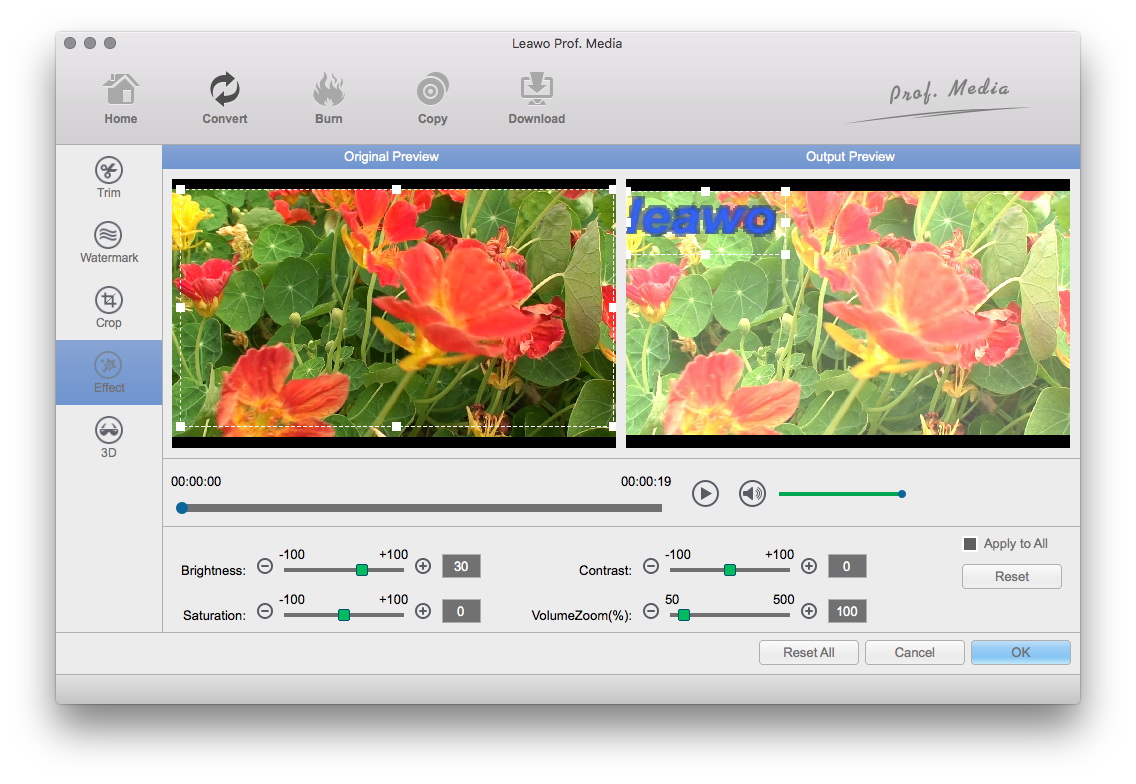
Open the "Effect" tab, and then you could adjust the MOV video effect including Brightness, Contrast, Saturation and VolumeZoom. You could slide the values to adjust the video effect and get instant preview.
Add 3D effect

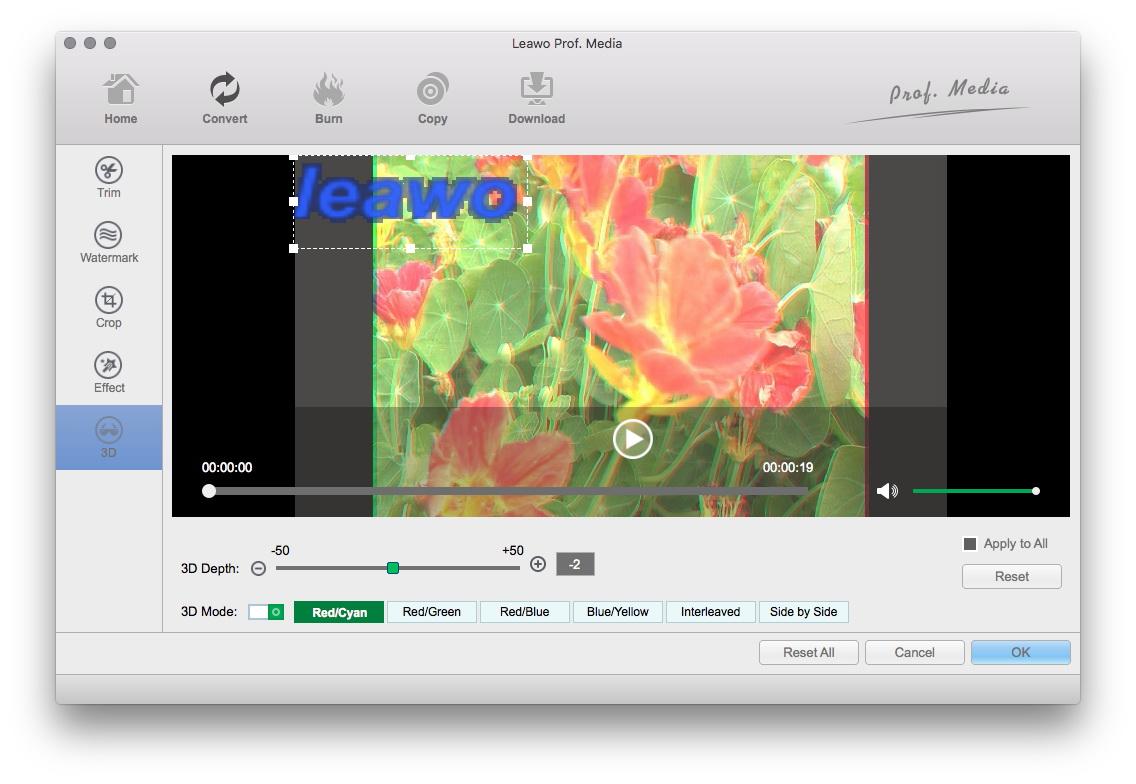
Leawo Video Converter even allows you to add 3D effect to MOV videos for output. Open the "3D" tab, and then slide the "3D Mode" to green. Then, you could choose a 3D effect from 6 preset 3D effects Red/Cyan, Red/Green, Red/Blue, Blue/Yellow, Interleaved, Side by Side for output. You could even adjust the 3D Depth to make the 3D movie effect more vivid in output MOV files.
After editing, you then could convert the edited MOV videos to iMovie compatible formats. Please refer to the last 3 steps in the last part to learn how to convert edited MOV videos within Leawo Video Converter for iMovie on Mac
Part 3: Import MOV to iMovie after Conversion from MOV to iMovie Video
After converting MOV videos to iMovie compatible formats on Mac with Leawo Video Converter for Mac, you then could freely import MOV files to iMovie for further editing. The below steps would show you how to import videos to iMovie for editing:
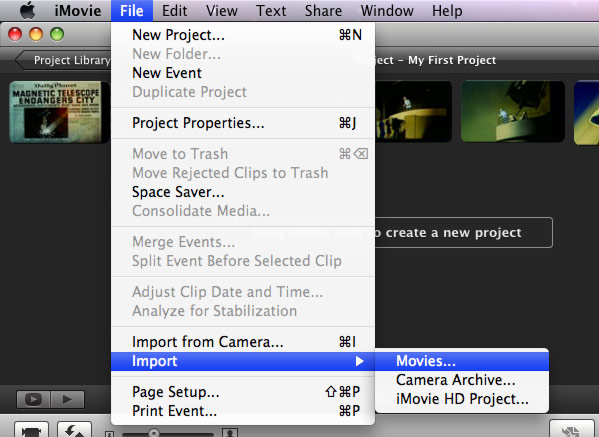
Guide on how to import MOV into iMovie on Mac:
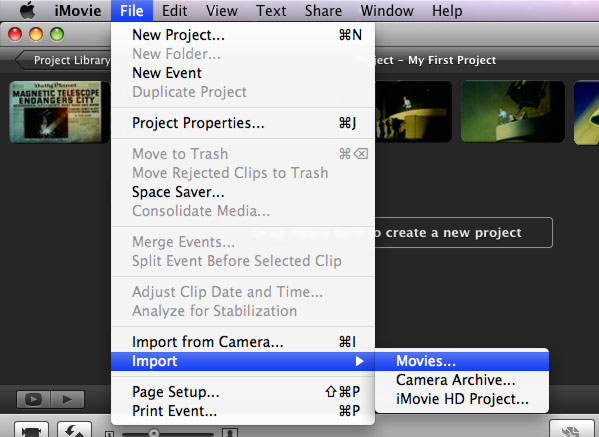
On the main interface of iMovie, click "File" button on the sub-menu, choose "Import" button on the drop-down list, and select "Movies" to browse and choose MOV video file (now converted into iMovie friendly video format) for importing MOV into iMovie.
1. Launch iMovie on Mac computer.
2. On the menu bar, click the "File" option.
3. Then, on the drop-down menu, click "Import" option.
4. Select "Movies…" option on the submenu.
5. Then, browse and load the MOV video files you've just converted with Leawo Video Converter into iMovie.
6. Once the loading finishes, your MOV videos would be successfully added to iMovie.
Now, you could freely edit converted MOV videos within iMovie on your Mac computer. Have fun.
Part 4: 3 iMovie Alternatives to Edit MOV Videos on Mac
Although iMovie is pretty good at video editing, especially for a beginner, but still lots of people want to find some iMovie alternatives for different purposes, like limited video formats supported and storage space limitation on videos to be edited. Leawo Video Converter not only provides you MOV converting ability, but also various video editing features to fulfill your basic MOV video editing. But you could still get more video editor choices to edit MOV videos on Mac. The more alternatives to iMovie you can have, the better it would be for you to know which one will be better for you in editing videos. Here we have collected 3 iMovie alternatives to edit MOV videos on Mac.
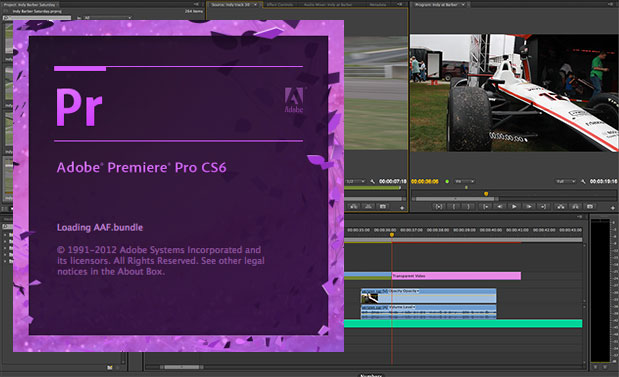
1. Adobe Premiere
Adobe Premiere Elements provides Mac users with the best video editing experience they have always wanted. It's easy-to-use and provides various video editing features to give your full control over your videos. It allows you to drag and drop to quickly create a video. You can also use Premiere Elements to create a dynamic collage with photos and videos by simply selecting a theme. After finishing editing, you can share your video to YouTube, Facebook and Vimeo with your friends and families, or you can also burn it to DVD or export to HDTV. The price for Adobe Premiere Elements is US99.99.
2. Final Cut Pro X
Final Cut Pro X, which has been completely rewired to become Final Cut Pro X, is another wonderful alternative to iMovie in video editing on Mac, especially on MacBook Pro. Final Cut Pro is a video editing software tool to help enthusiasts and independent filmmakers to edit, process and convert videos in a number of formats. Users can edit and process video stored on their hard drives and export the resulting video in a number of formats. This solution will be at your disposal staring at $299.99.
3. OpenShot
OpenShot Video Editor is a free and open-source video editor for FreeBSD, Linux, macOS, and Windows. The project was started in August 2008 by Jonathan Thomas, with the objective of providing a stable, free, and friendly to use video editor. OpenShot supports commonly used codecs that are supported by FFmpeg, including WebM, AVCHD, HEVC, and audio codecs such as mp3 and aac. The program can render MPEG4, ogv, Blu-ray, and DVD video, and Full HD videos for uploading to Internet video web sites.

 Nov. 06, 2013 by
