
Videos have been existing with us for one part of our daily life. During the working time, video is a tool for displaying the working materials such as PPT, short video clips, documentaries and so on. People can live without videos in their spare time for entertainment and study. As an important component of the video, aspect ratio is a key factor in deciding the effect of a video but it is always neglected by the viewers.
For most of the time, people care much more about the content of the video but pay little attention to the frame of the video. Better aspect ratio can have better viewing experience. There are a few types of aspect ratios but none of them befit all kinds of video. For changing the aspect ratio of the video, we normally use the professional video editing software such as Premiere. How to change aspect ratio in Premiere and other video editing software is on the topic of this article.
Outline
Why Should We Change Aspect Ratio in Premiere?
Aspect ratio is the relationship between the width and the height of the video. It is written in a figure as a form of width to height. For example, 16:9 describes the ratio of the width to height. The relationship matters as it determines how much space surrounds the image. If we want to shoot the landscape, the vertical format might better shows the special details of one character while the square format or the horizontal format shows more about the parameter of the whole scene. It all depends on how you would like the video to be presented to the viewers.
How to Choose the Right Aspect Ratio for Your Video?
Aspect ratio can be categorized as several types. The most common-adopted types are 4:3, 16:9, 1:1 and 9:16.
The first type can be defined as the old school aspect ratio. It was also called the academy ratio mainly applied in the films from the last century. With the development of the television, the high-definition widescreen format of 16:9 emerged. And later we have square format or 1:1 applied mainly on Instagram. And the last one 9:16 is also known as vertical format which can be described as turning the horizontal format around.

Among the listed aspect ratios, which one should we choose as the proper one. Most of us would rather choose the horizontal format than the vertical format because the former one occupies the viewer's whole field of vision and matches more with the visual effect. As we have two eyes side by side on our heads, we feel natural to watch things in a wider way.
However, the vertical format has better effect on character-driven image. If we want to capture the details such as body language and the gesture movements of people it is better to shoot the video in a vertical way.
There is no fixed solution for choosing the right aspect ratio. Every aspect ratio has its own feature and applies to specific occasions.
How to Change Aspect Ratio in Premiere?
In the above sections we have introduced different aspect ratios. In order to change the aspect ratio to cater our demand, we can use some video editing software like Premiere. No matter what format you like your video to be, just change some parameters with the setting in Premiere.
- Step 1: import your clip and create a sequence. Open a new project in Premiere and import your clip. In the Project Panel, right click the clip and choose New Sequence from Clip.
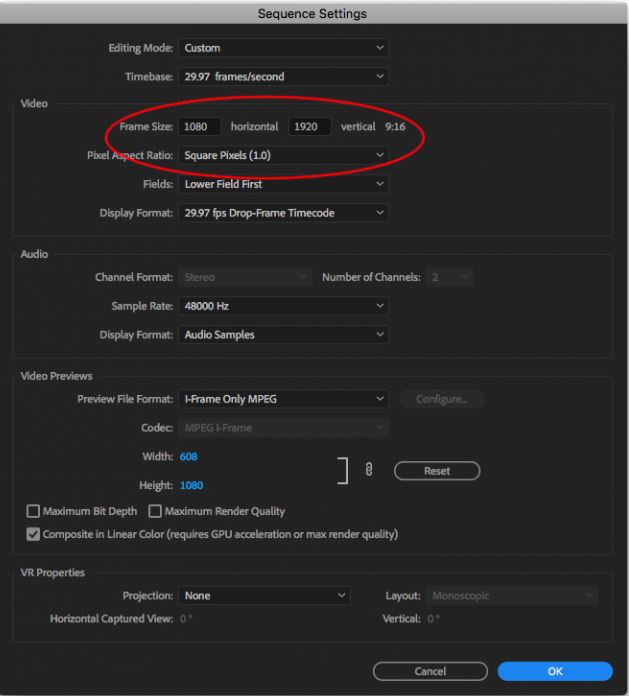
- Step 2: edit sequence setting. Still in the Project Panel, right-click the new sequence and choose Sequence Setting. Then select Custom for the editing mode and set the frame size to the targeted one such as 1920:1080. Just input any matched aspect ratio and the system will automatically calculate it as the simplified ratio. For the pixel aspect ratio, choose Square Pixels.
After the setting of the parameter is done, just click OK button to finish it.
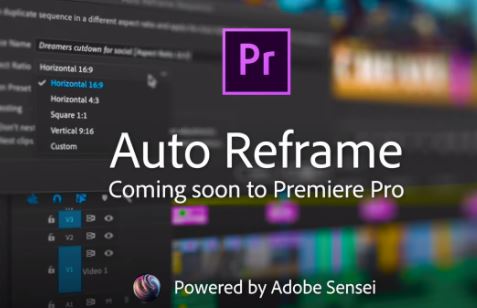
How to Change Aspect Ratio in Premiere with Auto Reframe?
Adobe introduced auto-reframe in the latest version of Premiere Pro CC 2020. The function of auto-reframe is to convert the existing clips into different aspect ratios automatically. It can adjust the video format to post on different platforms like Instagram or other websites.
The advantage of the latest update is that it carries out the conversion process quickly and automatically. In the past, we did this manually via cropping then applying motion key frames to alter the position of the video.
- Step 1: select the clip that you want to reframe and choose Effect Control>Auto Reframe.
- Step 2: then click Analyze which allows the Premiere to determine what it features in the reframed shot.
The program will automatically adjust the video format without setting the specific parameters.
Other Than Change Aspect Ratio in Premiere
Apart from the Premiere which can change the aspect ratio of the video, there's some other video converter to well replace it. We talk almost everything about the details of the conversion process with the Premiere but few do we mention the charge of the service. It costs more than 20 dollars per month at average for registering for the service of Premiere according to the published charge list. That is not a lot of expenses. If we want to enjoy the same service just as much as the Premiere can provide, we can turn to another professional video processing software.

-
Leawo Video Converter
- Convert video and audio files between 180+ formats without quality loss
- Support 720P, 1080P and even real 4K video output
- Create photo slideshows from photos stored on camera, computer, camcorder, etc
- Built-in video editor to trim, crop, add watermark, apply special effect, etc
- 2D to 3D converter with 6 different 3D movie effects available
Leawo Video Converter is a powerful video/audio processing software incorporating the features of video/audio conversion, merging, trimming, cropping, watermarking, adjusting video effect, applying 3D effect, etc. more than 180 formats of video/audio are available to be processed with the video converter. Furthermore, the video converter together with the video downloader, Blu-ray/DVD Ripper and other modules are composite to constitute the Leawo Prof. Media. The service of all six modules are inter-connected with each other by one-click. If you register for the Leawo Video Converter separately, it cost less than 30 dollars per year accounting for less than 3 dollars per month. That would save you much more expenses than buying for the Premiere. Talking about the built-in functions in video converter, it is a full-functioned video processing app covering all aspects of processing a video.
To change the aspect ratio of the video, the steps are even much easier than in Premiere and the interface of the app is clean and neat making the viewer catch everything at first glance.
Note:
- Before using the video converter to change the aspect ratio, we need to download the Leawo Prof. Media at first. The video converter is the subroutine of it.
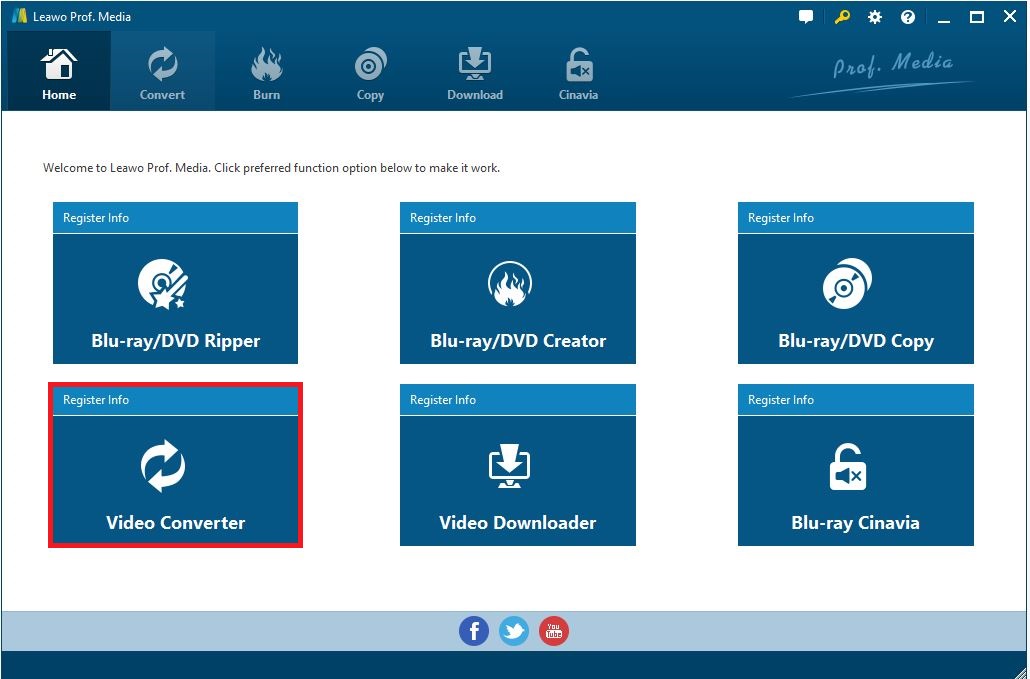
△Step 1: run video converter
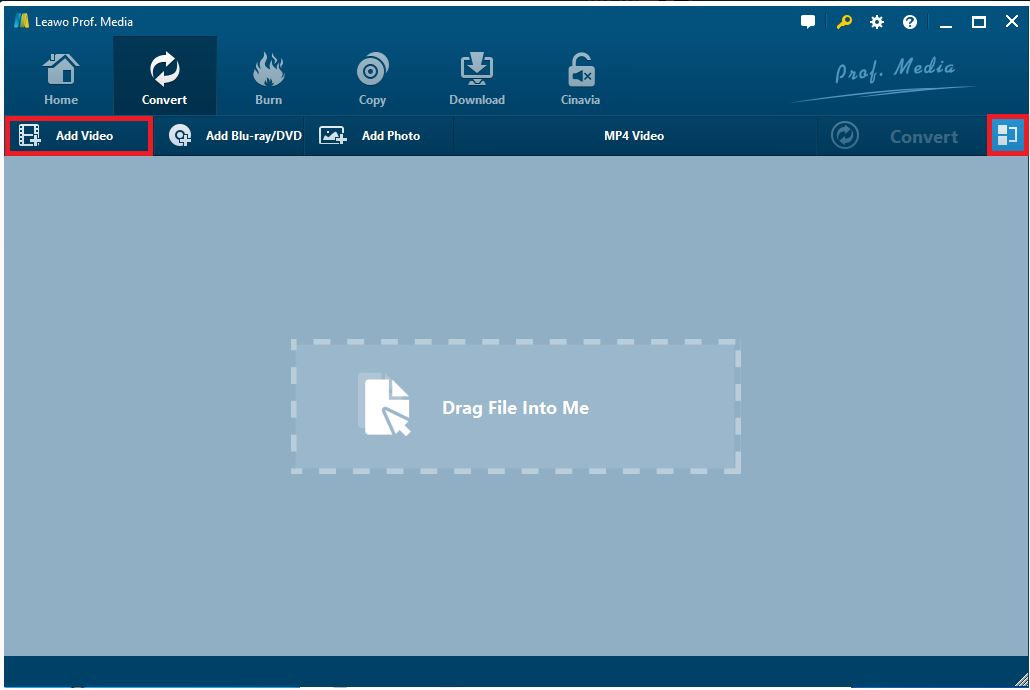
After entering the main page of Leawo Prof. Media, click the module of video converter to enter the next interface.
△Step 2: import video to the program
Click the "Add Video" button to import video to the program. You can add more than one separate file into the program. It supports files in batch to operate at the same time.
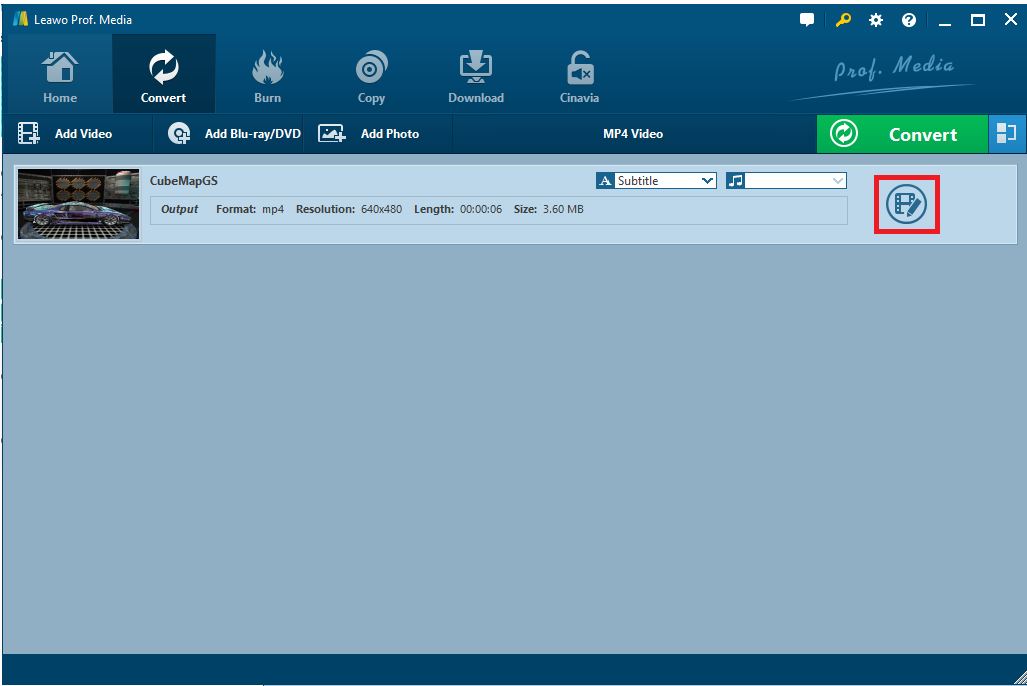
△Step 3: edit the imported video
After importing the video to the program, click the Edit button to start the editing process.
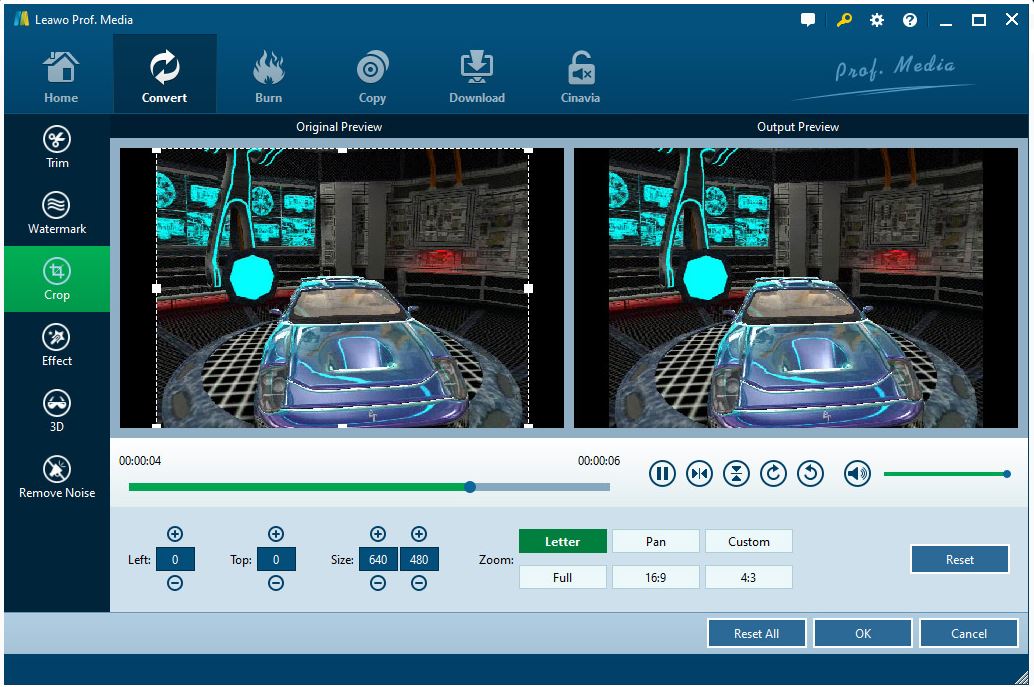
△Step 4: crop the video size
Under the "Crop" section, you can adjust the video with Letter/Pan/Custom/Full/16:9/4:3 in Zoom or drag the dot frame to crop the video. If you are not satisfied with the setting, just click "Reset" button to resume the setting. After all the settings are done, click the "OK" button to confirm it.
Besides cropping the video, Leawo video converter also does a good job in other video editing items such as removing black bar from video and making vertical video horizontal. Items of video editing are beyond what we can list.
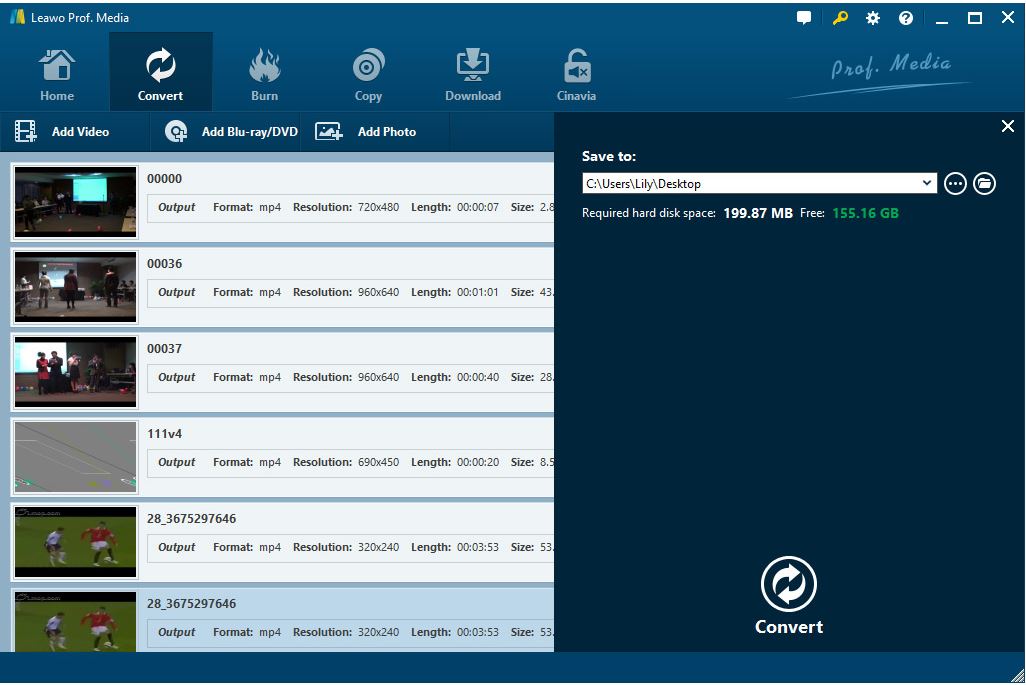
△Step 5: convert the video
After returning to the main page, click the green button "Convert" to pop out a new interface. You are required to set a output directory for the converted file and then click the "Convert" button to start the conversion process.
The converted video can be found in the output directory you just set.
Comparing with the Premiere, the Leawo Video Converter charges much less than the Premiere which makes it more acceptable for the users. The operating steps are well-organized with a cleaner interface instead of comprising all the parameters in one interface. The Leawo Prof. Media is an integrated program including several modules making it more convenient for the users to use all functions in one program. If you sign for the whole package in Leawo Prof. Media, it is more cost-efficient and every module of it shares fewer expenses.
 Apr. 19, 2021 by


 Prof. Media
 Blu-ray Ripper
 Blu-ray Copy
 iOS Data Recovery
 [12/29/23] MAX Downloader V15.0.0
 10,000,000 people are using Leawo!
 All Transactions are protected!
 30-Day Money Back Guarantee!