Google Photos app is a nice tool for you to store pictures. However, a common issue of this application is that it fails to show all photos that you have. This issue is annoying, and many users want to find a way to get rid of this trouble when they encounter this problem. This guidance will tell you 6 solutions to cope with this problem and you can read through the contents shown below to make it clear.
- Part 1: How to Fix the Issue of Google Photos App Not Showing All Photos
- Remove Google Photos cached data
- Select the folders that you desire to back up
- Activate Google Drive integration
- Check the Archive and Trash Bin
- Move photo folders to internal memory
- Use computer to re-upload images
- Extra: How to Back up iPhone Photos to Google Photos on Computer
Part 1: How to Fix the Issue of Google Photos App Not Showing All Photos
When you find your Google Photos app not showing all photos, you may feel confused on how to fix this issue properly. As a matter of fact, there are several ways that you can use to figure out this problem.
1.1 Remove Google Photos cached data
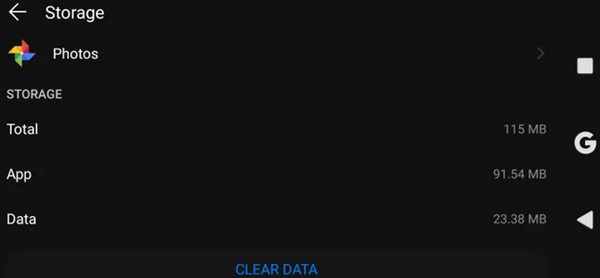
The most common reasons for Google Photos app not showing all albums are too much data and minor bugs. In that case, you can try to clear Google Photos cached data to make room for your images. This trick can be done with the following steps.
1. On your phone, you need to navigate to “Settings” to click on and then hit on “Apps/ Application Manager”.
2. Move to click on the “Photos” app and then hit on “Storage> CLEAR DATA” in the interface.
1.2 Select the folders that you desire to back up
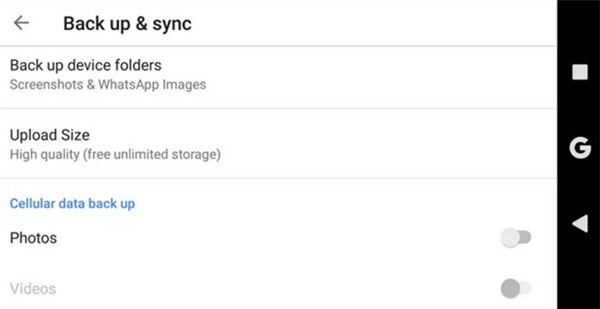
Google Photos app not showing all albums is an unpleasant issue, which can be resolved with the solution of folder backup. In general, Google Photos will locate the photo folders and inquire you if you desire to back up images or skip them. If you choose to skip the image folder, Google Photos app will avoid its backup. However, it is sensible for you to apply the backup feature to avoid photo missing issue. The steps shown below will direct you to make it.
1. Kick off Google Photos app on your phone and then click on the hamburger menu.
2. Choose “Settings” tab to hit on and then click on “Back up & sync”. After that, you need to choose which folder you desire to back up.
Thus, when the app does not show your photos, you can make use of the backup to find them.
1.3 Activate Google Drive integration
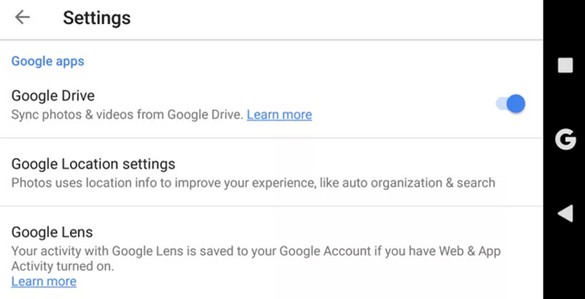
It is sensible for you to activate Google Drive integration to deal with Google Photos app not showing all photos. You should know that all the photos uploaded to Google Photos are still saved in the folder of “Google Drive > Google Photos”. Hence, if you have backed up images to Google Drive, these pictures probably will not show in the gallery of Google Photos app. You need to set the sync feature to avoid this issue. The exact steps for you to finish this task are shown below for you to refer to.
1. Fire up Google Photos app and then click on the hamburger menu.
2. Hit on “Settings” option and then turn on the feature of “Google Drive” under the tab of “Google apps”.
Thus, the photos you upload to Google Drive will be synced to Google Photos app for you to check out at ease.
1.4 Check the Archive and Trash Bin
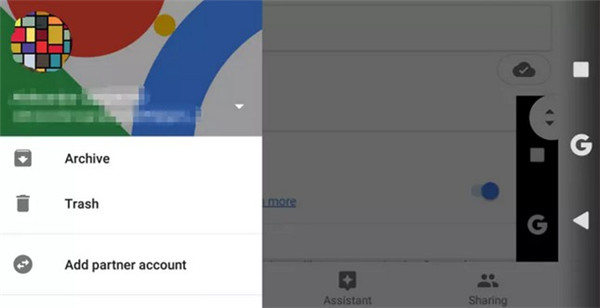
If you fail to view all photos in Google Photos app, you can check the Archive and Trash Bin. You need to make sure you have already uploaded images to Google Photos successfully before. Apart from identifying faces and reordering images, Google Photos Assistant can recommend archiving images.
If the photos are in the Archive, they will be quite safe and there is no need for you to worry about losing them at all. If you removed them by accident, you still can restore them during 60 days. If the time is over 60 days, the photos will disappear for good.
You only need to run Google Photos app and then click on the hamburger menu to access the Archive and Trash Bin.
1.5 Move photo folders to internal memory
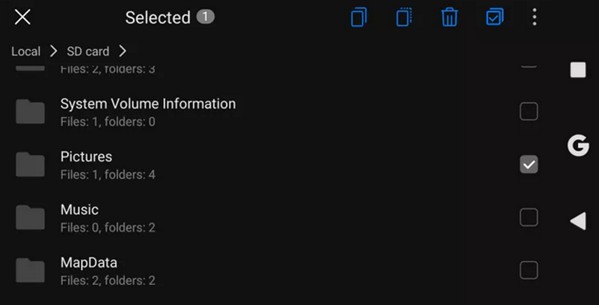
Since Google Photos app does not allow users to locate the photo folder on your phone and the SD card is hard to access, you can move the folder that containing pictures from the SD card to the internal memory. You can make it with the help of the built-in file explorer (Files or My Files) on your device. You can do this trick with the following steps.
1. Run Files app on your device and then navigate to the SD card.
2. Click and hold on the photo folder that you would like to move.
3. You need to select “Move” from the options that are available.
4. Go back to your internal memory and then click on “Move” tab to paste your chosen folder there.
5. Run Google Photos app on your device and then move to “Settings > Back up & sync > Back up device folders” successively.
6. Open the newly-transferred folder and wait for the uploading of the images.
1.6 Use computer to re-upload images
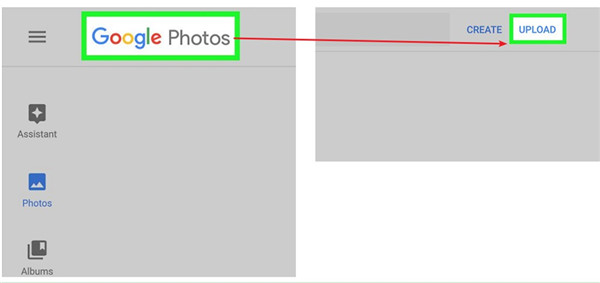
When Google Photos app not showing all photos issue occur, you can re-upload photos to Google Photos to settle this issue. First, you need to make sure you have transferred photos from your device to computer folder before the missing of photos. Thus, you can re-upload them to Google Photos.1. Go to the website of photos.google.com in a web browser and then click on “Upload” button near the top-right corner of the interface.
2. When a file browser window opens on your computer, you need to choose the photos you desire to upload.
3. After you select all the images well, you can click on “Open” button. Thus, the pictures will be uploaded to Google Photos account immediately.
4. When the uploading process comes to an end, you can clear cache and data on your device.
5. On your handset, you need to run Google Photos and sign into it with your own password. Thus, the missing photos should show in your apps now.
Extra: How to Back up iPhone Photos to Google Photos on Computer
If you worry about the loss of your iPhone or iPhone pictures, you can back up iPhone images to Google Photos on computer to avoid this issue. Thus, you will be able to check your iPhone photos on PC whenever you like. As for how to get this work done excellently, here I would like to recommend you make use of Leawo iTransfer to assist you. This tool can be applied to transfer 12 kinds of files among computers, iTunes and iDevices, which is one perfect iDevice file manager. For example, you can transfer music from iPhone to computer with simple clicks. You first need to use Leawo iTransfer to move images from iPhone to computer and then upload them to Google Photos via a web browser. Now let’s take a look at the detailed illustrations.
Leawo iTransfer
☉ Transfer up to 14 kinds of data and files without iTunes.
☉ Support the latest iOS devices like iPhone X, iPhone XR, etc.
☉ Play back, view, and delete data and files on iOS devices.
(A) Move photos to computer from iPhone via Leawo iTransfer
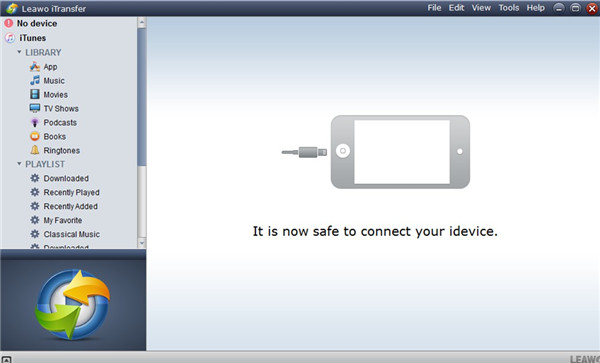
Step 1. Run Leawo iTransfer and Connect iPhone with Computer
Apply a proper USB cable to plug iPhone into computer and then open Leawo iTransfer on your computer. Your iPhone info will be detected by the software automatically.
Step 2. Choose Photos to Transfer
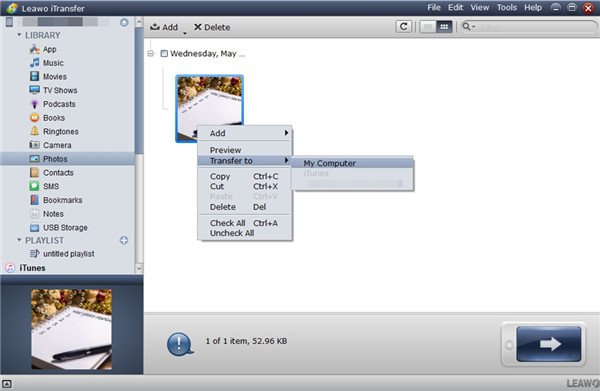
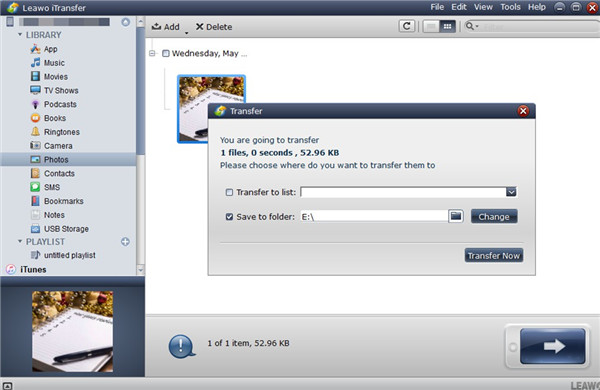
Hit on your iPhone icon at the top left corner of the interface and then click on “LIBRARY > Photos” menu tab to view all iPhone images in the right part of the program screen. Choose the photos you desire to back up and then click on the transfer button at the bottom right of the interface. After that, click on “Transfer to >My Computer” in the pop-up panel.
Step 3. Set Output Location and Transfer Photos
Afterwards, you need to check “Save to Folder” and hit on “Change” button set a proper folder to save the exported iPhone images. Hit on “Transfer Now” and the software will begin to move the selected photos to computer folder in a jiffy. In several seconds, your iPhone photos will be available in the target folder.
(B) Upload photos to Google Photos through a web browser
When your iPhone images are in computer folder, you can continue to upload them to Google Photos via a web browser for backup.
As for the detailed steps, please refer to the first 3 steps in Part 1.6 for reference.
The process for you to back up iPhone photos to Google Photos on computer is not hard at all. Leawo iTransfer plays a great role in this procedure. You can download and install this great tool on your computer and have a try.
After reading through the whole guidance, you will understand that the issue of Google Photos app not showing all photos can be addressed with various solutions. You can choose one way to help you when you meet with this problem.

