DVDs are still one of the most popular ways for people to enjoy high-quality movies. Until recently these discs are the standard way to watch a movie, but when you go to the Apple communities, we can easily notice the posts in some forums with title "MacBook Pro not reading DVD". Take one for example, the DVD drive accepts discs, it spins up like it is going to read the disc, then stops spinning then spins back up, it does this a couple of times then it ejects the disc on its own. What’s wrong with it? Why does MacBook Pro not read DVD?
Part 1: Why does MacBook Pro not read DVD?
Why does sometimes MacBook DVD drive not read and how to fix the problem to play DVDs on MacBook smoothly? Take some time to read and get more information of the issue “MacBook Pro DVD player not reading disc”. In order to solve the problem of MacBook Pro DVD drive not reading, we should get the reason why MacBook Pro DVD drive is not reading and then find the most appropriate solution.
Possibility 1.
There is something wrong with the super-drive. When your DVD drive is bad or damaged, the MacBook DVD drive is not reading.
Possibility 2.
There is some scratched in the DVD or the DVD gets dust.
Possibility 3.
Such kind of issues happens after you have upgraded OSX to Lion or Mountain Lion.
Possibility 4.
Sometimes, it hits a block when Mac DVD player to read a DVD encrypted with region code which is not matching region code of your DVD player. So your DVD player will go to a black screen and then unexpectedly quit.
Part 2: How to fix MacBook DVD drive not reading?
Solution 1.
You are able to lean the Super-Drive’s slot with compressed gas/vacuum cleaner. If the problem “MacBook not reading DVD” still exists, you have to repair the DVD drive or purchase a new one in order to watch DVD movies on Mac.
Solution 2.
If your DVD is scratched or dirty, your DVD player can accept discs but will fail to read it. As we all know, the default DVD player is very sensitive to the quality of DVD disc, if your DVD is scratched or dirty, you can get help from a third party.
Solution 3.
Try to reset NVRAM (or PRAM). Shut down your MacBook Pro and turn it on later. When you hear the start-up sound, press and hold the Command-Option-P-R keys at once until the MacBook Pro restarts and you hear the start-up sound again
Solution 4.
It is suggested to rip DVD any video formats supported by Mac to solve “MacBook DVD drive not reading” problem.
Part 3: How to convert DVD for playback without a DVD drive on Mac?
In most cases, MacBook Pro not reading DVD is because your DVD discs are in unsupported formats, for the default DVD player does not support certain commercial DVDs. Then it is a good idea to rip your DVD. Below, we will introduce some best DVD ripper, DVD Ripper, HandBrake, Format Factory and Avidemux and the method showing you how to convert DVD for playback without a DVD drive on Mac.
Convert DVD for playback without a DVD drive on Mac with DVD Ripper
Leawo DVD Ripper for Mac, the leading DVD Ripper for Mac available on MacBook, supports a large range of commercial DVDs with removal of encryptions like CSS, region code. It offers hundreds of profile allowing you to convert a DVD to AVI, WMV, FLV, iPhone, iPad, Apple TV, Android, Windows Mobile, Sony PlayStation apart from ripping DVD to MP4/MOV. In other words, Leawo DVD Ripper for Mac is 6 times faster in DVD ripping and converting. With detailed video and audio parameters adjustable, original quality of source DVD content can be 100% retained by setting value of Resolution, Frame Rate, and Aspect Ratio as that of original.
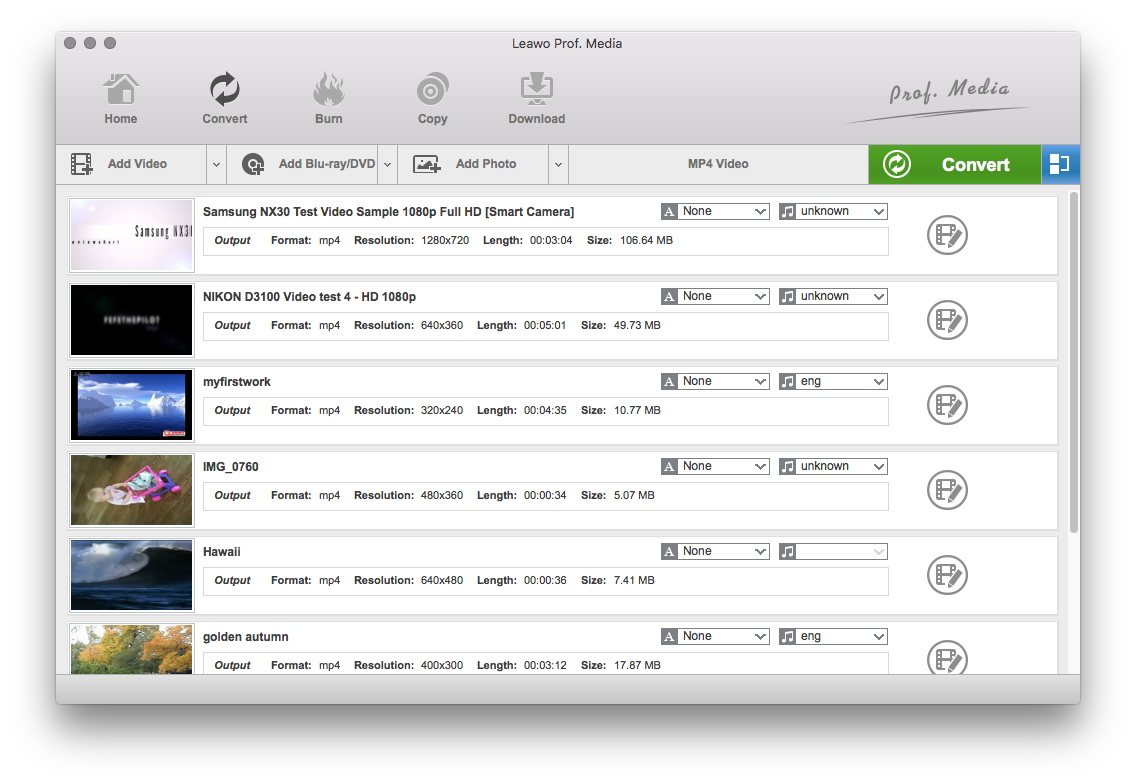
Step 1. Launch the powerful software Leawo DVD Ripper for Mac. You can directly drag and drop the DVD files into the "Convert" interface. It will take a few seconds to load the DVD. After it has completed, choose the import DVD mode you need: Full Movie, Main Movie and Custom Mode. If you prefer to import all titles, select “Full Movie”. If you want to import the longest title, choose “Main Movie”. Or you hope to freely choose titles for importing, kick “Custom Mode”. Get the mode you prefer to and click “OK”.
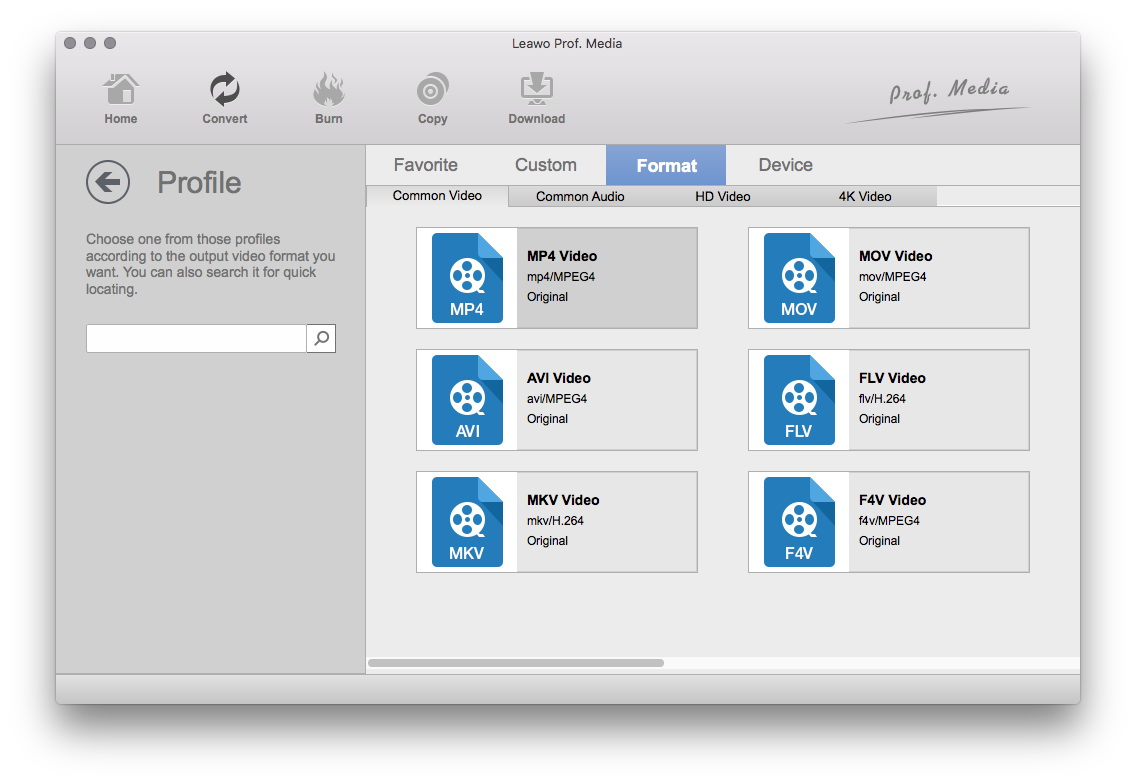
Step 2. Go to "MP4 Video">>"Change">>"Profile", you can choose either video/audio format or mobile device as output profile under “Format” or “Device” group. For video/audio format models, there are 4K MP4, 4K MKV, HD MP4, HD AVI, MOV, etc.
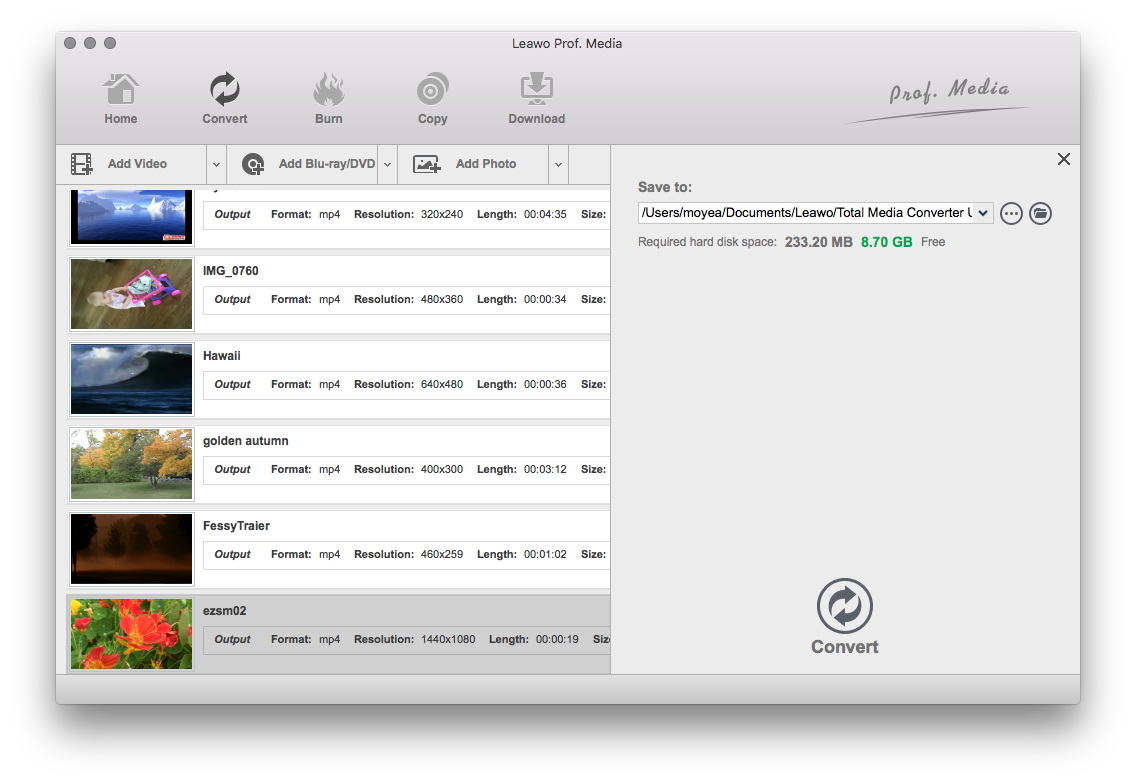
Step 3. After all the parameters are done, go to green “Convert” button to set output directory for saving the output files. In the end, hit “Convert” button at the bottom of sidebar to start to convert the DVD. Finally, you will not encounter the problem “MacBook Pro DVD drive not reading”.
Convert DVD for playback without a DVD drive on Mac with HandBrake
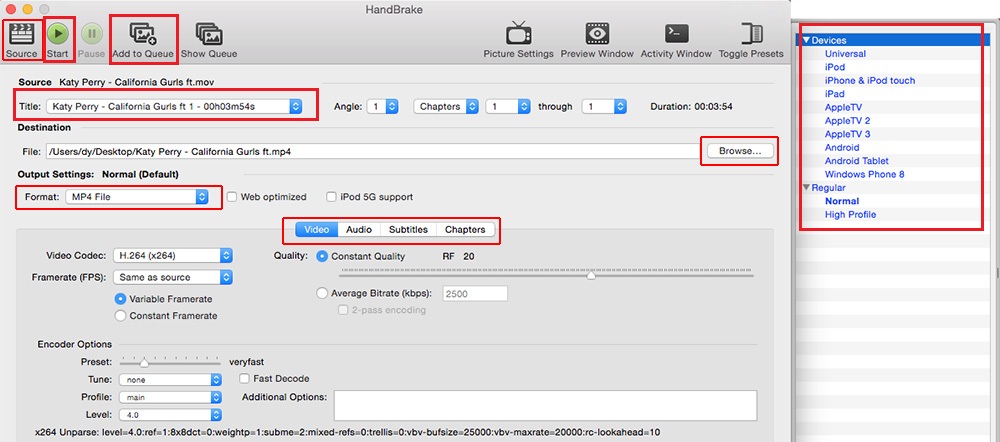
HandBrake is free, open source, multiplatform DVD ripping software and video converter available for Windows, Linux or Mac OS. Users are able to easily de-interlace, de-comb, de-telecine, and de-block their video files. Besides, cropping video, scaling and gray-scaling are supported as well. By the way, there takes HandBrake on Windows as an instance for the interface of Handbrake on Mac is nearly same.
Step 1. To rip a DVD with HandBrake, you will first need to download and install the software in your MacBook Pro.
Step 2. Then insert your DVD into your Mac’s disc drive and launch the HandBrake.
Step 3. Click the box next to “Title” and, from the pop-up menu that appears, you can select the title with the longest time.
Step 4. In general, HandBrake contains a lot of useful presets which is capable of making things much easier. You can click on the “Toggle Presets” button at the top of the HandBrake window.
Step 5. In the drawer, you’ll have some optional items, including Universal, iPod, iPhone and iPod Touch, iPhone 4, iPad... Select the one you like.
Step 6. Once you’ve chosen your “Title” and “Preset”, click “Start Encode” at the top of the window. Then, grab a snack.
Convert DVD for playback without a DVD drive on Mac with Format Factory
Whether you need a better way to back up your system to avoid MacBook Pro DVD player not reading disc, or are looking for a simple method for reformatting your discs, Format Factory is the way to go. Format Factory can help you manage many more formats than most of its competitors. Below is the simple process for ripping DVDs using Format Factory.
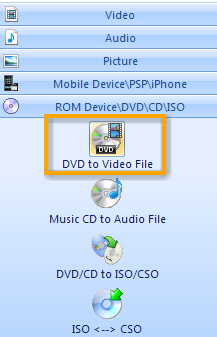
Step 1. Install and start up Format Factory in your MacBook Pro. Locate the panel labeled ROM Device/DVD/CD/ISO. Under the ROM Device\DVD\CD\ISO panel, click on the “DVD to Video File” icon.
Step 2. In the DVD to Video window that spawns, there are a few settings you need to do before starting the DVD rip. You can choose the format type for your video by clicking the drop-down list under the “Output Setting” area. Click the “Quality Setting” button if you want to alter the video quality settings. Or select a subtitle language for your video, or just choose None.
Step 3. Next you can name the file where your video will be stored. Go to the Output File area and enter in the title of your video. Then, select the output folder where you wish to store the file you are creating
Step 4. When you have finished, hit the “Convert” button at the top.
Convert DVD for playback without a DVD drive on Mac with Avidemux
The ripping program, Avidemux is specially designed for simple cutting, filtering and encoding tasks. Avidemux supports many file types, such as AVI, DVD compatible MPEG files, MP4 and ASF.
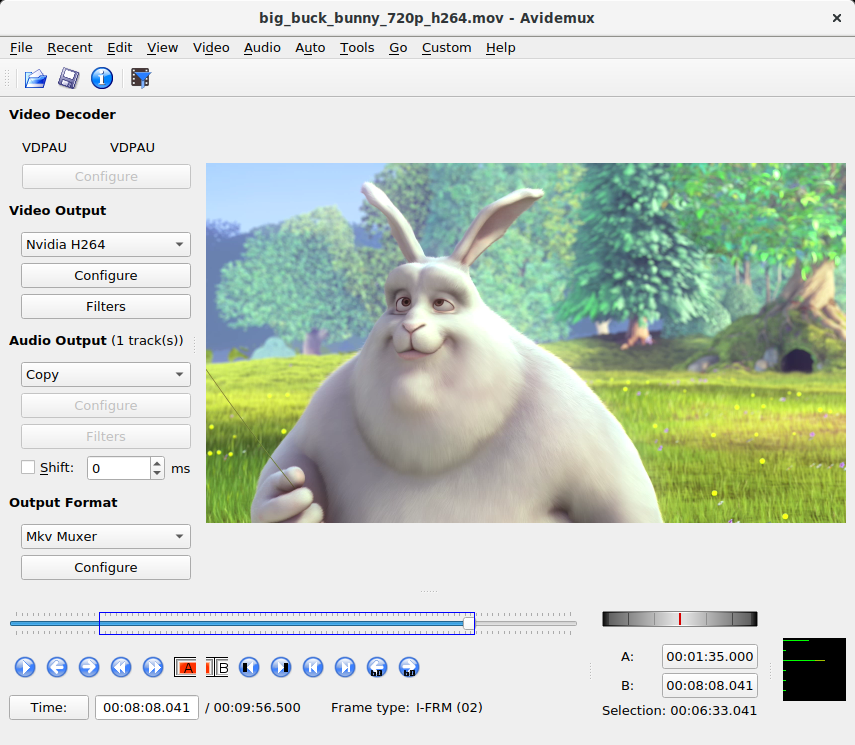
Step 1. Download and launch Avidemux. In the left top corner, click File>Open and search for the DVD-Video folder that you've just copied to your hard drive.
Step 2. Then select a video codec for the file in the Video Output option box. Click on the box and select a video codec from the drop-down menu.
Step 3. To configure the audio codec, click the “Copy” button (drop-down list) and select the desired audio codec, from the “Audio” section.
Step 4. click the “Save” button (File -> Save -> Save video...), select a folder where you want to save the file, type a name for it and hit the “Save” button. Finally, a new window will appear to show you some options and the current progress of the conversion.
After getting a better understanding of “MacBook not reading DVD”, you can download the DVD-Blu-Ray player in this article to see if it can help you out.


