"Does HandBrake supports NVIDIA NVENC encoding? Someone said that it's available on HandBrake but I couldn't find where to set. How can I enable NVIDIA NVENC encoding on HandBrake? "
As one of the most popular media encoder and decoder software tools, HandBrake could help people easily convert media files like video, DVD and even Blu-ray files to MP4/MKV files. With 3rd-party disc decryption plugins like libdvdcss for HandBrake, people could even use HandBrake to rip encrypted DVD/Blu-ray movies. There are quite a few hidden features inside HandBrake that could improve the media encoding and decoding experience. NVIDIA NVENC is one of them. However, any people might have encountered the issue of HandBrake NVENC not working and have no idea what to do. Well, in this guide, we would like to suggest some solutions to help you solve the issue of HandBrake NVENC not working.
MenuCLOSE
Part 1. What is Nvidia Nvenc Encoder?
Firstly, it's necessary for us to learn what is NVIDIA NVENC encoder. NVIDIA NVENC (short for NVIDIA Encoder) is a feature in Nvidia graphics cards that performs video encoding, offloading this compute-intensive task from the CPU to a dedicated part of the GPU. It was introduced with the Kepler-based GeForce 600 series in March 2012.
The encoder is supported in many livestreaming and recording programs, such as Wirecast, Open Broadcaster Software (OBS) and Bandicam, as well as video editing apps, such as Adobe Premiere Pro or DaVinci Resolve. It also works with Share game capture, which is included in Nvidia's GeForce Experience software.
You could freely enable NVIDIA NVENC encoder on HandBrake for better media encoding experience. Support for the NVIDIA NVENC encoder is enabled in preferences on the video tab. If your system is not supported, the option will be disabled. HandBrake supports the NVIDIA NVENC encoder but does not support the NVDEC decoder.
To make clear whether HandBrake on your computer supports NVIDIA NVENC encoding, you need to check your computer hardware and configuration to see if they meet the below:
- NVIDIA GeForce GTX Pascal (1050+), GTX/RTX Turing (1650+, 2060+) or Ampere (3060+) series GPU or better
- NVIDIA Graphics Driver 456.71 or later
- Windows 10
- Experimental Linux support is available in HandBrake's command line interface
Once you have enabled the NVIDA NVENC encoding, your computer CPU will be used for video decoding, all video filters, audio encoding, HandBrake's engine, A/V sync etc., subtitles and muxing. These operations all happen in parallel as the job progresses. As such, it is normal to see high (or even 100%) CPU utilisation even when using NVENC. It is also common, particularly on lower-end or older hardware, for the CPU to be a bottleneck which will cause lower than expected performance. To minimize this effect, disable any filters that you do not require.
The NVIDIA NVENC hardware encoder has a limited set of advanced encoder options. Generally speaking, it is not recommended to change these parameters, as the built-in presets offer a good range of options for common uses.
Part 2: Reasons that Cause HandBrake NVENC not Working Issue
There are quite a few possible reasons that cause the issue of HandBrake NVIDIA NVENC encoding not working, as listed below:
- Your computer hardware is not friendly with the NVIDIA NVENC encoding. NVIDIA NVENC encoding requires your computer to be qualified, with detailed information mentioned above.
- Your computer configuration has not been set properly for HandBrake NVENC encoding. Generally speaking, the default configuration would work for NVENC encoding. But there is exception on different computers.
- The Internet connection issue. Poor Internet connection would without doubt result in NVENC encoding not working on HandBrake.
- The settings of HandBrake filters or others might result in huge CPU occupation.
- Windows automatic update sometimes might disable HandBrake NVIDIA NVENC encoding.
There might also be other reasons that result in HandBrake NVIDIA NVENC not working in encoding. No matter what the reason is, the key point is to get a solution. In the below content we would like to recommend you some solutions.
Part 3: How to Fix HandBrake NVENC not Working?
Well, how can you fix HandBrake NVIDIA NVENC not working issue on your computer if you happen to encounter such issue? Is there any effective solution for it? Try the below recommendations:
- You could try to update your BIOS on your computer first.
- Disable vt-d as well as Windows automatic driver update on your computer.
- Make sure your computer hard drive supports NVIDIA NVENC encoding. For details, you could visit NVIDIA NVENC encoding GPU supported.
- Change the HandBrake filter settings and your computer configurations to make NVENC work normally on your computer.
- Make sure your computer is connected to the Internet well.
Sometimes, restarting HandBrake or even your computer would work as well to help you solve HandBrake NVIDIA NVENC not working issue.
Part 4: Try Best Nvidia Nvenc Encoder - Leawo Prof. Media
Since the NVIDIA NVENC encoding on HandBrake sometimes fail to work, and it would be much long to convert media files within HandBrake without the GPU accelerating. Hence, we would like to recommend you the best NVIDIA NVENC encoder software - Leawo DVD ripper.
As a professional DVD to video converter, Leawo DVD ripper could help you easily decrypt, rip and convert DVD to MP4, AVI, FLV, RMVB, etc. for various media players and devices. You could even adjust the video and audio parameters of output files so as to let the output files meet your media players or portable devices exactly. In addition, Leawo DVD ripper can also act as a video editor to help you trim DVD movie, crop DVD video size, add image or text watermark, create 3D movie, etc. And it can help you to select subtitles and audio tracks from source DVD movies for output videos.
Compared to HandBrake, Leawo DVD Ripper actually supports 3 different GPU acceleration technologies, including: NVIDIA CUDA, Intel Quick Sync and AMD APP. With these GPU acceleration technologies supported, Leawo DVD Ripper offers actually 6X higher conversion speed over HandBrake.
The below guide would show you how to use Leawo DVD Ripper to decode DVD movies and encode to video files for unlimited playback. Download Leawo DVD Ripper and install it on your computer. It's a module built in Leawo Prof. Media.
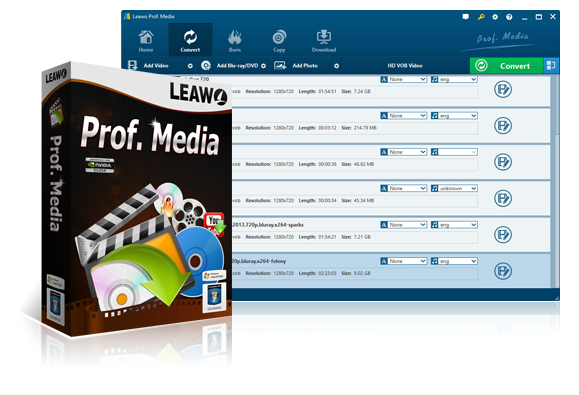
Leawo Prof. Media
☉ Decrypt, rip and convert Blu-ray/DVD to video/audio files.
☉ Convert and burn videos files to Blu-ray/DVD content.
☉ Download videos from YouTube, Facebook, VEVO, and 1000+ other video sites.
☉ Edit Blu-ray/DVD/video files to trim, crop, adjust effect, apply 3D effect, etc.
☉ Remove Cinavia protection upon Blu-ray discs
☉ Play back various media files including Blu-ray, DVD, video, audio files.
Step 1. Enable GPU acceleration
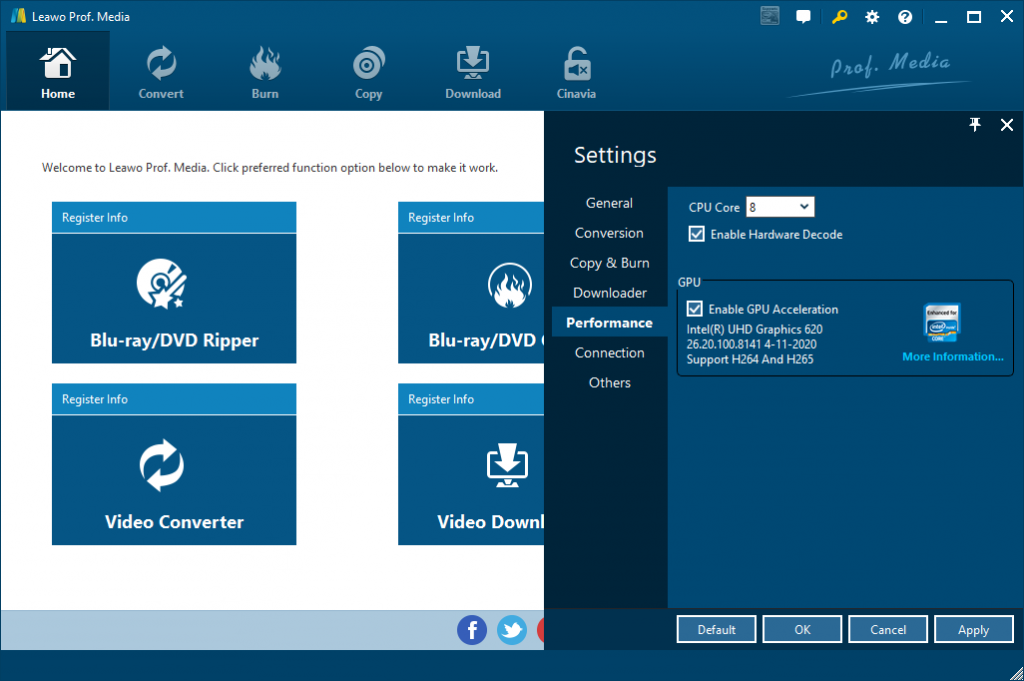
Kick off Leawo DVD Ripper. Click the wheel icon on the top-right corner to invoke the "Settings" panel. Open the "Performance" tab and check the "Enable Hardware Decode" option. Under the "GPU" box, which only shows up when your computer has GPU card, check the GPU card you want to use.
Step 2: Enter DVD Ripper
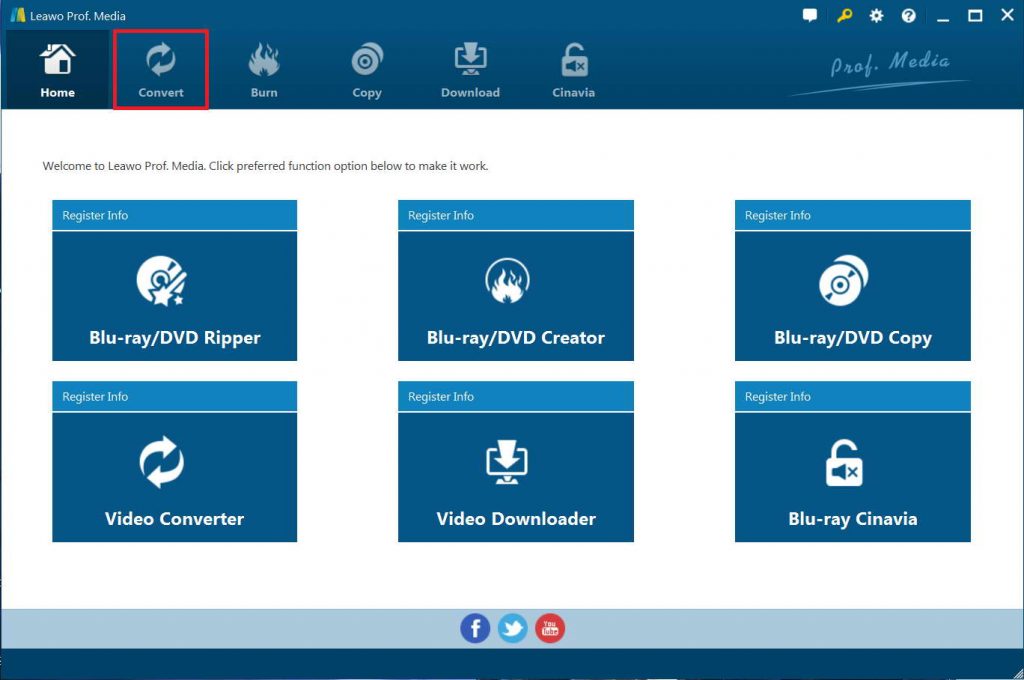
Then, open the "Convert" module or click the "Blu-ray/DVD Ripper" option on the Home interface to enter the DVD Ripper module.
Step 3: Add source DVD movie
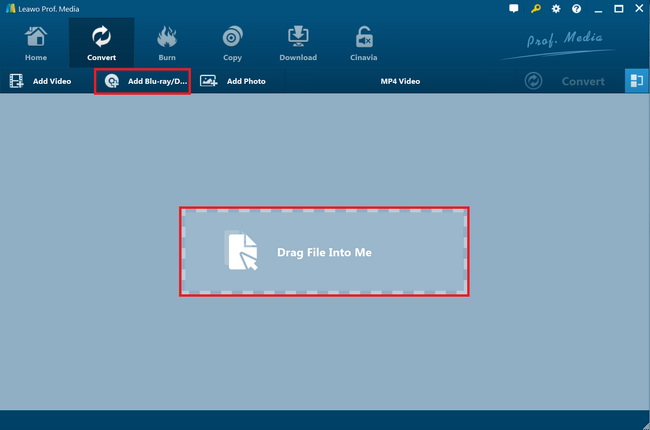
On the "Convert" module, click "Add Blu-ray/DVD" button to import source DVD movie files. You could see that there are 3 options: Add from CD-ROM, Add from folder and Add iso file. Just add source DVD movie file.
Note: Leawo DVD Ripper offers 3 different content loading modes. The Full Movie mode loads all source DVD content, Main Movie mode by default loads the longest title (generally the main movie) but allows you to switch another title for loading, while Custom Mode enables you to select desired DVD title(s) for loading. Choose one according to your needs.
Step 4: Set output format
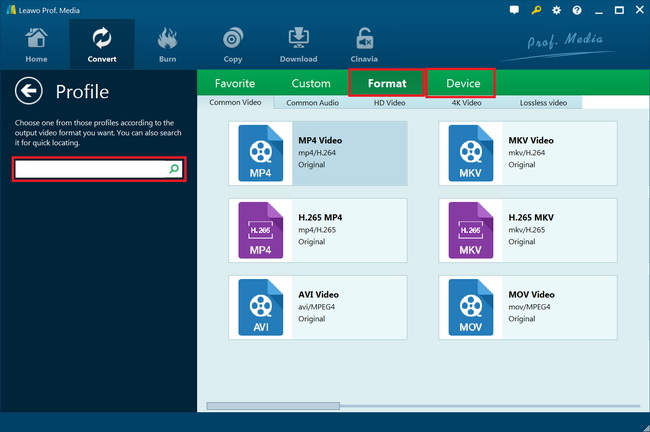
Click the drop-down box named "MP4 Video" by default before the big green "Convert" button. On the drop-down menu, click the "Change" option to enter the “Profile” panel, where you need to select a format as output format from "Format" or "Device" group for your media player or portable device, say MP4 Video.
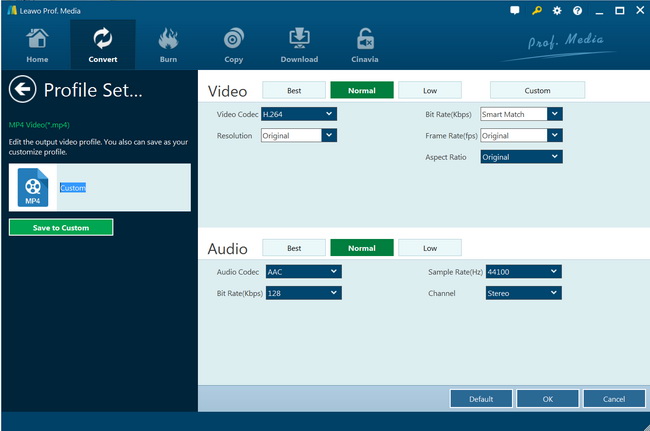
Also, if you want to set the parameters of output video and audio, you can select "Edit" to enter the editing panel. You could adjust parameters including "Video Codec", "Bite Rate", "Resolution", "Frame Rate", "Aspect Ratio", "Audio Codec", "Same Rate", etc. You need to adjust these parameters according to your target player.
Step 5: Set output directory
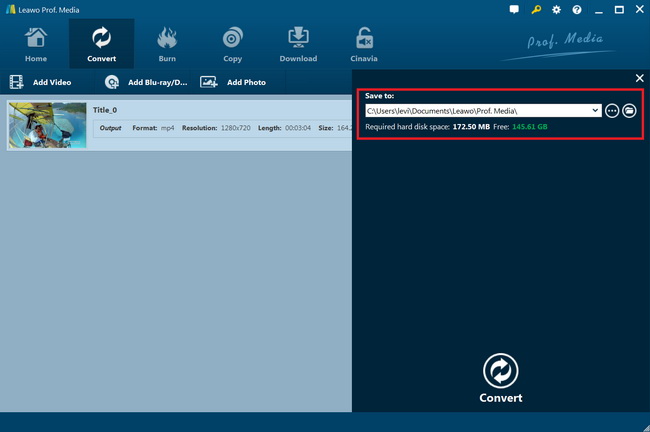
After adjusting the video settings, click "OK" and then click the big green "Convert" button. Select a target path to save the output file in the "Save to" box.


