
There are lots of iOS lovers in the portable device market. However, not everyone knows clearly on iOS 12, which was released this year. Now you can only get the beta of iOS 12, but the normal version will be available on July according to Apple Company’s report. Now you can check out the following contents to get to know some basic information of iOS 12 and the solution to back up its data to Mac.
Part 1: What to Expect in iOS 12
iOS 12 has many changes and you can expect the new features in it. The following chart will show you the detailed changes.
| New Features | Brief Introduction |
| Fewer interruptions | You can control over the way notifications appear and manage them as you prefer |
| Screen Time | Users can see exactly how addicted they are to their phone to improve their habit on using iPhone. |
| ARKit 2 | Users can enjoy the more immersive AR experiences on the new system version on iOS devices. |
| Memoji and camera effects | Improve the experience on sending Memoji and taking pictures |
| Group FaceTime | Users can chat to multiple people over FaceTime at the same time. |
| Siri Shortcuts | Users can program Siri to work with any application on iPhone. |
Part 2: What Devices will Support iOS 12
After you know what will iOS 12 be like, you can continue to read this part to see what devices can support iOS 12. Although iOS 12 is developed by Apple Company, you should know that not every type of iDevice can use iOS 12 due to some technology limitations. Here is the chart on which iDevice can make use of iOS 12.
| iPhone | iPad | iPod touch |
| iPhone X | 12.9-inch iPad Pro 2nd generation | iPod touch 6th generation |
| iPhone 8 | 12.9-inch iPad Pro 1st generation | —— |
| iPhone 8 Plus | 10.5-inch iPad Pro | —— |
| iPhone 7 | 9.7-inch iPad Pro | —— |
| iPhone 7 Plus | iPad Air 2 | —— |
| iPhone 6s | iPad Air | —— |
| iPhone 6s Plus | iPad 6th generation | —— |
| iPhone 6 | iPad 5th generation | —— |
| iPhone 6 Plus | iPad mini 4 | —— |
| iPhone SE | iPad mini 3 | —— |
| iPhone 5s | iPad mini 2 | —— |
Now you can see what iPhones will get iOS 12. iPad and iPod also support iOS 12 according to the chart listed above.
Part 3: How to Download iOS 12
As for how to get iOS 12 and how to install iOS 12 on your iDevice, you can view the following contents to get a clear idea. Here I would like to take iPhone for instance.
1. Click on “Settings” app on iPhone home screen. After that, click on “General> Software Update”.
2. In the next interface, hit “Download and Install” and enter your passcode to continue.

3. Hit “Agree” button when you see the “Terms and Conditions” interface. Click on “Agree” button once again to confirm your operation. Your iPhone will reboot to install iOS 12 and you need to wait for a moment. Make sure your IPhone has enough space and battery to install the new system version. Good Wi-Fi network also plays an important role for the success of the installation.
The issue of how to download iOS 12 can be settled with several steps. You just need to operate according to the steps shown above to realize you goal. Thus, you can fix how to get iOS 12 and how to install iOS 12 conveniently.
Part 4: How to Backup iOS 12 Data to Mac
Now you know what to expect in iOS 12 and how to install iOS 12. However, you should pay attention to the space of your iDevice before the installation of the new system version. Once you do not want the iOS 12 and want to downgrade to iOS 11 for some reasons, you actually can back up iOS 12 data to Mac for later use. Leawo iTransfer for Mac will be helpful in this process. This software is recommendable, which is quite popular among users in backing up files and managing files among iTunes, computers and iDevices. Follow the steps shown below and you can grasp the solution to backup iOS 12 data to Mac effectively. Here I will take iPhone photos for instance.
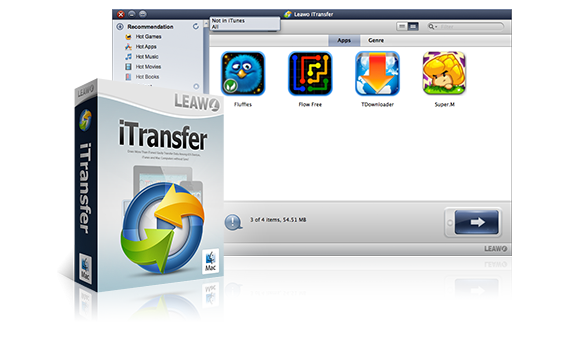
Leawo iTransfer for Mac
☉ copy files among iOS devices, iTunes and PCs with ease.
☉ copy up to 14 kinds of data and files without iTunes.
☉ Support the latest iOS devices like iPhone 7, iPhone 7 Plus, etc.
☉ Play back, view, and delete data and files on iOS devices.
![]()
![]()
Step 1: Run iTransfer for Mac and Connect iPhone with Mac
Run Leawo iTransfer for Mac and insert iPhone into Mac with matched USB cable. The program will scan your iPhone information automatically.

Step 2: Choose Photos and Transfer to Mac
Click on “iPhone icon> LIBRARY> Photos” to check all pictures on iPhone. Choose your desired ones and click on the transfer button at the right bottom of the window. Click on “Transfer to> My Computer” successively to call out the output setting panel. Tick “Save to folder” and click on “Change” in the panel to find a proper location to save the exported iPhone pictures. Afterwards, you can hit “Transfer Now” button to begin to back up iPhone photos to Mac folder. In a few seconds, the process will end, and you will be able to view iPhone photos on Mac.

This simple process will surely make you satisfied and the knowledge on iOS 12 will help you to some degree. I hope the brief introduction may offer you some assistance.
 Jul. 10, 2018 by


 Prof. Media
 Blu-ray Ripper
 Blu-ray Copy
 iOS Data Recovery
 [12/29/23] MAX Downloader V15.0.0
 10,000,000 people are using Leawo!
 All Transactions are protected!
 30-Day Money Back Guarantee!