
AirPlay has become a popular function of Apple devices, which can help users a lot in transferring files. However, not every one is clear of its features and how does AirPlay work. This guidance will introduce its basic information and its working process in detail. Read on and you will fall in love with this function.
Part 1: What is Evernote
Evernote is one software service based on cloud, which is designed to create, manage and store diverse of media files. It can store all your stuff in the cloud via your own individual account of evernote, such as text files, pictures, videos and etc.
This app is centered on the creating of notebooks and notes, but users can also upload files directly from your devices as well. When you upload a file in Evernote, it will sync up the new file across your entire account. Thus, you can access the file from a different machine. This feature is quite convenient for users to manage files.

Evernote has both the free version and the paid versions. The free version of it allows users to upload 60 MB of new notes a month with limited features. If you pay $69.99 one year for the account, you are allowed to upload 10 GB of new notes every month. As for the $120 per year account, users are able to upload 20 GB of new notes and can enjoy the shared 2 GB notes space.
Part 2: What is OneNote
OneNote is also one note-taking app with great features, which enables users to realize the free-form information gathering and multi-user collaboration. Users are able to enter typed or handwritten notes, audios, file attachments and other kinds of notes. This software can assist users to make your notes more tidy and centralized. You can search your notes in this program and you can also access your notebooks via OneDrive as well. This software is developed by Microsoft, which is accessible as one part of Microsoft Office and Windows 10.

Is OneNote free? Here I would like to tell you that it is free to download and use, and there is no restrictions or crippled features on it. If you really do not want to pay for the note-taking app, OneNote will be your best choice.
Part 3: The Comparison Between Evernote and OneNote
The comparison of Evernote Vs OneNote is a hot topic in the note-taking app market. Here I would like to list some aspects to show you the feature difference between them.
| Evernote | OneNote | |
| Pricing | a) Free version offers the basic features and only 2 devices at the same time b) $46.99/YR paid version adds some other features c) $89.99/YR paid version allows users to access all features |
|
| Storage | a) Available to upload 60MB notes/month for the basic version b) Available to upload 1GB notes/month for the plus version c) Available to upload 10GB notes/month for the premium version |
No limitation on file uploading, but for storing more files, the OneDrive space asks for payment |
| Device Support | Windows, Mac, iOS, Android, Windows Mobile, Web | Windows, Mac, iOS, Android, Windows Mobile, Web |
| Compatibility | Compatible with lots of third-party apps on every platform | Compatible with some third-party apps with full Office integration |
| User Interface | Flexible layout with a three-column design | Feel weird at first and need some time to adjust |
Evernote Vs OneNote comparison is very clear by viewing the chart shown above. As you can see, the two apps can support the same platforms and there are some big differences in other aspects.
Part 4: How to Migrate Evernote to OneNote
After you know the answers to the questions of “What is Evernote” and “What is OneNote” and check out the comparison of Evernote Vs OneNote, you can continue to see how to convert Evernote to OneNote if you are fans of both note-taking applications. As for how to import Evernote to OneNote, the detailed step listed below will show you clearly.
1. Download and install the desktop version of Evernote on computer and log into your account.
2. On Evernote, choose one file from the section of "Notebooks" and then click on “File> Export Notes” to hit. Browse your computer to find a location to save the exported notes. In the end, tap on “Save” button to download the notes in the format of ENEX.
3. Go to Microsoft official website to download OneNote Importer and install it on computer with the on-screen instructions.
4. Open OneNote Importer and then click on “Get Started” button. Hit “Choose File” button to choose Evernote files that you have exported in the second step on computer.

5. After that, you need to sign in with the Microsoft account and then click on “Import” button to initiated the importing process.

6. Wait until the import procedure comes to an end. The time depends on how many notes you are importing.

The process to import Evernote to OneNote is not so hard for you to realize and you can refer to the steps shown above to have a try to test whether this method can work well.
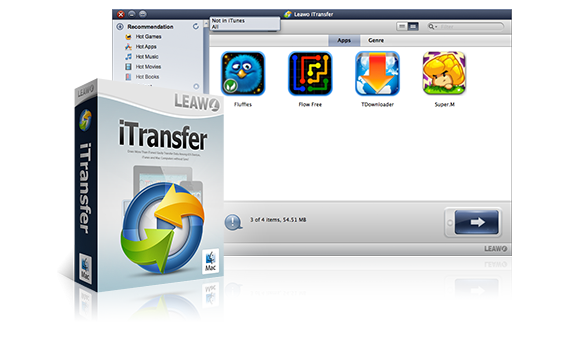
Part 5: How to Manage iPhone Notes on Mac Using iTransfer for Mac
iPhone notes are important for many users to arrange work and life. Sometimes, people may also want to check them on Mac more clearly. In the aim of reaching this target, you can resort to Leawo iTransfer for Mac. This tool has many good functions for you to manage files on iOS devices. It can also deal with the transfer issues among iTunes, iDevices and computers with some clicks. As for how to make this aim come true, you can continue to read the following steps for reference.
Leawo iTransfer for Mac
☉ copy files among iOS devices, iTunes and PCs with ease.
☉ copy up to 14 kinds of data and files without iTunes.
☉ Support the latest iOS devices like iPhone 7, iPhone 7 Plus, etc.
☉ Play back, view, and delete data and files on iOS devices.
![]()
![]()
1. Connect iPhone to Mac
Insert iPhone into Mac and then run iTransfer for Mac. Your information on iPhone will show in the main interface automatically.

2. Choose Notes to Export
Hit “iPhone icon > LIBRARY > Notes” and you could view all your notes on Mac, then choose the notes you desire to export to your Mac in the right part of the tool.

3. Export Notes from iPhone to Mac
Check the notes you want to move and then hit “Export” button. In the pop-up panel, you need to choose an output directory to save iPhone notes on Mac computer. Hit “Transfer Now” and then the process to export iPhone notes to Mac folder will begin. Wait for a few seconds and your iPhone notes will be available on Mac.

This process to view iPhone notes on Mac is recommendable for its convenience and high efficiency. You’d better now download and install iTransfer for Mac on computer to use this solution to realize your goal of exporting notes from iPhone to Mac.
 Jul. 13, 2018 by


 Prof. Media
 Blu-ray Ripper
 Blu-ray Copy
 iOS Data Recovery
 [12/29/23] MAX Downloader V15.0.0
 10,000,000 people are using Leawo!
 All Transactions are protected!
 30-Day Money Back Guarantee!