
If you want to capture your vision with exceptional clarity and beauty, you won't want to miss Canon Camcorder. Canon is a popular Japanese MNC that is known for its range of cameras, camcorders and other imaging and optical related products. Considering different needs of different users, Canon had a wide range of video camera with the different set of specifications.
Camcorder does not only captures videos, but the excited moments and memories that treasured for a life time. In order to make the most of your video, it should be transferred to a computer. Transferring video from a camcorder to a PC may take up a lot of hard drive space. If you have an external flash drive, or it's convenient to burn camcorder video to DVD, you could transfer videos to external devices to save hard drive space.
The DVD camcorder could directly record videos to DVD for playing with Blu-ray player or regular DVD player. To transfer recorded DVD videos on camcorder to computer, the below guide would be helpful.
Menu
Part 1: Transfer Video from Camcorder DVD to Computer using the DVD-ROM
There are quite a few ways to help you transfer recorded camcorder DVD to computer for playing on your computer. One way is to make use of the DVD-ROM. You can transfer video from the camcorder DVD using the DVD-ROM drive on a computer. The below steps would show you the detailed operation:
Steps
- Insert the camcorder DVD into a computer DVD-ROM drive that supports 8cm discs.
- On the computer desktop, click the Start button and then click My Computer. NOTE: If available, you can double-click the My Computer icon on the desktop instead.
- In the My Computer window, right-click the DVD Drive icon, then click Open.
- Right-click the appropriate folder and then click Copy option. For still images, right-click the DCIM folder. For movie files, right-click the VIDEO_TS folder.
- Right-click on the desktop and then click Paste. In this way, the folder and all the contents in the folder will be copied to the desktop of the computer.
- On the computer desktop, right-click the newly copied folder and then click Rename.
- Type a new name for the folder.
- Press the ENTER key on the keyboard.
By following the above steps, you could easily transfer video from camcorder DVD to computer using the DVD-ROM. However, you need to know that ;this only applies to DVD-RW, DVD+RW, and DVD-R recorded with a DVD Handycam® camcorder, and it can't copy movies from copyright-protected DVD content to computer. And you should finalize the camcorder DVD before you beginning this procedure. Meanwhile, do not use an 8cm CD adapter with the 8cm DVD since it may cause a malfunction.
Part 2: Transfer Video from Camcorder DVD to Computer via USB Cable
The easiest way to transfer videos to a PC is by using a USB cable or Firewire. To transfer videos from camcorder DVD to computer via USB cable, you could follow the below steps:
Steps
- Turn on the computer.
- Connect the USB cable to the USB port on the camcorder.
- Connect the other end of the USB cable directly to the USB port on the computer.
- Turn on the camcorder.
- On the LCD screen of the camcorder, touch COMPUTER or USB CONNECT . The available selection will differ depending on the camcorder model. After the computer recognizes the connection, some camcorders may continue to display Connecting... even though the connection has already been established. This is normal operation for some camcorder models.
- Open the My Computer window on the computer. The camcorder will be listed in the My Computer window as an additional DVD-RW drive.
- In the My Computer window, open the DVD-RW icon that represents the camcorder. Certain operating systems may require that you right-click the DVD-RW drive and select explore in order to view the available folders.
- Click to select the VIDEO_TS folder (or BDMV folder for high-definition video recorded with an AVCHD DVD camcorder).
- Press the CTRL+C keys on the keyboard to copy the folder and all its contents.
- Click on the computer desktop or folder where you want to copy the video contents.
- Press the CTRL+V keys on the keyboard to paste the folder and its contents into the desired location.
It's quite similar to the first solution, in this way, you couldn't transfer copy protected DVD movies from camcorder to your computer.
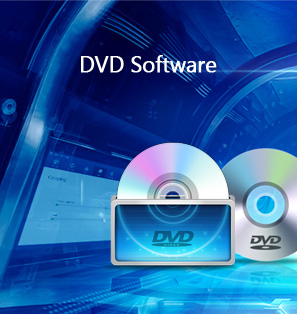
Part 3: Best Way to Rip Camcorder DVD - Leawo DVD Ripper
As mentioned above, no matter you choose to transfer videos from camcorder DVD to computer by using DVD-ROM or USB cable, you can't transfer copy-protected DVD content. So, what would you do to transfer copy-protected DVD content to computer? Try Leawo DVD Ripper.
Leawo DVD Ripper is a professional DVD to video converter tool that could help you transfer video files from various DVD content to computer, no matter your source DVD content is copy protected or not. As one of the top-notch DVD converter tools, Leawo DVD Ripper could help you decrypt, rip and convert DVD movies from disc, folder and even ISO image file to digital videos in various formats. With it, you could convert DVD to video and audio in 180+ formats, like MPEG, MP4, AVI, FLV, RMVB, etc. for various media players and devices, like Windows Media Player, iOS devices, Android devices, iMovie, QuickTime, etc., Zoom Player included as well. It comes with advanced disc decryption feature that could help you get rid of disc protection and region restrictions so as to let you freely transfer DVD videos to computer.
In addition, Leawo DVD ripper can also act as a video editor to help you trim DVD movie, crop DVD video size, add image or text watermark, create 3D movie, etc. And it can help you to select subtitles and audio tracks from source DVD movies for output videos.
Follow the below steps to learn how to transfer camcorder DVD content to computer.
Step 1: Get prepared
Download and install Leawo DVD Ripper, and then launch it. (Mac users please download the Mac DVD Ripper). Meanwhile, connect your source camcorder DVD disc into the DVD drive that is connected to your computer.

-
Leawo DVD Ripper
☉ Convert DVD to video/audio files like MKV, MP4, AVI, FLV, RMVB, etc
☉ Convert DVD to iPad, iPhone, Android devices
☉ Edit DVD video files with built-in video editor
☉ Add 3D effect with built-in 3D movie creator
☉ Selectable subtitles and audio tracks from source DVD movies for output videos
Note: Leawo DVD Ripper is a module built in Leawo Prof. Media.
Step 2: Load source camcorder DVD movie

Kick off Leawo Prof. Media, and then open the "Convert" module. Click "Add Blu-ray/DVD" button to import DVD disc, folder or ISO image files. To load camcorder DVD, choose "Add from CD-ROM" option to browse and load camcorder DVD from the USB drive.
Note: Leawo DVD Ripper offers 3 different content loading modes. The Full Movie mode loads all source DVD content, Main Movie mode by default loads the longest title (generally the main movie) but allows you to switch another title for loading, while Custom Mode enables you to select desired DVD title(s) for loading. Choose one according to your needs.

Step 3. Set output format
Click the drop-down box before the big green "Convert" button. On the drop-down menu, click the "Change" option to enter the Profile panel, where you need to select a format as output format from "Format" or "Device" group, say MP4 Video.

Also, if you want to set the parameters of output profile, you can select "Edit" to enter the editing panel including "Video Codec", "Bite Rate", "Resolution", "Frame Rate", "Aspect Ratio", "Audio Codec", "Audio Sample Rate", etc. Just modify these parameters according to Zoom Player requirements.

Step 4. Set directory and convert camcorder DVDs
After adjusting the video settings, click "OK" button to return to the "Convert" main interface. And then click the big green "Convert" button. Select a target path to save the output file in the "Save to" box and then click the "Covert" icon below to start ripping and converting camcorder DVD movie file to video files.

When the conversion completes, you will get your source camcorder DVD content transferred to your computer in video files. It won't take you long.
Part 4: Play Cannon Camcorder DVD on Computer - Leawo Blu-ray Player
After transferring Cannon Camcorder DVD to your computer, you then need a DVD player to help you play back Cannon Camcorder DVD content smoothly. There are quite a lot of wonderful free DVD players for you to use, among which Leawo Free Blu-ray Player is the best Cannon Camcorder DVD player for you.

As the best multimedia player software combo, Leawo Free Blu-ray Player could perform as:
- Region-free Blu-ray disc player to play back Blu-ray discs for totally free, as well as BDAV movie folder and Blu-ray ISO image files, no matter they are commercial or homemade, and regardless of disc protection and region restrictions.
- Free DVD disc player to play back DVD disc, folder and ISO image files like standalone DVD player does, regardless of disc protection and region codes.
- Free HD video player (free 4K video player) to play back up to 4K video files in 200+ file formats like MP4, AVI, FLV, MOV, MKV, WMV, etc.
- Free audio player (free music player) to play back audio/music files in MP3, AAC, FLAC, and other formats.
- Deliver super high-quality stereo audio experience with the support of various advanced audio decoding technologies like Dolby, DTS, AAC, TrueHD, DTS-HD (including 5.1, 7.1 channels), etc.
- Select subtitles and audio tracks, and even add external subtitles.
- Adjust video and audio effects during playback.
- Blu-ray to MKV converter to help you convert Blu-ray to lossless MKV files for unlimited playback.
You could easily and smoothly play back any DVD content on your computer with Leawo Free Blu-ray Player with high quality.
 Oct. 28, 2017 by


 Prof. Media
 Blu-ray Ripper
 Blu-ray Copy
 iOS Data Recovery
 [12/29/23] MAX Downloader V15.0.0
 10,000,000 people are using Leawo!
 All Transactions are protected!
 30-Day Money Back Guarantee!