iCloud is a cloud storage and cloud computing service provided by Apple company. This program allows you to store, share or send data such as documents, photos, and music. It can also help you manage your Apple devices if it is lost or stolen. Your iCloud account includes 5 GB of free disk space — located on Apple’s servers — for storing device backups, app data, iCloud Drive files, iCloud Photo Library photos, email, and more. That 5 GB can be easily eaten up by backups, and then you will have to pay to get more iCloud space. You can free up iCloud storage space by deleting photos you don’t want to keep. In this passage, several efficient ways to delete photos from iCloud would be introduced below.
- Part 1: How to Delete Photos from iCloud on both Your Devices & iCloud?
- Part 2: How to Delete Photos from iCloud But Keep on Your Devices?
- Part 3: How to Delete Photos from iCloud via iCloud Website?
- Part 4: How to Delete Photos from iCloud on Mac?
- Part 5: How to Recover Deleted Photos with Leawo iOS Data Recovery?
Part 1: How to Delete Photos from iCloud on both Your Devices & iCloud?
How to delete photos from iCloud on both your devices and iCloud? The methods would be given depending on your specific needs. Do you want to delete all the photos or a part of the photos? Here would elaborate the details for different purposes.
1. How to delete a part of photos?
Step 1: Open Photos app on your iOS device, tap Albums.
Step 2: Tap Camera Roll on your device and all the photos and videos would appear on the screen.
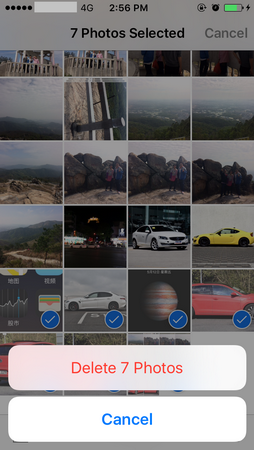
Step 3: Tap Select and select the photos you want to delete. You can select a lot of photos simultaneously.
Step 4: Tap on the Trash Can icon, and tap Delete X Photos. X is the number of photos you've selected.
2. How to delete all photos?
If you prefer to permanently delete all photos, you can follow the steps below to delete the photos on both devices and iCloud.
Steps:
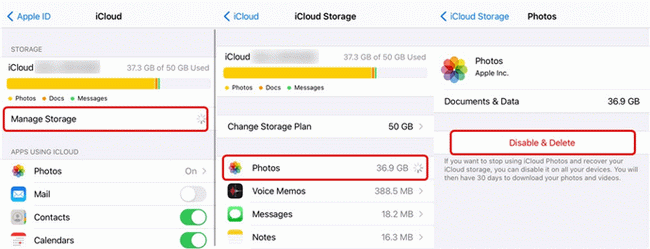
- Go to Settings on your iPhone and navigate to iCloud where you need to enter the Apply ID and password.
- Click Manage Storage >> Photos >> Disable & Delete options. Here make sure you have tapped on Disable & Delete, then you can see a pop-up window which may reminds you to confirm the photos and videos you would like to delete.
- Your photos and videos stored in iCloud would be removed and your iCloud Photos function would not be activated anymore on your device. Then, if you would like to recover these photos and videos, you only have 30 days validity to download to other devices.
Here, according to the above steps, the videos and photos would be deleted at the same time on your iPhone and iCloud. If you want to keep them on your iPhone, you had better make a backup of the photos ahead of time with some powerful tools. Leawo iTransfer can be the firm choice you can make to transfer photos from iPhone to computer for further backup.
Part 2: How to Delete Photos from iCloud But Keep on Your Devices?
What if you want to delete photos from iCloud only but keep them on your iPhone only? You have to understand that you can’t do this if the iCloud Photos feature is turned on since the photos would be synced on both iCloud and your iPhone or iPad. If you have turned off the iCloud Photos syncing on your device, then you can delete photos from iCloud without affecting your device. Follow the steps below.
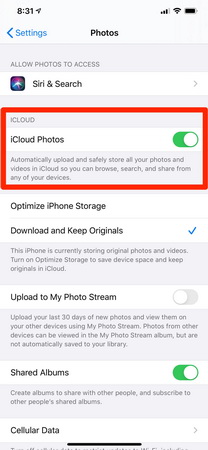
Step 1: Go to Settings on your device and tap Photos. Then turn off iCloud Photos by tapping the toggle to the left.
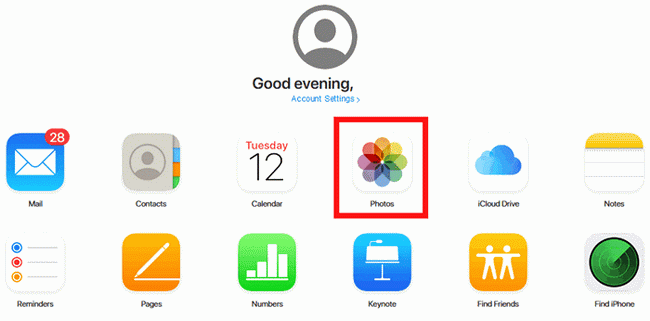
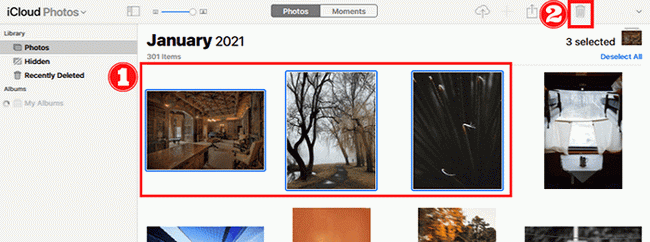
Step 2: Open iCloud on the webpage and log in the Apple ID if needed. Then on the main page, click Photos and the delete icon, now you can choose the photos you would like to delete from iCloud. When it is done, the chosen photos would be deleted from iCloud, but all the photos would remain intact on your device.
Part 3: How to Delete Photos from iCloud via iCloud Website?
This solution would be quite similar to the previous part on how to delete photos from iCloud but keep on your devices. You can follow detailed steps to delete photos.
Step 1: Go to icloud.com and log in using the Apple ID and password.
Step 2: Once you enter the main screen of iCloud, click Photos in iCloud and then you can see the photos and videos stored in your iCloud. Select your targeted photos you want to delete and then click on the trash bin icon and confirm the deletion easily.
Part 4: How to Delete Photos from iCloud on Mac?
If you are using Mac OS, you can also use the Photos app in it to delete photos on iCloud.
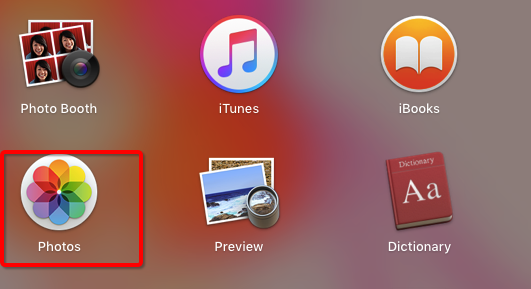
Step 1: Make sure that you have sign in to iCloud on your iOS devices and open Photos app on Mac OS.
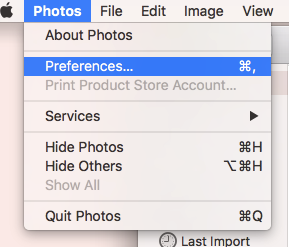
Step 2: Click Preferences, then click iCloud.
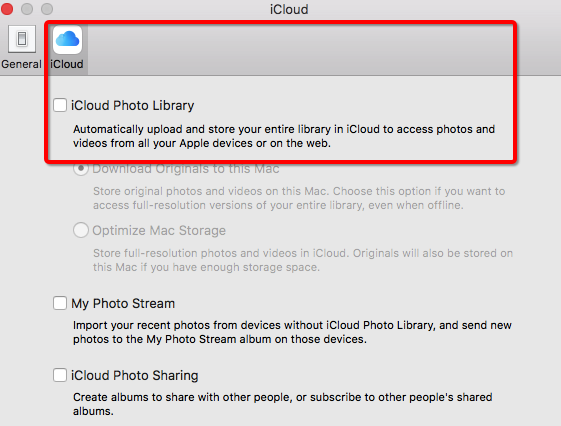
Step 3: Select the iCloud Photo Library checkbox to turn it on. You will see that there are two options for you to choose:
- Download Originals to this Mac: This option enables you to store the full-size versions of your photos both on your Mac and in iCloud, and you can always see them even if you’re not connected to the Internet.
- Optimize Mac Storage: This option is useful when your Mac’s disk space is limited, it enables you to store smaller versions of your photos, and keeps the original, full-size photos in iCloud. If you want to restore the originals back to your Mac, just select “Download Originals to this Mac.” Restoring the original photos may take some time, depending on the size of your photo library.
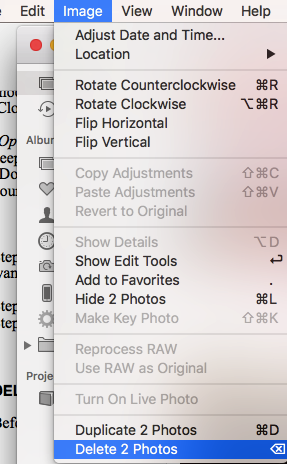
Step 4: To delete an item from iCloud Photo Library: click photo that you want to delete, hold command button then click to choose more than one photo at the same time. Go to menu on the left top side then click image, choose delete X photos, X represents the number of photos you choose.
Part 5: How to Recover Deleted Photos with Leawo iOS Data Recovery?
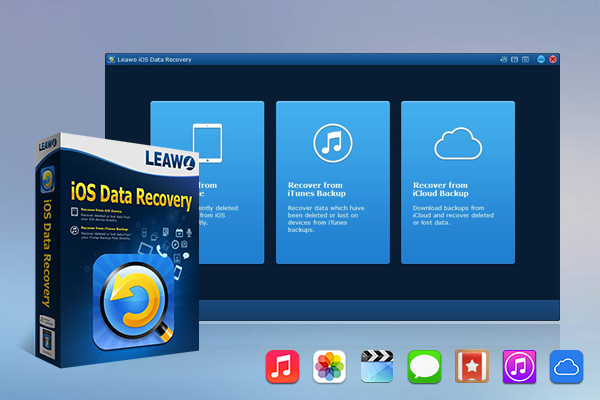
If you delete some photos by accident, are there any possibilities to recover them correctly? The answer would be positive. But here you may need some help from third-party data recovery program. Leawo iOS Data Recovery is the one you should not miss. Leawo iOS Data Recovery can work on Windows and Mac, which enables you to retrieve various data from iPhone with or without backup. With just a few steps, this software can help you to recover deleted chat history in iPhone as well as photos and videos perfectly. Leawo iOS Data Recovery stands out for its great design and powerful functions. It allows you to preview and select the files that you want to recover, which can work easily to scan and search for files and data with very accurate results. It is compatible with all iOS devices and all versions of iOS. With Leawo iOS Data Recovery, all kinds of iPhone app data could be recovered. You can follow the detailed steps below to recover your deleted photos.
Step 1. Download Leawo iOS Data Recovery
Go to the official site and download the installation package of Leawo iOS Data Recovery. Install the program on your computer in minutes.
-
Leawo iOS Data Recovery
- Recover lost or deleted data from iOS devices, iTunes backup and iCloud backup
- Retrieve files from iTunes and iCloud backup even for lost or broken iOS devices
- Restore 12 types of data, including photos, videos, SMS & MMS messages, contacts, call history, notes, calendar, etc.
- Fully support all iPhone, iPad and iPod touch models
- 100% safe, accurate and speedy recovery
- User-friendly interface and simple operations
Step 2. Choose recovery mode in main interface
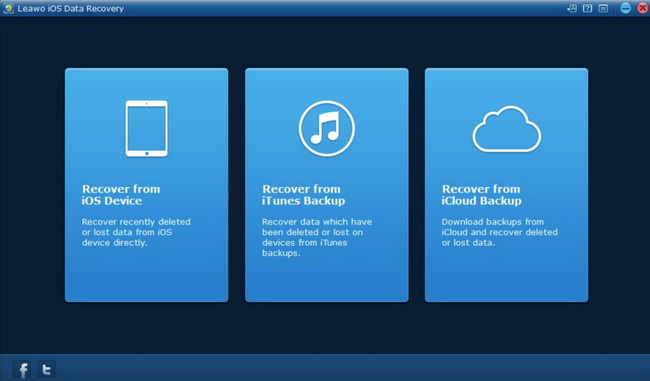
Run Leawo iOS Data Recovery on computer and then use a proper USB cable to connect iPhone with your computer. This software will detect your iOS device automatically. After that, you need to pick up "Recover from iOS Device" to click on.
Step 3. Select photo data to recover
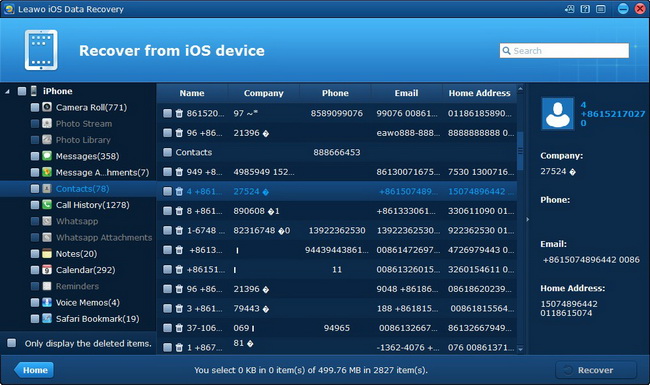
When you view all categories of iPhone in the left sidebar of the software screen, you need to check “Photo Library”, or “Camera Roll”. Afterwards, you need to click on the "Recover" button at the rightmost corner of the interface.
Step 4. Choose target folder on your computer
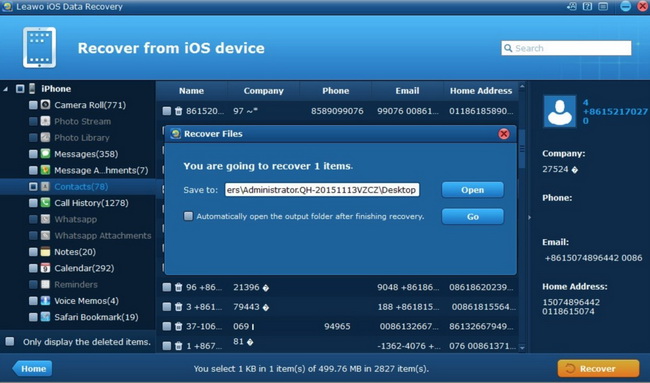
In the pop-up dialogue, you need to click on "Open" button and then browse your computer to choose a proper location to save the exported files. After you set the target directory well, you can tap on the button of "Go" to start the process to recover files. In a few seconds, the data will be available in the folder. Once the recovery process has been finished, all the deleted photos would be recovered immediately and you can transfer the recovered photos and videos to your devices again.

