"Hi, I love recording things with my phone and I store all of them on my MacBook Air. I opted for the 128GB version of MacBook Air and now I regret it because I'm running out of storage space because of all the MP4 video recordings. I'm looking for a way to compress them without compromising the quality. How can I do that?"
Running out of storage space on laptop is a problem that bothers a lot of laptop users. And videos are one of the most common kinds of data on your hard drive. MP4 is one of the most popular video container formats and it's used by a lot of smartphones to store recorded videos. It's no surprising that a person who loves recording his/her life will have a hard drive filled up with MP4 video recordings. If you want to make room on your hard drive, compressing those MP4 videos is actually a valid idea as you can still keep the MP4 videos while making more space available on your hard drive. So in this post I will show you how to compress MP4 on Mac in 2 different ways.
How to compress MP4 on Mac with a video converter program
To compress MP4 Mac users could consider using a video converter. The reason why you can use a video converter as a video compressor is that it allows you to change the parameters of the video like resolution or frame rate that could decide the size of the video. So if you can change those parameters, you would be able to make the video smaller.
To compress MP4 file Mac does have a lot of programs that can do that. Here I would recommend to you a powerful video converter: Leawo Video Converter for Mac. It's capable of converting videos and audio files between 180+ formats. And it enables you to adjust the parameters of your MP4 video recordings, thus allowing you to be able to easily compress your MP4 videos. Learn how to compress a MP4 video on Mac with using Leawo Video Converter for Mac from the content below.
Note: Leawo Video Converter was integrated into a software package called Prof.Media, which you would find out after the installation.
Step 1. Import your MP4 video recordings to the program
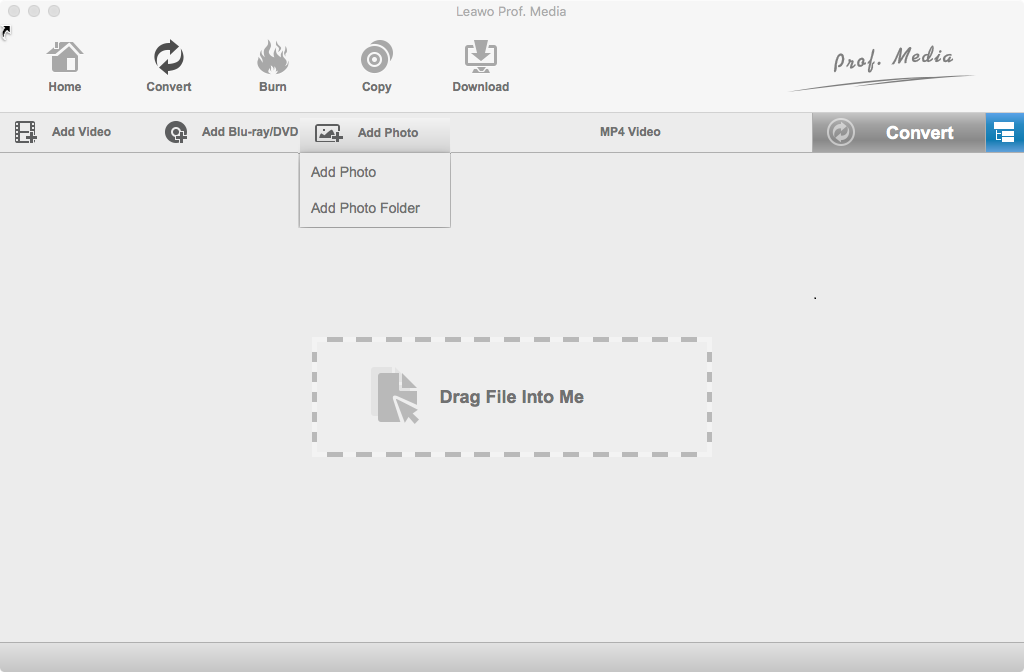
Open Prof.Media and on the interface, find the Video Converter tab and click on it to launch the Video Converter module. Or you can do so by clicking the Convert button at the top. After launching the video converter module, you can start to import your MP4 videos to the program. You can do so by clicking the Add Video button in the top left-hand corner or directly dragging and dropping the MP4 videos to the interface of the program.
Step 2. Set default output format
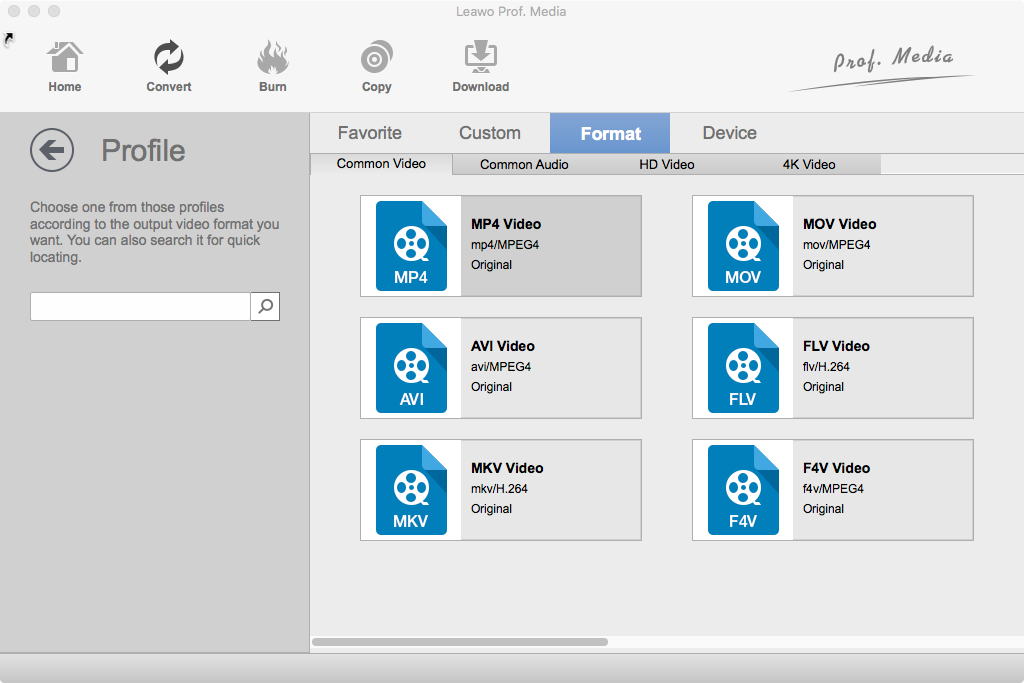
There is a button that locates to the right side of the green Convert button. It shows you the default output format on it, so let's call it the Format button. Click on it and then a pop-up menu would appear. Click on the Change button in the middle and you will open the Profile page where all the supported output video and audio formats are listed. Find the ideal output format you need, select it and click the OK button to set it as the default output format and go back to the interface.
Step 3. Optimize video parameter
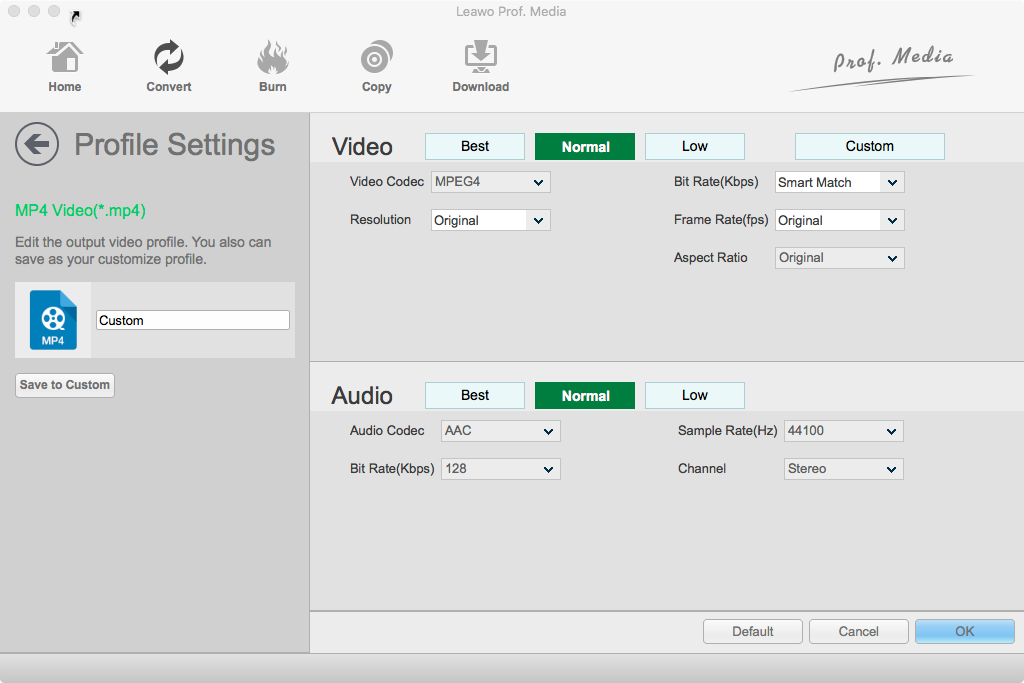
This step is crucial to the outcome of the compression. Click on the Format button mentioned above and then on the following menu, click on the Edit button on the left side and you will open Profile Settings page where you can adjust and optimize the video and audio parameters of your MP4 videos. To make the video smaller, you can change video parameters like resolution, frame rate and bit rate and audio parameters like bit rate and sample rate. When you are done tweaking the video, click on the OK button to return to the file list.
Step 4. Start compressing MP4 on Mac
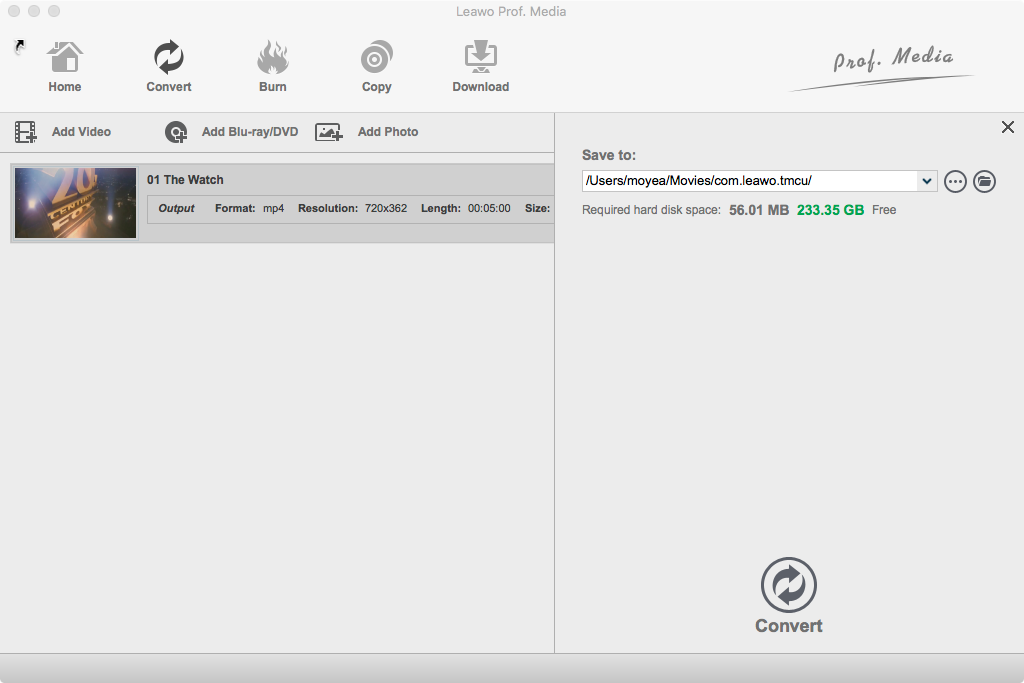
To start compressing your videos, click the green Convert button mentioned above. A sidebar would come out from the right side of the file list. The option box under the Save to tag shows you the default output format. To change that, click the "…" button next to it. To start compressing your MP4 videos, click that Convert button at the bottom.
That's how you can compress MP4 on Mac with Leawo Video Converter for Mac. It's a powerful video compressor that could help you compress AVI, WMV and a lot of other videos on Windows and macOS.
How to compress MP4 on Mac with an online video converter
To compress MP4 video Mac users should definitely give Leawo Video Converter a try. But it's not the only choice to go with when you try to compress a MP4 video on Mac. Actually, if you don't have much MP4 videos to compress, I would recommend that you use an online video converter. As some of you might not know, you can actually convert a video online. What's great about an online video converter is that you don't have to install a program on your computer or pay for it when trying to convert or compress a video. But whether an online video converter is valid idea for compressing your MP4 video depends on how much MP4 videos you want to compress and how big are those MP4 videos. Note that you will have to upload your video to the website first when you try to compress a video and when it's done, you will have to download it to your computer. If you are talking about compressing an MP4 video or a certain number of MP4 videos in large size, then I would recommend that you use Leawo Video Converter for Mac as it would definitely be the better choice here.
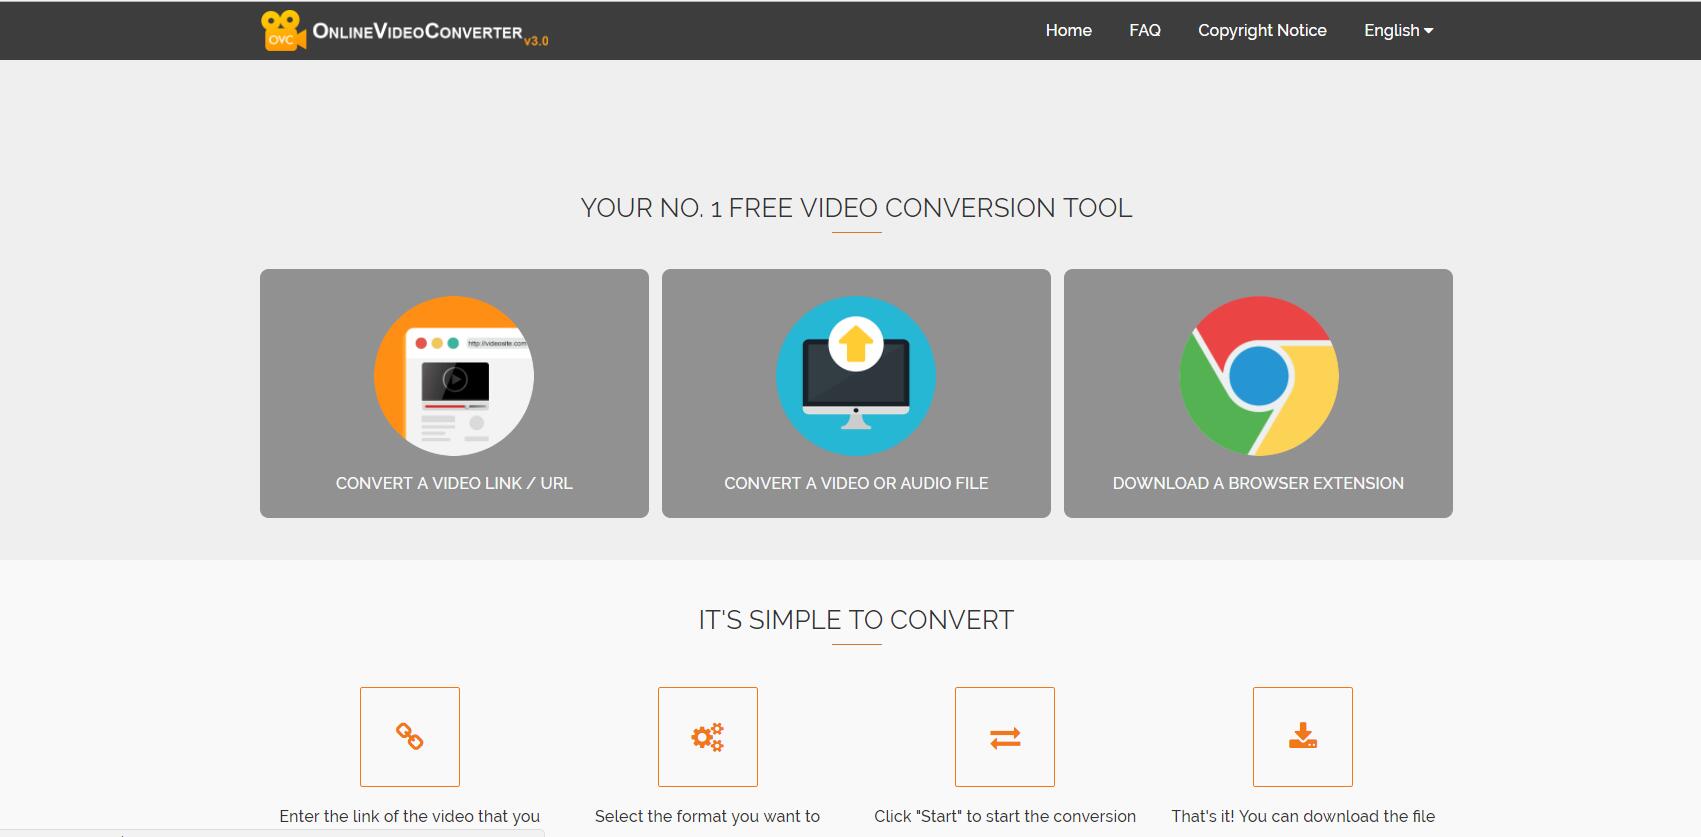
Here I would show you how to compress a MP4 video with an online video converter. I'll be using onlinevideoconverter throughout the instructions below.
1. Click to open onlinevideoconverter's official website. Or you can google online video converter and click on the first result. On the Home page, click "CONVERT A VIDEO OR AUDIO FILE".
2. To upload your MP4 videos to the website, you can drag and drop your source videos to the website or click the SELECT OR DROP FILE button.
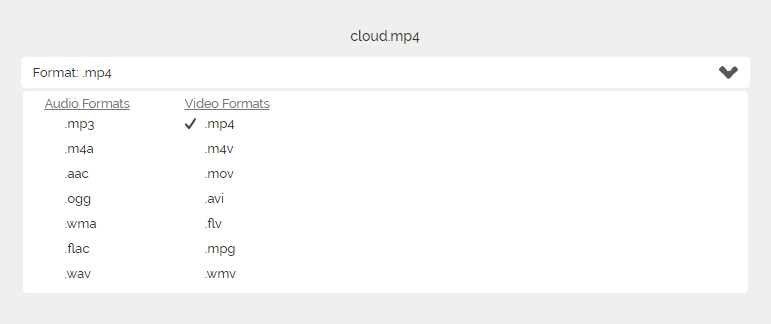
3. Click on the Format option box and then select one video format as the default output format.
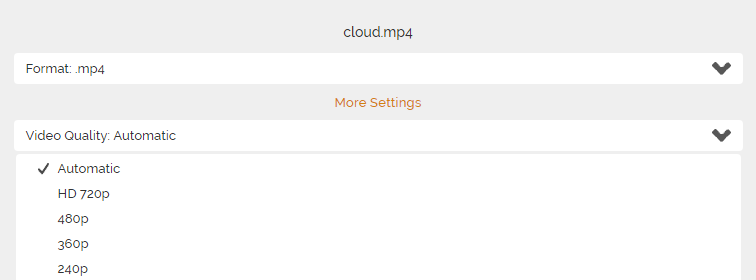
4. Click on More Settings from below and click on Video Quality. On the drop-down menu, select the ideal quality level for the output video.
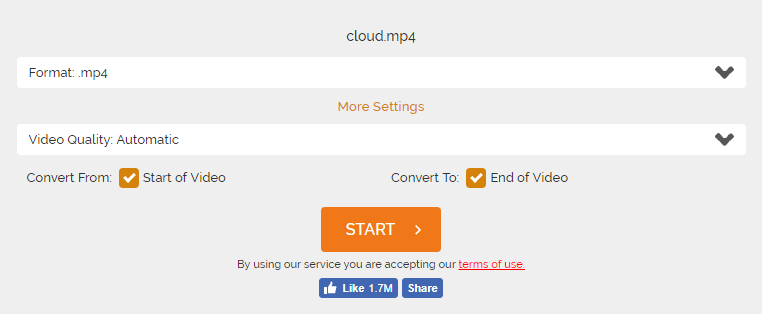
5. Click Start to start compressing your MP4 videos.
When it finishes compressing the video, you will be redirected to the download page for downloading the compressed video. Click the Download button to download the compressed video to your computer.
That's how to compress MP4 on Mac with 2 different ways. You can decide which one to go with according to your own needs. And it shouldn't be hard to make a decision between the two choices offered above.

