iCloud is Apple's private cloud service, allowing users to store 5GB free data, so Apple users can share personal data between different iDevices, such as iPhone and Mac. iCloud allows users to synchronize and push data over the wireless device, making it easier to operate and experience better than Apple's traditional iTunes solution (requires data cable connection). iCloud can help us to automatically restore the data function. Through Wi-Fi and other wireless networks, iCould can achieve automatic backup every day. The contents of the backup include music, photos, videos, applications, books and so on. However, not everyone has an idea on how to check iCloud storage usage and the way to cancel/downgrade iCloud storage plan on various devices. This tutorial will focus on the solutions to these issues and tell you how to manage and back up your iPhone data after canceling the iCloud storage plan.
- Part 1: How to Check iCloud Storage Usage?
- Part 2: How to Cancel/Downgrade iCloud Storage Plan on iPhone?
- Part 3: How to Cancel/Downgrade iCloud Storage Plan on Mac?
- Part 4: How to Cancel/Downgrade iCloud Storage Plan on Windows PC?
- Part 5: What Happens to Your Data If You Cancel/Downgrade iCloud Subscription?
- Part 6: How to Back Up and Manage iPhone Data After Canceling iCloud Storage Plan?
Part 1: How to Check iCloud Storage Usage?
You can gain an iCloud account automatically after you register for your Apple ID. You can enjoy the 5GB of free cloud storage space, which can be used on almost all your devices. 5GB is not a lot. Therefore, when you desire to upload big files to your iCloud space, it is sensible for you to check iCloud storage usage beforehand. As for how to get this work done, you can follow the steps shown below to assist you.
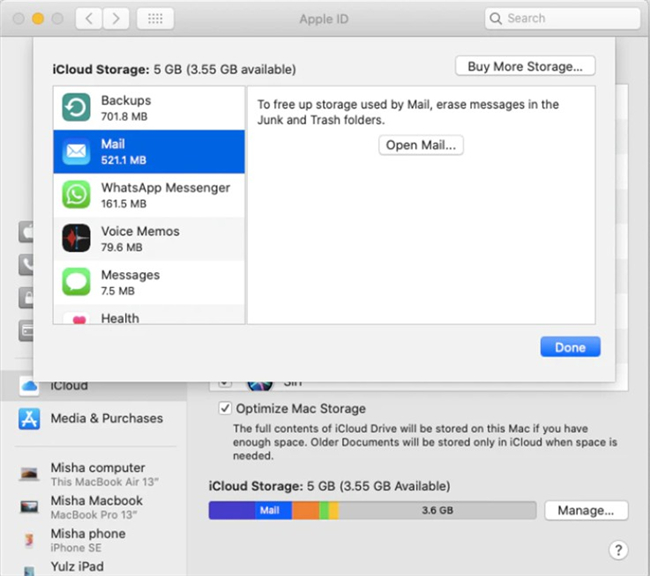
Step 1. On your computer, you need to navigate to “System Preferences” and then hit on the button of “Apple ID”.
Step 2. Hit on the “Manage…” button at the bottom right corner of the interface under the tab of “iCloud Storage”.
Step 3. Here you can check out the free space amount that is available for you. You can also drag down to check all apps that have stored their data in your iCloud right now.
Part 2: How to Cancel/Downgrade iCloud Storage Plan on iPhone?
When people get a new iOS device, such as iPhone, people can get free 5GB iCloud storage for storing your data. But many people would find that 5GB is not enough and they would usually upgrade their storage plan. But if you no longer need those extra storage space on iCloud or think your iCloud storage plan is too large for you, here's how to cancel iCloud storage plan or downgrade it to a smaller plan on iPhone. Just follow the steps below.
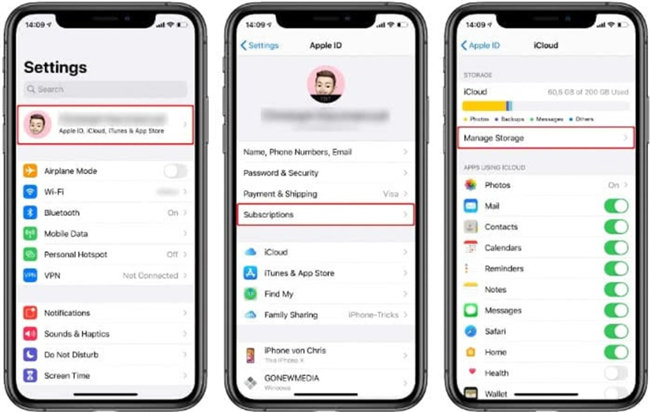
Step 1. Open Settings app on iPhone and then navigate to “your name> iCloud> Manage Storage”.
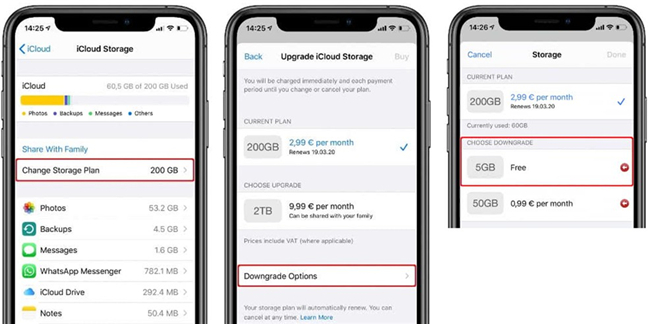
Step 2. Tap “Change Storage Plan” to see your current iCloud storage plan and the payment per month. This panel allows you to upgrade or downgrade your iCloud easily.
Step 3. In order to downgrade iCloud storage or cancel it, you need to click on the “Downgrade Options” button at the bottom.
Step 4. Then you need to identify yourself again with your own Apple ID. Type in your password to get to the interface to allow you to cancel/downgrade your iCloud storage plan at ease. Choose the free storage plan (“5GB”) to downgrade iCloud storage completely. You can also choose a smaller iCloud storage plan to help you save files in daily life.
Part 3: How to Cancel/Downgrade iCloud Storage Plan on Mac?
The same reason, when you find your iCloud of Mac OS is too small to store your data, you also can choose to cancel the iCloud storage plan.
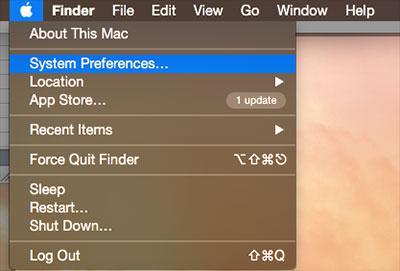
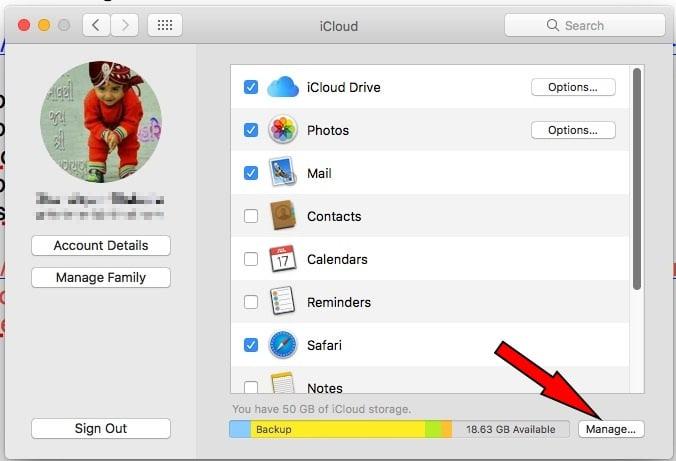
Step 1: Click on Apple menu and then click System preferences.
Step 2: Click iCloud.
Step 3: Then, click Manage in the lower right corner.
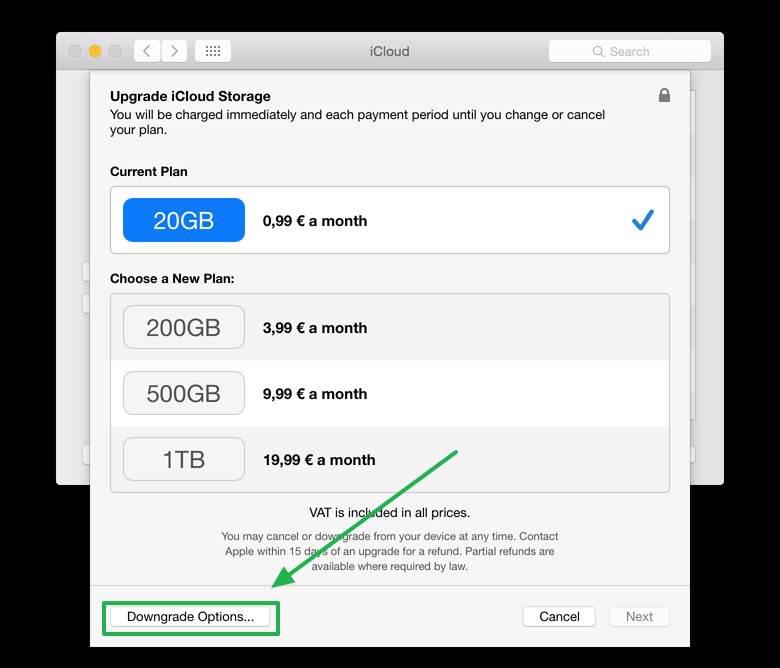
Step 4: Next, click Change Storage Plan and then click Downgrade Options…. If prompted, enter your Apple ID and password.
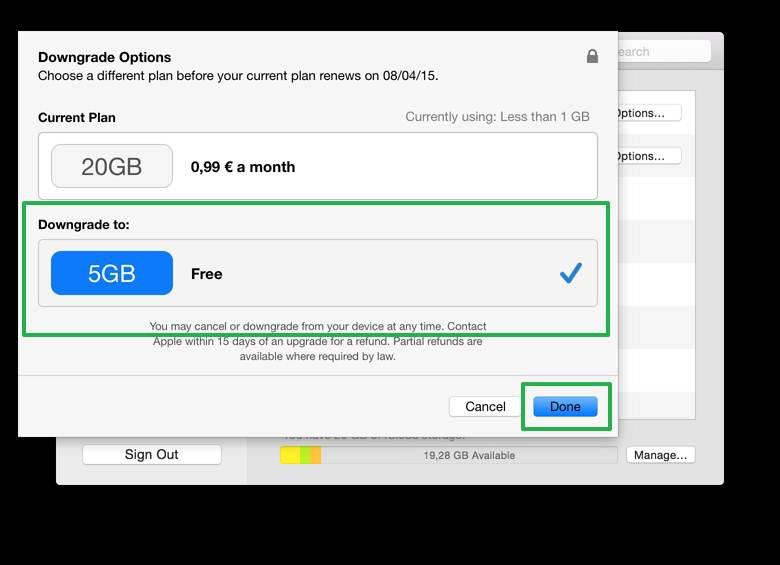
Step 5: Click Manage and select Free.
After these steps, the new storage plan of iCloud will take effect immediately when the current subscription expires. It is not hard to handle at all. You can refer to the steps shown above to help you get the work done smoothly.
Part 4: How to Cancel/Downgrade iCloud Storage Plan on Windows PC?
After you learn how to cancel iCloud storage plan or downgrade it on your iPhone and Mac computer, you may also desire to know how to make it on your Windows PC. In fact, you can resort to iCloud for Windows to assist you to finish this task perfectly. The steps here will tell you the measure clearly.
Steps:
- Download and install iCloud for Windows on your computer and then open it.
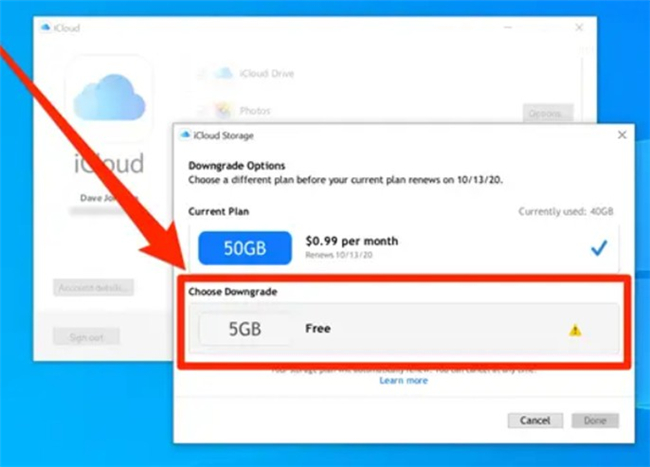
- Launch it and then hit on “Storage> Change Storage Plan> Downgrade Options”.
- It asks you to enter your Apple ID password to indentify yourself. Afterwards, click on “Manage” button to select another storage plan. You can hit on the “Free” plan to switch to use the 5GB iCloud storage plan without payment.
- In the end, you need to hit on the “Done” button to confirm your operation.
Part 5: What Happens to Your Data If You Cancel/Downgrade iCloud Subscription?
The method to downgrade iCloud storage is easy. However, this will not cancel iCloud subscription, and your iCloud account is still there for you to use freely. Do you know what will happen if you cancel iCloud subscription or downgrade it? This question confuses many iCloud users. In order to help you to get rid of this issue, this part will explain to you clearly.
- After you downgrade your iCould storage plan, you can still access to your content exceeds the storage, but new files like photos and videos will not be uploaded to iCloud Photo Library. Your devices will stop to back up data to iCloud automatically.
- If you cancel/downgrade/refuse iCloud subscription, you have 30 days to get your data from iCloud before it’s erased permanently. If in those 30 days you decide to keep the same subscription, all your stuff will remain there.
- You will not be able to send or receive emails with your iCloud email address after you downgrade your iCould storage plan or cancel iCloud subscription.
- iCloud Drive and iCloud-enabled apps won’t update across your devices.
You need to think twice before you cancel or downgrade iCloud storage plan, for this will affect your data to a great degree.
Part 6: How to Back Up and Manage iPhone Data After Canceling iCloud Storage Plan?
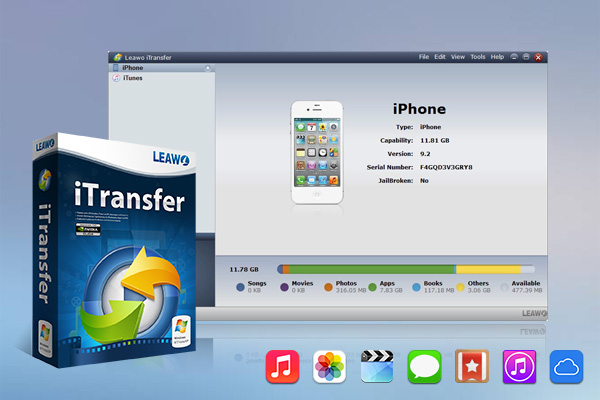
Once you cancel your iCloud storage plan, you might not have enough space to store your files, especially when you take a lot of photos. So the right thing to do is to back up your files on iPhone to computer to save storage space on iCloud. Leawo iTransfer is a practical data backup program capable of transferring data among iOS devices, computers and iTunes. With it you can easily back up specific files on your iPhone to your computer hard drive. You can also transfer your files back to iPhone from computer in case you need with the assistance of this great tool. Here's how to back up iPhone data to PC using Leawo iTransfer. Photos will be taken for instance in this part.
Step 1: Download and install Software
Go to the official website of Leawo iTransfer to download a proper version and install it on your computer for preparation.
-
Leawo iTransfer
- Transfer files among iOS devices, iTunes and PCs with ease.
- 6x faster than iTunes
- Transfer up to 14 kinds of data and files without iTunes.
- Support the latest iOS devices like iPhone 12, iPhone 12 Pro, etc.
- Play back, view, and delete data and files on iOS devices.
- Support Windows & Mac OS
Step 2: Run Software and Connect iPhone with Computer
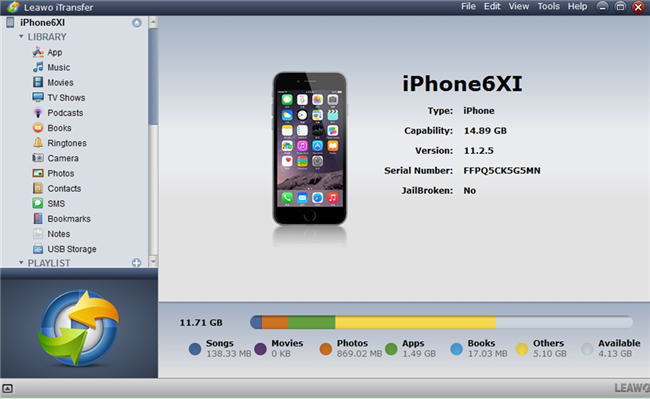
Find a proper USB cable to connect your iPhone with computer. Launch Leawo iTransfer on your computer and the tool will begin to detect your iPhone automatically. You iPhone info will be shown in the main interface clearly.
Step 3: Select iPhone Photos to Transfer
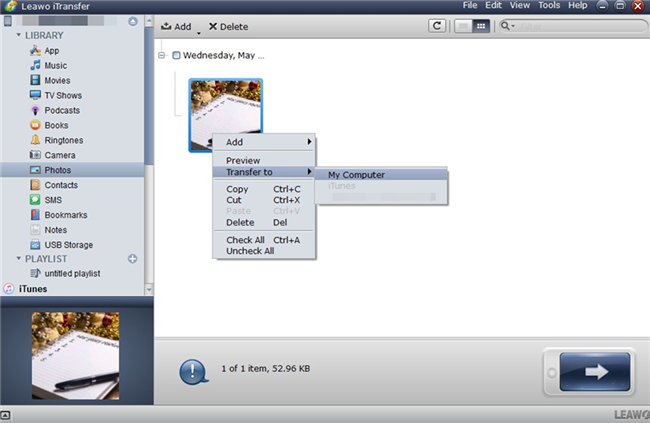
Click on your iPhone icon in the top left corner of the window and then hit on “LIBRARY > Photos” menu to check all your iPhone photos. Your iPhone images will be shown in the right part of the interface. Select the pictures you would like to transfer to your computer for back up and then hit on the transfer button at the bottom right of the screen. Afterwards, you can hit on “Transfer to >My Computer” in the panel that shows up.
Step 4: Specify Output Location and Transfer Photos to Computer
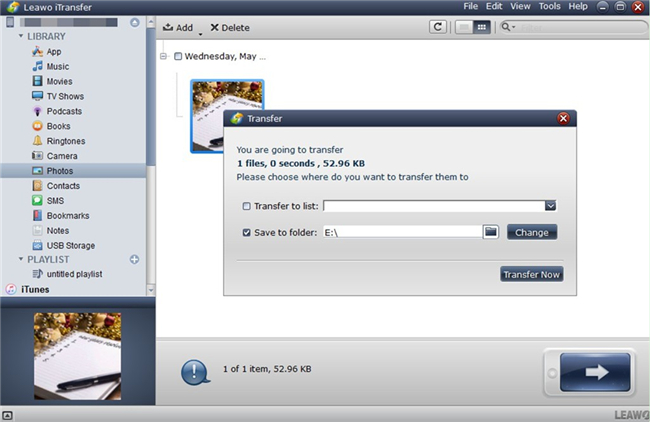
In the next panel that appears on the screen, you need to check the option of “Save to Folder” and then click on the button of “Change” to browse your computer to specify a computer location to save your exported iPhone photos. Click on the “Transfer Now” button and the program will start transferring your selected iPhone images to computer. In a jiffy, you will be able to access your iPhone photos on your computer local folder.
As you can see, the process to use Leawo iTransfer to back up iPhone photos to computer is just a piece of cake. Just with a few clicks, you can transfer iPhone files to computer quickly and accurately. If you desire to use Leawo iTransfer to back up other kinds of iPhone files to computer, you can also refer to the steps shown above. You just need to choose the right category menu to make it.

