
Since Apple HomePod went on back in February 2018, smart speakers have been widely known and adopted in the daily life. But most of people only can get to know some basic features of Apple HomePod, like “Hey, can you play a song for me”. Actually, due to the continuing improvement and innovation of iOS system, Apple HomePod can be able to be fully used in the great range. How do you know exactly what Apple HomePod can do or can’t do? Therefore, if you have purchased an Apple HomePod at home and you would like to obtain more features and functions of this device, then you have to read on some handy tips and tricks in this post.
Part 1: What is Apple HomePod?
It is not the first time for Apple to make audio devices as well as speakers, but HomePod is indeed the most popular Apple audio product after AirPods to a great extent. HomePod is a built-in Siri smart speaker launched by Apple. Users can play, pause, cut songs and other operations by touching the top of the HomePod, and can also perform Siri conversations by long-pressing. In other words, Apple HomePod has made full use of Siri which could be monitored at any time. Concerning the exterior design, HomePod uses a billowing lantern shape with a height of less than 7 inches. When Siri is in the command monitoring state inside the HomePod, it will flash a dynamic color LED ripple. For the technical design, Apple HomePod is equipped with 6 microphone arrays, 4-inch subwoofer, 7 speaker arrays at the bottom and built-in Apple A8 processor. With a very complex algorithm and internal design, it can emit the best sound at any occasion when you put it at home. Even after you move it, it can regain its algorithmic perception of the space, making it still possible which could give the best playback effect.

Part 2: 10 Useful Apple HomePod Tips and Tricks You Need to Know
But some of users may only know the speaker function of Apple HomePod, but no any further features and funny tricks within this device. For your further information, here top 10 useful Apple HomePod tips and tricks would be listed.
Tip 1. How to Set Up Apple HomePod
If this is your first time to use Apple HomePod, the first tip you should know is how to set it up. Similar to AirPods and Apple TV, before setting up, you should upgrade your iOS system to the latest version and make sure your iOS device is located while using Apple HomePod. Then you can follow the steps below to set up this speaker.

Steps:
- Turn on Apple HomePod and don’t release the button until the light glow on the top.
- Turn on your iOS device, including iPhone or iPad, and put it beside Apple HomePod. Then you can see an automatic pop-up on your iPhone, tap “Set Up”.
- Choose which room you would like to use HomePod in. Next, follow the instructions on your screen, including “Agree to transfer your iCloud account over to the speaker” and so on.
- Finally, click “Done” to complete the whole set-up process and now you can say “Hey, Siri, can you play some music”, and you can hear from HomePod immediately.
Tip 2. How to Reset Apple HomePod
Sometimes, your Apple HomePod would not act effectively, then you can reset Apple HomePod to the factory setting. It is quite easy to reset Apple HomePod by following the steps below.

Steps:
- Download Apple HomePod on your iPhone or other iOS devices.
- Open Home app and hold the HomePod tile to click “Details”, then scroll to the bottom and choose “Remove Accessory” option. Then all the previous settings have been removed successfully.
- You can also unplug Apple HomePod and wait for about five seconds, then plug it again.
- Press the On button on the top of Apple HomePod and hold until the white light turns red.
- Hold still and then you can hear Siri says that your HomePod is about to reset. After you hear three beeps that means the reset process has been completed.
Tip 3. Create Stereo Sound with HomePod Stereo Pair
For better audio effects, you can choose one more HomePod so as to creat stereo sound with HomePod pair. Before this, you have to buy another HomePod. Then you can launch the Home app on your iPhone and long-press one of your HomePods. Tap the “Settings” icon and choose “Create Stereo Pair”. Finally, choose the other HomePod to complete the stereo sound setting. If you would like to create stereo sound between two separate HomePods, then you can go back the menu and choose“Ungroup Accessories”.

Tip 4. Stream Spotify Music on Apple HomePod
Once you have got an Apple HomePod, then you can set it as your default player that can provide various solutions for all kinds of streaming platforms, including Spotify. Here, you should be clear that Spotify is not listed as the music streaming partners for Apple HomePod. Then can Apple HomePod play Spotify music smoothly? How to stream Spotify music on Apple HomePod? Now you can follow the steps below to stream Spotify music on Apple HomePod.

Tip 5. Update Apple HomePod to iOS 14
To obtain more functions and features, you have to upgrade your Apple HomePod to 14 or above when necessary. With this latest version, you can experience more features related to Apple Maps, stop timers and alarms and so on.

Steps:
- Open Home app on your iPhone and tap the House icon on the screen.
- Click Home “Settings” and scroll down and you can find “Software Update”.
- Tap it to start updating Apple HomePod to iOS 14.1 or above. Before that, you need to choose “Agree on the Terms and Conditions page”.
Tip 6. Change Siri’s voice on your HomePod
If you are tired of hearing the robotic British accent, you can try to change Siri’s voice on your HomePod. You are allowed to choose American accents from the local, including male and female voices. It is quite easy to choose. Go to Home app on your iPhone and long press HomePod’s tile, then you can get the options to change personal assistant’s language. Choose you preferred one and also choose to mute Apple digital assistant.

Tip 7. How to Set Up Apple HomePod
One of the most attractive features on HomePod is the “For You” recommendation. HomePod would recommend some similar songs or other audio files to you based on your listening history.

Steps:
- Open Home app on your iPhone.
- Tap HomePod speaker in “Favorite Accessories” and then long press on HomePod icon..
- Click on “Details” to scroll down to “Music & Podcasts” where you can find “Use Listening History”. Toggle this option to enable the listening history function.
Tip 8. Adding to your Reminders or Lists
Asides from the basic audio playing function, Apple HomePod could be used as an excellent reminder, where you can add to your reminders or lists. What you need to do is tell Siri the exact things you have complete, or the items you would like to buy. Then HomePod would keep them down and remind you at the given time. In such a way, you can regard HomePod as the alternative of Evernote.

Tip 9. Use HomePod to control HomeKit devices
If you are an Apple enthusiast, you may have been indulged in HomeKit devices asides from HomePod. While, HomePod can be easily used to control HomeKit devices. It is the same steps to control HomeKit devices via HomePod just like your iPhone acts. Just call Siri to complete the tasks. For example, “Hey Siri, can you turn off the light” and so on. All the devices that have been set up with your iPhone would also work in the same way on your HomePod.

Tip 10. Send and read messages through HomePod
This is quite convenient when you are not ready to light on your iPhone screen, for example with greasy fingers. You can ask your HomePod by saying “Hey Siri, can you send a message to Maggie?”, then your assistant would carry out this task immediately. What’s more, HomePod would also read the messages for you. But this function is not enabled by default. You need to enable this function by switching “Personal Requests” on. Open Home app on your iPhone and go to “Settings” for the home in which the HomePod lives. Choose the icon under “People” and tap “Personal Requests” on the screen. Then, it would read messages once you got new ones.

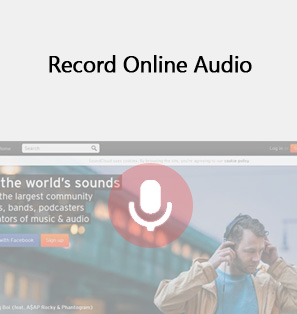
Part 3: How to Download Music Free for Apple HomePod with Leawo Music Recorder?
Just as mentioned above, HomePod would easily stream all kinds of online music platforms with ease and accuracy. Sometimes, for example, Spotify would require users to be registered with membership for permanent use, therefore if you would like to keep the music files forever, the best way is to download the music files to the local. Here, in order to obtain the downloads, you can refer to Leawo Music Recorder for help which allows you to record sounds in high sound quality. What's more, professional online audio recorder can also edit music tags like artist, album, album artwork, song name, and son on to recordings. . The following will take the best professional online audio recorder - Leawo Music Recorder as an example to show how to record music from YouTube with professional online audio recorder.
Step 1. Download Leawo Music Recorder
Choose the version that meets you system, then download and install Leawo Music Recorder on your computer.

-
Leawo Music Recorder
- Record any sound from computer stream audio and built-in input audio.
- Record music from 1000+ music sites like YouTube, Facebook, Veoh, VEVO, etc.
- Schedule music recording via the internal recording task scheduler.
- Automatically/manually add and complete music tags like artist, album, cover, genre, etc.
- Save recorded musicfiles into either WAV or MP3 format for wide uses.
Step 2. Set recording internal audio from computer
Click the "Audio Source" icon on the main interface to set audio source firstly. To record music files, select "Record Computer Audio" option.

Step 3. Start to record online music
Click the red "Start" button to let this Music Recorder work. And then play the target music files that you want to record. It should be born in mind that you should first let this music recording software start recording and then play your source audio on other media players, like Spotify.

Step 4. Edit music tags after recording
In "Media > Library" tab, you can see all your recordings. Select a recording and right click, then choose "Edit Music Tags" to manually edit music tags.

Follow the steps above, you can easily record your preferred music files for permanent use in the future. Furthermore, besides downloading the music files from streaming devices to your iPhone, you can also transfer downloaded music from computer to iPhone for further use which can also be streamed on your HomePod.
 Jan. 04, 2021 by


 Prof. Media
 Blu-ray Ripper
 Blu-ray Copy
 iOS Data Recovery
 [12/29/23] MAX Downloader V15.0.0
 10,000,000 people are using Leawo!
 All Transactions are protected!
 30-Day Money Back Guarantee!