
As an important part to make movie audiences understand the movie content in a clearer way, subtitles should be paid more attention. Not only for the movies released in the cinema, but also the subtitles can be quite necessary in our daily life. For example, you have captured a short conference video and now you would like to share it on a social platform, then adding subtitles for the video is also an urgent job you have to focus.
How to add subtitles for your videos? Windows Movie Maker can be a helpful hand in adding subtitles. In today’s article, you are going to learn more about how to add subtitles with Windows Movie Maker.
Part 1: About Windows Movie Maker
What is Windows Movie Maker? What are the main steps to add subtitles with Windows Movie Maker? Actually, Windows Movie Maker is a video production tool that allows users to create, edit, and share their own home movies on their PCs. Windows Movie Maker can be used with the latest versions of Windows 7, Windows 8, and Windows 10. Its classic version is available for Windows XP and Windows Vista.
Windows Movie Maker includes features such as adding video effects, cutting scenes, adding subtitles and notes, adding music and dubbing, timeline adjustments, and automatic video production. New effects and animations can be added at any time, and existing ones can be modified at will, via XML encoding. Windows Movie Maker is also audio editing software with all the basic features. Windows Movie Maker can add various effects to the audio, such as fade-in, fade-out, and more. You can export audio files directly, or you can export video files and customize them to your needs.
The main features and functions of Windows Movie Maker include:
1. Windows system comes with video production tools and the process is quite easy to learn;
2. It is an excellent tool to make family movies full of fun;
3. With this movie maker, you can create, edit and share your own home movies on your personal computer;
4. With simple drag and drop operations as well as careful picture capturing, and then add some effects, music and narration, the family movie has begun to take shape;
5. You can share your movies with friends and family through the Web, email, PC or CD, or even DVD; you can also save your movie to a videotape and play it on your TV or on your camcorder.

Part 2: How to Add Subtitles in Windows Movie Maker
Since Windows Movie Maker is so easy to handle, what are the details to add subtitles in Windows Movie Maker? For your details, the detailed steps will be shown below. Just refer to the following steps and add subtitles for your video accordingly.
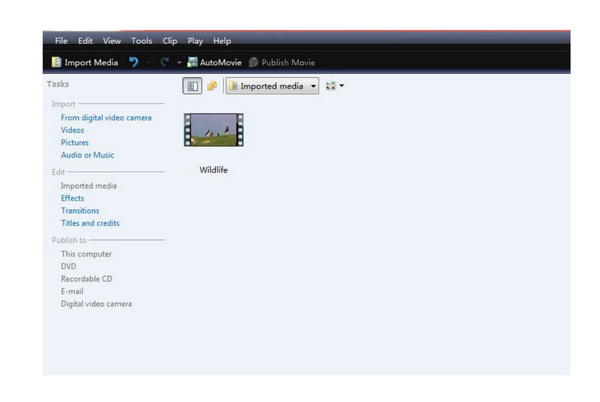
Step 1. Load the video. First of all, you need to open Windows Movie Maker, once entered the main interface, you need to import the video you would like to add subtitles to this program. On the main panel, click the “Import Media” option on the top to load the video to Windows Movie Maker.
Step 2. Set the timeline. Timeline is an important factor for adding subtitles. If you have further requirement in the subtitle’s timing and position, you have to set Timeline. Click on the "View" tab on the menu bar and confirm the timeline option. Then you can be able to see the Timeline view.
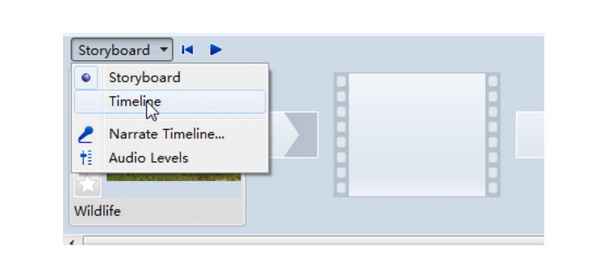
Step 3. Import the video to the timeline. Once you have entered the Timeline viewing panel, then you need to load the video to the timeline for accurate setting. You can find three timelines at the Windows Movie Maker which represent from the top to the bottom “Labeled Video”, “Audio” and “Title Overlay”. Then set the related parameters respectively.
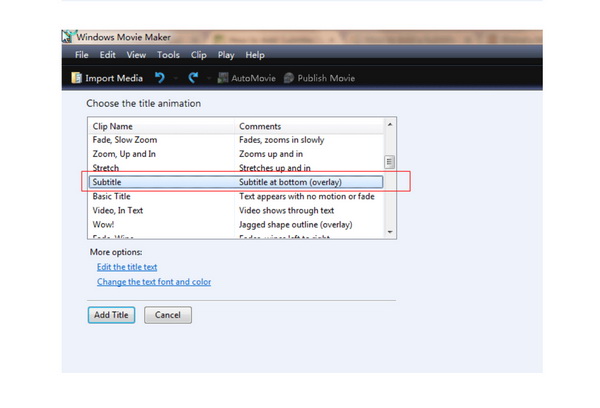
Step 4. Add subtitle to the selected video. When you have imported the video to the timeline, then you can click “Title on the selected clip” to enter the text and load the subtitles to the video. By the way, you are also allowed to set the subtitle font, color and size as well.
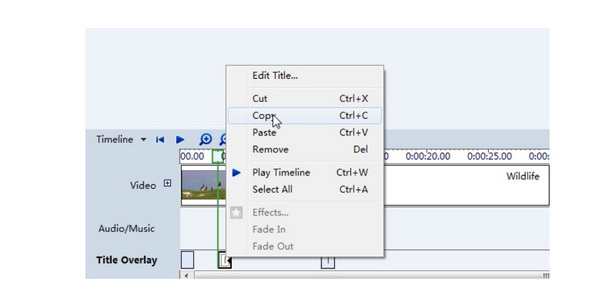
Step 5. Start adding subtitle to the video. After you have finished all the settings and adjustments, dimply click the “Add Title” button on the “Title Overlay timeline”. Repeat the steps above and insert all the subtitles.
Part 3: How to Add Subtitles in Leawo Video Converter
Additionally, if you prefer the more advanced features and functions of subtitles adding, here I will strongly recommend you to take a try on another powerful professional program – Leawo Video Converter. With Leawo Video Converter, you can easily convert videos and audios in more than 180 types of formats with 6X higher speed with 100% quality retained, including common video and audio formats and even HD video and 4K video formats. It also supports iPhone, iPad and other portable devices video and audio conversion. Furthermore, it is capable of converting photos into slideshows with excellent quality.
At first glance, you must regard it as a piece of video converter. Actually, it is really a comprehensive video converter which is capable of converting among all kinds of videos, including MP4, MPEG, MOV, FLV, WMV and so on. Asides from the basic video converting functions and features, Leawo Video Converter is also here to edit the videos based on your own needs, such as trimming videos, adding 3D effects, removing noise and so on. Of course, with Leawo Video Converter, you can easily upload the subtitles to the video.
For the details, please refer to the following steps.
Step 1. Download Leawo Video Converter and install it on your computer.
![]()
![]()
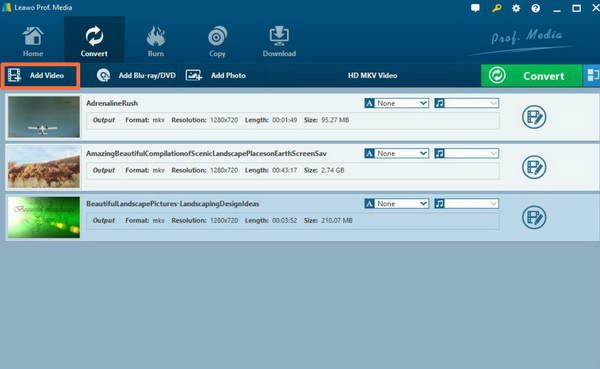
Step 2. Load the video you would like to insert subtitle. Open Leawo Video Converter, and you can click on the “Add Video” icon to import the file to the main panel, or you can just drag the video directly to the main menu.
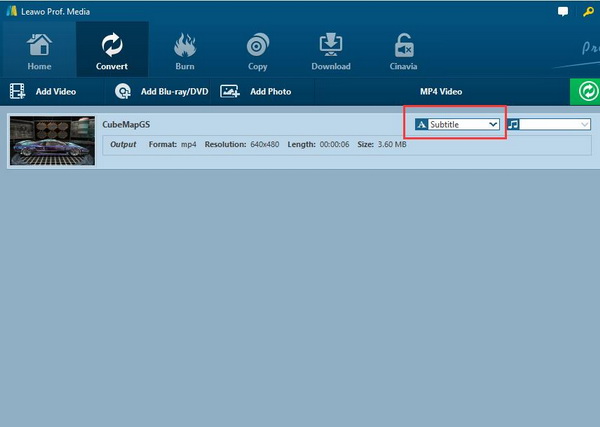
Step 3. Upload the subtitle to the program. Before uploading, you have to make sure you have already downloaded the subtitles for the movie video from the Internet. Usually, you can download the SRT format for the movie. Once you have obtained the subtitle, then on the list of the importing video, you can find a drop-down icon where you can select “Subtitle” from. When you have chosen the subtitle from your local computer, then the subtitle will be added immediately to the video.
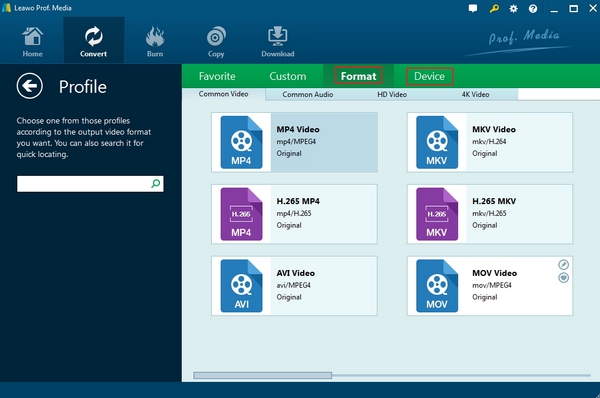
Step 4. Select the output format. Beside the green icon “Convert” icon, you can choose “Change” option to enter the “Profile” panel where you can set the output video format. This is based on your own requirements.
Step 5. Set the Video parameters. Furthermore, if you have further needs on the output video effects, then you can set the Video parameters accordingly. You can just open the drop-down box to click “Edit” instead of “Change” in the main menu. It includes “Video Codec”, “Bite Rates”, “Resolution”, “Frame Rate” and “Aspect Ratio”.

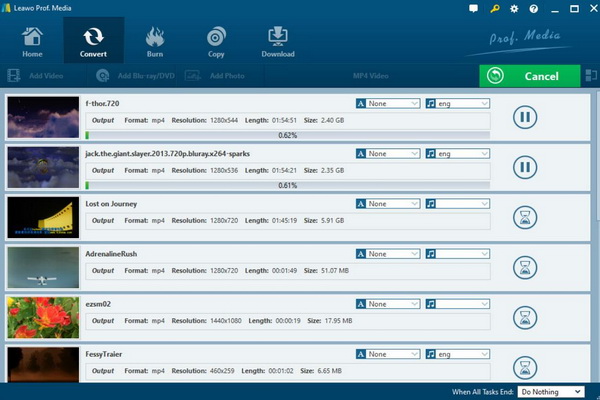
Step 6. Start converting and adding subtitles. Once all the settings have been done, then you only need to click the big green icon “Convert” on the main interface to start converting the video. When it has been completed, the subtitles have been added successfully to the video.
Part 4: How to Temporarily Add Subtitle during Playback
In some special cases, for some specific reason, you may have the need to hide the subtitles during the playback, for example, you are a language learner and you prefer to practice your listening skills without references to the subtitles. What would you do under the circumstances? Actually, there is a simple way for you. But the premise is that you must have downloaded the subtitles for your video ahead of time. Then what you need is a piece of media player software that can be able to add and hide subtitles as you like. Well, here you have to mention about Leawo Blu-ray Player.
As a 100% free and 6-in-1 media player software, Leawo Blu-ray Player contains all media playback solutions you need for your leisure entertainment, including 4K, Blu-ray, DVD, CD, HD (4K), MPEG, WMV and so on. With advanced image and audio processing technology, Leawo Blu-ray Player provides you extraordinary movie playback and cinema-like experience. Furthermore, within Leawo Blu-ray Player, you could obtain the personalized settings according to your preference and all the settings could be done automatically. Besides, its bonus features related to the subtitles are quite reachable.
For the details, you can refer to the steps below.
Step 1. Download Leawo Blu-ray Player and install it on your computer.
![]()
![]()
Step 2. Load the video you prefer to play to the program. Simply, you only need to click the “Open File” button on the main interface of the media player to import the video. Once it has been imported, then the video can be played automatically then.
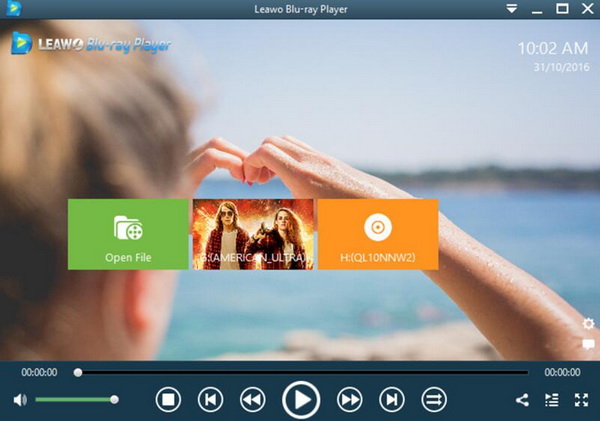
Step 3. Set subtitles. After loading the movie video, during the playback, you can move mouse to the title area where you could see 4 icons. Then select the first icon and a pop-up window for subtitles setting will appear which includes “Enable subtitles”, “Subtitle offset”, “Subtitle selecting”, “Browse for subtitle”. If you would like to show the subtitle, you simply need to click on the “Enable subtitle” option, vice versa.

Words in the end
How to add subtitles in Windows Movie Maker? Referring to the above article, you must be clearer on this problem. Just follow the steps above, and you can make full use of Windows Movie Maker, or you can depend on a professional video editor which has the capability of adding subtitles as well.
 Oct. 12, 2019 by


 Prof. Media
 Blu-ray Ripper
 Blu-ray Copy
 iOS Data Recovery
 [12/29/23] MAX Downloader V15.0.0
 10,000,000 people are using Leawo!
 All Transactions are protected!
 30-Day Money Back Guarantee!