iPhone is an outstanding device to take photos, the excellent hardware and intelligent software enable it to be enough in taking stunning photos. But iPhone also has its limitations, if you can go around these limitations to snap pictures in a smart way, you will take better photos than before. Therefore, it is a must to master some simple tips to snap photos that you never ever thought before. Keep on reading and you will find 10 iPhone photography tutorials of how to take perfect photos and how to share it to different sites to enrich your life.
Part 1: 10 brilliant iPhone photography tips that you should know
1. Get the lenses cleaned to make photos taken clear
If your iPhone had kept in your hands or your purse or your pocket for a long time, it will result in getting the dirt and dust as well as fingerprints covered in the lenses of camera. A dirty lens will make some smudges or blurs left on the photos that you took, and the photos look terrible. Therefore, the first tip of taking perfect photos is to clean the lenses of your iPhone to make the photos clear. What you should do is to wipe your iPhone’s lens gently by using a soft cloth. If you want to snap photos on the beach or under the condition of dust, you should blow to the iPhone’s lens to get the sand and dust removed, but it will get the lens scratched. It is an easy thing to clean the lenses of your iPhone, however, users always forget this step. So, developing a good habit of cleaning the iPhone’s lenses is a must for each user, which will make the photos that you have taken different from the previous ones.
2. Focus setting makes sure that you have a sharp subject
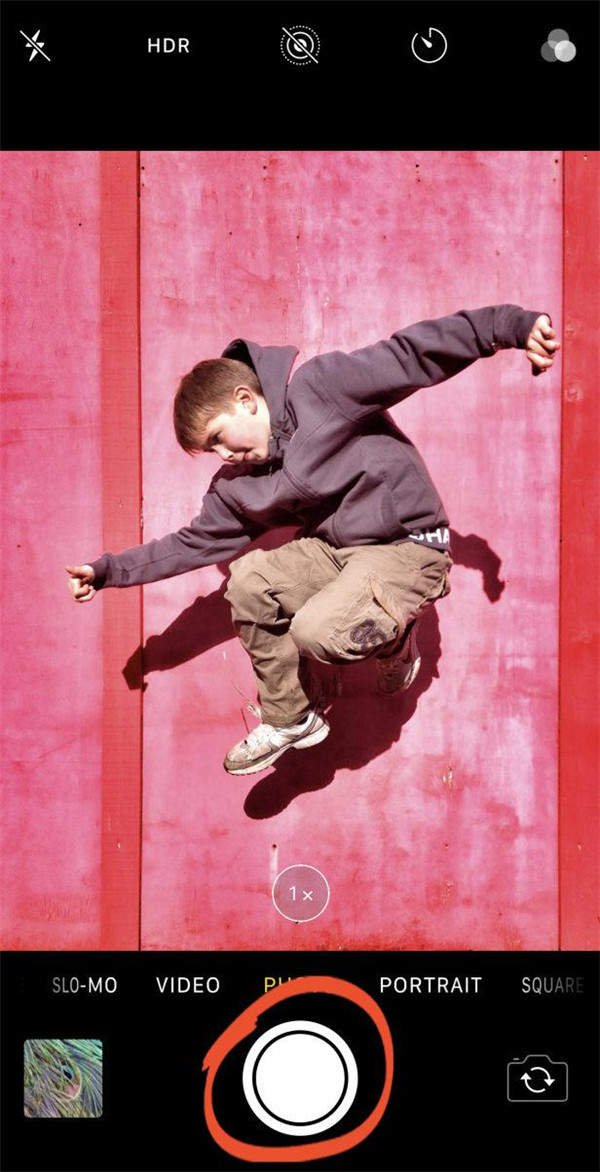
Though your iPhone’s lens is not dirty completely, your subject still cannot look sharp. Why? Because the autofocus of the camera does not focus on the place that you want to shoot. To make sure that your subject can be in sharp focus, you must make a focus point set in a manual way. How to set the camera focus of the iPhone? You just need to make your shot compose, then hit on the iPhone screen in which you need to have focus set. Afterwards, the appearance of a yellow box will direct the focus point of your subject. Now, you just need to hit on the shutter button, then a perfect photo can be taken.
3. To make perfect brightness level by adjusting exposure
Do your find that your photos always become bright or dark? How to ensure the level of brightness to be in perfect condition? You just need to simply make an adjustment to the brightness prior to taking a photo. When you hit on the subject to have focus set, then adjust the brightness by swiping up or swiping down. Once you adjust the brightness to a correct level, you will have a perfect color for your photos.
4. Shoot evenly-photos by using HDR
When you are taking photos, your iPhone camera is hard to capture the details in dark areas or bright areas. Usually, your photos will end up with two results: the bright area will be shown correctly, but the dark area will be under-exposed. Luckily, an evenly-lit photo can be created by a feature called HDR in iPhone camera. You just need to go to the Settings app and choose Camera to enable the option Smart HDR, then the photos can be shot with a perfect brightness.
5. Use Portrait Mode to get a gorgeous blurred background
Portrait Mode is widely used in the internal Camera app of iPhone. How to use this mode? You can choose Portrait mode at the bottom of your screen. To get your shot composed, ensure that your subject is in a correct distance, such as between 2 and 8 feet away. When Natural Light can be seen in yellow words, you should be ready to shoot your photos. Hit on the shutter button and then you can take a beautiful photo with a blurred background.
6. Use Burst mode to capture action photos
Burst mode in iPhone camera can help you to shoot wonderful action photos. How to use this mode? For iPhone 11, you can make the shutter button slide to the left side, then the photo can be taken in quick succession till your finger has been released. For iPhone XS or the older version, you can get the burst mode activated by holding down the shutter button. Then you can capture at least one picture of your subject with the perfect pose from the burst of photos that you took.
7. Ensure to take sharp and shake-free photos by keeping camera steady
Camera-shake easily caused the photos to become blurry especially in dark condition. If you want to shoot a perfect photo under low light, you can keep your iPhone on the steady surface or hold your phone with a tight grip or make your body steady by leaning against the wall or tree. Also you can make your arms steady by positioning your elbows or crouch down to keep your phone on your knees. You have to keep your phone as steady as you can when under low light.
8. Zoom in or zoom out by switching camera lenses
A closer view can be captured by zooming in. And the wider view can be captured by zooming out. Zoom icons are located on the bottom of the viewing tool. 0.5x stands for the Ultra-Wide lens. 1x stands for Wide lens. 2x stands for Telephoto lens. Different shooting result can be gained relying on the lens you have chosen.
9. Compose perfect photos by setting apart the photo like the rule of thirds
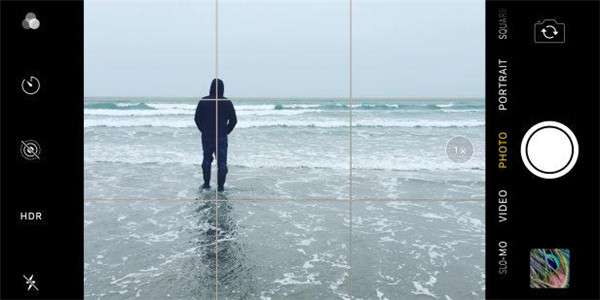
A useful tool called camera grid of iPhone camera can help you to use the rule of thirds. Launch Settings app on your iPhone’s home screen to turn on gridlines. Then scroll down to choose Camera. Make sure that the Grid option has been enabled. After that, run Camera app and make the subject position on which two gridlines cross with each other.
10. Use the leading lines to create the in incredible depth for your images
A leading line can make the foreground lead to the scene’s background. It can be a wall, a road a bridge or anything else which can attract your attention to the image. Therefore, search a leading line when you are shooing, which can create depth in your photos.
Part 2: How to share your photos to different platform
Facebook is a good platform to share your photos as most of your friends can see them freely. Below are the steps to share the photos with your friends on Facebook.
1. Add your photos via the share box from the home page of Facebook.
2. Click the button Upload Photos.
3. Choose the photos that you want to share by clicking on Open or Choose button.
4. Hit on the Share box, then type into any word you want to express.
Instagram is one of the most powerful social media platforms in the purpose of marketing.
1. Launch Instagram app on your iPhone.
2. Choose Blue Square from the bottom.
3. Tape photos by clicking on the shutter button on the bottom.
4. Choose desired effects.
5. Type into caption.
6. Tag friends.
7. Post photos by clicking on Share button on the upper right corner.
Twitter is a great platform to present your photo.
1. Run Twitter app on your iPhone and then click on the icon button “new tweet”.
2. Get your thought shared.
3. Click on camera icon button and then choose the option “Take a Photo” or “Choose from Library”.
4. After you have finished editing, click on the button “Tweet” to share your photos.
Part 3: How to back up these great photos safely and efficiently
Once you have mastered the photography lighting tips of shooting photos, you will have many amazing photos kept in your iPhone for memory. But have you thought that if your iPhone gets broken or lost one day, all these memorable photos will be lost or damaged as well? Therefore, to back up your iPhone is the most effective way to retrieve the lost photos. Here we will recommend you an excellent third-party tool Leawo iTransfer to back up the photos in a simple way.
Leawo iTransfer is a powerful iPhone, iPod, and iPad transfer tool. Up to 12 kinds of files which include photos, apps, videos, and others are supported for transfer. In addition, Leawo iTransfer is also a great program to backup iPod to iTunes library to prevent against data loss. Below we will show you the full tutorials of how to back up your great photos safely and efficiently with Leawo iTransfer.
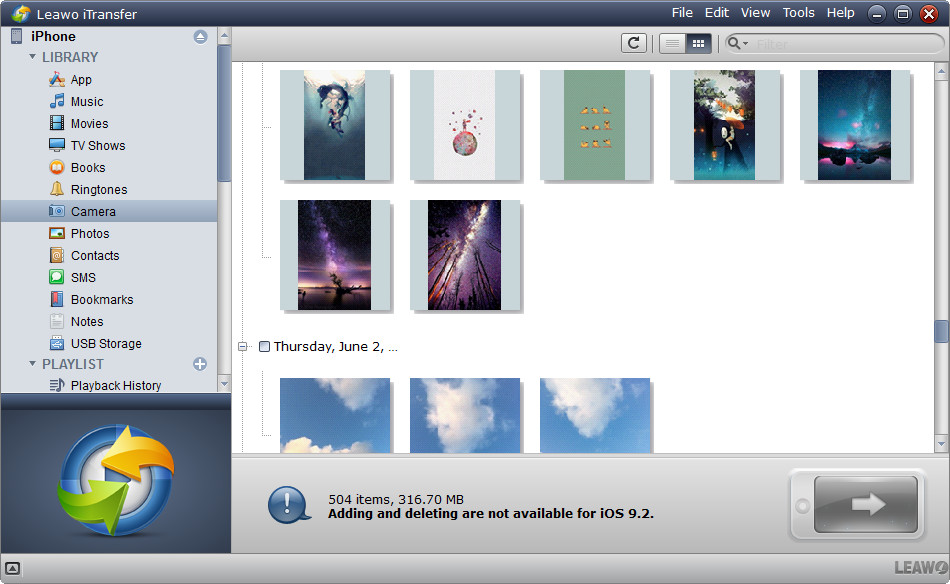
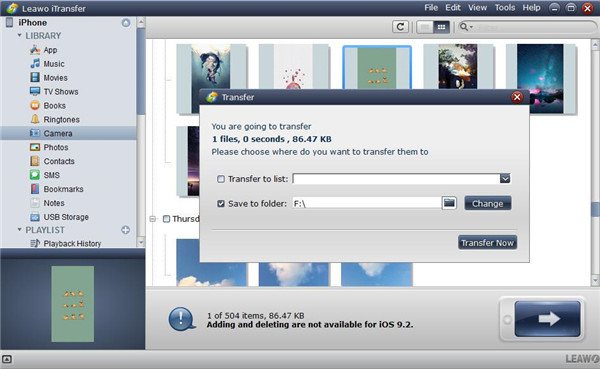
1. Complete the downloading and installation of Leawo iTransfer on your computer. Then run this program and connect your iPhone to computer via USB cable. Afterwards, the program will recognize and detect your iPhone automatically. Then your iPhone library will be listed in the left sidebar of the iTransfer window.
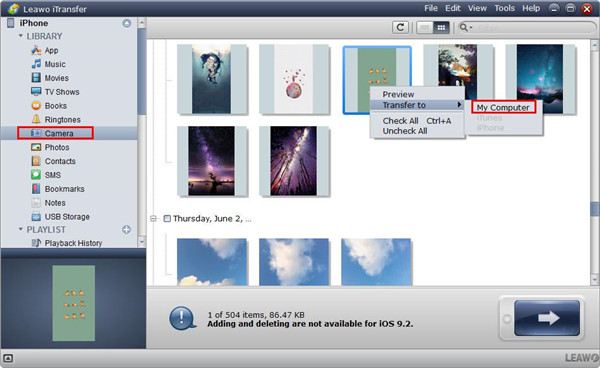
2. Hit on “Photos” from the left column and then all the iPhone photos will be shown on the right part. Select the photos that you would like to back up from your iPhone. After that, hit on the button “Transfer” at the right bottom corner. Also, you can choose some photos to back up by holding Ctrl/Shift and then right-click the photos that you have selected. Finally, choose “Transfer to >My Computer”..
3. After selecting the photos for backing up, a prompt will show up to require you to choose a location for saving the backed up photos. Check the square beside “Save to folder” and then hit on the “Change” button to set an output folder to save the photos you want to backup. At last, press on the button “Transfer Now” to begin backing up your photos to computer.

