On iOS 11, you can find a lot of new features and improvements over the old iOS versions. And the Files app is one that worth your attention because it could be a very practical tool if you make full use of it. The iOS 11 Files app is like the Finder app on Mac OS X which allows you to manage all the files and data on your iOS device. And the files you can manage is not limited to those on your device. With this brand new iOS 11 file manager, you are able to manage all the files on your iDevice, on iCloud and other third-party storage services that supports the Files app like Dropbox. Now with this files app iOS 11 users can work seamlessly between different iDevices. And to make things better, you can use a lot of multitasking features and gestures in the app.
Check out the content below to see how to use this new iOS 11 files app on your iPad and iPhone. The interface of the Files app varies from device to device, so most of the time I'll be using the Files app in landscape mode on iPad as the example.
How to Use The iOS 11 Files App
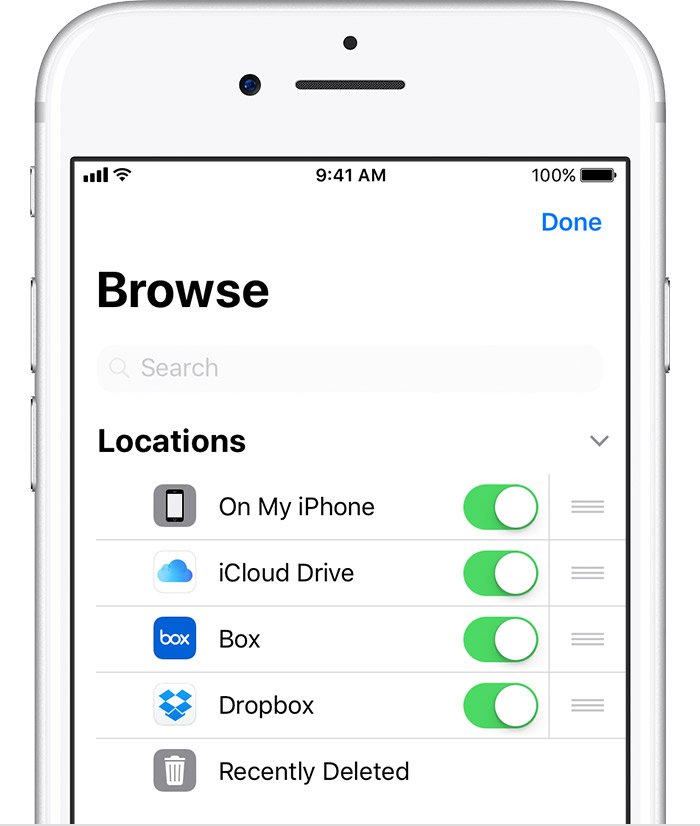
This files app iOS 11 has is something a lot of Apple users have been waiting for. Now with this iOS 11 file manager, you can easily get your files on your iDevice organized. On iPad, thanks to the bigger display, you can use a lot of gestures to help you do a lot of different things and perform different tasks. And you are not limited to accessing the files on your device or iCloud Drive but files on other third-party cloud services as long as the cloud service app supports Files integration. You can find a lot of popular cloud services to be on the support list:Dropbox, OneDrive, Google Drive, Box and more. Below are instructions on how to add third-party apps to the iOS 11 Files app.
1. Add third-party cloud app to the iOS 11 Files app
1. Download the cloud app you want from the App Store on your device.
2. On your iPhone, open the Files app and press Locations > Edit. You should see the option of the cloud app you just install. Slide to activate it in the Files app. On your iPad, directly open the Files app and you should see the cloud app under the Locations list.
If you can't find the cloud app in the Files app, that probably means it doesn’t support Files integration yet.
2. Use Drag and Drop to move files on iPad
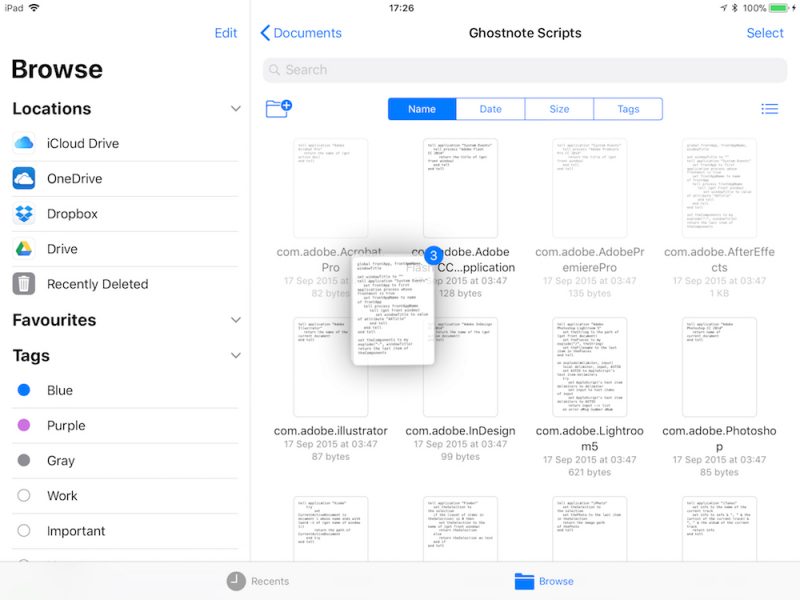
If you want to move multiple files in the Files app on iPad, you can use the Drag and Drop gestures to help you get it done.
1. Tap and hold the file you want to move, if you want to move more than one file, tap and hold one of them first. The file thumbnail would get a little bigger, meaning that it's ready for Dragging and Dropping.
2. To move more files, keep holding the first files you select and then use another finger to tap and choose other files, and they will stack up automatically.
3. Keep holding the files under your finger and use another finger to open the folder that you want to put the files in.
4. After opening the destination folder, just release the files by lifting your finger from the screen and you've successfully dropped the files in it.
3. Manually organize your files on iPad
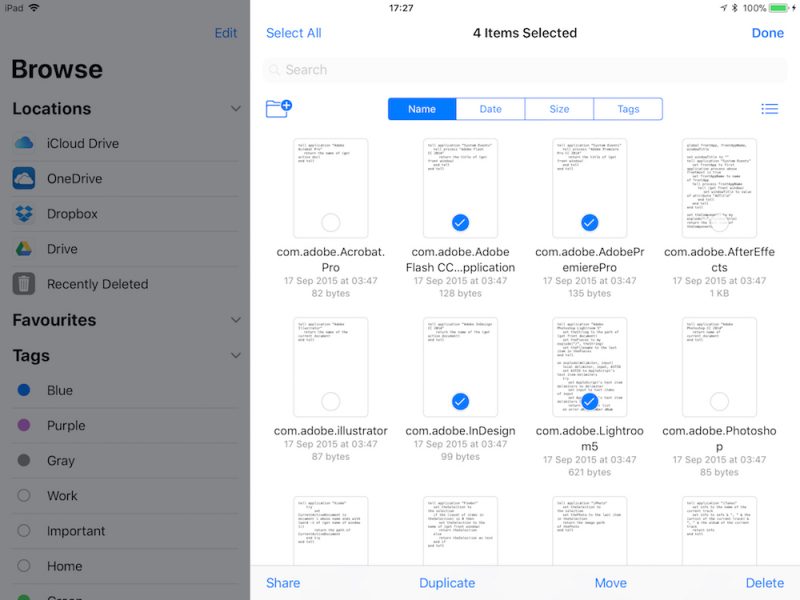
- 1. Open the folder that you want to organize, tap on the Select button in the top right corner of the file list.
- 2. Select all the files you want to organize on the file list, and 4 options would appear at the bottom of the file list: Share, Duplicate, Move and Delete.
- 3. Press Share to see more sharing options. Or tap on Move to move the files to another location.
4. Tag Documents on iPad
Putting tags on different documents can help you sort and find needed files more quickly. If you've been tagging files on Mac OS for years, then you should be no stranger to tagging on iPad. Here's how:
1. On your iPhone, tap on the Select button and select the files you want to tag. And then tap on the first button from the left on the bottom of the screen and then tap the Add Tag button. Choose the tag you want to add.
2. On your iPad, tap the Select button, select the files you want to add and then directly drag them to one of the tags on the tags list in the sidebar.
How to Recover Mistakenly Deleted Files from iPhone and iPad
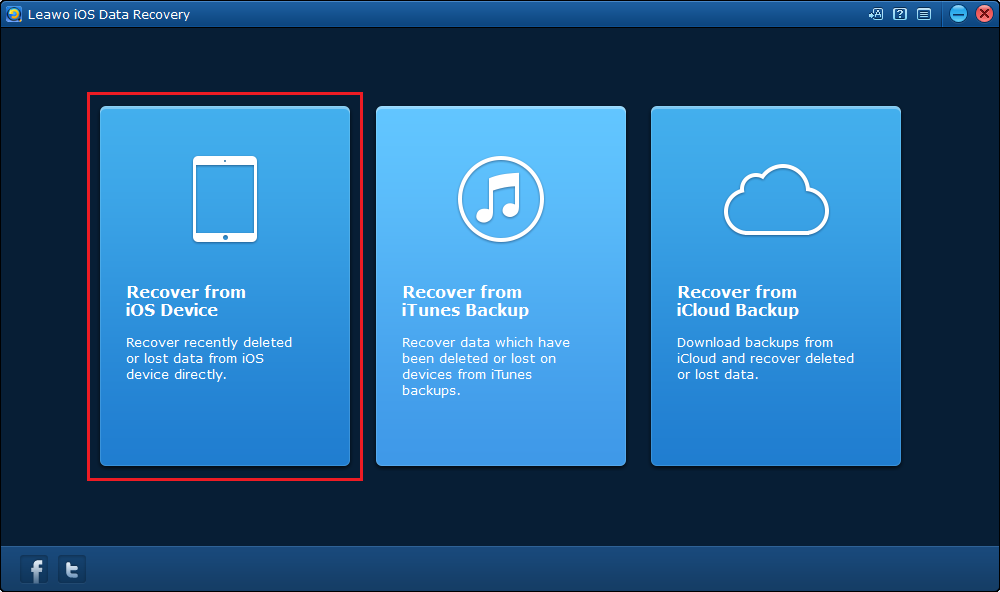
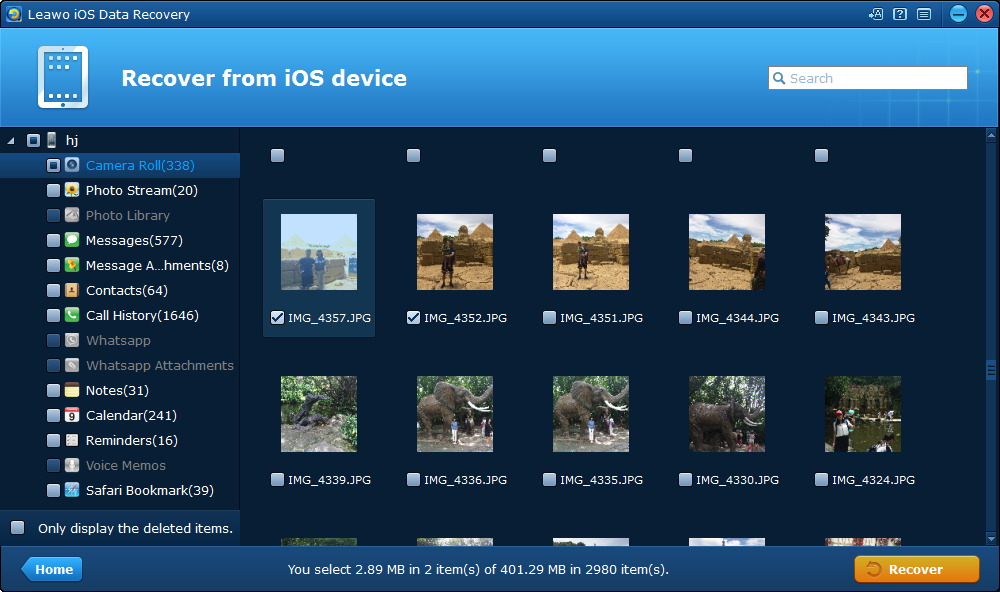
Getting a file deleted by mistake seems inevitable on smartphones, especially on devices that involve a lot of dragging and dropping. If you happen to have one important file like a photo deleted from your iPhone or iPad, try using a third-party data recovery program to recover it. Check out Leawo iOS Data Recovery, it’s a good choice for recovering lost or deleted files on iOS devices. It supports recovering 14 different types of files directly from iOS devices: Messages, Contacts, Call History, WhatsApp, Notes, Calendar, Reminders, Safari bookmark, Camera roll, Photo stream, Photo library, Message attachments, Voice memos, WhatsApp attachments. Here’s how to use it to recover deleted photos from iPad and iPhone.
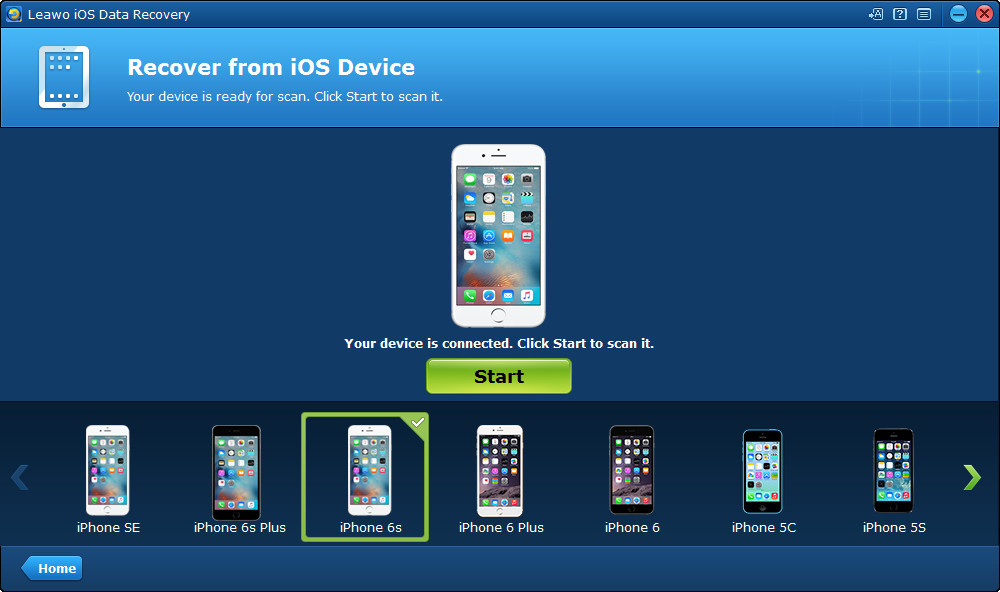
Step 1. Open this program on your computer. There will be 3 options provided to you on the main interface. Click on Recover from iOS Device.
Step 2. Use a USB(lightning) cable to connect your iPhone to your PC. And then you should see the Start button below the image of your device, click on it to activate the scanning process.
Step 3. After it finishes scanning your iPhone/iPad, check out your files on the interface. Enable Only display the deleted items option in the bottom of the left sidebar so that you can find your deleted files more easily. Select the file you want to recover and then click Recover.
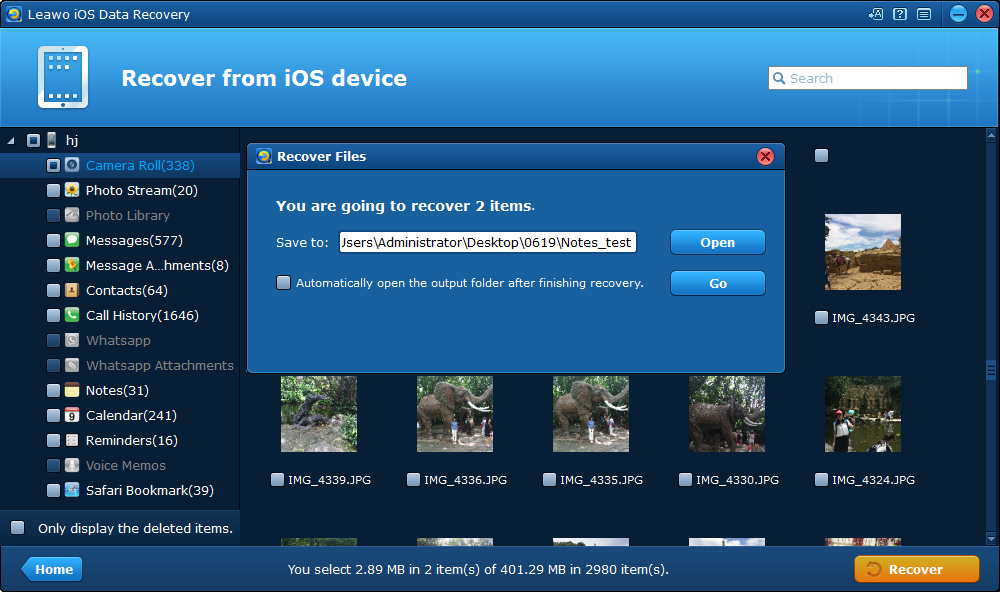
Step 4. On the following window, set the directory for the files you are recovering. Click on the Open button to select a folder to store your files. And then click Go button to start the file recovery.
If you are interested, here are several other iOS 11 tips:Record screen on iOS 11, turn off auto brightness on iOS 11, iOS 11 control center tips.

