
“Turn off HandBrake auto-cropping? I started recording in .flv a long time ago to make my recordings more crash-immune. But this also means I have to convert every video with HandBrake afterwards. When you load a video into HandBrake, it populates a bunch of default settings. The most annoying of which is if it perceives borders of a video to be black bars, it will crop them out. I only catch this and change it back to the full 1280x720 about half the time it does it. I'm sick of waiting 30 minutes for a video converter, just to have to go back, change a couple of numbers and wait through it all over again! Does anyone know how to turn off HandBrake auto-cropping?”
As an open-source, multi-platform and multi-functional video encoder, HandBrake has gained worldwide popularity in DVD ripping and video encoding. It has multiple options, video cropping included. By default, the crop feature in HandBrake is enabled. That means it will automatically detect black bars and enable cropping automatically when ripping DVD, converting video, etc. This helps remove black margins to shorten encoding time, reduce output file size, and offer a better visual experience.
However, not all people prefer this auto-cropping feature. Some may prefer manual cropping in professional editing software tools, while some others might want to keep the original videos. Therefore, the problem “how to disable HandBrake automatic cropping” has been asked quite frequently. In this guide, we would like to introduce you to detailed solutions to turn off HandBrake auto-cropping and alternatives to help you set HandBrake cropping manually.
Part 1: How to Turn Off HandBrake Auto-cropping?
Sometimes HandBrake crops too much. Sometimes we don't need crop videos. Therefore, let’s firstly make a clear answer to the question “how to turn off HandBrake auto-cropping”. To stop automatically cropping videos within HandBrake, you need to manually disable the HandBrake automatic cropping feature. To do this, you need to:
- Launch HandBrake and go to "Dimensions" tab.
- Navigate to "Cropping" option.
- Then choose "Custom" option.
- On the newly popup window, set the four crop values (Top, Bottom, Left, and Right) to "0". Then nothing needs to be changed. Simply leave "Anamorphic" on "Loose" and "Modulus" on "2". Now, you have successfully disabled HandBrake auto-cropping feature. HandBrake will no long automatically crop videos during DVD ripping and video converting. You could then freely convert DVD and videos within HandBrake with original file retained for editing in other editing tools like Windows Movie Maker, PhotoShop, etc.
Part 2: How to Crop DVD Manually When Using HandBrake?
By disabling automatic cropping within HandBrake, you could crop DVD and video manually within HandBrake before you start the conversion. It is quite simple to do manual DVD cropping with HandBrake.

Just follow the below steps to learn how to crop DVD video black margins manually within HandBrake:
- Download and install HandBrake on your computer.
- Click the “Source” button to browse and load source DVD movie into HandBrake. And then choose desired title and chapter.
- In the “Destination” box, set an output directory to save cropped output file.
- Under the “Output Settings” box, firstly choose an output format in the “Container” box.
- Then, under the “Picture” tab, go to select "Custom" under "Cropping" section.
- Set values for Top, Bottom, Left, Right respectively based on your own needs.
7. Hit "Preview" in the top toolbar to check if the output looks good. If there's something wrong, just change the values to make some adjustments.
8. Click "Start" button to start encoding DVD to video with cropped size.
Then, you only need to wait for the encoding to complete. It should be noted that if you are going to encode commercial DVD movies, you have to install DVD decrypting tools like libdvdcss, which helps decrypt disc protection and remove region restriction. Therefore, we would like to recommend you some alternatives in cropping DVD movies to HandBrake. Please check below.
Part 3: Crop DVD with Avidemux
Avidemux a free alternative in DVD cropping to HandBrake we would like to recommend to you. As a free video editor designed for simple cutting, filtering and encoding tasks, Avidemux supports many file types, including AVI, DVD compatible MPEG files, MP4 and ASF, using a variety of codecs. Tasks can be automated using projects, job queue and powerful scripting capabilities. Avidemux is available for Linux, BSD, Mac OS X and Microsoft Windows under the GNU GPL license. The program was written from scratch by Mean, but code from other people and projects has been used as well. Patches, translations and even bug reports are always welcome.
The below steps would show you how to crop DVD with Avidemux in detail. You could freely crop DVD video with it for totally free.
- Download and install Avidemux on your computer. Launch it and get your source DVD movies ready for cropping.
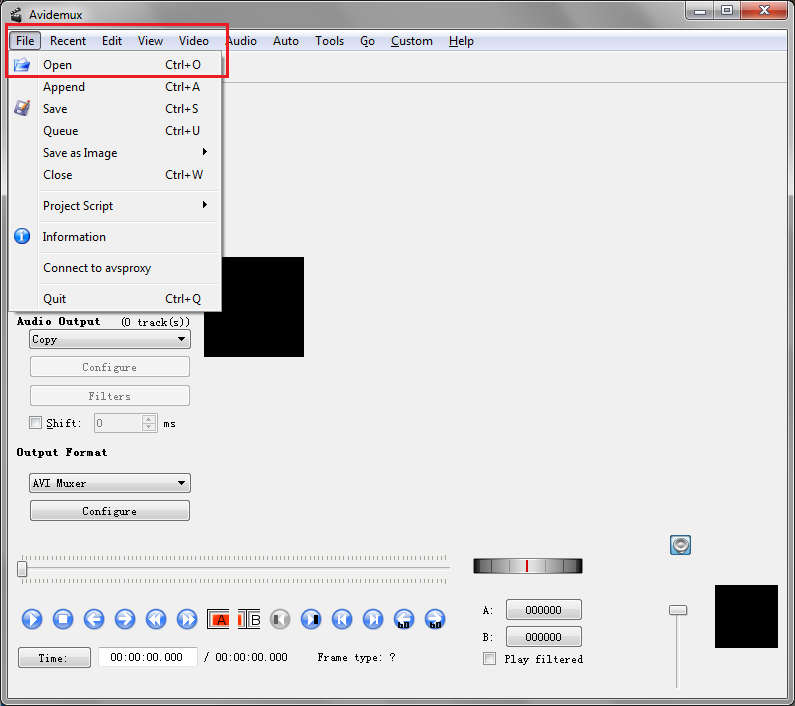
- Click “File > Open” or directly drag the MPEG video from your DVD folder to the interface to import the DVD video you want to crop to the program.
- The video editing features are called Filters in Avidemux. In order to apply filters on your video you will have to first choose a video codec for the video before getting to the cropping process. You will see an option box under the Video Output label. Click on the box and select a video codec from the drop-down menu.
- Click “Video > Filters” from the menu bar at the top. On the following Video Filter Manger window, double-click Crop to open the Crop window.
- The four boxes on the top are used to decide how many pixels to crop from what direction. Directly enter a value in the box and preview the changes in the preview window below. When you are done cropping the video, click OK and close the Video Filter Manager window.
- Changes can’t be seen on the preview window on the main interface. Click “File > Save” option from the menu bar at the top to save the video to your hard drive.
Then, you only need to wait for the settings to be applied. It should be noted that Avidemux can’t convert DVD movies to other video files like MP4, AVI, MOV, MKV, etc. It still keeps the cropped DVD files in .mpeg format. What’s more, obviously Avidemux can’t process commercial DVD movies.
Part 4: Best HandBrake Alternative to Rip and Crop DVD Easily - Leawo DVD Ripper
How about a HandBrake alternative that could crop DVD movies, handle commercial DVD content and convert DVD movies to regular videos? Leawo DVD Ripper is what you need. As a professional DVD ripping software tool, Leawo DVD Ripper helps you decrypt, rip and convert DVD movies to video and audio files in over 180+ formats for various devices, like DVD movie to MP4 video, DVD to AVI, DVD to MKV, DVD to MOV, DVD to MP3, etc. What’s more, Leawo DVD Ripper enables people to edit DVD movies before converting, including trimming video, cropping video size, adding watermark, adjusting effect, etc. You could even apply 3D movie effect within the built-in editor.
Firstly, you need to download and install Leawo DVD Ripper on your computer. Meanwhile, get source DVD movies ready for converting and cropping.
Note
- Note: Leawo DVD Ripper is a module built into Leawo Prof. Media.

-
Leawo DVD Ripper
☉ Convert DVD to video/audio files like MKV, MP4, AVI, FLV, RMVB, etc
☉ Convert DVD to iPad, iPhone, Android devices
☉ Edit DVD video files with built-in video editor
☉ Add 3D effect with built-in 3D movie creator
☉ Selectable subtitles and audio tracks from source DVD movies for output videos
Step 1: Add source DVD movie
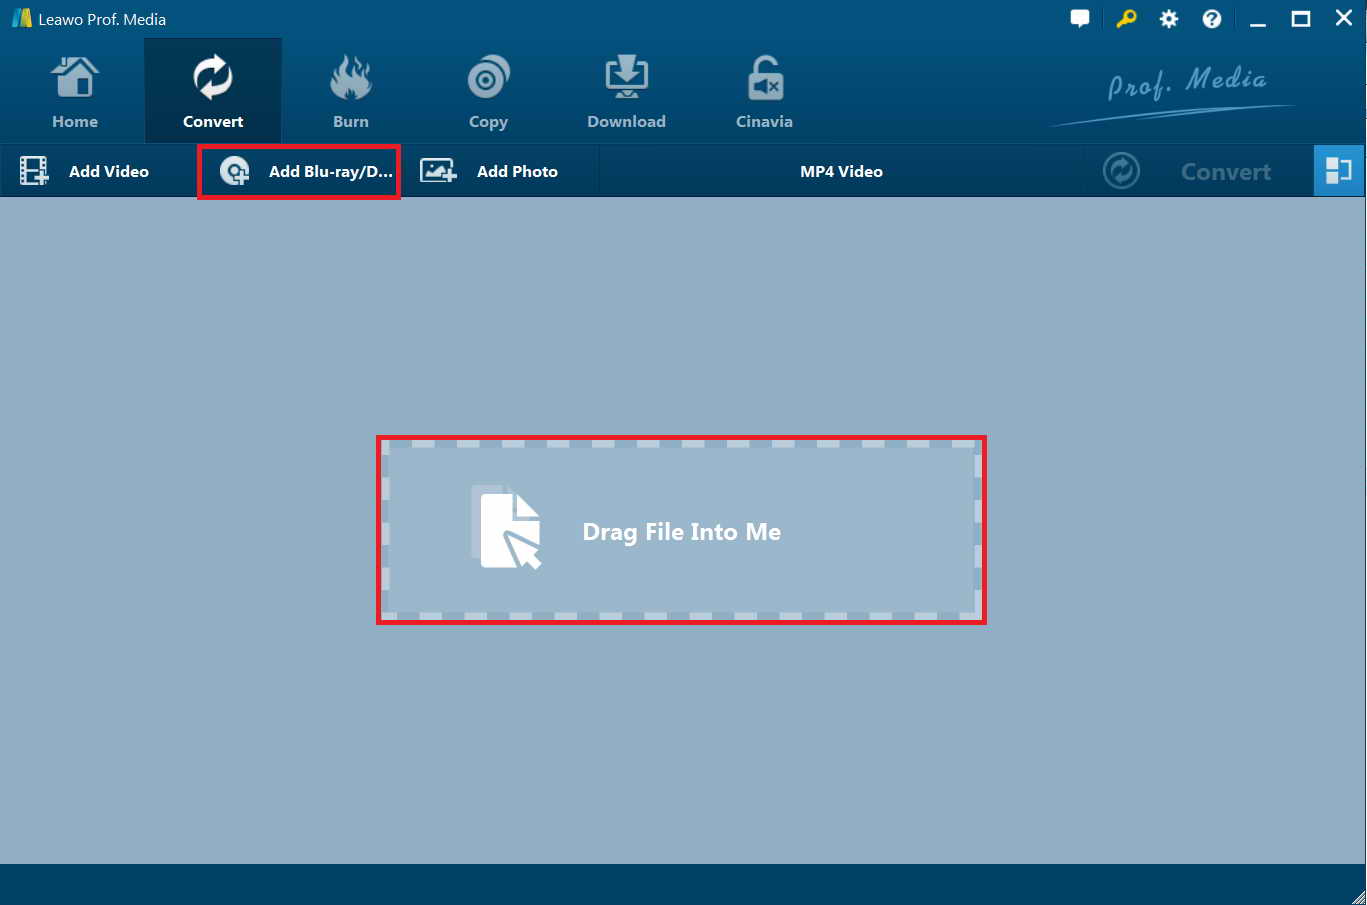
Launch Leawo Prof. Media and then open the “Convert” module (or click the “Blu-ray/DVD Ripper” option on the Home interface) to enter the “Convert” module. Then, click “Add Blu-ray/DVD” button to add either disc from disc drive or DVD movie from folder. You could also click the “Add iso file” to add DVD ISO image file.
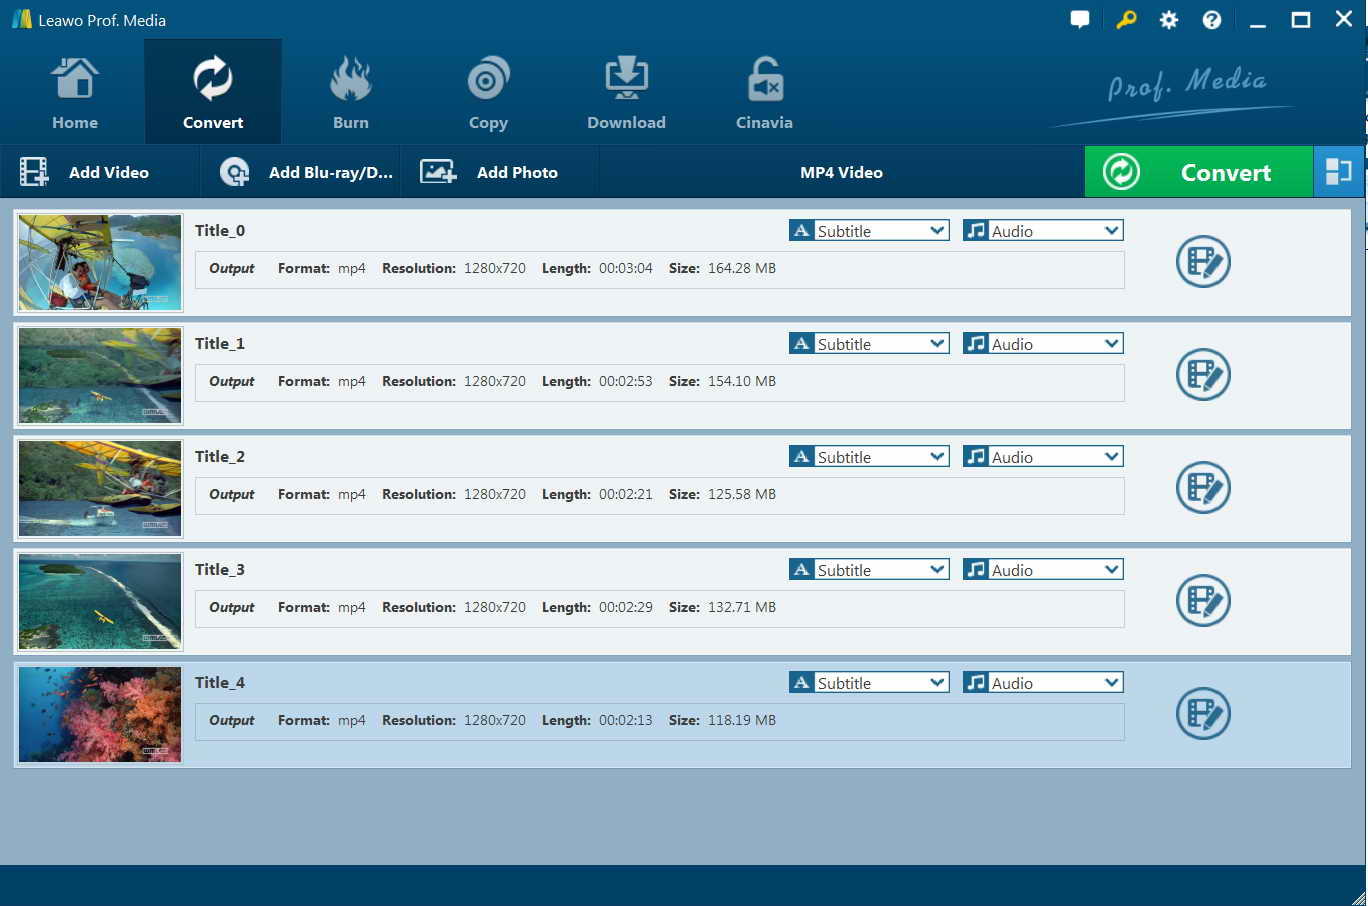
Step 2: Choose output format
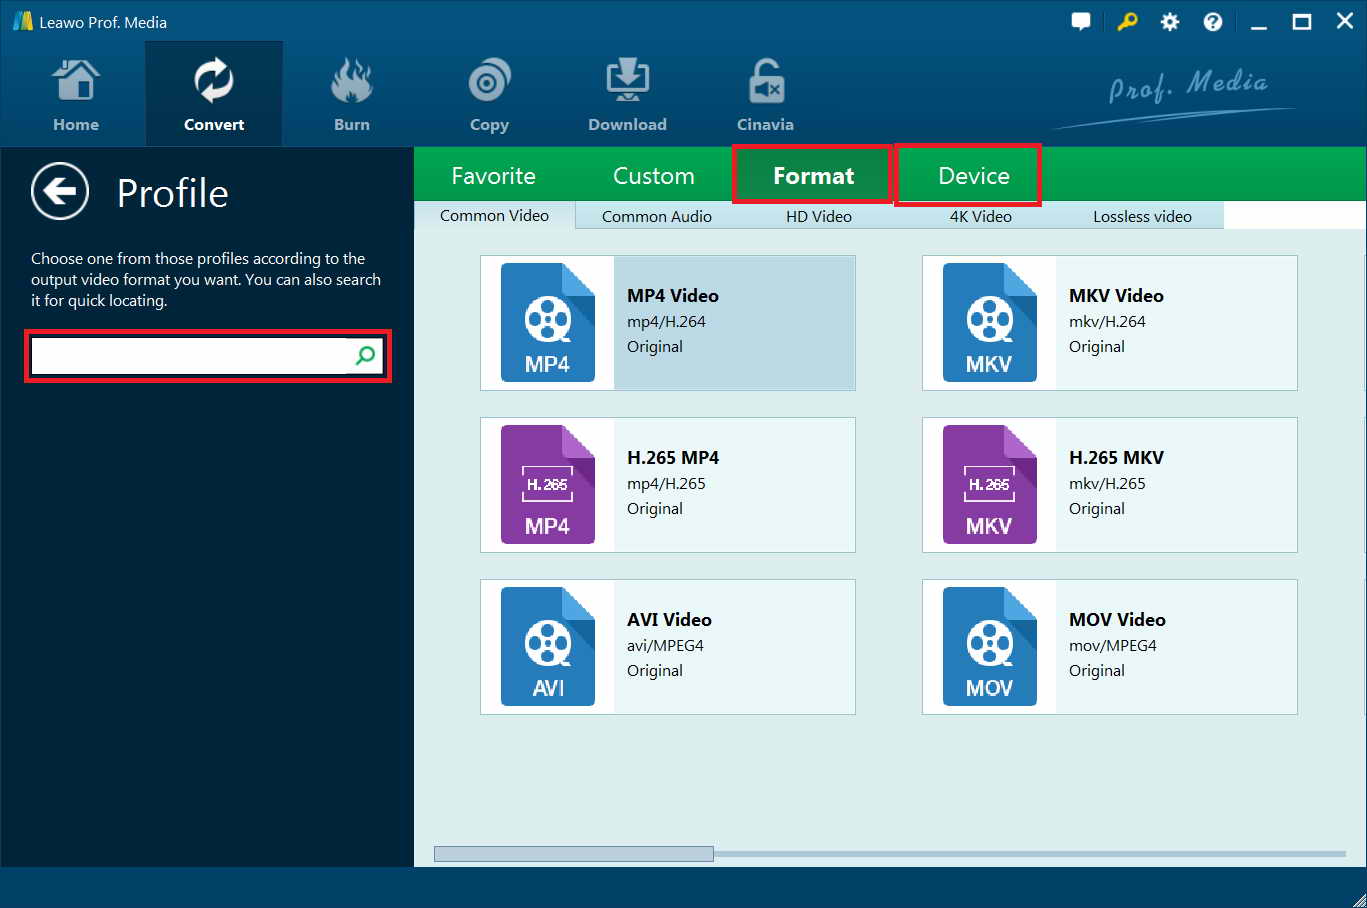
Click the drop-down box (named “MP4 Video” by default) right before the big green “Convert” button on the sub-menu bar, and choose “Change” to choose output format from the “Format > Common Video” group according to your own needs.
Note: 3 different DVD content loading modes are available. Full Movie mode enables you to load all content in source DVD for converting, while Main Movie mode enables you to select one title for loading and converting. In Custom Mode, you will be able to select multiple titles for loading and converting. Just choose the mode and then determine which titles to load here.
Step 3: Adjust detailed settings
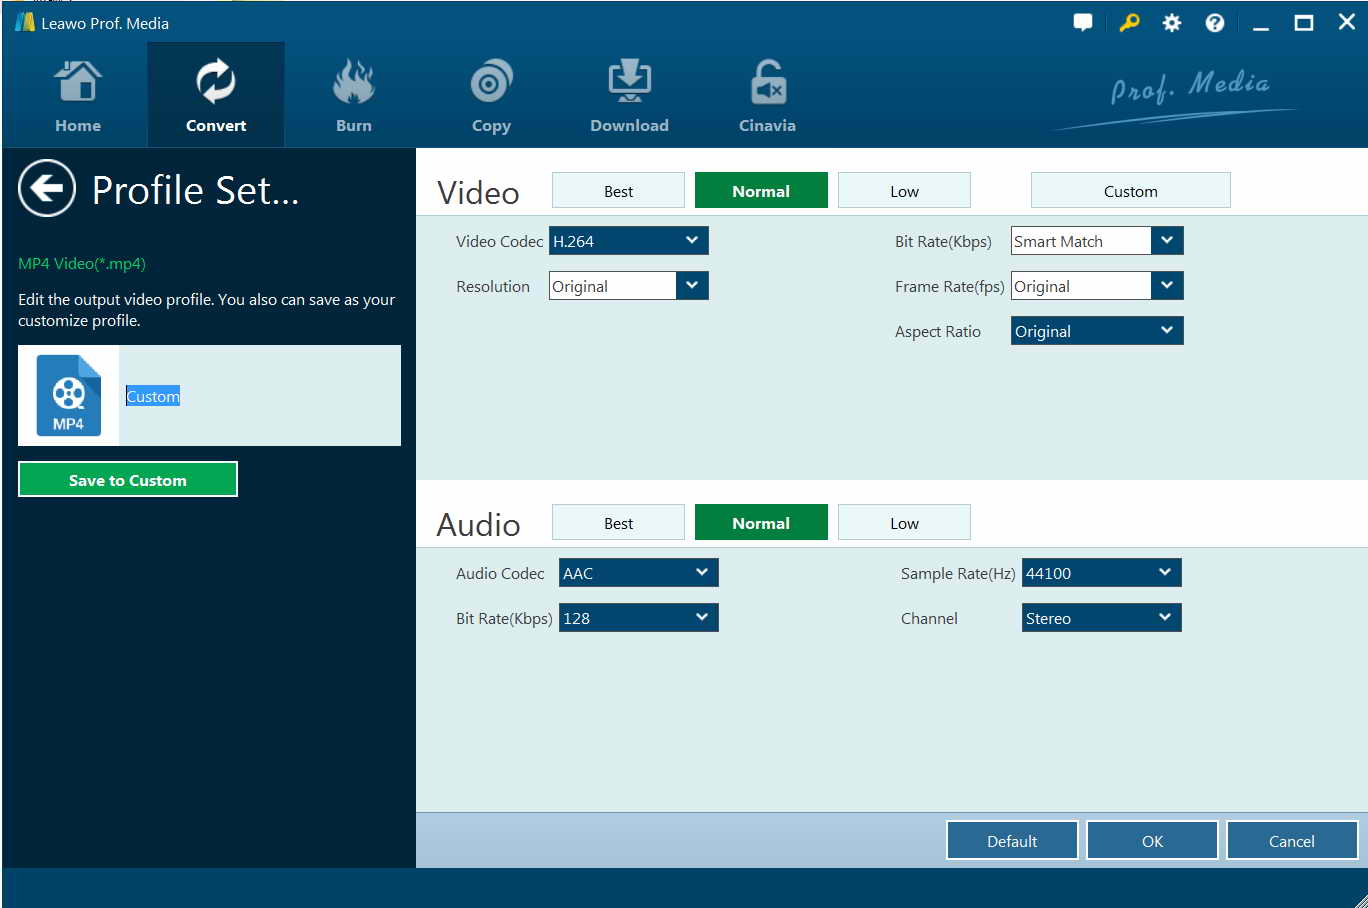
After setting output format, open the drop-down button right before the big green “Convert” again and then choose “Edit” option to enter the “Profile Settings” panel, where you could adjust video and audio parameters of output format, including: video codec, quality, bit rate, frame rate, aspect ratio, channel, audio codec, resolution, etc.
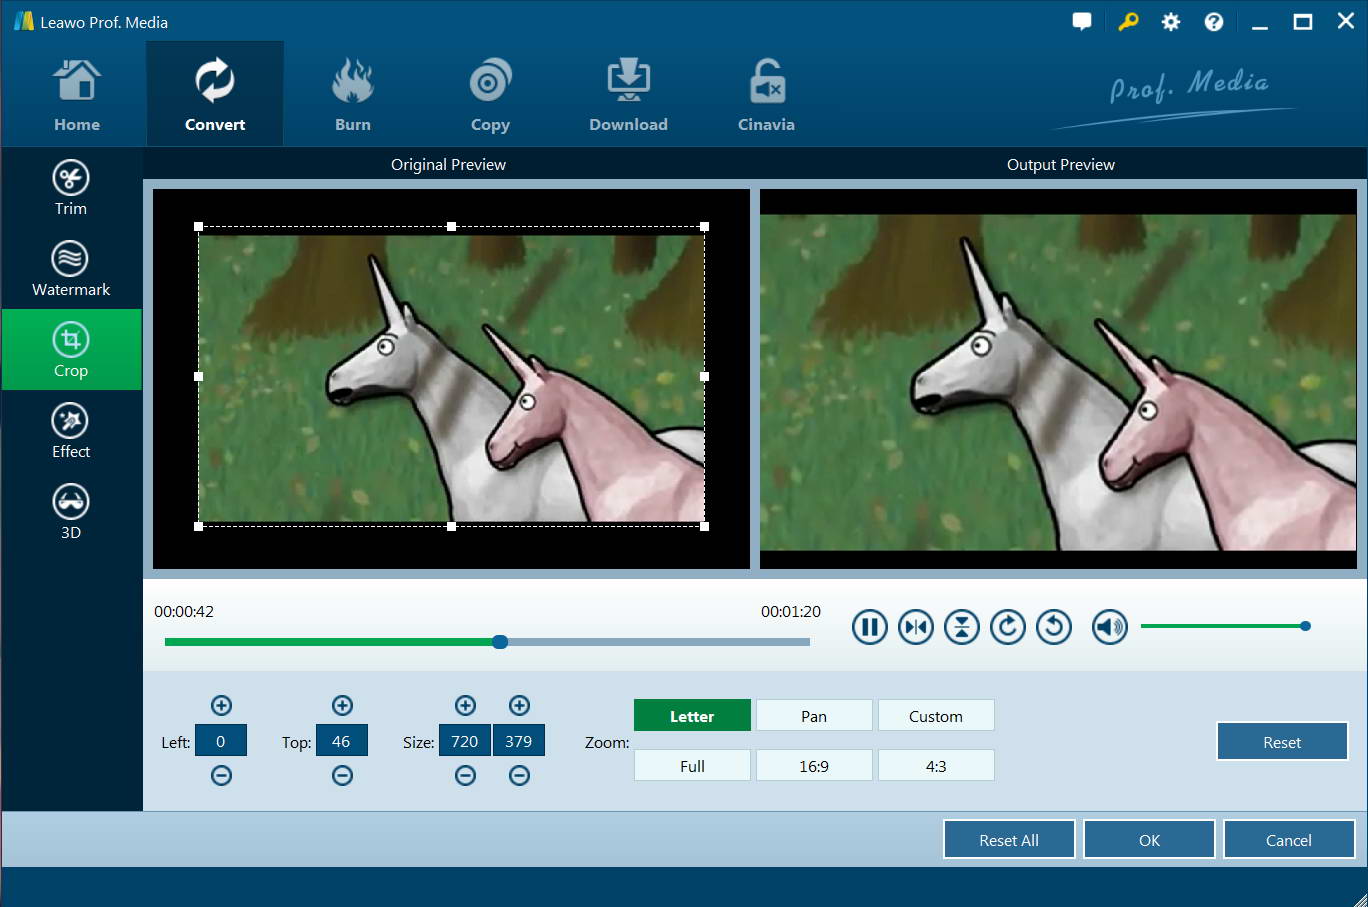
Step 4: Crop DVD movies
In each loaded DVD title, right click it and then choose “Edit” option to enter the editing panel. Then, open the “Crop” tab to adjust the values of Left, Top and Size. You could even directly choose a Zoom mode to let the program automatically crop DVD video.
Actually, as mentioned above, Leawo DVD Ripper offers other editing features like trimming, adding watermark, adding 3D effect, etc. You could see the details on how to edit DVD with Leawo DVD Ripper.
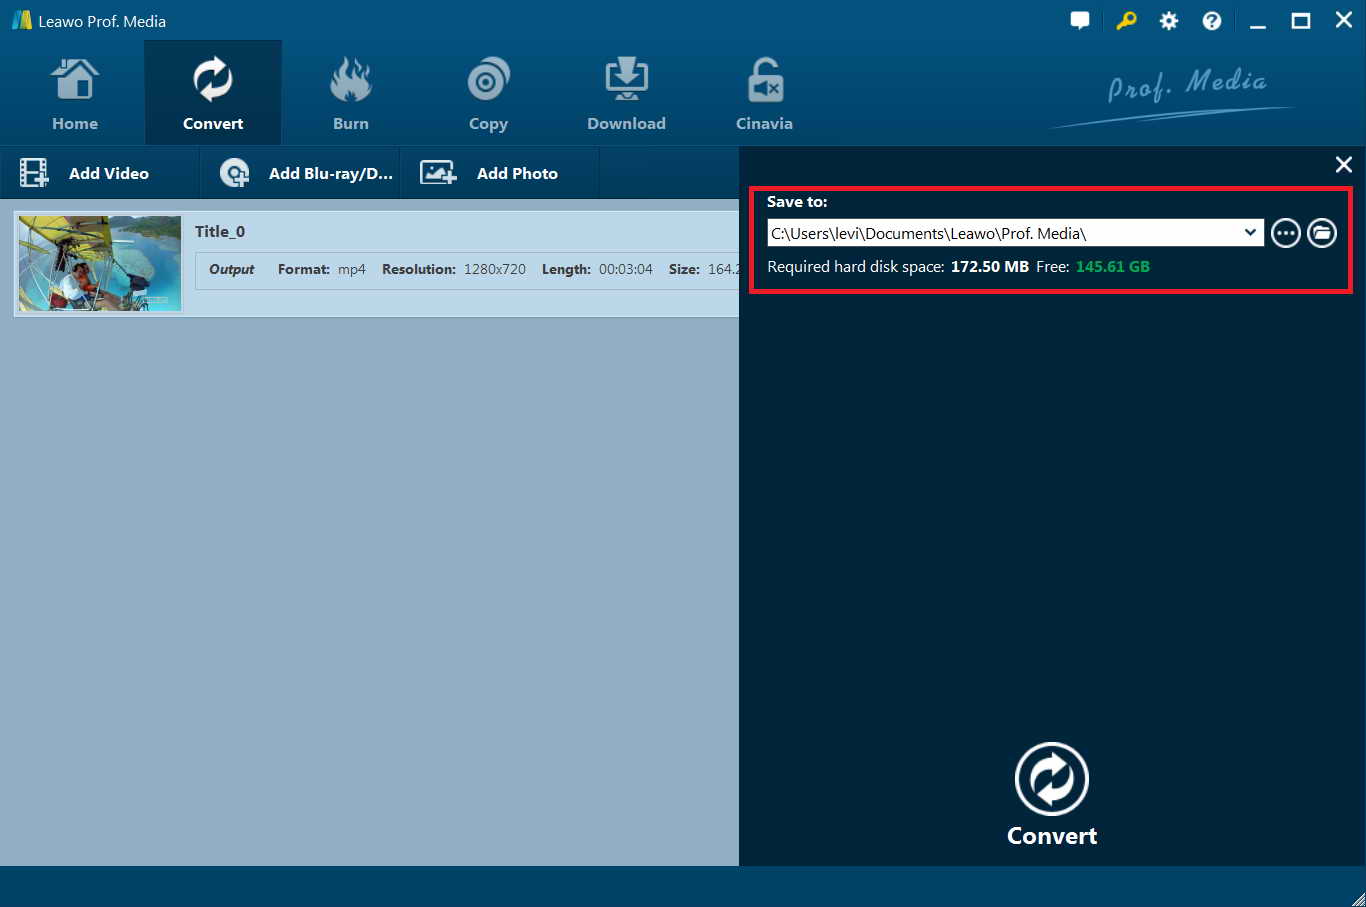
Step 5: Set output directory
After setting output format and deciding the parameters, click the big green “Convert” button on the sub-menu bar and then set output directory in the “Save to” box.
Step 6: Start to convert
After that, click the bottom “Convert” button on the pop-up sidebar. Leawo DVD Ripper would then start cropping and converting DVD movies.
After converting, you get cropped DVD movies in the file format you like. Then, you could freely play back cropped DVD movies on any media player or device.
Part 5: Comparison
We here made a comparison between these above 3 tools in cropping DVD movies. You could learn their differences here.
|
|
HandBrake |
Avidemux |
Leawo DVD Ripper |
|
Automatically crop DVD movie |
Yes |
No |
Yes |
|
Manually crop DVD movie |
Yes |
Yes |
Yes |
|
Convert DVD to video |
Yes |
No |
Yes |
|
Supported output file format |
MP4, MKV |
Original |
MP4, MKV, MOV, and 200+ others |
|
Convert DVD to audio |
No |
No |
Yes |
|
Apply 3D movie effect |
No |
No |
Yes |
|
Add image/text watermark |
No |
No |
Yes |
|
Trim video length |
No |
Yes |
Yes |
|
Adjust video effect |
No |
No |
Yes |
|
Rotate video |
No |
No |
Yes |
|
Play back DVD movies |
No |
No |
Yes |
|
Decrypt DVD protection |
No |
No |
Yes |
|
Remove DVD disc regions |
No |
No |
Yes |
|
Merge DVD files into one |
No |
No |
Yes |
If you have non-commercial DVD content to crop and convert, HandBrake would be your first choice. If you only need to crop non-commercial DVD movie without changing file format, choose Avidemux. Leawo DVD Ripper is a most comprehensive solution that could handle both commercial and non-commercial DVD content in converting and cropping. Of course, Leawo DVD Ripper still has other features to improve your user experience.
 Sep. 08, 2021 by


 Prof. Media
 Blu-ray Ripper
 Blu-ray Copy
 iOS Data Recovery
 [12/29/23] MAX Downloader V15.0.0
 10,000,000 people are using Leawo!
 All Transactions are protected!
 30-Day Money Back Guarantee!