SHAREit is a good platform to share files with others, which is very quick. It is really convenient for you to share audios, videos, pictures and data of any format with your family members, colleagues and etc. on computer or on your phone. You can also refer to the method shown below to fix how to transfer music from SHAREit to iTunes. Try this amazing software to share data with others will save you much time.
Part 1: How to Transfer Songs from SHAREit to iTunes
As for how to transfer songs from SHAREit to iTunes, you need first transfer music from SHAREit app to a temporary folder on computer and then transfer from the computer folder to iTunes. The following steps will direct you to make it.
1.1 Transfer Songs from SHAREit to Computer Temporary Folder
You can check out the detailed steps listed below to know how to transfer music from SHAREit to computer.
1. On your computer, you need to make sure you have installed the latest version of iTunes. Run iTunes and then insert your iDevice into computer via proper USB cable. After that, click on the device icon in the main interface.
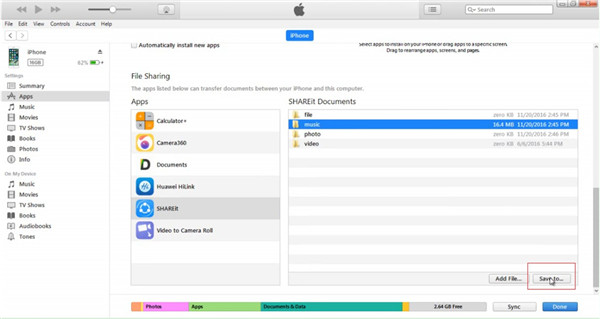
2. Move to “Apps” tab under the menu of “Settings”. In the right part of the screen, you need to drag down until you see “Apps” under the “File Sharing” area. Choose “SHAREit” to click on.
3. Hit the “music” folder under “SHAREit Documents”, and then hit "Save to" button to choose a folder to save songs from SHAREit App to computer temporarily. Afterwards, the SHAREit app songs will be transferred to this selected folder automatically.
1.2 Transfer Songs from Temporary Folder to iTunes
After you get the SHAREit music in the temporary folder, you can continue to import the songs to iTunes.
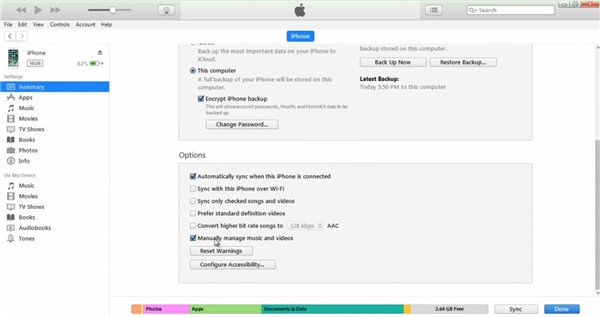
1. Click on “Settings> Summary” and then drag down until you see the section of “Options”. Check “Manually manage music and videos” under it and then hit “Done” button to save your settings.
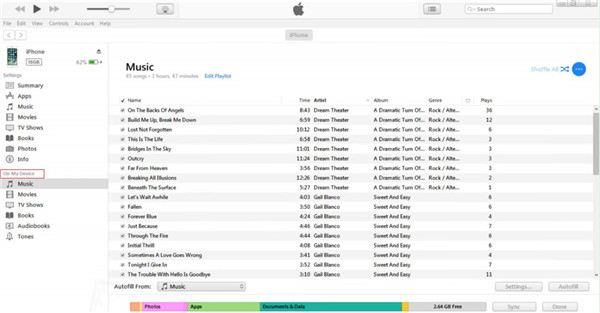
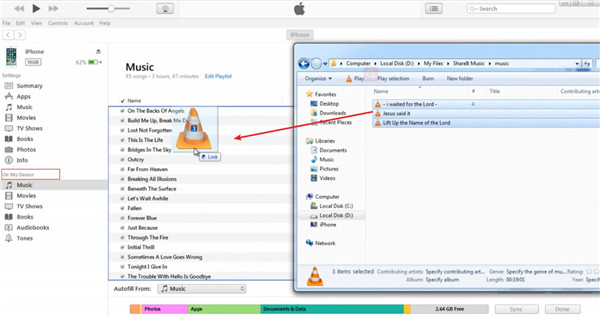
2. Click on the tab of “On My Device” and then tap on “Music” option.
3. Navigate to the folder that you use to save the SHAREit app music temporarily and then drag the songs from the folder to iTunes music library. After that, you can address how to import music from SHAREit to iTunes successfully.
This method just calls for a few clicks and you can refer to the steps shown above to have a try. This solution can stand your test, for many people have made it via this means. You can also deal with how to transfer SHAREit files from iPhone to PC with the steps in Part 1.1. By the way, it is also viable to fix how to transfer files from iPhone to PC using SHAREit. To do so, you just need to connect your iPhone and PC, and then make use of the share icon to realize this goal.
Part 2: How to Transfer Music from iPhone to iTunes via iTransfer
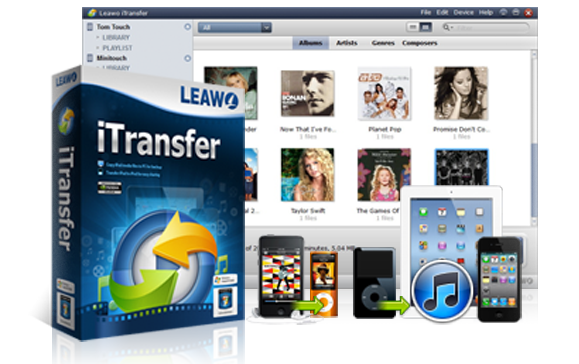
After you understand the means to transfer music from SHAREit to iTunes, you may also want to know the way to import music from iPhone to iTunes. If you do not know which tool to choose, here I would like to recommend you make use of Leawo iTransfer to realize this goal. Its perfect functions will meet your transfer demands of 12 kinds of files among different devices, including iTunes, computers and iOS devices. You can refer to the steps listed below to get the solution to make it come true.
Leawo iTransfer
☉ Transfer files among iOS devices, iTunes and PCs with ease.
☉ Transfer up to 14 kinds of data and files without iTunes.
☉ Support the latest iOS devices like iPhone 7, iPhone 7 Plus, etc.
☉ Play back, view, and delete data and files on iOS devices.
Step 1. Run iTransfer
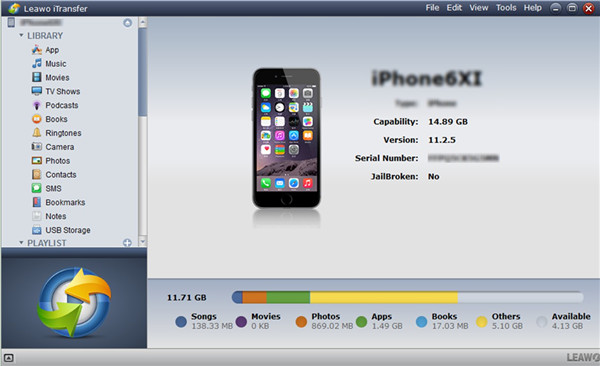
You need to prepare a proper USB cable to plug iPhone into computer and then run iTransfer on computer as well. You will see iPhone info clearly in the right part of the screen. After that, click on the icon of iPhone in the left sidebar to call out other tabs.
Step 2. Transfer Music from iPhone to iTunes
Click on “Music” tab under the menu of “LIBRARY”, and you can see your iPhone songs in the right part of the window. Then you can choose the iPhone songs that you want to export to iTunes and then click on the transfer button at the bottom right of the interface. Afterwards, you need to tap on “Transfer to> iTunes” in the pop-up panel. The software will quickly import songs from iPhone to iTunes. This will only consume you a few seconds to make it. The process is automatic and you can see it on a percentage bar intuitively. When the rate panel reaches 100%, it indicates the termination of the transfer procedure.
This procedure is quite time-saving. You can read through this guidance to assist you in daily life for music transferring. You will surely admire the solutions listed above.


 Sep. 06, 2021 by