Audio message is convenient for us nowadays, even if you are busy with your hands, you just need to speak out what you would like to convey by audio message instead of texting a message. When the audio message has been sent, the messaging rates will be charged according to your carrier. If the iMessage is sent without Wi-Fi connection, it must require cellular data traffic.
- Part 1: How to use audio messages on iPhone X
- Part 2: How to recover audio messages on iPhone X via Leawo iOS Data Recovery
- Part 3: How to recover deleted audio messages on iPhone with iTunes
- Part 4: How to recover deleted audio messages on iPhone via iCloud
- Part 5: How to backup audio messages through iTransfer
Part 1: How to use audio messages on iPhone X
To send audio messages on your iPhone X, you need to go to the “Settings” and enable the option “iMessages” firstly. Then you can send audio message on message app. Below are the instructions of how to send audio message on iPhone X.
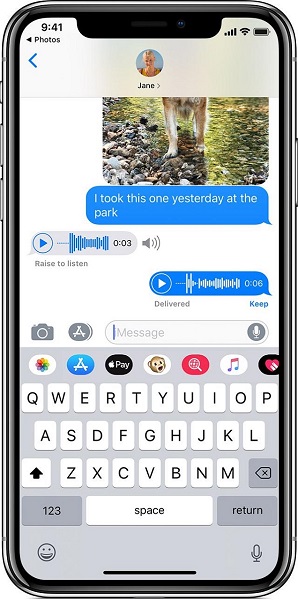
1. Enter your message app and record your audio message by touching and holding an icon button which looks like a microphone.
2. You can preview your audio message by tapping the “Play” button. If you want to cancel the message, tap on the button “X” to delete it. When your audio messages finish recording and want to send it, you can tap the the “Send” button which is symbol of facing upward arrow.
Part 2: How to recover audio messages on iPhone X via Leawo iOS Data Recovery
Sometimes, you may find that your important audio messages are removed accidentally and have no idea how to find it back. It is very frustrating and annoying when you meet this trouble. But luckily, our Leawo iOS Data Recovery will help you to solve this problem in a simple way. Leawo iOS data recovery is a powerful software for data recovery on Apple devices. The lost data can be recovered by this software for all kinds of models of Apple devices including iPhone, iPad or iPod. No matter what cause the data loss, more than 14 types of files can be recovered effectively with Leawo iOS data recovery. There are three recovery modes for the lost data recovery, that is to recover from iOS devices, from iTunes and from iCloud. Here we will show you the specific steps of how to recover the lost audio messages from 3 recovery modes.
I. Recover audio messages from iOS device
If you want to recover deleted audio message iPhone, two recovery modes are included in it. That is Normal mode and DFU mode. Normal mode is to recover the data such as messages, whatsapp, notes and contacts, etc. DFU mode is able to recover the data like Photo library, Camera roll, Voice memos and Message attachments, etc., not only recovering the data that can be done by Normal Mode. However, Normal mode is applicable to all kinds of iOS devices, while DFU mode can only be applied to iPhone 4 and iPod touch 4.
Here will introduce you how to recover audio message from iPhone X via Normal Mode.
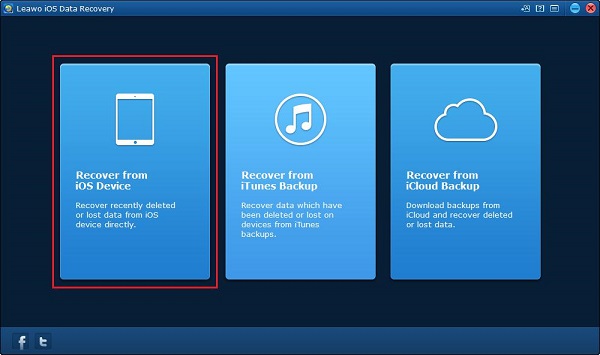
1. Run Leawo iOS data recovery on your computer and choose “Recover fom iOS device”.
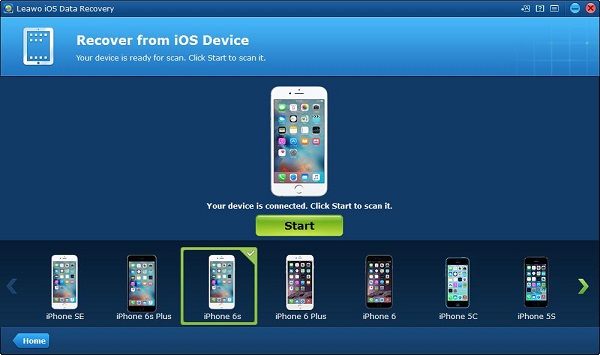
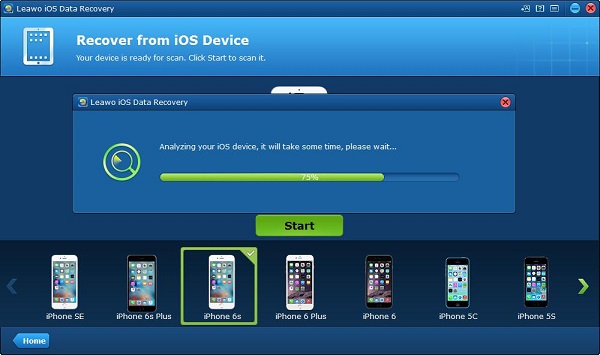
2. Connect your iPhone X to the computer and choose your device on the bottom list. After that, click on the “Start” button to begin scanning your iPhone X.
The scanning will be completed after a while.
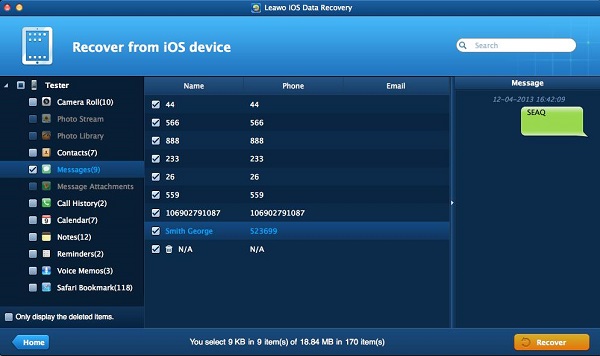
3. All the data of your iPhone X will be listed once the scanning is over, then select to check the deleted data by enabling the option “Only display the deleted item”. You will see the recoverable data files will be displayed in the left sidebar, the specific data will be shown on the right part of the window. Check “Messages” in the left sidebar and then choose the ones you would like to recover. Next, click on the button “Recover” on the right bottom.
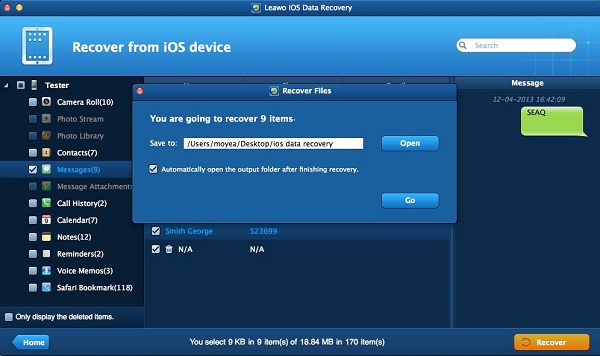
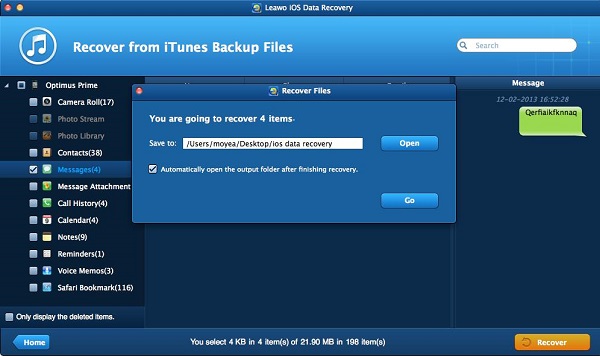
4. A pane will pop up and requires you to choose a target folder for saving the recovered audio messages by clicking the button “Open”. Or you also can check the option “Automatically open the output folder after finishing recover”. Then, click on the button “Go” to begin recovering the audio messages to your computer.
II. Recover audio message from iTunes backup
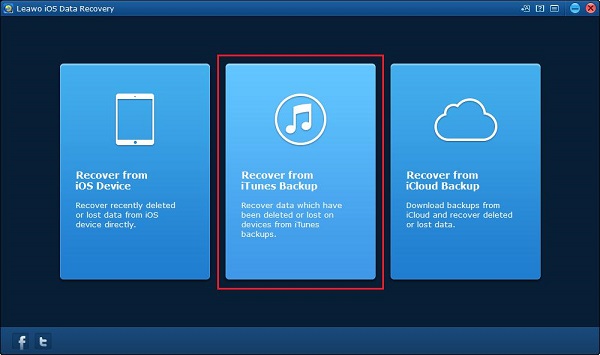
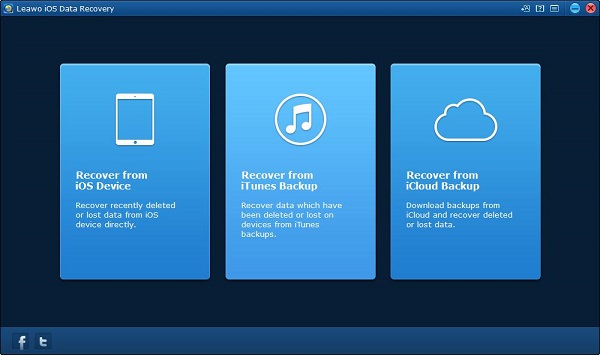
1. Choose “Recover from iTunes backup” in the main interface when you run Leawo iOS data recovery on computer.
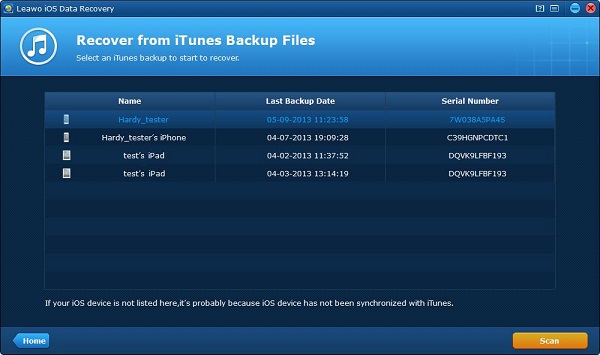
2. All backups on iTunes from your different iOS devices will be listed as the picture shown below. If your device with iTunes backup cannot be found here, that probably means the data on your device hasn’t been backed up on this computer. Choose the backup you need and then click on the button “Scan” to begin scanning.
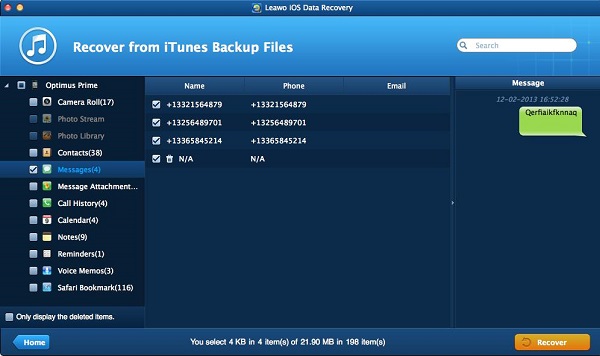
3. All the recoverable data will be listed in the left sidebar once the scanning is completed. Check the option “Only display the deleted items”, then you can only view the deleted items in the list. Choose the audio message you need to recover and then click on the button “Recover” on the right bottom.
4. A pane will pop up and requires you to select an output directory for saving the recovered files. Or you can check the option “Automatically open the output folder after finishing recover” to let the output folder open automatically once the recovery is completed. Finally, click on the button “Go” to begin data recovering.
III. Recover audio message from iCloud backup
1. Run Leawo iOS data recovery on computer and choose the mode “Recover from iCloud backup”.
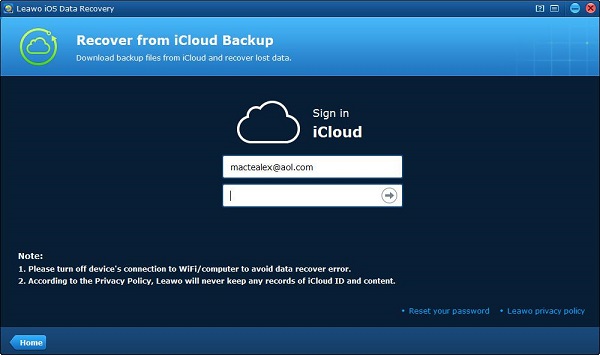
2. Then you are required to log in iCloud account by using your Apple ID.
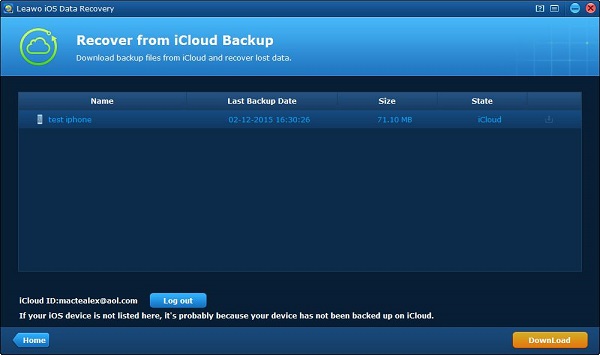
3. Your backup on iCloud will be scanned when you have logged in iCloud. The backup files will be listed when the scanning is completed. Double click on the backup or click the button “Download” on the right bottom. You also can select log out by clicking the button “Log out” prior to downloading your backup. If you want to stop downloading, you can click the button “Cancel” during the process of downloading.
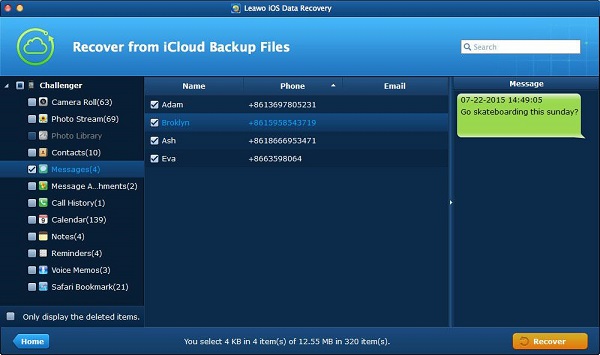
4. The scanning of your backup will begin automatically once the downloading of backup on iCloud is finished. All your backup files will be listed on the left sidebar. Check the option “Only display the deleted items”, so that you just need to view the deleted items then you can find the recoverable audio messages as you need. Once you have selected the audio messages you need to recover, click on the button “Recover”.
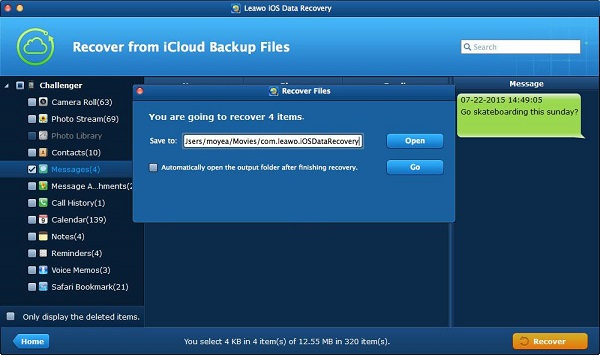
5. Then a pane pops up to require you to choose an output directory for the recovered files by clicking the button “Open”. Or you can enable the option “Automatically open the output folder after finishing recovery” to make the output folder open automatically. Finally, click the button “Go” to begin recovering.
Part 3: How to recover deleted audio messages on iPhone with iTunes
If you like to use iTunes and often create backup for your device with it, it is very easy for you to restore the deleted audio messages via the connection of your iPhone X to the computer. Below are the specific instruction for how to recover audio messages on iPhone.
1. Connect your iPhone X to the computer and run iTunes on it.
2. Click the icon button of iPhone on the left top corner of iTunes window.
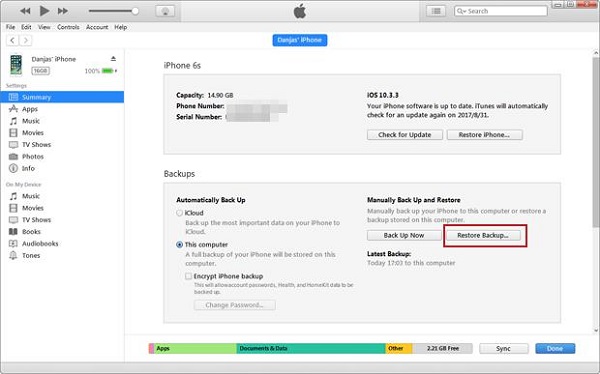
3. Select “Summary” in the left sidebar and then click on the button “Restore Backup”.
4. You can view the date and the size of the backup files on iTunes, choose the one which is the most related to your audio messages.
5. Click on the button “Restore”, all the deleted items including audio messages will begin to restore. Once the restoring is completed, all the message conversations can be seen in your messages app.
Part 4: How to recover deleted audio messages on iPhone via iCloud
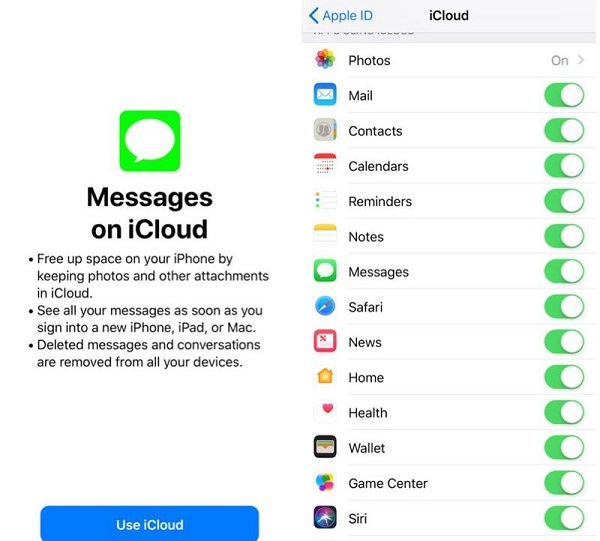
This is a common way to recover the deleted data since iOS 11.4 has been released. Apple offers a service to synchronize message conversation which includes videos, photos and other attached files. If you have enabled the option “Message” via iCloud prior to the deletion of audio messages, the deleted audio messages can be recovered on your iPhone. To recover deleted audio message iPhone, below are the steps for your reference.
1. Enter “Settings” and go to iCloud with your Apple ID.
2. Switch off the option “Messages”.
3. When a notification pops up, select “Keep on My iPhone”.
4. Turn on the option “Messages” one more time.
5. Tap on “Merge” from the pop-up. Wait for a while, the deleted audio message will be restored to the messages app on your iPhone.
Part 5: How to backup audio messages through iTransfer
Leawo iTransfer is a useful transfer program which also can be used to back iPhone files such as music, SMS, apps, contacts and others are supported by this software. Just with one simple click, the selected files can be backed up in a few seconds. Here we will guide you how to recover audio messages on iPhone via iTransfer.
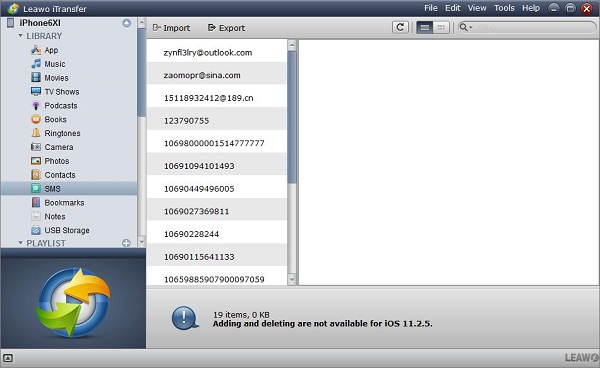
1. Run Leawo iTransfer on the computer and connect your iPhone to computer. Your iPhone will be recognized and detected automatically and the library of it will be shown in the left column.
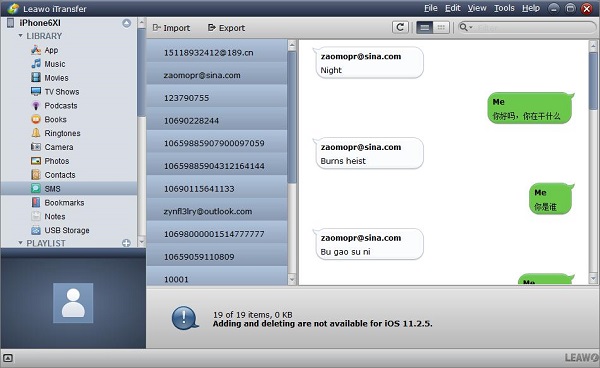
2. Choose “SMS” in the library and the details of SMS will be displayed on the right part of the window. You can view the message content by clicking on the message you choose. All the messages can be backed up to the computer or you can also choose the certain messages to back up. Then click the button “Export”, the selected message will begin to back up to your computer.
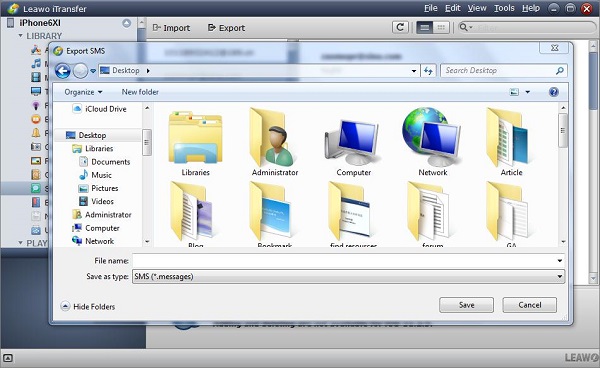
3. When you click on the “Export” button, a window will pop up and require you to choose a target folder to save the backup messages. Once the backup is completed, you can find the audio messages in the destination folder on your computer.

