"I want to create a Facebook photo slideshow with music for my touring souvenirs. I have Windows 10. But I don't see Movie Maker in Windows 10. So, I downloaded what I thought was Movie Maker for Windows 10, nothing happens when I click on "Slideshow". How do I create a slideshow on Facebook? What do I need to create a slideshow on Facebook? Is there anything free I can use?"
It's easy to make it, actually. You know that it is booming for nearly all netizens to use the online social media to communicate with others from all over the world, among which Facebook would be the industry bellwether. As of January 2018, Facebook had more than 2.2 billion monthly active users. It is so amazing that there are so many people sharing their photos, daily life stories, favorite music, beautiful sceneries slideshow and any videos that are interesting, funny or beneficial on Facebook. For someone who wants to share some slideshow with music on Facebook, you should know how to make a slideshow with music on Facebook at the beginning. That's not a tough work only if you get the point. And here come useful solutions to create a slideshow on Facebook.
Part 1: The supported formats for uploading files to Facebook
It is obvious that you can upload photos and videos to Facebook to share your daily activities, interests, backgrounds or real-life connections. Facebook allows you to upload photos in PNG, JPG, GIF and more. While you may encounter some problems when you want to post the slideshow or video in an unrecognized format. After all, Facebook supports the video formats listed below:
• 3g2/3gp/3gpp (Mobile Video)
• wmv/asf (Windows Media Video)
• avi (AVI Video)
• dat (MPEG Video)
• divx (DIVX Video)
• dv (DV Video)
• f4v/FLV (Flash Video)
• m2ts (M2TS Video)
• mkv (Matroska Format)
• mod (MOD Video)
• mov/qt (QuickTime Movie)
• mp4/m4v/mpeg4 (MPEG-4 Video)
• mpe/mpeg/mpg (MPEG Video)
• mts (AVCHD Video)
• nsv (Nullsoft Video)
• ogm/ogv (Ogg Media Format)
• tod (TOD Video)
• ts (MPEG Transport Stream)
• vob (DVD Video)
If your slideshow or video is in the format that is not listed above, you will fail to upload the file to Facebook. And the easiest approach on how to make a slideshow on Facebook with music is to make the slideshow right with the supported format. The program that is integrated with a slideshow creator and a video converter would figure it out.
Part 2: How to make a slideshow with Leawo Video Converter
Would you like to create a slideshow on Facebook? And how do you make a slideshow on Facebook, then? You will find that the simplest solution to create a Facebook Photo Slideshow with Music is to use the professional software program. And Leawo Video Converter would be one of the most powerful and user-friendly programs that offer solution to how to make a slideshow on Facebook.
Leawo Video Converter can not only support various video and audio formats input or output, empowering users to convert video and audio files contained in more than 180 formats from one to another, but also allows users to make photos and photo folders into photo slideshows for well keeping precious memory. Besides, you can also adjust the photo slideshow effect, set output video effect, adjust photo order, add background music, and set the output audio effect accordingly. With this Photo Slideshow creator downloaded and installed, users can create a slideshow on Facebook in a better way.
Note: When you download Leawo Video Converter, you will get Leawo Prof. Media which is consisted of Video Converter, DVD Ripper, DVD Creator and other five programs. You can just launch the program and then click Video Converter to start this Photo Slideshow creator by following the guide steps on how to make a slideshow on Facebook.
Step 1: Add photos to the program
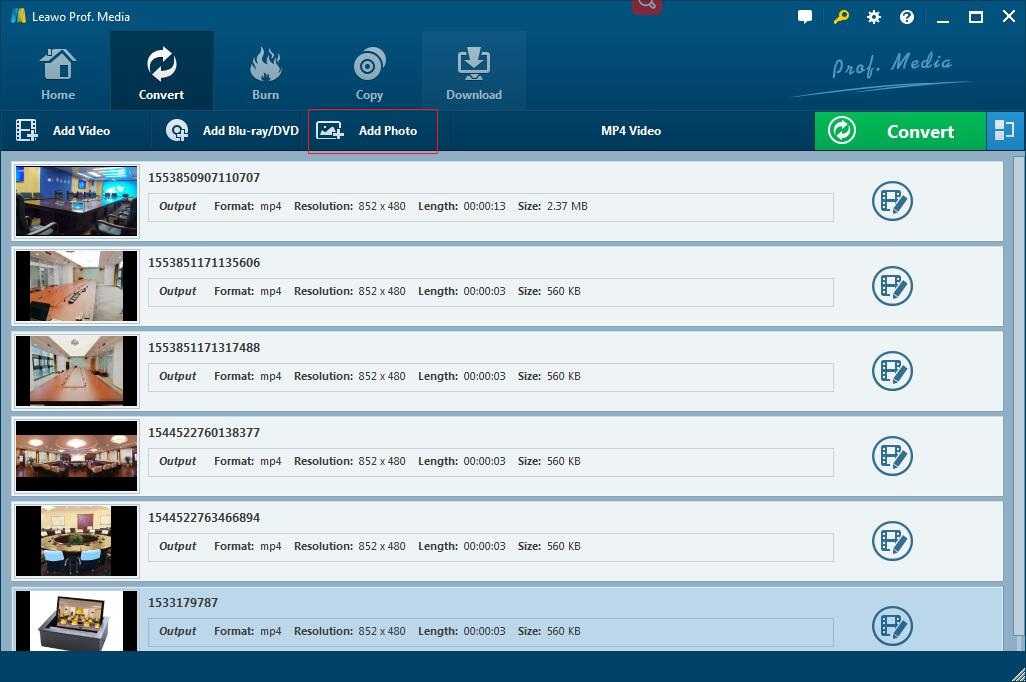
When you enter the main panel of the program, click on the “Add Photo” button on the menu bar to add either photo files or photo folder you need. Or you can also directly drag and drop photos into this photo slideshow maker software. And then the program will generate a slideshow automatically.
Step 2: Edit photo slideshow
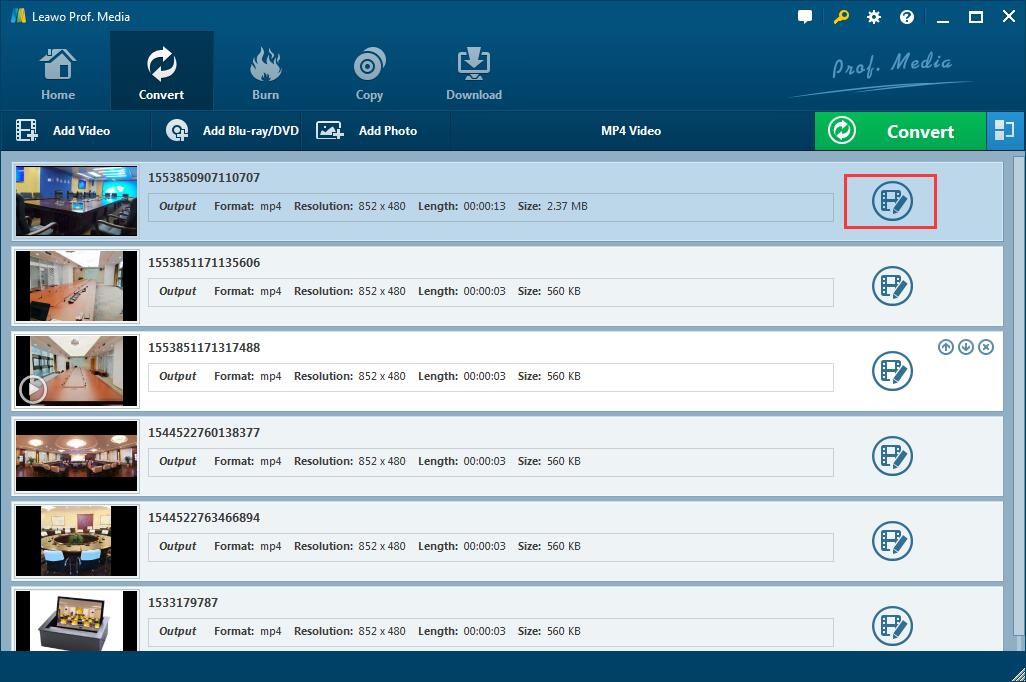
Click the “Edit” icon or right click the generated photo slideshow to select “Edit” option and then you will enter the photo slideshow editing panel.
1. Edit photo slideshow video
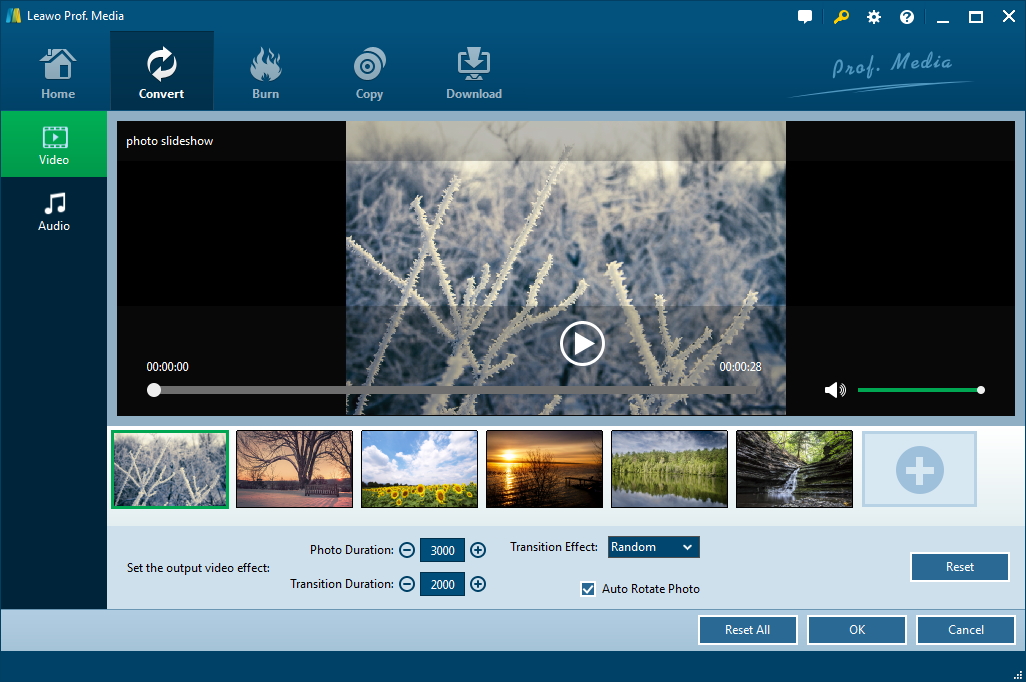
When entering the editing panel, you will be in the “Video” tab where you are allowed to add external photos, remove photos, adjust photo order, set photo duration, transition duration and transition effect.
2. Edit photo slideshow audio
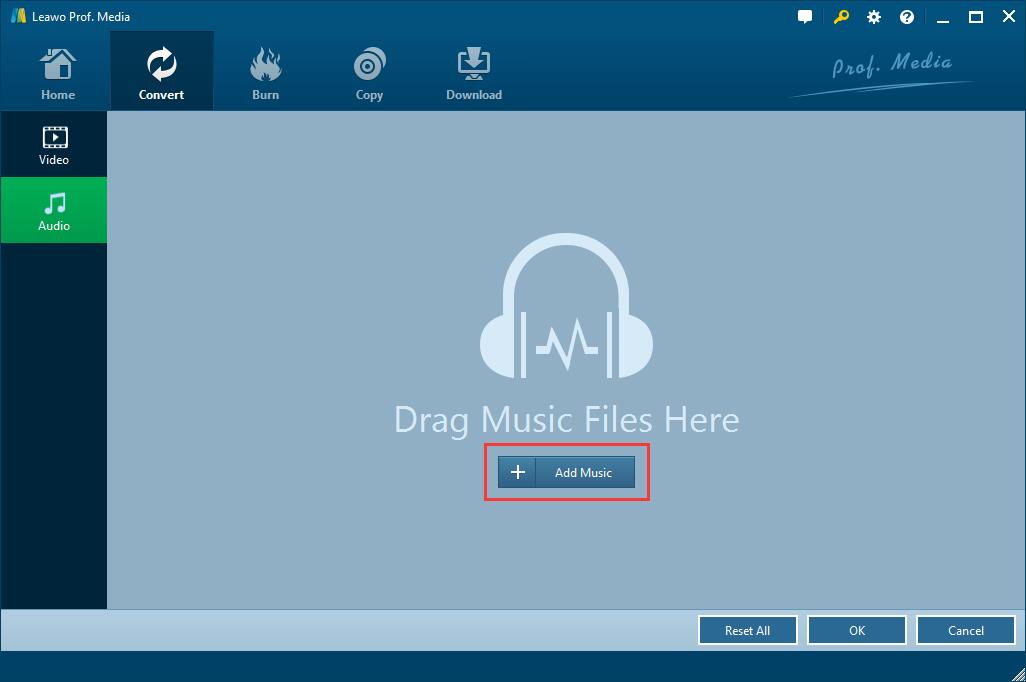
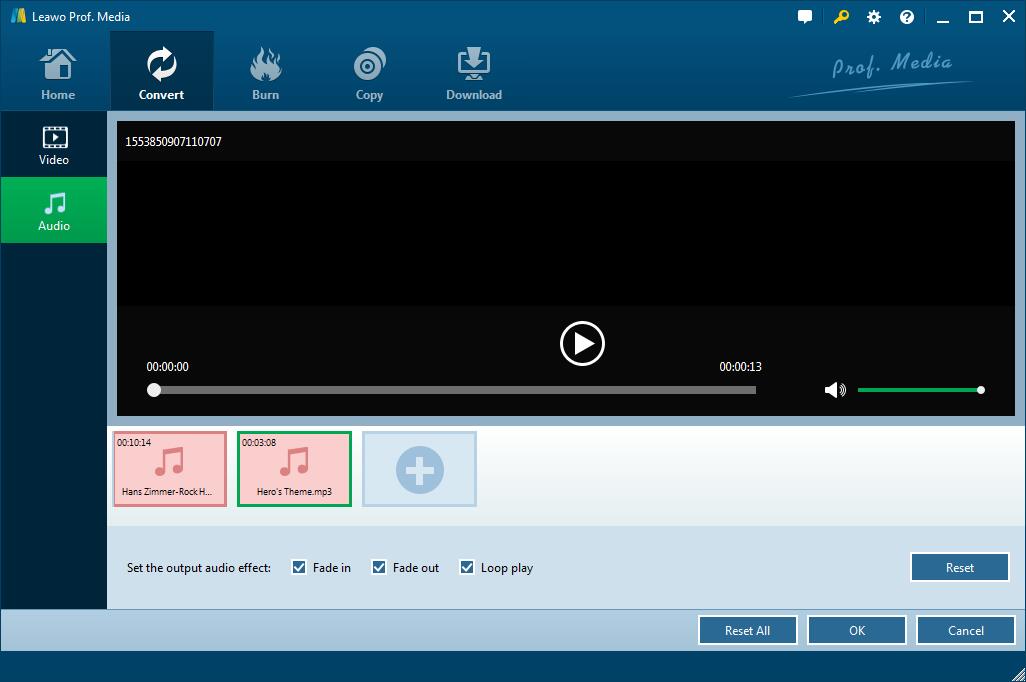
While you are under the "Audio" tab, you are able to add music files as the background music for the photo slideshow. You want to create a Facebook photo slideshow with music? Just click "Add Music" button to browse and choose your favorite music for inserting to your slideshow on Facebook.
When music files are added, you could edit the background music effect including Fade in, Fade out, and Loop play. And then click “OK” to confirm the settings and you will go back to the main interface of the program.
Step 3: Save slideshow in MP4 format
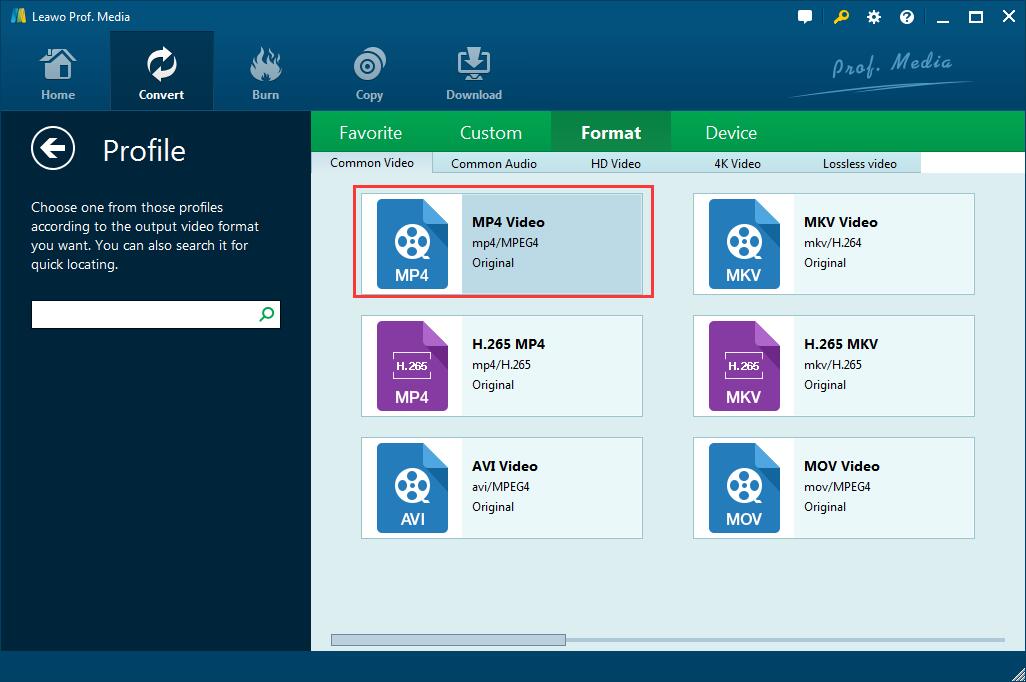
Open the drop-down box next to Add Photo button, and then choose the "Change" button to enter the "Profile" panel, on which you could select "MP4 Video" under "Format" tab as output format. If you want to find another output format, you could also make use of the profile search bar to search desired profile directly.
Step 4: Choose selectable parameters
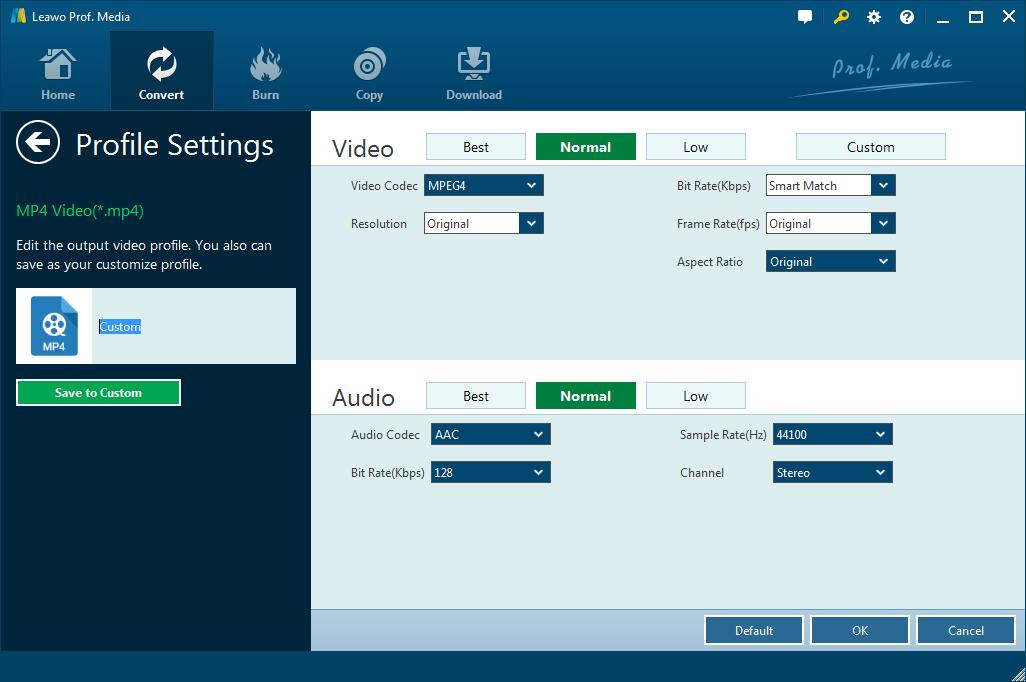
Return to drop-down box, click the "Edit" option this time to enter the "Profile Settings" panel to select proper video and audio parameters of the output profile. Video parameters like Video Codec, Quality, Video Size, Bit Rate, Frame Rate, Aspect Ratio are available, and audio parameters including Audio Codec, Quality, Bit Rate, Sample Rate, Channels, etc. are optional as well.
Step 5: Set output directory for saving the generated slideshow
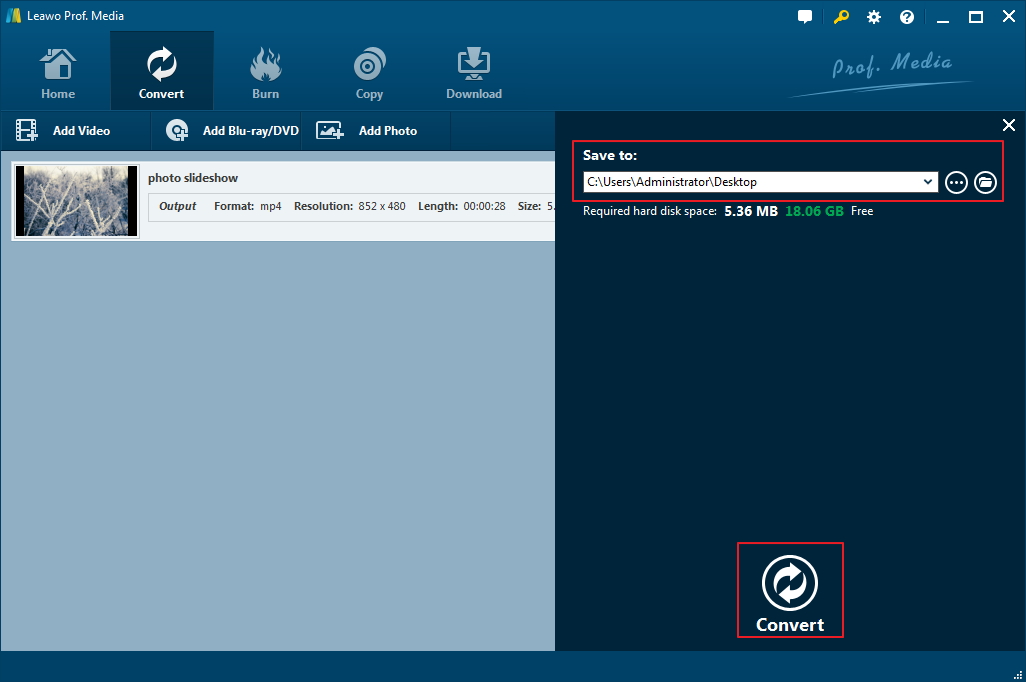
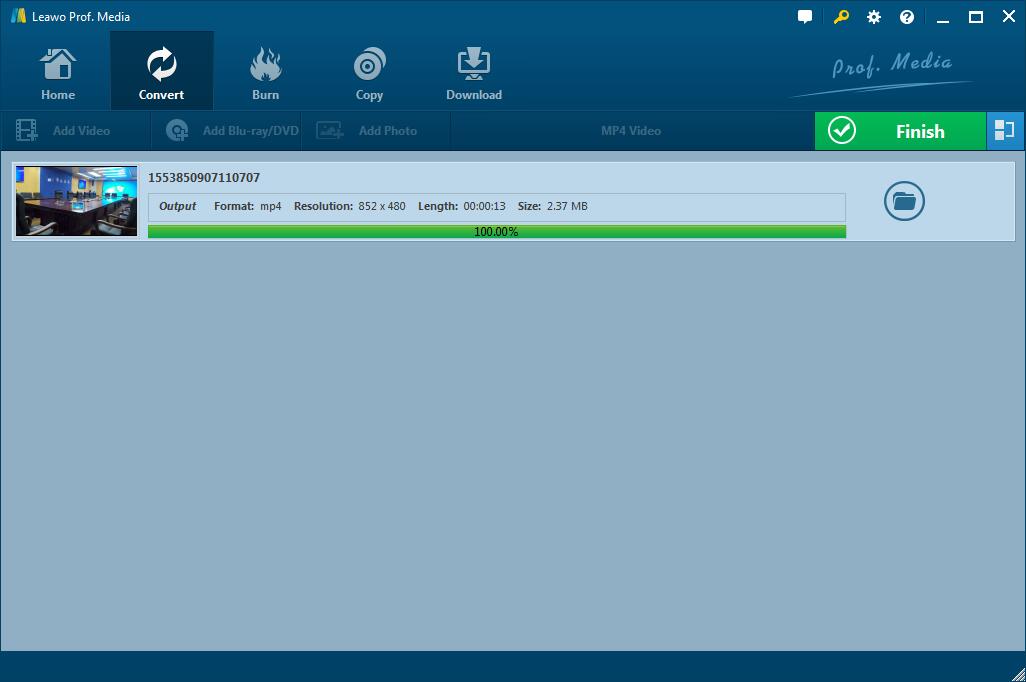
Now since all settings are done, you can click on the big green “Convert” button on main interface to pop up a sidebar where you can set a directory to save the output photo slideshow files in the “Save to” box.
After that, click on the "Convert" button at the bottom of the sidebar to start generating the photo slideshow with music in MP4. And you are able to get the slideshows in seconds. And finally, you can feel free to share the slideshow on Facebook.
Obviously, this program is quite powerful and multi-functional so that you can create a slideshow on Facebook whenever and wherever you are. It is so effective and efficient that you will get the photo slideshow in any format you like. Besides, it is also an audio converter as well as a video converter which can convert MP3 to video for Facebook and rip audio from YouTube as well. And if you are Mac users, there is Mac version for you to convert WMV to MP4 Mac.
Part 3: How to create slideshow with another slideshow maker
Surely, there are also other free slideshow makers, such as the most commonly used Windows Movie Maker and Freemake Video Converter. Since Windows Movie Maker has limited features for the beginners, the latter one would be more popular for some users. Freemake Video Converter is designed for making slideshows with high efficiency by arranging the collection of videos and photos for Windows PC. It supports popular import/export formats and allows you to merge large number of pictures into your presentation as well.
It is not complicated to create a Facebook Photo Slideshow with music after you download and install Freemake Video Converter on your PC. You can follow the guide here on how to make a slideshow on Facebook:
Step 1. Add Photos to the slideshow maker
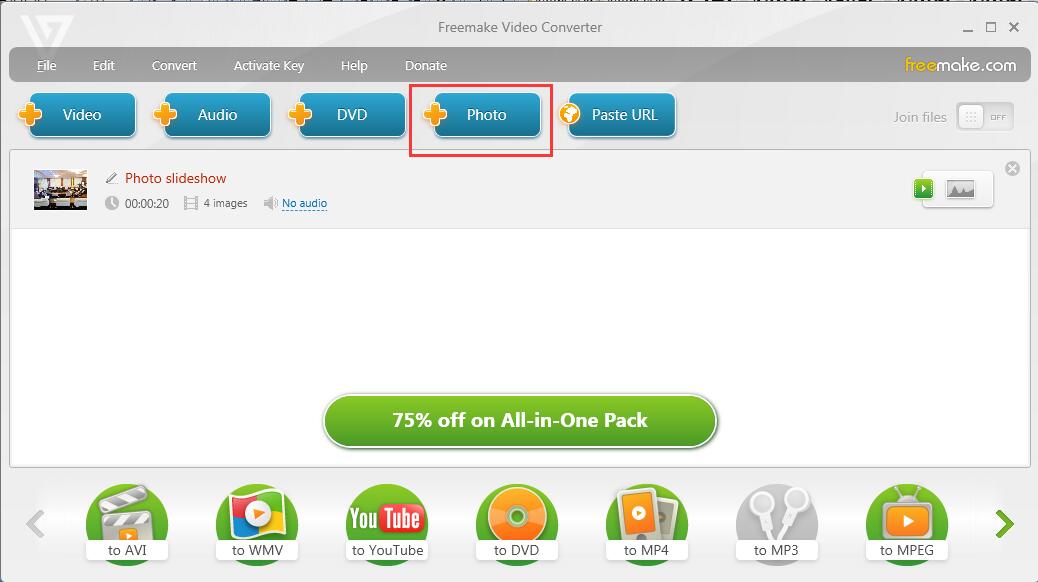
You can collect all the pictures you need for slides in one folder at the beginning, and then run Freemake to enter the main interface. Now click the “Photo” button to select all the desired photos from the folder. Or you can also directly drag-n-drop them into the tool. And the photos will be generated into a slideshow by the program itself.
Step 2: Add music to the slideshow
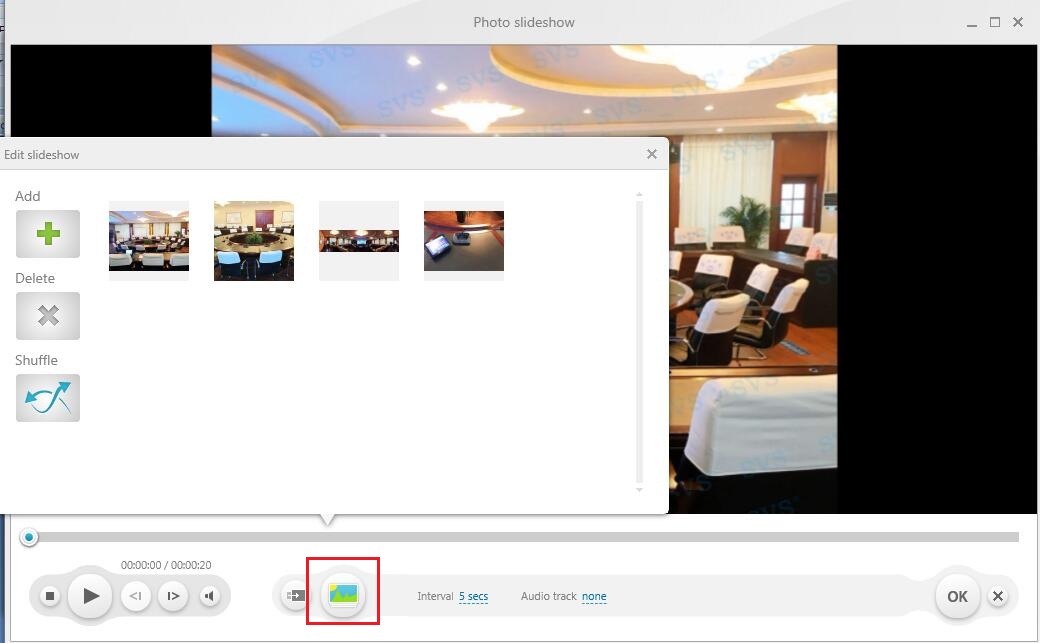
Click the generated slideshow to enter the photo slideshow. Now you can click the picture icon to enter “Edit Slideshow” panel where you can “Add”, “Delete” and “Shuffle” the photos.
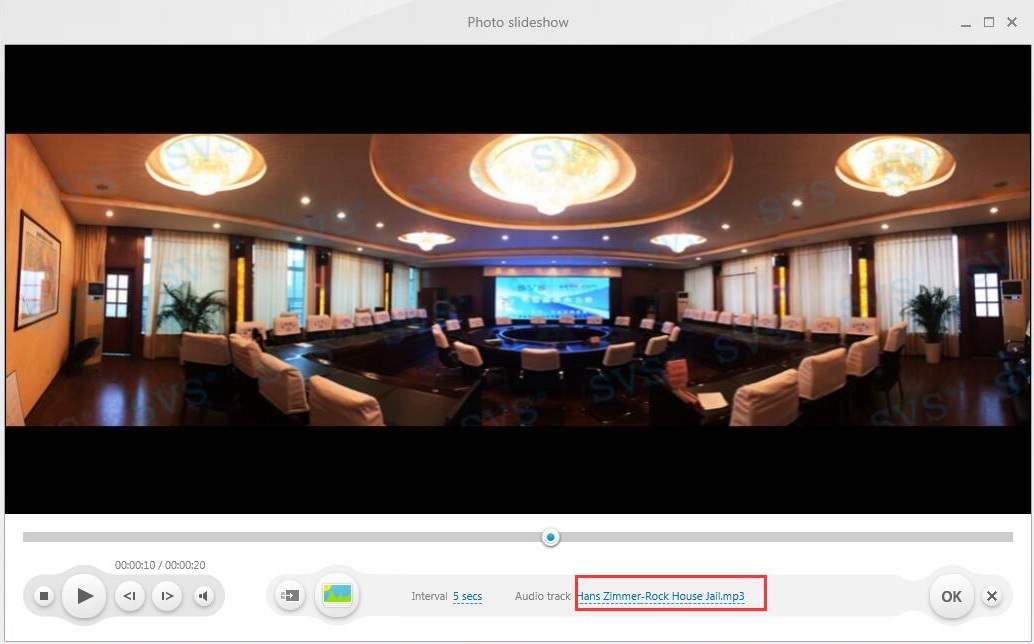
To set the speed of slides, you can choose from the Interval drop-down list. While to add music, you should click “None” > “Browse” to add an audio track for your photos. And then click “OK” to confirm the setting and return to the main interface. Please note that you can add only one non-protected song to your photos.
Step 3: Choose output format
Now you can choose “MP4” as the output format and enter the “MP4 Output Parameters” panel. In the Preset drop-down list, you can choose the different size or customize the output parameters including the title, size, video resolution, codec, bitrate, and so on. In the “Save to” box, select proper file directory to contain the converted slideshow.
Step 4: Make a slideshow with music
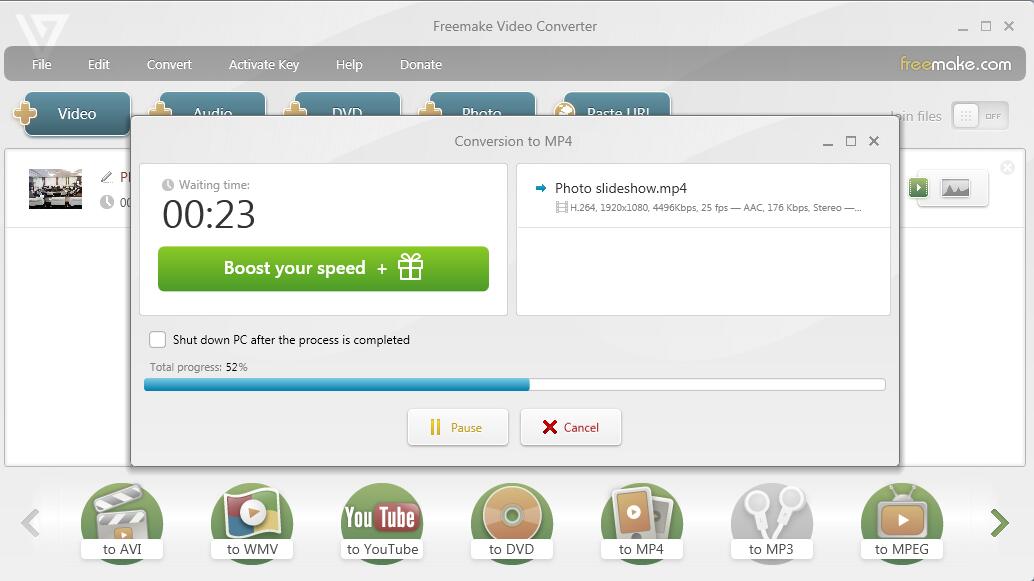
Click on the blue “Convert” button to turn your photos into video with the imported music. And you will make a slideshow on Facebook with music in a while. Note that the free making is with a logo on it.
This Freemake video converter is absolutely free and you can use it even you don't sign up. But you will have no access to the ready templates or adding text to slideshow. Anyway, it is still a good choice to create a slideshow on Facebook.
Part 4: How to upload slideshow to Facebook
Definitely, you create a slideshow on Facebook to post and share it with others. Now you may have been familiar with how to post a slideshow on Facebook. Let's make a clear guide here if there are any laymen:
Step 1: Sign in Facebook with your account information.
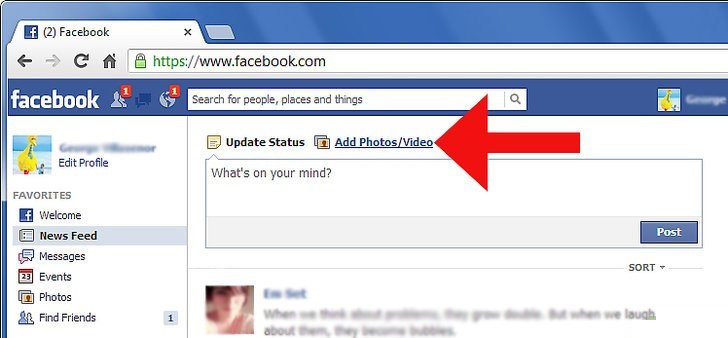
Step 2: Click on the “Upload Photos/Video” tab to browse and choose the ready slideshow video for importing.
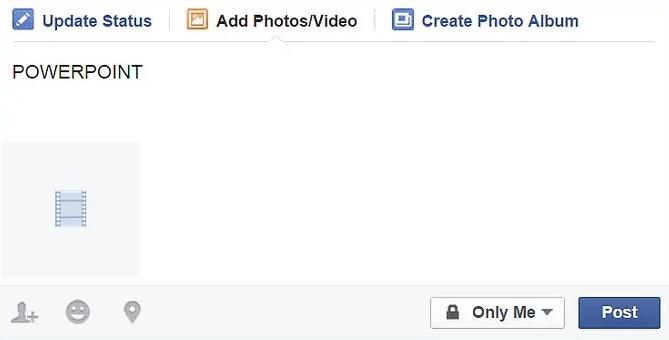
Step 3: Once the file has imported to Facebook, you can write any comments you would like to appear in the caption box for intriguing others, and then click on “Post”.
Finally, how do make a photo slideshow on Facebook now? Undoubtedly, the approaches mentioned here would be useful and efficient. You should definitely have been skilled at how to create a slideshow on Facebook with the detailed guide here. Anyway, though the two programs on how to make a photo slideshow on Facebook have their own pros and cons, you can select Leawo Video Converter to create a slideshow on Facebook when you want to make a perfect post, or you can use Freemake to create a Facebook photo slideshow with music when you are wanting a common one.

