☉ Convert DVD, videos and audios to 180+ formats.
☉ Photo slideshow maker turns photos into slideshow.
☉ Screen Recorder captures any on-screen activity to video.
☉ Webcam Recorder records anything camera or webcam sees.
☉ Practical video editor and 3D movie creator add more fun.
$39.95 Win-Version erhalten
Support to convert video/audio, convert DVD to video/audio, create photo slideshow, capture screen activities and record videos with Mac’s built-in camera or webcam, Leawo Video Converter Pro für Mac offers the most comprehensive solution to improve your digital entertainment. With Leawo Video Converter Pro für Mac, you could easily get your DVD/videos converted, turn your images to video slideshows, record computer screen activities and record camera videos, and then play them on various tablet PCs, mobile phones, music players, game players, etc. What’s more, you could even do video editings or/and create 3D movies to expand your movie experience.
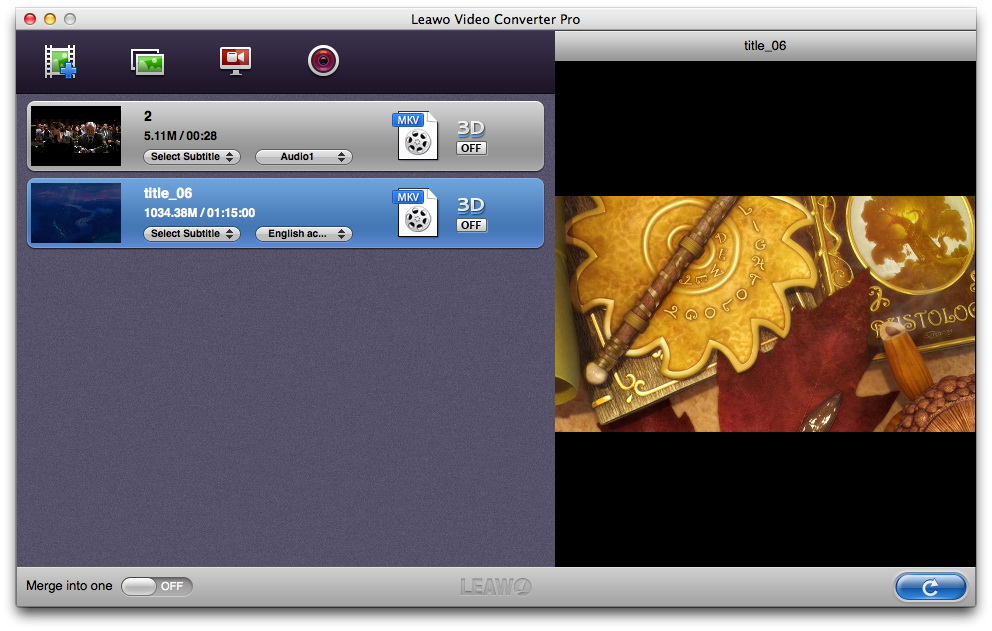
Simply click on "Load Video" or "Load DVD" button to add video/DVD files or import video/DVD sources by direct drag-and-drop. You can select Subtitle and Audio after loading if provided. Double click on the video/DVD file you can have a preview of it. And under the video preview window there is button provided for you to take snapshot. On the left bottom of this interface, you can move the slider of "Merge into one" to merge files into one or not.
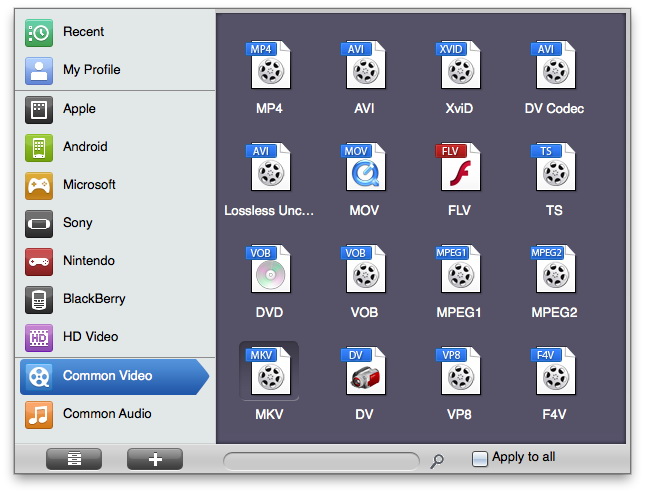
Click the icon before 3D button in each file to enter the Profile setting panel. You need to select a profile as output format. For quick profile setting, you could make use of the profile searching bar.
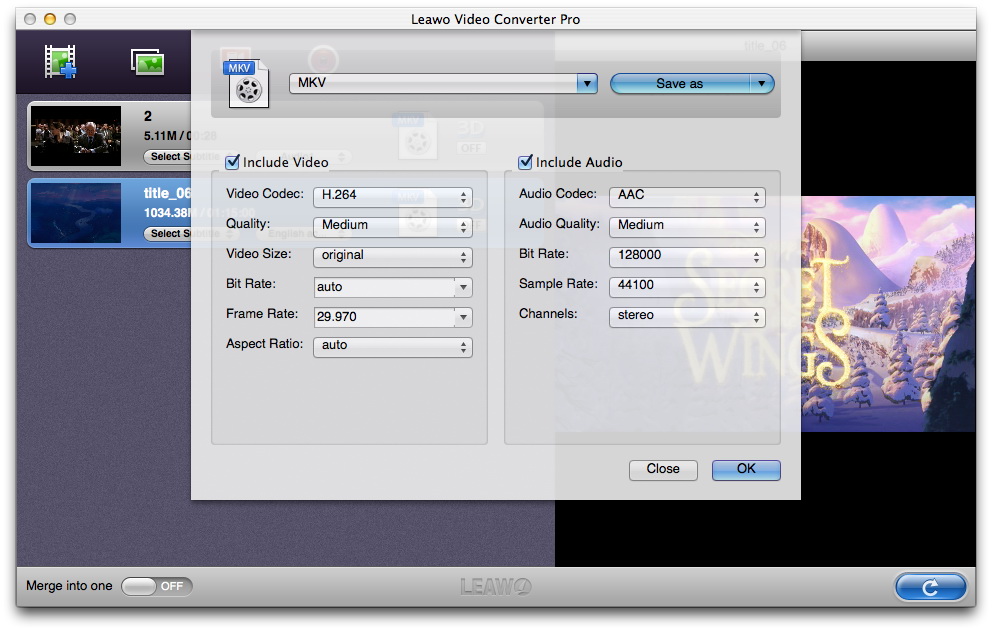
Click on the "+" button on the profile setting interface to custom video and audio parameters of output files. You could determine Video Codec, Quality, Video Size, Bit Rate, Frame Rate, Aspect Ratio and Audio Codec, Quality, Bit Rate, Sample Rate, Channels.

Click "LeawoVideoConverterPro > Preferences > Convert > Output" to set output directory to save the converted files.
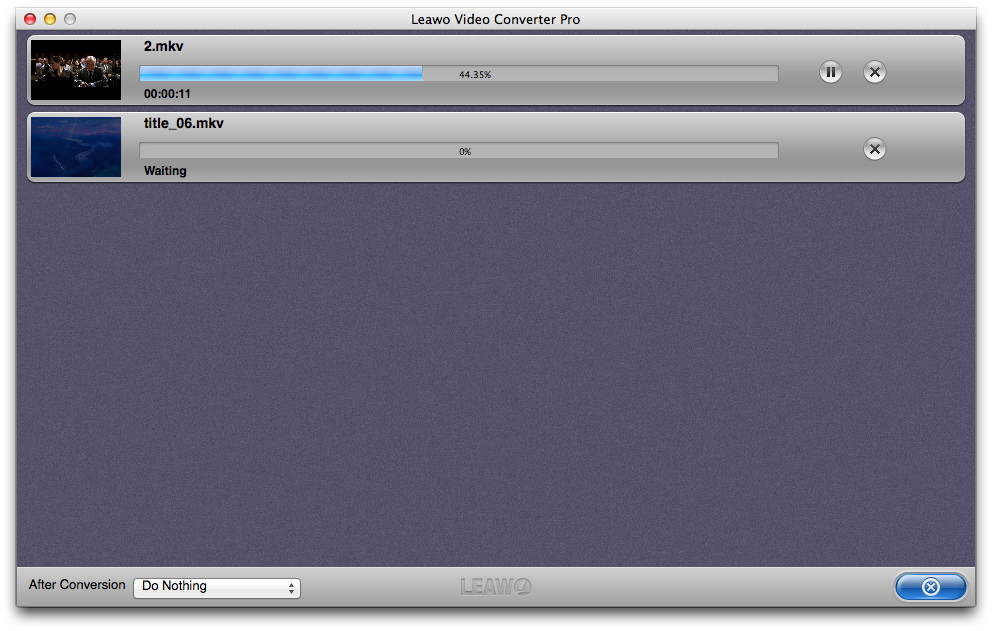
Back to the main program interface to click the bottom right button to start video/DVD conversion.
Featuring a Photo Slideshow Maker, Leawo Video Converter Pro für Mac enables you to create photo slideshows in one click.

After you start Leawo Video Converter Pro für Mac, click the "Photo Slideshow Maker" icon on the program interface. The Photo Slideshow Maker would then guide you to browse and load source photos or images.
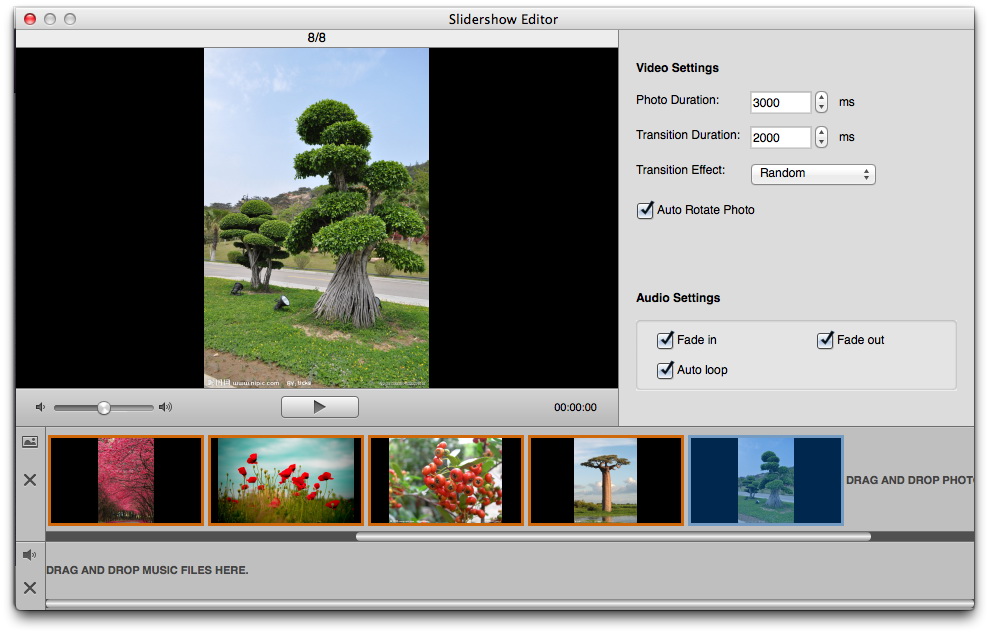
The Photo Slideshow Maker would automatically generate photo slideshows once photos are loaded. You could double click the created slideshow for instant preview. On the preview panel, you could click the "Edit" icon to enter the "Slideshow Editor" panel for slideshow editing. You could do Video Settings, Audio Settings, drag and drop music files, etc.
The created photo slideshows are in MOV format by default. But you could convert the created photo slideshows from MOV format to MP4, AVI, FLV, etc. Simply click the icon in the end of each slideshow on the left processing list panel to enter Profile setting interface, where you could select desired format as output format for created photo slideshows.
Note: If you need, you could click the "+" icon on the Profile setting interface to adjust video codec, bit rate, video size, audio codec, aspect ratio, frame rate, channels, etc. of output files.
Click "LeawoVideoConverterPro > Preferences > Convert > Output" to set output directory to save converted photo slideshows.
Start converting photo slideshows from MOV format to other formats by clicking the convert button on the bottom right corner of the main program interface.
The built-in Screen Recorder of Leawo Video Converter Pro allows you to record any activity on your Mac computer screen. You could even define the recording region.
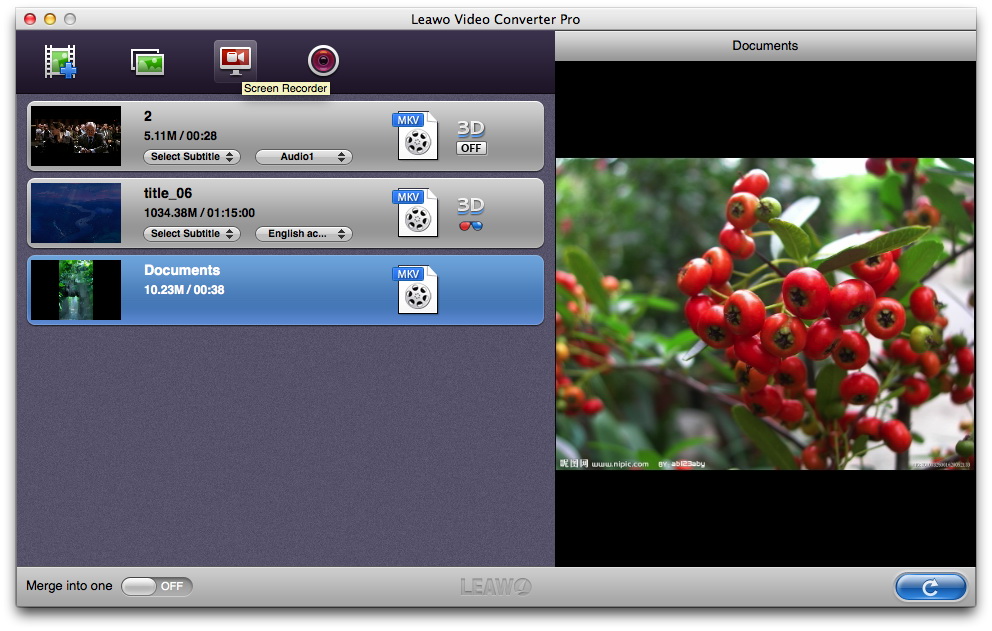
When Leawo Video Converter Pro has been launched, click the "Screen Recorder" icon.
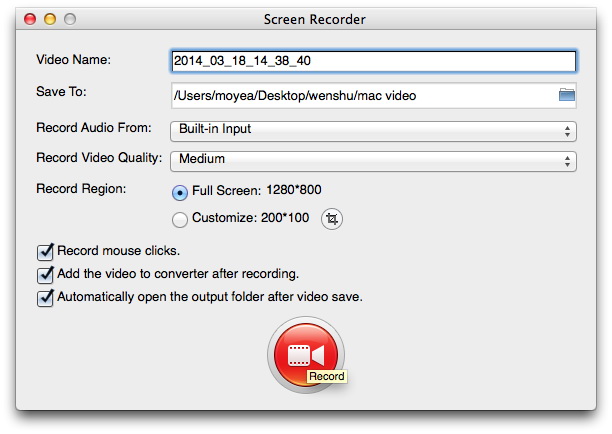
Then do some recording settings on the pop-up "Sreen Recorder" interface, including: Video Name, Save To, Audio source, vidqo quality, record region, etc. As the default format for recordings is MOV, you could check "Add the video to converter after recording" to converted recorded MOV videos to other formats. Then, click the red button to start recording. The program would run on background, minimized in the Dock panel. To finish recording, you need to call it out and click the red button again.
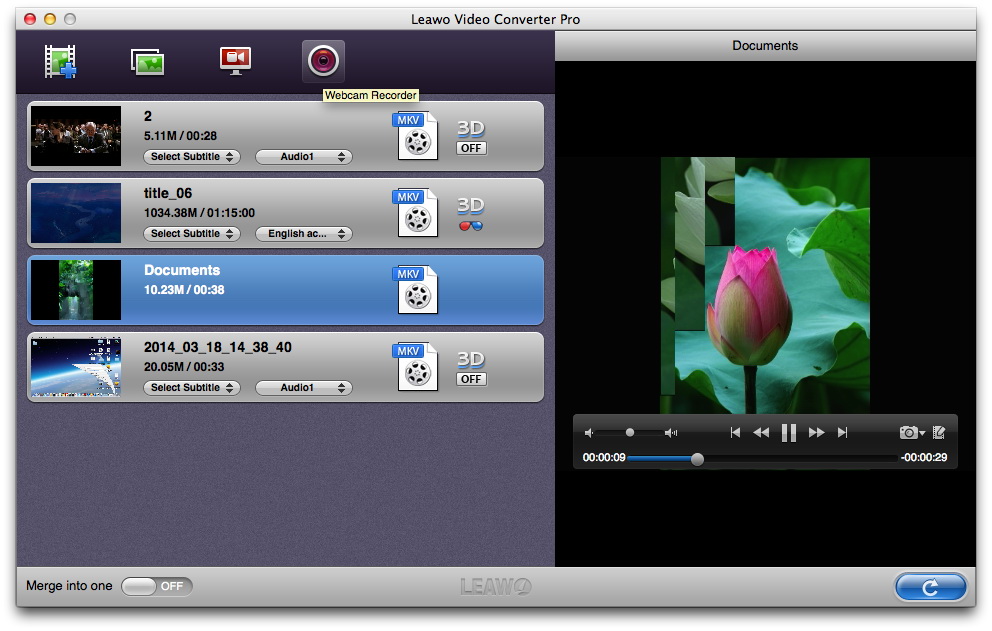
Click "LeawoVideoConverterPro > Preferences > Convert > Output" to set output directory for final recorded videos after conversion. The recorded video would appear on the left processing list panel. Click the clickable icon before 3D button in the recorded video title to call out the Profile panel, where you could set output format.
You could even click the "+" button to adjust video and audio parameters of output files: video codec, bit rate, video size, audio codec, aspect ratio, frame rate, channels, etc.
After output settings, click the convert button on the bottom right corner of the main program interface. Leawo Video Converter Pro für Mac would start converting recorded videos instantly.
Including Webcam Recorder, Leawo Video Converter Pro für Mac could let you make use of your Mac’s built-in camera or external webcam to record videos and then convert recorded videos to other formats for uploading to YouTube, blog, or playing on various players.
After you launch Leawo Video Converter Pro on your Mac computer, click the "Webcam Recorder" icon to enter the Webcam Recorder interface.
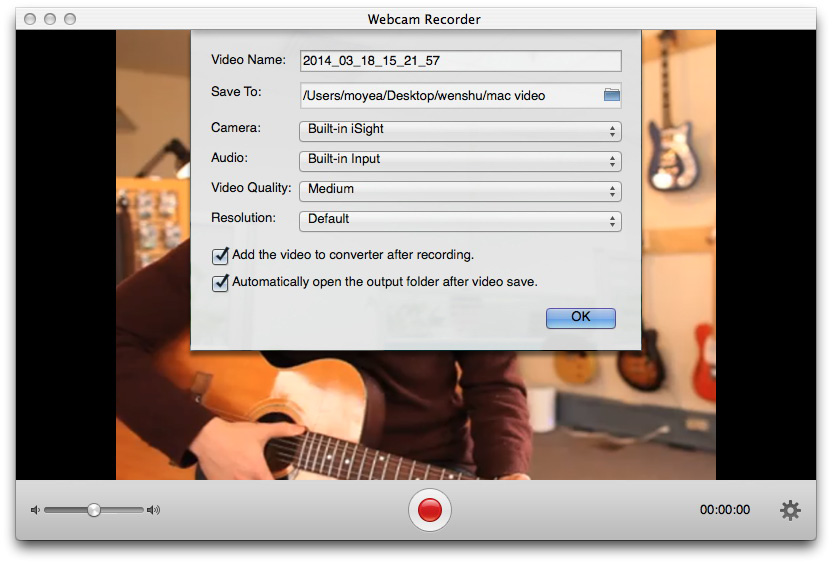
After entering the "Webcam Recorder" interface, click the gear icon on the bottom right corner to call out the Webcam Recorder settings. After setting, click "OK" button.
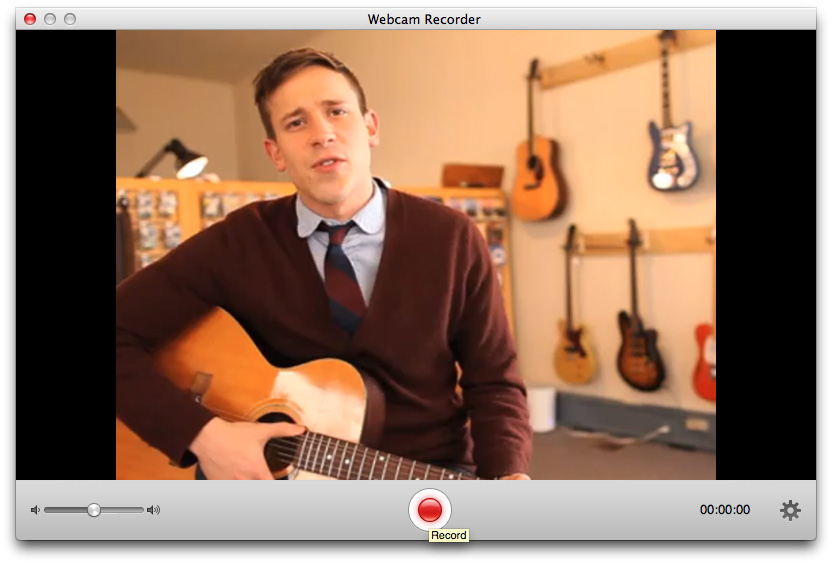
Then hit the red button on the Webcam Recorder interface to start recording. When you want to stop recording, click the red button again.
The recorded videos are in MOV format by default. You could make use of Leawo Video Converter Pro für Mac to convert the recorded MOV videos to other formats for multiple uses. Check "Add the video to converter after recording" option in Webcam Recorder settings. The recorded videos would appear on Leawo Video Converter Pro für Mac. Click the icon before 3D button in recorded video title to enter the Profile setting panel, where you could select various formats as output format.
Leawo Video Converter Pro für Mac allows you adjust video and audio parameters for output files to make the output files meet your players exactly. You could click "+" button to do the changes, including: Video Codec, Bit Rate, Aspect Ratio, Video Size, Audio Codec, Channels, etc.
Click "LeawoVideoConverterPro > Preferences > Convert > Output" to select a folder to save the output files.
Move mouse to the convert button on the bottom right corner, and click it to start converting.
Right click on each video/DVD/recorded video file and select "Media Edit" to get into video editing panel. There are five options available for you to apply Funktionen to the output: Trim, Crop, Rotation, Effect and Watermark.
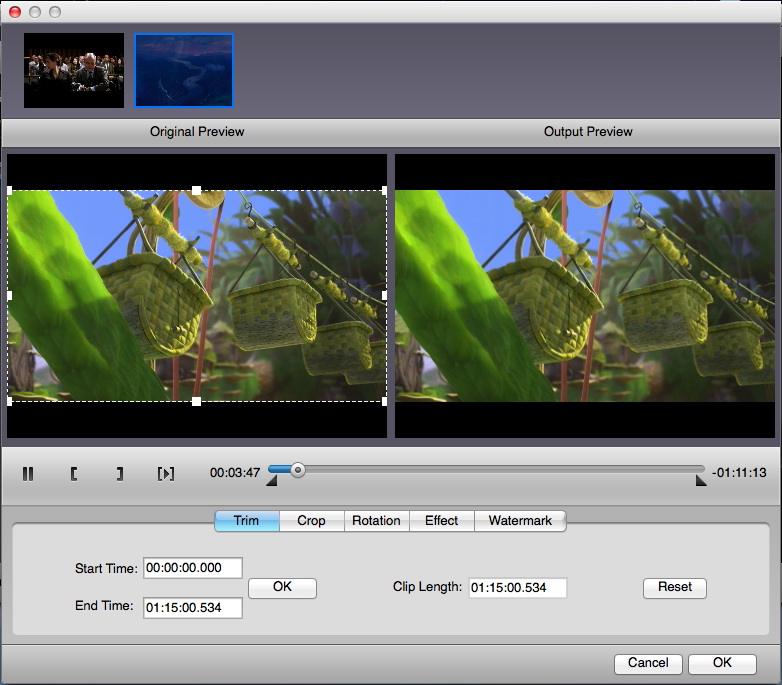
Drag the twin limiters under the video or set values in Start Time and End Time to Video trimmen length to milliseconds.
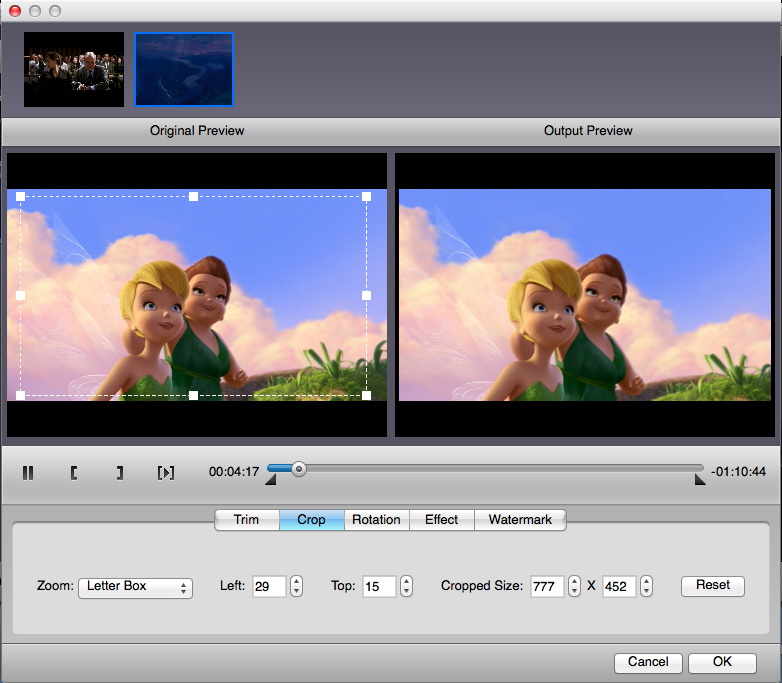
Drag the dot frame on the left original video preview window or set values in Left/Top/Cropped Size to cut the black margins or the unwanted part.
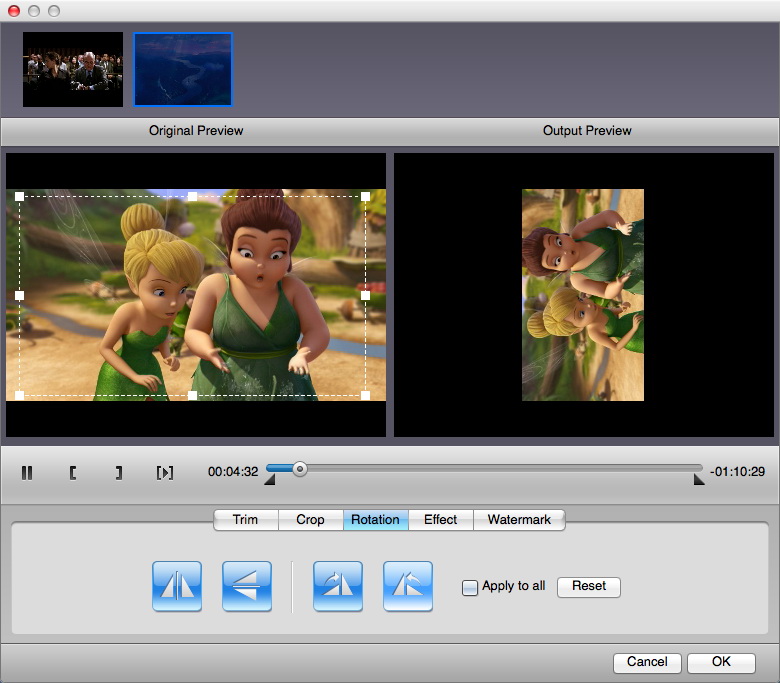
Rotate videos in horizontal flip & vertical flip, or realize to rotate 90° clockwise and rotate 90° counterclockwise.

Drag the sliders of Brightness, Contrast, Saturation and Volume Zoom to set video display effect.

Check "Enable Watermark", then you can add Image or Text watermark to set as your unique logo or banner. You are also able to customize watermark via Transparency, Left Margin, Top Margin and Image Size.
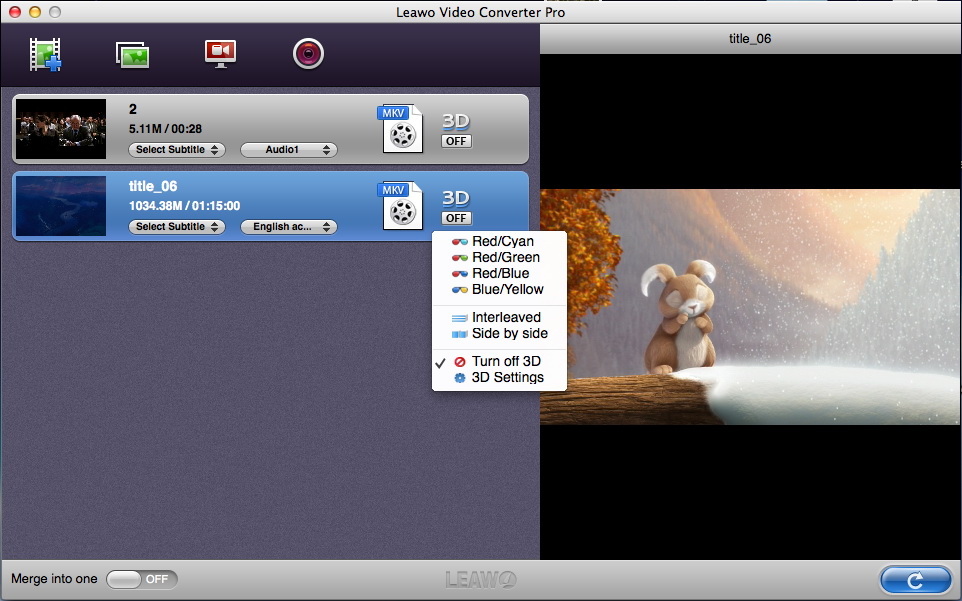
Leawo Video Converter Pro für Mac provides you advanced Mac 2D to 3D converter. So you could freely create 3D movies out of 2D DVD/video files. Firstly check a video/DVD source file, then click the 3D button in the end of each title to choose a 3D effect that is compatible with your device or 3D glasses Red/Cyan, Red/Green, Red/Blue, Blue/Yellow, Interleaved and Side by Side.
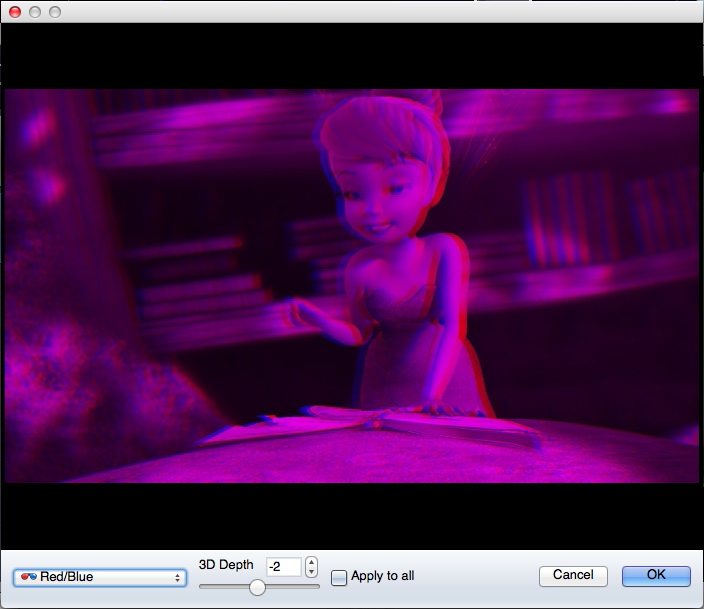
Or you can also select the 3D setting mode on 3D Settings interface. Preview the instant 3D video effect here. 3D Depth is adjustable so you can either set a value in the box or directly drag the slider to choose a specific value.
Size: 21.70 MBVersion: V3.1.0Price: $39.95
Folgen Sie uns


Abonnieren
Abonnieren Sie unseren Newsletter, um über uns auf dem Laufenden zu bleiben.
Alle Produktnamen, Marken, Logos und Bilder von Drittanbietern, die gelegentlich auf dieser Website erwähnt werden, gehören ihren jeweiligen Eigentümern. Dazu gehören YouTube, Apple, Amazon, Adobe, Netflix, etc. Leawo Software ist unabhängig von diesen Eigentümern.