
As an easy way to shoot pictures, iPhone is adopted as one of the most convenient and professional cameras for many users. For many iOS devices holders, iPhone would not be their only device to store pictures or for other usages. Now, some users may prefer to transfer photos from iPhone to iPad for further viewing and sharing. It seems that this would not be a difficult task, but many users still can’t find the good ways to complete the transfer with ease and accuracy. In order to provide more information on how to transfer photos from iPhone to iPad, several efficient ways would be listed below.
- Method 1: Using iCloud to Sync Photos from iPhone to iPad
- Method 2: Using AirDrop to Transfer Photos from iPhone to iPad
- Method 3: Using iTunes to Transfer Photos from iPhone to iPad
- Method 4: Using iTransfer to Transfer Photos from iPhone to iPad
- Method 5: Using Email to Transfer Photos from iPhone to iPad
- Method 6: Using Wireless Transfer App to Transfer Photos from iPhone to iPad
- Method 7: Using Dropbox to Transfer Photos from iPhone to iPad
Method 1: Using iCloud to Sync Photos from iPhone to iPad
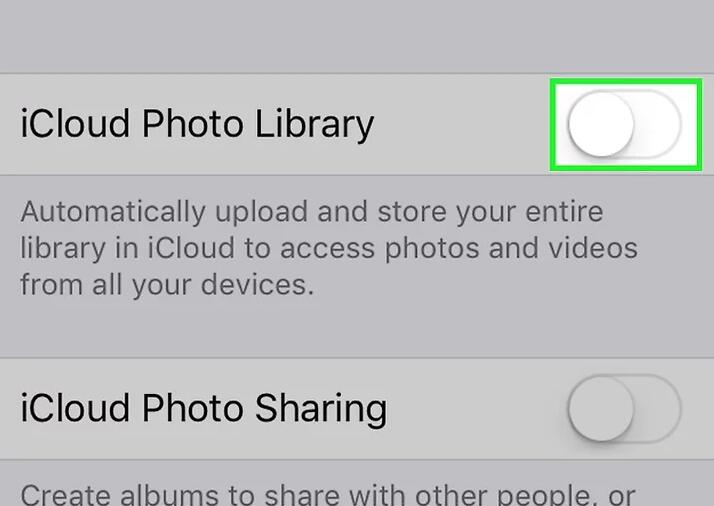
As one of the most useful storage tools on iPhone, iCloud could be your first solution you can turn to. iCloud can transfer photos from iPhoto to iPad easily. This solution can offer you more convenience. You need to make sure you have downloaded and installed iCloud on your iPad. The following steps will show you how to move photos from iPhone to iPad via iCloud.
Step 1: Go to iCloud.com on your computer, and then log in iCloud.com with the same Apple ID account on your iPad.
Step 2: After you log in the account, tap the iCloud icon to enter into the space of your iCloud Drive.

Step 3: When you get access to your iCloud space, tap the Cloud shaped upload icon to browse and upload photos from computer to iCloud.
Step 4: After uploading photo files to iCloud, open iCloud Drive app on your iPad and you will see all the uploaded photo files on your iPad.
Step 5: Click the photo file to open it and then call out the menu at the bottom of the interface, and you can see a share icon. Click the share icon and then download to your iPad.
You can have a try to finish the process of “iPhone to iPad transfer” easily with this method. I hope this way can help you to solve the problem.
Method 2: Using AirDrop to Transfer Photos from iPhone to iPad
AirDrop is a unique function under Apple's iOS, iPadOS and macOS systems. It is used to share files between multiple devices. What you need to do is drag the file to another iOS device, which has been set with another account to perform one-to-one file transfer (similar to wireless network transfer). If you prefer to transfer different files from iPhone to iPad wirelessly, then you can make full use of AirDrop transfer function.

Steps:
- Open your iPhone and turn on AirDrop. Usually, you only need to activate Wi-Fi connection button and Bluetooth button and make sure your iPad and iPhone is working under the same Wi-Fi network.
- Open the Photos app on your source iPhone, then select all the photos you would like to transfer.
- Share the photos and click on the icon “Share” and choose the correct AirDrop avatar for iPad to start transferring these photos to iPad.
Method 3: Using iTunes to Transfer Photos from iPhone to iPad
If your Mac computer has installed the newest version of iTunes, as an iPad user, you are able to sync photos from computer. The photos will be saved in the “Photo Library” on your iPad, and they can be viewed and edited on your iPad. To move photos from iPhoto to iPad, follow the steps below:

Steps:
- Install and run iTunes on your Mac computer, and click “Edit > iTunes > Preferences > Devices”, and tick “Prevent iPods, iPhones and iPads from syncing automatically”.
- Plug iPad into computer via the USB cable, and iTunes will launch automatically. If not, you will need to manually open it.
- iTunes will recognize your iPad. Click the iPad icon, and then select “Photos” in the “Summary” panel under the category of “Settings”.
- Check “Sync Photos from” and then select the folder that you have saved the photos. Then click “Sync” at the right bottom. Finally, click Apply to start syncing the photos.
- Then iTunes will sync the folder with your iPad. When the sync is done, you will get all the photos from the folder to your iPad. This is a very helpful way to copy photos from iPhone to iPad.
Method 4: Using iTransfer to Transfer Photos from iPhone to iPad
iPad users can also use the third-party iPad transfer software to transfer photos from iPhone to iPad. Among all the transfer programs for iOS devices on computers, Leawo iTransfer is really quite fantastic to use. This software allows users to transfer and share files among iOS devices, iTunes and computers without the sync of iTunes, and users can transfer various kinds of files without any difficulty. If you are a music enthusiast, you can’t miss: How to Download Music from Mac to iPhone. The following guidance will show you how to move photos from iPhone to iPad.
Step 1: Download Leawo iTransfer
Click to choose a proper version according to your computer system, then download and install Leawo iTransfer on your computer.

-
Leawo iTransfer
- Transfer files among iOS devices, iTunes and PCs with ease.
- 6x faster than iTunes
- Transfer up to 14 kinds of data and files without iTunes.
- Support the latest iOS devices like iPhone 12, iPhone 12 Pro, etc.
- Play back, view, and delete data and files on iOS devices.
- Support Windows & Mac OS
Step 2: Run Leawo iTransfer and Plug iPad into Computer
Run Leawo iTransfer and connect iPad to computer with the USB cable. The software will automatically detect the libraries of iPhone, and then show the libraries in the left sidebar.

Step 3: Tap “Photos” Library and Then Add File to iPad
Tap the name of iPad and choose “Photos” library in the left sidebar. The synced photos on your iPad will display in the right part of the interface. When the content of your “Photos” library is empty, Leawo iTransfer will provide you with an “Add File” button in the middle of the panel to assist you to add photos to iPad from computer. Or you can click “File > Add > Add File/Add Folder” successively at the upper right corner of the panel to copy photos to iPad from your computer.

Step 4: Choose Photo Files and Transfer Photos from iPhone to iPad
After choosing your photos, Leawo iTransfer will begin transferring photos from iPhone to iPad. The procedure bar in the pop-up panel will show you the percentage of the transfer process. When the photo transfer is completed, you will get the photos in your “iPad Photo Library”.

Method 5: Using Email to Transfer Photos from iPhone to iPad
Besides iCloud, iTunes and Leawo iTransfer, people can also use email to sync photos from iPhone to iPad. This is also an easy method to share a little number of photo between iPhone and iPad. Here are the detailed steps.
Step 1: Open Photos app on your iPhone. Locate the preferred photos you would like to share on your iPhone. Then, click the “Share” button.

Step 2: Choose the “Mail” icon and open a new email. The photos will be attached to the draft.
Step 3: Type in the email address of the iPad account and edit the subject and details as you like. Click “Send” on the upper-right corner to finish your job. Then you can go to iPad and open your “Mail” app to save the photos down any time.

Method 6: Using Wireless Transfer App to Transfer Photos from iPhone to iPad
Additionally, if you have known Wireless Transfer App, then you would have more ways to solve the problem. Wireless Transfer App could transfer photos from iPhone to iPad without further actions on your computer. You only need to make sure that both your iPhone and iPad have been connected to the same Wi-Fi network.
Step 1: Download Wireless Transfer App on your iPhone and iPad.
Step 2: Connect your iPhone and iPad to the same Wi-Fi network and run the app simultaneously on the two devices.

Step 3: Enter the main screen of the app on your iPhone and click Send button. Then you can choose your own preferred photos on your iPhone to your iPad.

Step 4: Click Receive button on your iPad and then you can find the device name of your iPhone. Tap the iPhone’s name and then the photos would begin to be transferred from iPhone to iPad. Finally, tap the Download button to download the photos you prefer to your iPad.

Method 7: Using Dropbox to Transfer Photos from iPhone to iPad
You can also choose other cloud storage service to transfer files under the good Wi-Fi connection. Dropbox can be also used to transfer files. But in comparison, Dropbox would be limited on the upload file size. Here the tutorial of transferring music from iPhone to iPad with Dropbox would be introduced. If you are interested in Dropbox, here are the steps on how to transfer music files from iPhone to iPad via this program.

Steps:
- Download and install Dropbox on your iPhone.
- Upload the music files to the Dropbox on your iPhone. Open Dropbox and choose “Files” > “My Files” > “Upload Files” to upload the photos on your iPhone to Dropbox.
- Install Dropbox on your iPad as well.
- Sign in Dropbox with the same account on your iPad.
- Sync and download the uploaded photos to iPad. Once you signed in the same account and all the files would be synced on your iPad and you can see all the loaded photos from your iPad. Then choose the photos and download them to the local of your iPad.
 Dec. 11, 2017 by


 Prof. Media
 Blu-ray Ripper
 Blu-ray Copy
 iOS Data Recovery
 [12/29/23] MAX Downloader V15.0.0
 10,000,000 people are using Leawo!
 All Transactions are protected!
 30-Day Money Back Guarantee!