Nowadays, it has been well-known that the iTunes is popular for managing the music library or syncing your iPhone with the Mac. Additionally, the iTunes store, which is a special feature of iTunes, helps you choose and enjoy the latest movies, TV shows and music videos. The advantages of iTunes store lie in the large library of films and nice blend genres which include new, classic, and romances shows it offers. Also, the apple movies rent is much lower than the price for buying them. Meanwhile, the movies are provided in high quality, and the subtitles are distinct, which will capture your mind and help you kill boredom. However, you can't take the advantage of the iTunes store if you don't know how to rent movies on iTunes. Thus, this article mainly tells you how to get iTunes movie rentals.
How to rent movies on iTunes
Similar to iTunes movies purchase, the procedure of renting movies on iTunes mainly includes 5 steps. Before we start, you should bear in mind that iTunes 10 or above is required to rent movies on the Mac and the iTunes movies rented could only be played by the Apple devices. How to rent movies on iTunes? The procedure of renting movies on iTunes 12 is articulated as follows.
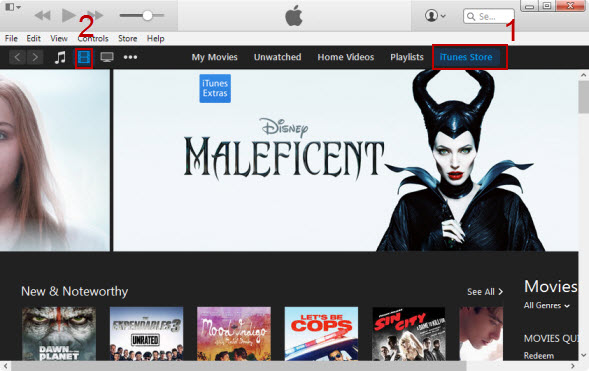
Step 1. Launch the iTunes program on the Mac and click on the iTunes store tab on the right side of the middle toolbar.
Step 2. Click on the Movies icon which is located in the middle of the left toolbar to enter the interface about the movies.
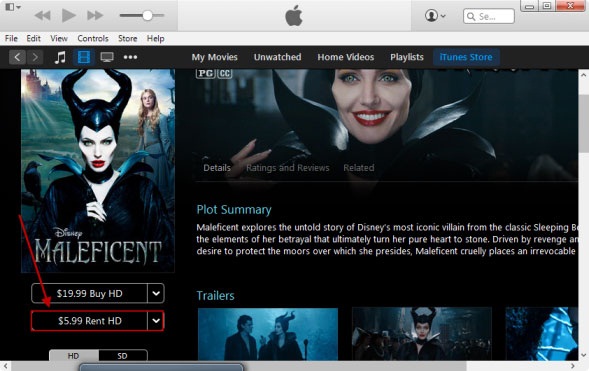
Step 3. Determine the movie you want to rent and click on the image of the movie to enter the its own interface. Then, click on the Rent button in the left panel of the interface.
Step 4. Enter the Apple ID and password when they are required, and click on OK. However, if you try to rent a movie for the first time, your identity need to be verified through the security questions.
Step 5. Click on the Watch Now tab to play the movie. Alternatively, click on the Watch Later tab, and find the name of the movie in the Rented tab. It's up to you to decide. If you want to download the movie to your Mac, click on the Download icon.
How to remove DRM from the rental movies and convert them to ordinary videos using Leawo Prof. DRM
Unlike the purchased iTunes movies, the rented movies have time limitation for playing. In the other words, a movie will expire in 30 days after it is rented, and it will expire in 24 hours once it has been played. Thus, it's quite annoying if you want to watch the rented movies freely and permanently. The solution to the problem is to remove the DRM from the iTunes movies using Leawo Prof. DRM. The Leawo Prof. DRM could remove the DRM protection from the iTunes M4V video files directly and convert the M4V video files to MP4 files in order to get rid of the time limitation while keeping the high quality of movies. Read the procedure carefully and patiently to get to understand how to remove DRM from iTunes movies without problems.
Step 1. Add M4V files to Prof. DRM
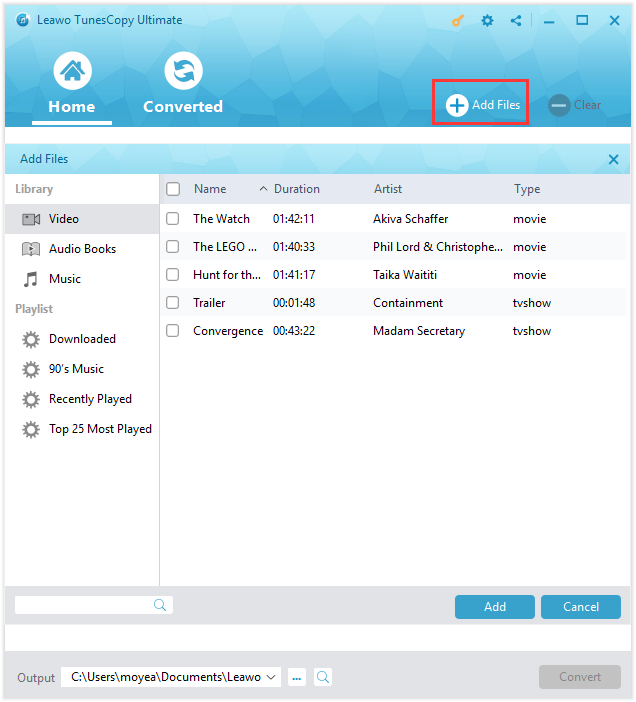
Launch the TunesCopy program on the Mac, and click on Add Files button in the middle of the sub-menu bar. Click on Video just below Library in the pop-up Add Files panel and choose the M4V files to be imported into Prof. DRM. Then click on Add to begin the importing process.
Step 2. Edit the M4V files
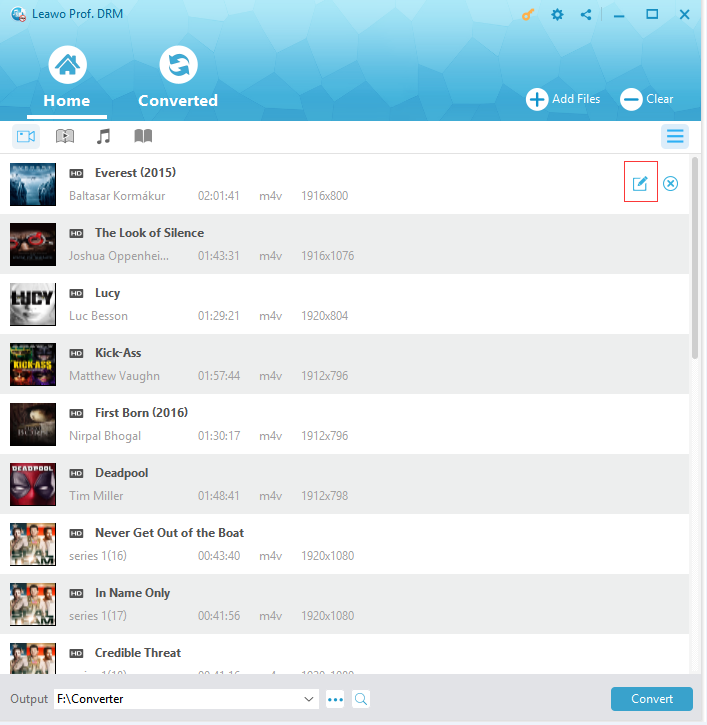
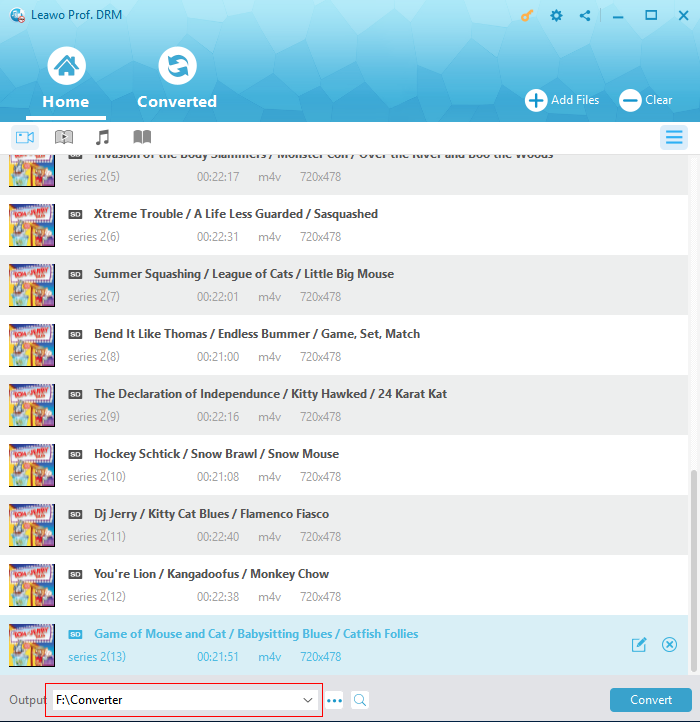
Click on Video tab to view the list of the M4V files which have been added to Prof. DRM. You could choose the file and click on the remove button to remove a M4V file from the list. Also, all the M4V files will be removed immediately after you click on Clear button on the sub-menu bar. Furthermore, the Prof. DRM enables you to edit the M4V file through the edit feature. Choose an M4V file in the list and click on the Edit button, then choose the audio tracks and subtitles you like. The chosen audio tracks and subtitles will be kept after removing the DRM protection from iTunes movies.
Step 3. Set the output directory
Click on "…" button at the bottom of the interface and choose the appropriate output directory for keeping the MP4 file after you remove the DRM from iTunes movie.
Step 4. Removing DRM from iTunes M4V files
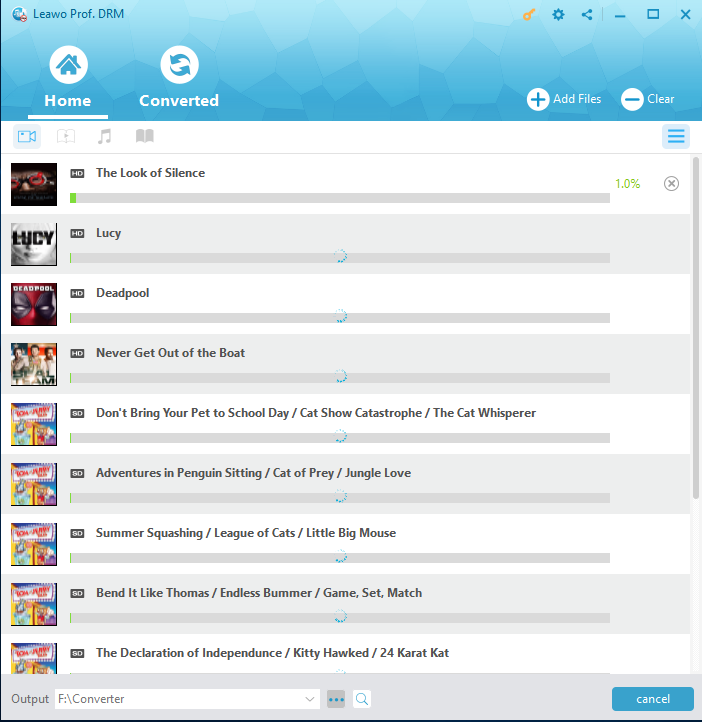
Click on the Convert button which is located in the lower right corner of the interface to start removing DRM from iTunes movies. You have to enter the Apple ID and password when prompted so that your computer is authorized for playing the iTunes movie before the conversion process starts. After the conversion process, the M4V files will be converted to MP4 files with 100% original quality.
Step 5. Locate the output MP4 file
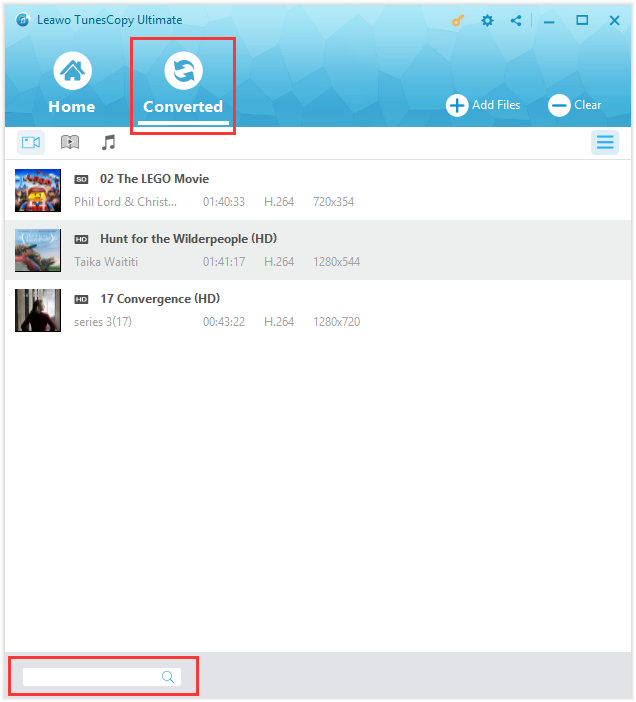
The converted tab will be marked with a red dot once the conversion process finishes. Click on the Open file option at the end of the target file if you want to open the output MP4 file immediately. Also, you can find the output file without effort through the quick search column at the bottom of the interface.
The iTunes store could provide you with millions of hot movies with high quality. The advantages of iTunes store lie in the large library of films and nice blend genres it offers. Thus, you need to know how to rent movies on iTunes if you want to take full advantage of the iTunes store. The DRM protection which is appended to iTunes movies results in the time limitation of the iTunes movie rented, therefore, you need to know about how to remove the DRM from iTunes movies. This article mainly tells you how to get top movie rentals. Also, the procedure of removing DRM from iTunes movies using Leawo Prof. DRM is articulated clearly. If you follow these steps carefully and patiently, you could enjoy the movies rented permanently and pleasantly. If you have other iTunes media content, you can also use Leawo Prof. DRM to convert them into common files as it can also remove DRM from iTunes music and audiobook and Audible audiobooks other than iTunes rental and purchased movies.

