
QuickTime files are used to encode and store digital video for sharing among users and playback on QuickTime and other Apple’s applications. QuickTime movies are often found on the Internet or produced by some digital cameras. There might be some cases that you need to burn QuickTime movies to DVD on Mac or Windows computer so as to save your hard drive space or to conveniently play those QuickTime files on your DVD player. But unlike digital videos that are compressed with the MPEG-2 standard, QuickTime files are not usually published onto DVD in their native format. In cases like these, you can refer to this post for an effective QuickTime to DVD burner to help you burn QuickTime to DVD on Mac or PC.
Part 1: Know about QuickTime
QuickTime is an Apple’s multiplatform, multimedia technology for handling video, sound, animation, graphics, text, interactivity, and music. As a cross-platform technology, QuickTime can deliver content on Mac OS and Windows computers. Many applications, including Final Cut Pro, use the powerful architecture of QuickTime to view, create, import, and export media.
QuickTime supports most major videos, including: MOV, MPEG and so on, audios, like: M4A, MP3 etc., and graphics file formats. It works with local disk-based media, media accessed over a network, and streams of real-time data. QuickTime supports a wide variety of video and audio codecs and can be extended with third-party codecs. But if you want to play movies in other formats like RMVB, WMV, FLV, MKV, etc.? QuickTime player is obviously not able to accept these formats.
Part 2: How to burn QuickTime movie to DVD on Windows own DVD burner - Windows DVD Maker
As a Windows-specific DVD burning software tool, Windows DVD Maker supports burning video in more than 60 formats to DVD, including AVI to DVD, DIVX to DVD, MPEG to DVD, WMV to DVD, RM to DVD, QuickTime to DVD. With Windows DVD Maker, users can not only create DVD movie disc with their own subtitles (up to 32 for each video), but also make their own DVD menu. In addition, Windows DVD Maker allows users to burn videos to ISO files. What’s more, with an easy to use interface, Windows DVD Maker create DVD chapters freely.
Next, I'll show you the specific steps that how to burn QuickTime to DVD with Windows DVD Maker:
Step 1: Download Windows DVD Maker from the web and install it on your computer, then run Windows DVD Maker.

Step 2: Select menu File -> Add Video Files ... to add your video files. Once you add the video file, it will be shown in the video list.
Step 3: Windows DVD Maker allows you to customize the DVD menu and menu text so that you can make the disc your own disc and give it the look you want. This includes changing the DVD menu style, menu text and DVD menu buttons. Also, if you add images to your DVD, you can customize how they play on the DVD as a slideshow, and you can add music, too.
Step 4: Insert a blank DVD disc to your DVD recorder. Press F5 to burn the videos to DVD disc. Then it will pop up a dialog to show the burning progress.

Part 3: How to burn QuickTime movie to DVD on Mac own DVD burner – iDVD
As we all know, Apple has its own DVD burner application. This is iDVD. Similar to Windows DVD Maker for Windows users, iDVD allows Mac users to burn QuickTime movies, MP3 music and digital photos to DVDs that can be played on commercial DVD players. iDVD contains more than 100 Apple-designed DVD menus and sub-menu themes, making it easy to create a DVD menu system. Each theme includes a "placement area" where you can place movies or photos, some of which can be animated automatically. Any theme can be applied to every menu in an iDVD project. With iDVD, you can easily convert QuickTime to DVD.
Here are the specific steps that how to burn a DVD from QuickTime on mac with iDVD:
Step 1: Launch iDVD, and then click the Create a New Project option. On the pop-up Create Project interface, give the output disc a name in Save as option and choose disc aspect ratio between 16:9 and 4:3.

Step 2: Go to File > Import > Video to browse and locate QuickTime movies for loading. Best Mac formats to import are DV, M4V, H264. Next choose a theme style for the DVD menu. You could customize the disc menu as you like. After all things done, insert a blank disc in your SuperDrive and click the Burn button (just to the right of the volume slider) to start converting QuickTime to DVD.
Part 4: The best alternative of Windows DVD Maker and iDVD - Leawo DVD Creator
As the best alternative of Windows DVD Maker and iDVD, Leawo DVD Creator can easily burn videos to DVD or make photos as DVD slideshows on both Windows and Mac. Leawo DVD Creator supports more than 180 video types, including MOV, MKV, and so on. Therefore, it is of course possible to burn QuickTime movies to DVD.
In addition to the main functions of burning DVDs, Leawo DVD Creator offers over 40 DVD menus for users to use. At the same time, it allows users to customize DVD menu or download DVD menu online. In addition, Leawo DVD Creator also allows users to process the loaded video, including: Adding watermark to video, trimming the video length and so on. More importantly, Leawo DVD Creator has a built-in video player. With this feature, users can not only view their video processing effect in time, but also take a screenshot of the video. The most surprising thing is that Leawo DVD Creator supports batch burning of video, which makes burning video much faster and more convenient.
Next, I will show you how to burn QuickTime movie to DVD with Leawo DVD Creator:
![]()
![]()
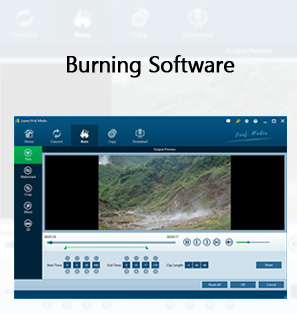
Step 1: Firstly, install and run Leawo Prof Media on your computer. Next, click Blu-ray/DVD Creator button or the Burn tab to go to the function interface of Leawo DVD Creator.

Step 2: Click the Add Video button or drag the QuickTime video files to the interface of Leawo DVD Creator to load the QuickTime video files from computer hard drive to Leawo DVD Creator.

Step 3: In the drop-down menus of Subtitle and Audio, you can select one of the subtitles and audio tracks, or you can import subtitles from local files. At the bottom of the page, you can not only choose to burn QuickTime video files to dvd-9 or dvd-5, then choose video aspect ratio between 4:3 and 16:9, but also set the resolution to the Fit to disc that best suits video.

Step 4: Click the edit button to the right of the Audio drop-down menu to edit video. Leawo DVD Creator provides users with 6 kinds of video editing functions, such as trimming video length, adding 3D effect, adding watermark to video, etc. You can use these functions on your own. Finally, click the OK button to save the changes.

Step 5: There is a sidebar to the right of Leawo DVD Creator, where we select the DVD menu. We can preview the DVD menu we select by clicking the eye icon. What’s more, users can further customize the DVD menu. Using the editor, we can edit the DVD menu name, font size, font color and other content. Alternatively, you can change the background to an image or video in the local file and add background music to it. When all Settings are completed, click the save button at the bottom of the page.

Step 6: Click the green Burn button on the screen to bring up the sidebar. In the Burn to option, Leawo DVD Creator allows you to burn QuickTime video files to the DVD folder, ISO files and a blank writable disc. Because we want to burn QuickTime video files to DVD, we tick the third option. in the Disc Label and Save to options, we can name the file that will be stored in the DVD and set output path. Finally, click the round Burn button to start the process of burning QuickTime video files.

From the above introductions, it is easy to see that Leawo DVD Creator is more powerful than other QuickTime to DVD software tools. Here are the key reasons why I think so:
1. Leawo DVD Creator supports both Windows and Mac, while iDVD is only available for Mac, and Windows DVD Maker is only available for Windows.
2. Leawo DVD Creator can burn videos to DVD discs, DVD folders and ISO files, while the other two software tools can only burn videos to DVD discs.
3. Leawo DVD Creator not only edits the video, but also browses the video in time through the built-in video player, while the other two software tools do not provide these features.
In addition, Leawo DVD Creator has other advantages that users can experience during their use. All in all, Leawo DVD Creator is our first choice.
 Nov. 06, 2013 by


 Prof. Media
 Blu-ray Ripper
 Blu-ray Copy
 iOS Data Recovery
 [12/29/23] MAX Downloader V15.0.0
 10,000,000 people are using Leawo!
 All Transactions are protected!
 30-Day Money Back Guarantee!