As we all know that Android device can be used as one hard drive quite easily, which offers convenience for users. However, iOS devices, iPad for instance, are not so convenient for you to make it. If you are just seeking the method to make iPad as an external hard drive for data transferring, this guidance will be proper for you.
Part 1: How to Transfer Data between PC and iPad via iTunes
When it comes to the issue of how to use iPad as an external hard drive, iTunes may be the first tool that comes to your mind. It can be applied to fix some transfer problems between iOS device and computer. The detailed steps of using the iPhone or iPad as external drive with the assistance of iTunes are as follows.
1.1 How to Transfer Data from iPad to PC via iTunes
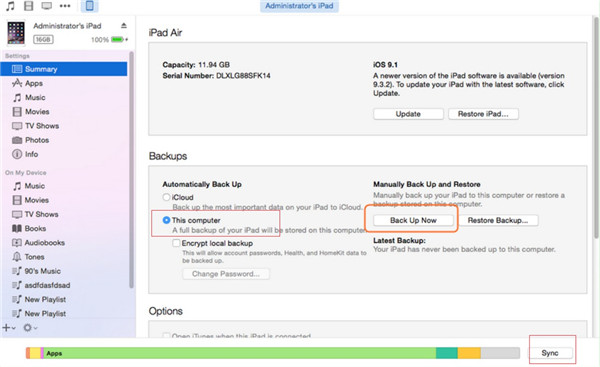
1. On your computer, run the latest version of iTunes and then insert iPad into PC with suitable USB cable. After that, move to “Edit> Preferences > Devices” to tick the option of “Prevent iPods, iPhones, and iPads from syncing automatically”.
2. Click on the iPad icon and the move to the “Summary” panel under the menu of “Settings”. Check “This computer” by dragging down to the area of “Backups”. Click on “Back Up Now” and then tap the “Sync” button at the bottom right of the window. After a while, your iPad data and files will be accessible on PC via iTunes.
1.2 How to Transfer Data from PC to iPad with iTunes
As for how to transfer files from PC to iPad via iTunes, I would like to take movies for example to show you how to realize your goal of using the iPhone or iPad as external drive.
1. Refer to the first step in Part 1.1 to prevent the automatic syncing process.
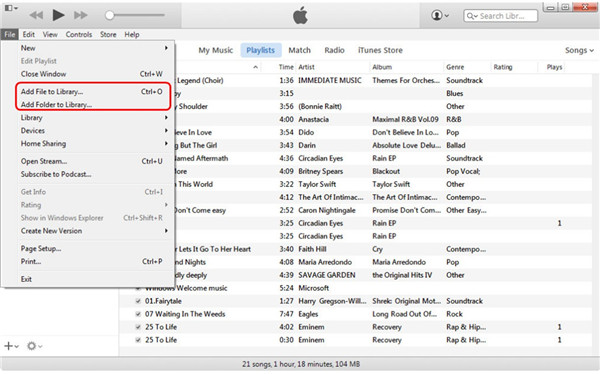
2. Move to click on the “File” button on iTunes interface and then click on “Add File to Library” or “Add Folder to Library” as you need. Find the movies on your computer and then add them to the library of iTunes.
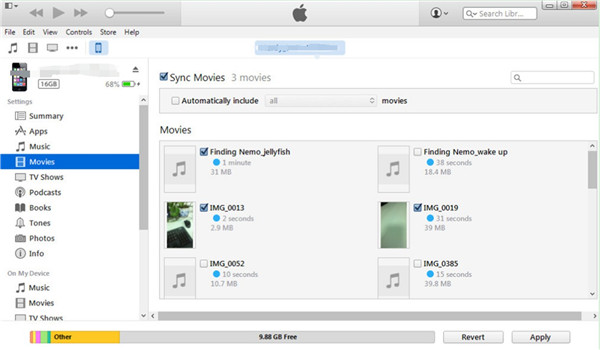
3. After that, you need to click on iPad icon and then tap on “Settings > Summary > Movies > Sync Movies” in order. In the end, click on the “Apply” button and the software will begin to sync movies from iTunes library to iPad. You need to wait for a while. When the process is over, your can enjoy PC movies on iPad when you are on way home or way to work at ease.
It is not tough to make use of this method to make iPad as an external hard drive for data transferring. iTunes is actually quite helpful in transferring and backing up files. Have a try and you will fall in love with this tool.
Part 2: How to Transfer Data between PC and iPad via iTransfer
If you are not fond of iTunes, iTransfer can help you get rid of the issue of using the iPhone or iPad as external drive perfectly. It is easy for you to take advantage of iTransfer to manage files on iPad and PC. To transfer files from PC to iPad and to transfer data from iPad to PC are quite simple tasks for it. If you do not believe in my words, you can now download and install it on your computer to have a try by referring to the following steps.
2.1 How to Transfer from iPad to PC via iTransfer
This is not hard to do at all. Follow the steps shown below and you will know how to make it. Here I would like to take movies for instance.
Step 1. Launch iTransfer and Connect iPad to PC
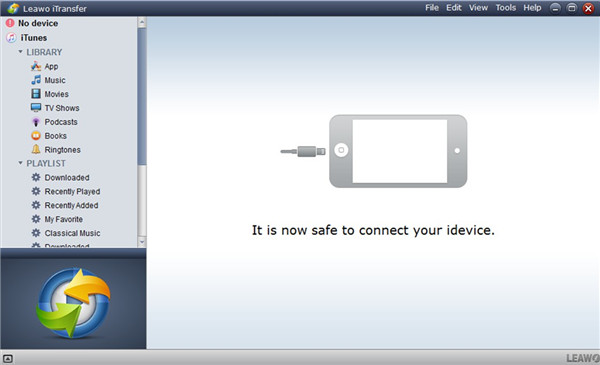
On your PC, you need to run this software and then connect iPad with it with proper USB cable. Wait until the information of iPad shows up.
Step 2. Choose Files and Click on “Transfer”
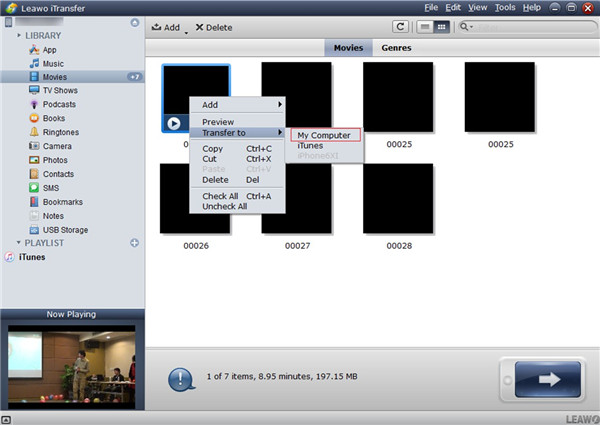
Find iPad icon to click on. Move to click on the “Movies” tab under the menu of “LIBRARY”. Choose the movie files that you want to share to PC and then right click on one chosen movie to call out the menu of “Transfer to > My Computer” to tap on.
Step 3. Set Output Folder and Transfer Files
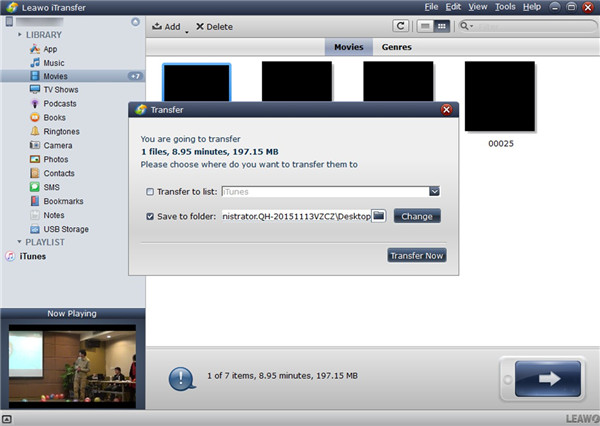
In the next panel, check the option of “Save to folder” and then tap on the “Change” button to find a location on PC to save the exported movie files. Finally, you can click on “Transfer Now” to begin to export movies to PC folder. Wait for a few seconds and the process will comes to an end. Thus, the iPad movies will be accessible on PC.
2.2 How to Transfer from PC to iPad via iTransfer
After you know how to use iTransfer to transfer files from iPad to PC, now you can continue to read this sub-part to know how to share files from PC to iPad. Movies will also be taken example in the following instructions.
Step 1. Launch Leawo iTransfer and Connect iPad to PC
Refer to the first step in Part 2.1 to make it.
Step 2. Add Files and Transfer to iPad
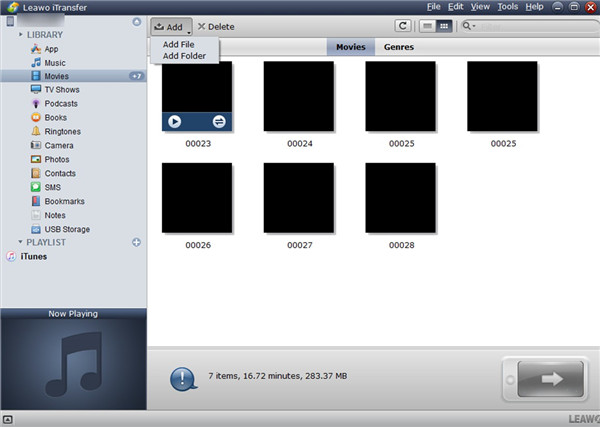
Click on iPad icon and then move to tap “Movies” tab under “LIBRARY” menu. Tap on the “Add” button and then choose “Add File” or “Add Folder” according to your need. Find the movie files on PC and then open it to import to iPad. The process will take you several seconds. After that, you can enjoy PC movies when you are on the go.
As you can see, this method to make iPad as an external hard drive for data transferring is quite convenient. There is no need for you to worry about data loss at all. The process is quite safe and accurate. You can choose the files you actually need to initiate the transfer procedure.
Part 3: How to Delete Data on iPad without iTunes but iTransfer
To delete file on iPad is also one great function of Leawo iTransfer to deal with how to use iPad as an external hard drive. With the assistance of this wonderful program, you can clear iPad files on PC without any difficulty. Check out the detailed steps shown below to reach your goal easily. Let’s have a look at how to delete movies on iPad for instance.
Leawo iTransfer
☉ Transfer files among iOS devices, iTunes and PCs with ease.
☉ Transfer up to 14 kinds of data and files without iTunes.
☉ Support the latest iOS devices like iPhone 7, iPhone 7 Plus, etc.
☉ Play back, view, and delete data and files on iOS devices.
Step 1. Launch Leawo iTransfer and Connect iPad to PC to View Movies
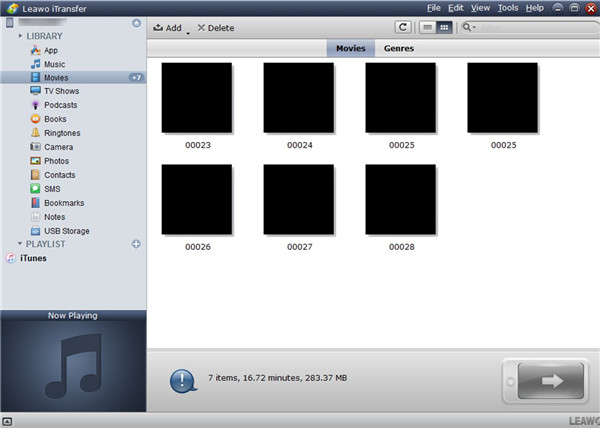
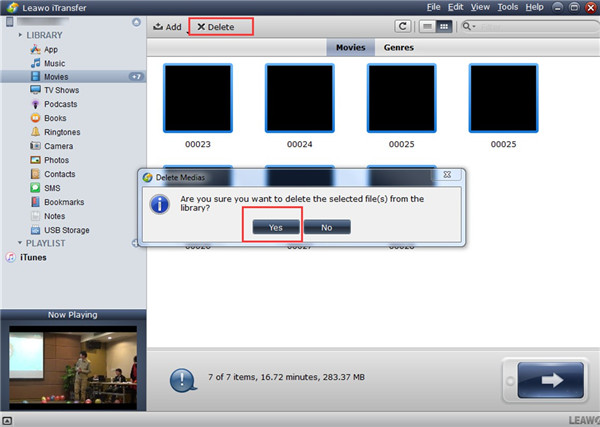
Plug iPad into PC with suitable USB cable and then click on iPad icon. Head to “LIBRARY > Movies” to check out all movie files on iPad.
Step 2. Choose Movies and Delete from iPad
Select the movie files that you want to clear from iPad. Afterwards, click on “Delete” button. A panel will show up to require you to confirm, and you need to tap the “Yes” button. In a few seconds, the chosen movies will disappear in the interface. Thus you successfully realize your goal of deleting files from iPad via iTransfer.
The steps to fix how to use iPad as an external hard drive are so easy to understand. If you are lucky to read this guidance, you can now use this tool to achieve your aim perfectly and efficiently. But I still want to tell you that iPad cannot be as convenient as real external hard drive, so you'd better get a real external hard drive. Thus you can use it to backup iPad data to external storage.

