Have you ever been annoyed by your mistaken deletion of photos on iPhone? Or have you ever been disturbed by the prop-up “Insufficient Storage Space”? If your answer is yes, then my suggestion will be to backup iPhone photos to Google Drive and then delete all the photos in your iPhone to free some storage space of your iPhone. Thus, these two problems will be solved at once by uploading iPhone photos to Google Drive. However, how can we backup iPhone photos to Google Drive? In this guidance, I will show you two solutions on how to upload photos from iPhone to Google Drive.
iPhoto is also a good place to store iPhone photos, see how to make it by clicking: How to Import Photos from iPhone to iPhoto
- Part 1: Upload Pictures on iPhone via Google Drive App
- Part 2: Upload Pictures on iPhone to Google Drive via Photos app
- Part 3: Upload Pictures on iPhone to Google Drive via iCloud.com
- Part 4: Upload Pictures on iPhone to Google Drive via Mobile Google Drive Web
- Part 5: Upload Photos to Google Drive from iPhone on Computer
Part 1: Upload Pictures on iPhone via Google Drive App
The most common and simplest way to upload iPhone photos to Google Drive is to use the Google Drive app, which can be downloaded directly in the App Store on your iPhone. In the following context, I am going to show you how to upload photos to Google Drive from iPhone directly in Google Drive app.
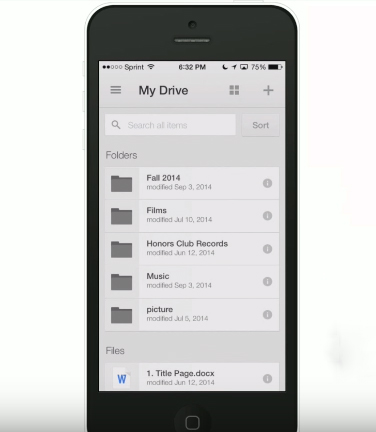
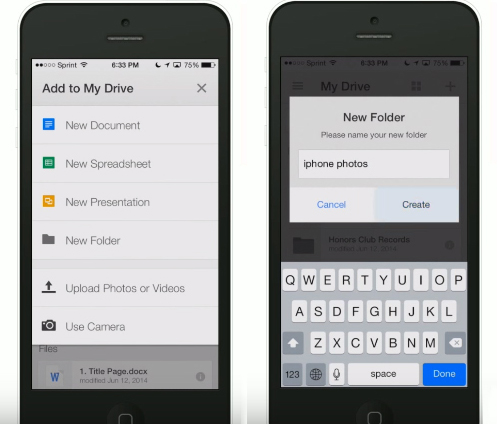
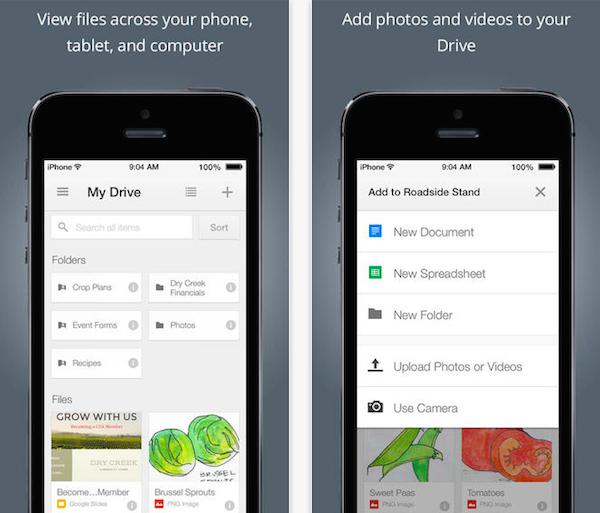
1. Firstly, you need to download Google Drive from the App Store and sign in it. And then launch the Google Drive app and click the plus icon at the top right corner of the page.
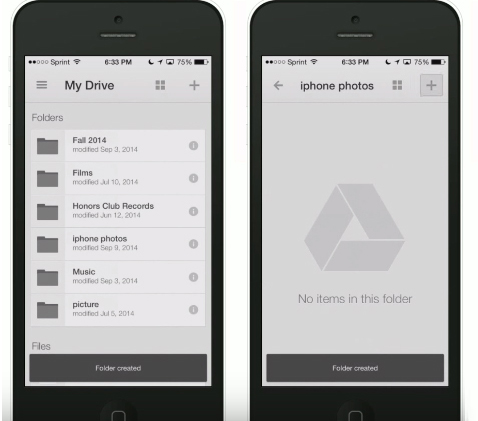
2. Secondly, you need to click the “New Folder” icon to create a new folder and rename it as “iPhone Photos” for convenience.
3. Thirdly, you need to tap the “iPhone Photos” folder you’ve created and then click the plus icon at the top right corner of the page to upload iPhone photos to Google Drive.
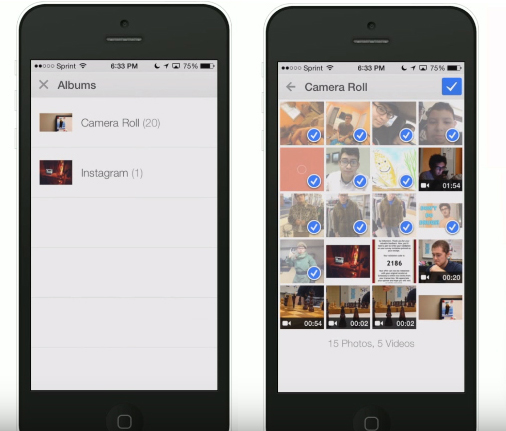
4. Finally, just choose the album and click the photos you want to upload, and then click the tick icon at the top right corner of the page to start uploading photos to Google Drive from iPhone.
Part 2: Upload Pictures on iPhone to Google Drive via Photos app
1. Download the app of Google Drive from app store on iPhone. Open the Google Drive app and sign in with Google account that you have.
2. Go back to home screen on your iPhone, then go to your iPhone photos app. Open this app and the photos you want to upload to Google Drive must be found.
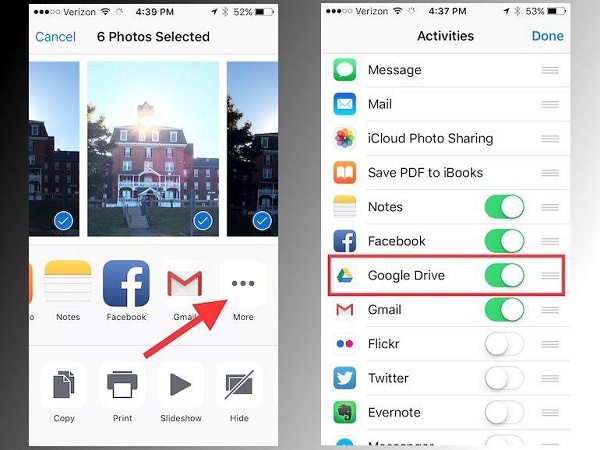
3. Tap on “Share” button on the left bottom and choose the photos you need. There are some methods related to sharing photos are listed in the second line, slide it to the left side and tap on the button “More”.
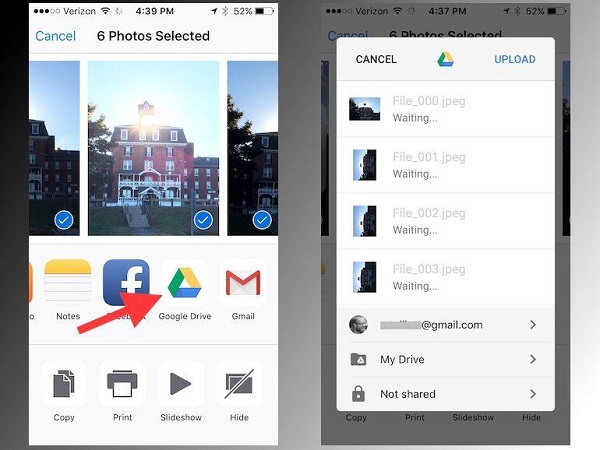
4. Find the photos sharing method: Google Drive by sliding down. The switch next to this option must be toggled on. Then tap on the icon option “Google Drive” to send the photos.
5. The photos will be continued to send to Google Drive by confirming. The time of the completion of photos uploading will rely on the number of selective photos.
Part 3: Upload Pictures on iPhone to Google Drive via iCloud.com
iCloud offers good storage for photos. All photos can be kept updated on Apple device via iCloud. However, iCloud only provides 5 GB storing space for free of charge. In order to save more free space on iCloud, transferring the data such as photos or other files to Google Drive which is another cloud service would also be a great way to solve the problem of saving space on iCloud. Here we will instruct you how to upload photos to Google Drive from iPhone via iCloud.com.
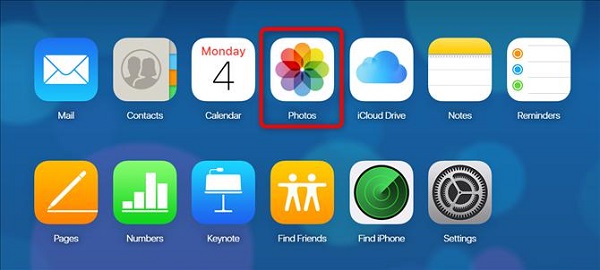
1. Get access to iCloud.com by entering your personal Apple ID as well as password. Then select photos.
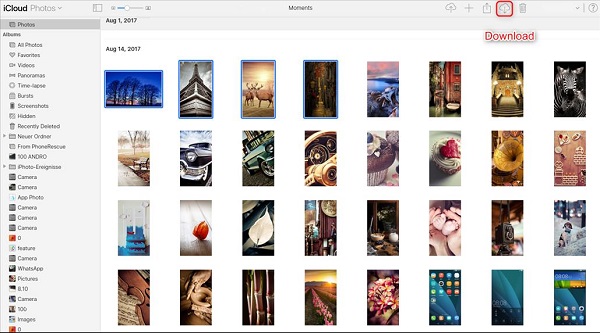
2. Choose the photos that you would like to upload to Google Drive and then click on the button “Download” locating on the right upper of the iCloud window.
3. Open the official web page of Google Drive and log in your Google account by entering the account name and password.
4. You will see a button “New” as the picture shown below and click on it. Then go to the option “Select File Upload” and choose the photos you have downloaded via iCloud. Finally, the photos from iCloud will be uploaded to Google Drive immediately.
Part 4: Upload Pictures on iPhone to Google Drive via Mobile Google Drive Web
There is one directest way of uploading photos to Google Drive from iPhone, that is to log in Google Drive through your iPhone browser. You can follow the steps as below to complete the photos uploading via mobile Google Drive web.
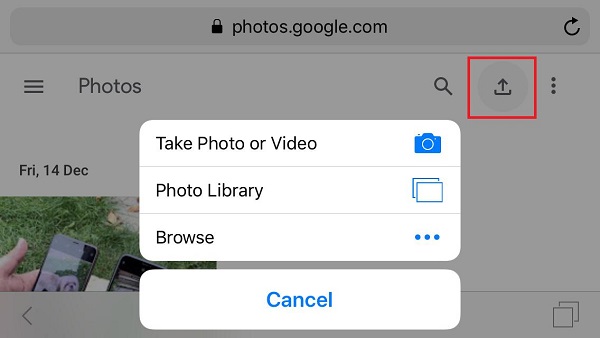
First, enter https://drive.google.com on your iPhone browser. Then you will see all the files you have stored in Google Drive.
Second, tap on the button which looks like a symbol of uploading on top of the screen.
Third, the uploading work will begin and you should keep in mind that don’t switch off the browser until the upload is completed.
Part 5: Upload Photos to Google Drive from iPhone on Computer
Sometimes we might don’t have enough storage for us to download Google Drive app on iPhone, thus, we need to download it on computer and to upload iPhone photos to Google Drive. In addition, it is also more convenient to upload iPhone photos to Google Drive on computer. But before we upload iPhone photos to Google Drive through computer, the first thing we need to do is transfer photos to our computer. So how can we upload photos from iPhone to computer conveniently? You might need the Leawo iTransfer software.
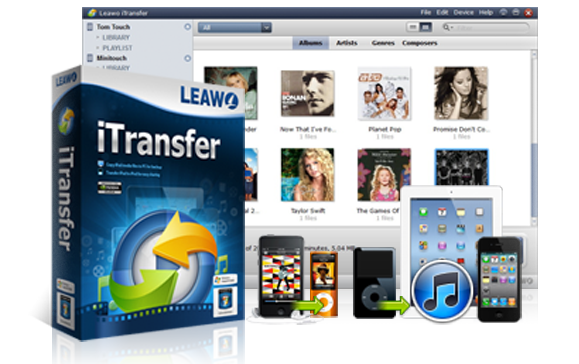
Leawo iTransfer is powerful transfer software which can be easily used in your computer. It is able to transfer all kinds of files such as apps, picture, documents, movies, TV shows, music, ringtones, ebooks, and Camera Roll files among iOS devices, iTunes and PCs. With this convenient software, you can backup iPhone photos to Google Drive on computer quickly. In the following part of this guidance, steps about how to transfer photos from iPhone to computer and how to transfer iPhone photos to Google Drive will be respectively introduced in detail.
Leawo iTransfer
☉ Transfer up to 14 kinds of data and files without iTunes.
☉ Support the latest iOS devices like iPhone X, iPhone XR, etc.
☉ Play back, view, and delete data and files on iOS devices.
5.1 How to transfer photos from iPhone to computer with Leawo iTransfer
1. Connect your iPhone with computer
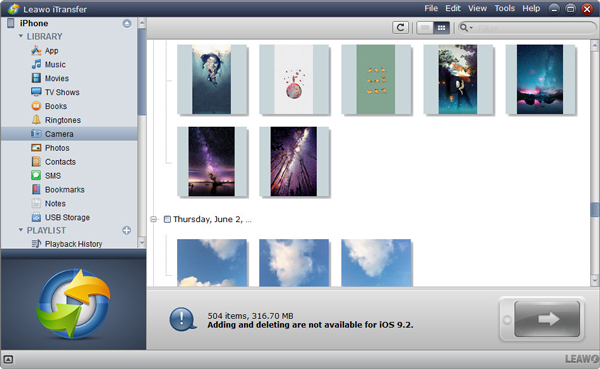
Launch the Leawo iTransfer on your computer, and then connect your iPhone with the computer via the USB cable. All the files in your iPhone will be detected automatically by the software and be displayed in the right side.
2. Choose photos you want to upload
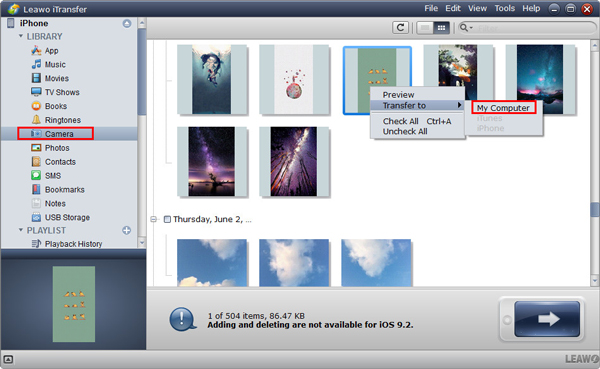
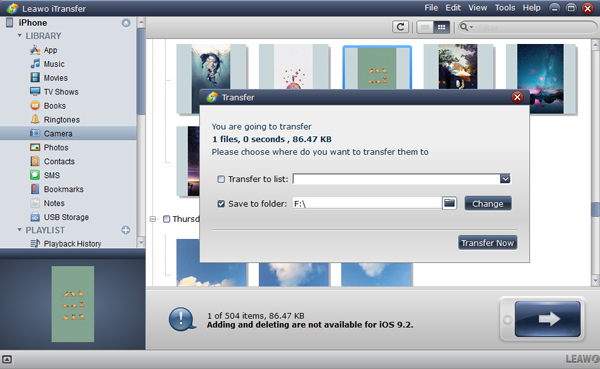
Choose “Camera” in the left side and all the photos will be shown in the right side. And then you can select the photos you want to transfer to the computer and then click the big arrow icon in the lower right corner of the page, or just right click the photos you’ve selected and subsequently click the “Transfer to” and finally click the “My computer”.
3. Start transfering photos to PC
After you finish the above steps, a dialogue of settings will prop up in the page. All you need to do is click the “Save to folder” and “Change” to choose a folder to save the photos you are going to upload. Then you can just tap the “Transfer Now” to start backing up the photos in computer.
5.2 How to upload iPhone photos to Google Drive through browser on computer
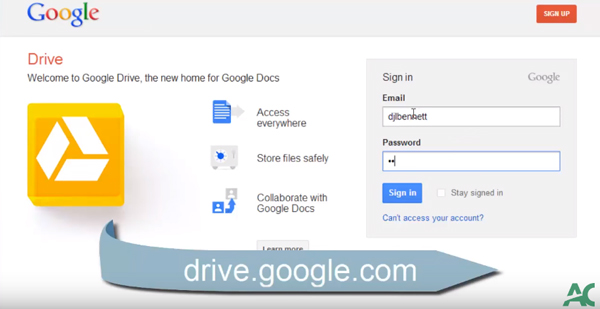
1. Firstly, you need to search Google Drive with browser on your computer. And then you need to sign in Google Drive in the page you’ve opened in the Internet.
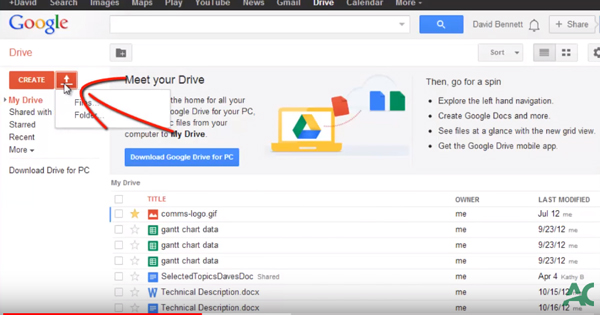
2. Secondly, you need to tap the white arrow in the top left corner and then click the files or folders where your iPhone photos has been previously backed up.
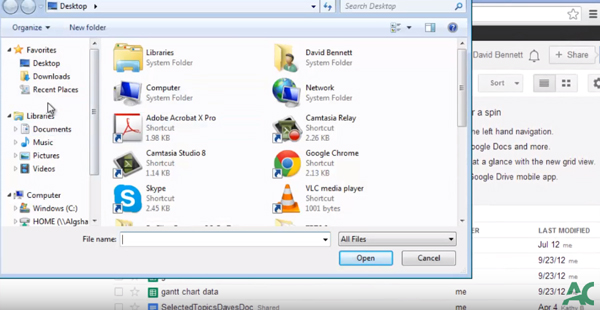
3. Thirdly, you can choose the iPhone photos you want to upload through the computer and transfer iPhone photos to Google Drive.

