You may encounter the problem that some of the iOS functions can not be used and it asks you to update to apple iOS latest version. If this issue bothers you sometimes and you even do not know what is the latest version of iPod touch, you can refer to this guidance to help you to make it clear.
Part 1: How to Update iPod to the Latest iOS Version
As for what is the latest version of iPod touch, you should know that Apple Company will fix some errors in the old version and add some new functions to the new one, which intends to make the users’ experience more smooth and comfortable. If you want to know how to update to apple iPod latest version, you can refer to the detailed steps in the following contents.
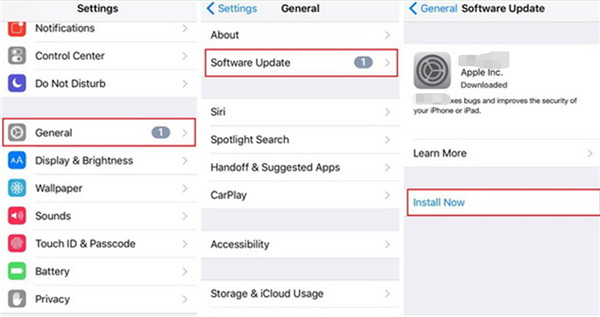
1. If a pop-up panel tells you that iTouch latest version is available, you can then tap on the button of “Install Now” to begin to update to apple iOS latest version.
2. You can also manually check out if the apple iOS latest version is available now. Now you can follow the steps shown below to have a try.
a) Connect your iPod to good Wi-Fi connection and make sure your iPod storage is enough and the battery is able to support the iPod update.
b) Click on “Settings > General > Software Update” successively.
c) When your iPod has detected an apple iPod latest version, you can click on the button of “Install Now”. If a dialog requires you to delete some apps temporarily because the new version needs more storage, you can click on “Continue” to uninstall the apps. If you click on “Cancel” button, your apps will not be uninstalled.
d) After that, iPod will begin downloading and installing the apple iOS latest version in no time. Wait until the update is finished.
The process to update to iTouch latest version is not hard at all. Actually, before the update, you can manage your iPod files to make some room for the new version or to make the process much smoother. The next two parts will instruct you how to manage files via iTunes or iTransfer in detail.
Part 2: How to Manage iPod Files via iTunes
iTunes is a good assistant tool to help you to manage iPod files before or after the update. You can use it to transfer, delete, add and edit files, which is quite easy to use. Here I will show you the steps to achieve your aim with the help of iTunes. First you need to click iTunes to run it on your computer and make sure it is the latest version. And then connect your iPod to computer to go to tap “Preferences > Devices” and choose the option of “Prevent iPods, iPhones, and iPads from syncing automatically” to check.
1. Transfer Files
a) First, you need to navigate to “Device > Summary”.
b) After that, you can tap on the option of “This computer” under the menu of “Backups”. Finally, you need to click on “Backup Now” to back up all iPod files to your computer for later use.
2. Delete Files
a) You need to go to click on “iPod icon> Settings > Summary” to choose the panel that you want to delete files from, such as apps, music, movies and so on. For instance, if you want to delete songs, you need to click on the “Music” tab and then choose a song or to select several songs at the same time.
b) Afterwards, you need to click the “Delete” key on your keyboard to remove the files.
3. Add Files
Go to click on “File > Add File to Library” or “File > Add Folder to Library” to find the files that you want to add to your iPod and then put them to your iTunes library.
4. Edit Files
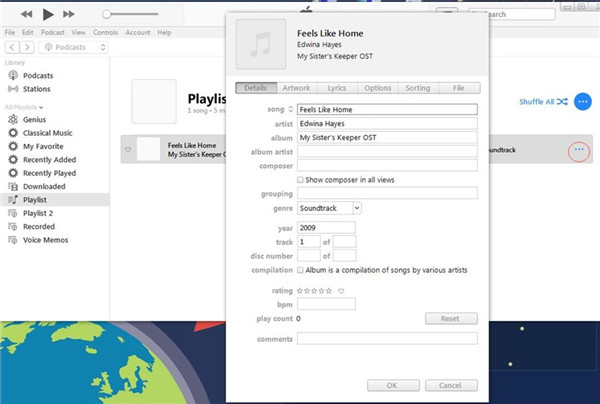
a) Go to highlight the file that you want to edit, like a song or a movie.
b) Then you need to click on “File > Get Info”, and the information of the file will appear. You can edit the information as you need.
Note: After every change, you need to sync to your iPod to save the changes on your iPod.
If you are not fond of using iTunes to manage iPod files, you can use a more professional program to help you to make it. Continue to read the following contents and you will be pleased to know a powerful tool to assist you.
Part 3: How to Manage iPod Files via Leawo iTransfer
Leawo iTransfer can assist you to manage iPod files easily and professionally. You only need a few clicks to realize your goal. You can actually make use of this software to transfer different kinds of files among different devices, which is quite powerful to use. As for the detailed information, you can have a look at the following content to help you. Here I would like to take photos for instance.
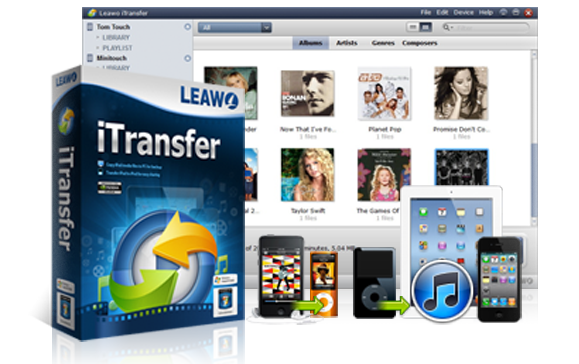
Leawo iTransfer
☉ Transfer files among iOS devices, iTunes and PCs with ease.
☉ Transfer up to 14 kinds of data and files without iTunes.
☉ Support the latest iOS devices like iPhone 7, iPhone 7 Plus, etc.
☉ Play back, view, and delete data and files on iOS devices.
Step 1. Connect iPod to Computer
Run Leawo iTransfer on computer and then connect iPod to computer. Leawo iTransfer will detect your iPod device. Then your iPod libraries will be shown in the left sidebar.
Step 2. iPod File Management
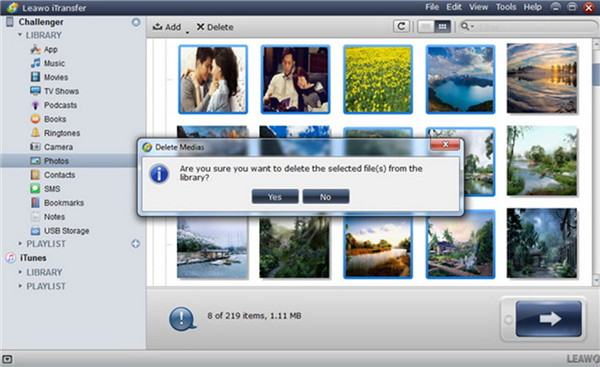
In order to mange files of iPod via iTransfer, you need first to navigate to “iPod icon > LIBRARY” and choose the tab you want to manage. Here I will show you how to manage photo files of iPod in detail. So you need to click on the “Photos” panel in the left sidebar. For music fans, you can use iTransfer to transfer iPod music files to iTunes library easily.
1.For deleting iPod photos, you can select the photos and tap the “Delete” button to delete them. When a panel pops up, you need to choose “Yes” to click on to confirm your deletion.
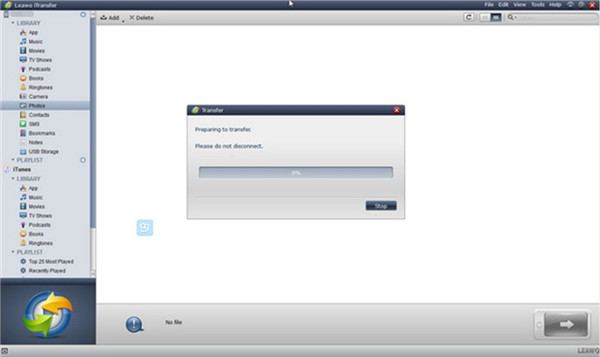
2. For transferring photos to computer, you can select the photos and right-click on one of them to choose “Transfer to > My Computer”. Then you can click on “Change” to choose the output folder to save the files. Click on “Transfer Now”, and the pictures on your iPod will be available to your computer in no time. Then you can edit and enjoy the iPod photos on your computer at ease.
3.For adding new photos to iPod, tap “File > Add File” or “File > Add Folder” to add photos from your target folder. When the importing procedure starts, the photos that you have chosen will be added to iPod.
As you can see, it is a quite powerful tool to help you to manage iPod files. You can take advantage of it to assist you to solve various transfer problems as well. You can now download and install it on computer and have a try.
Part 4: The Comparison of These Two Methods to Manage Files on iPod
The two methods shown in the above are both effective. However, there are also some differences between them.
1. Transfer
iTunes can back up all files to computer for backup, but if you want to transfer a target file to computer, it is not easy to realize.
iTransfer can help you to transfer 12 kinds of files between iPod and computer easily. See how to transfer music between iPods.
2. Delete
You need to sync to iPod after you delete files on computer via iTunes and before the sync you need to prevent the automatic sync process.
You can directly delete files via iTransfer on computer.
3. Add
For iTunes, you also need to sync to iPod after you add files to iTunes and prevent the automatic sync procedure before the sync begins.
For iTransfer, you only need to add files to the software and the files will be available on your iPod simply.
4. Edit
For iTunes, you can use some editing functions in iTunes.
For iTransfer, you can transfer files to computer from iPod and then edit the files on computer as you prefer.
Through the comparison, you can conclude that iTunes is a bit complex when it comes to managing files of iPod. iTransfer is more professional and powerful in managing iPod files.

