When you find your iPhone is disabled connect to iTunes, what can you do? This problem can result from various reasons. This guidance will show you the methods to solve how to unlock iPhone is disabled connect to iTunes in detail. You can also bypass iPhone is disabled connect to iTunes with iTransfer. The second part will show you how to use iTransfer to move songs from iTunes to iPhone effectively. Now let’s begin to check out the contents of this tutorial.
You may also be interested in:
iPhone Won't Sync with iTunes, Here's Fix
How to Fix iTunes Not Recognizing iPhone in Windows 10
How to Fix "iPhone Won't Play Videos" Issue
Part 1: Methods to Solve How to Unlock iPhone is Disabled Connect to iTunes
Although the reasons for iPhone is disabled connect to iTunes are diverse, we can use some methods to fix it. This part will show you some methods to help you to bypass iPhone is disabled connect to iTunes. The detailed instructions are shown below.
1.1 Fix iPhone is Disabled Connect to iTunes with iTunes
Before iPhone is disabled connect to iTunes, if you have synced iPhone with iTunes, you can use this solution to help you. The following steps will instruct you to solve how to unlock iPhone is disabled connect to iTunes with iTunes.
1. Use a proper USB cable to plug your iPhone into PC. Make sure this computer has the backup of your iPhone. Click to run the latest version of iTunes on computer. If iTunes enquires you to fill in the password, you need to use other ways in this part to help you to solve how to unlock iPhone is disabled connect to iTunes.
2. Now, click on “iPhone icon > Summary”. After that, you need to click on “Restore iPhone” in the right part of the interface. When your iPhone has been restored, it will start up just as a new iPhone. You need to follow the process of set up and then choose the most recent iTunes backup that you want to recover. Thus, you can solve how to unlock iPhone is disabled connect to iTunes perfectly.
To bypass iPhone is disabled connect to iTunes is a restore process. If you are not fond of this methods, you can check out the second solution to help you to bypass iPhone is disabled connect to iTunes.
1.2 Fix iPhone is Disabled Connect to iTunes with iCloud
You can use iCloud to bypass iPhone is disabled connect to iTunes. iCloud allows you to get access to your iPhone online. You can use the iCloud account to erase iPhone and passcode when your iPhone disabled. First, you need to make sure your iPhone has turned on “Find My iPhone” before iPhone is disabled connect to iTunes. In order to achieve your aim, you can follow the detailed steps listed below.
1. Navigate to iCloud.com on your computer and then log into it with your Apple ID and password. Click “All Devices” and then choose the iPhone that you would like to erase.
2. Click on the iPhone that is disabled to erase it and its password. Afterwards, you can restore iPhone from a backup or follow the on-screen instructions to set up your iPhone as a new one.
This method to solve how to unlock iPhone is disabled connect to iTunes is useful for you. You can have a try if you have enabled “Find My iPhone” before your device is disabled.
1.3 Fix iPhone is Disabled Connect to iTunes with Recovery Mode
You can also bypass iPhone is disabled connect to iTunes with the recovery mode to erase iPhone and its password. Now let’s begin to look at the detailed instructions to help you to realize your goal.
1. Plug your iPhone into PC with suitable USB cable and then launch the latest version of iTunes on your computer. After that, you need to force restart iPhone.
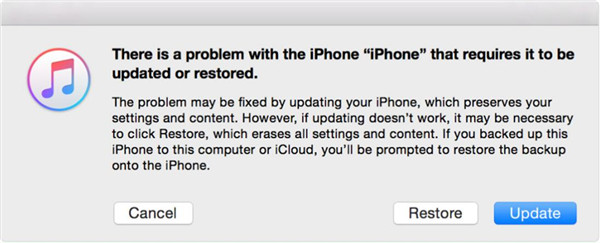
2. After a while, you will be able to see a panel asks you to restore or update on iTunes, you need to select “Restore” button to click on. When this process is over, you can set up your iPhone to bypass iPhone is disabled connect to iTunes effectively.
1.4 Use Another USB Cable
You can also use a new USB cable to try to solve how to unlock iPhone is disabled connect to iTunes.
1.5 Use Another Computer
To fix iPhone is disabled connect to iTunes, you can use another computer to have a try.
1.6 Check Computer Updates
Check out the updates on your computer to bypass iPhone is disabled connect to iTunes.
The solutions to fix iPhone is disabled connect to iTunes are various. You can choose one to have a try to help you. As you can see, you can not fix iPhone is disabled connect to iTunes without computer. If your computer is not able to help you to achieve your aim, you can borrow the computer of your friends to assist you to make it.
Part 2: How to Transfer Songs from iTunes to iPhone via Leawo iTransfer
Leawo iTransfer is good tool for you to employ to transfer songs from iTunes to iPhone. This is quite useful when you encounter the problem that “iPhone is disabled connect to iTunes”. This program can help you to manage 12 kinds of files among computers, iDevices and iTunes. Now let’s begin to look at the detailed steps shown below.
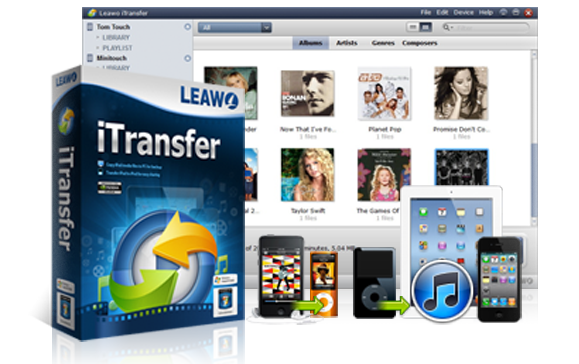
Leawo iTransfer
☉ Transfer files among iOS devices, iTunes and PCs with ease.
☉ Transfer up to 14 kinds of data and files without iTunes.
☉ Support the latest iOS devices like iPhone 7, iPhone 7 Plus, etc.
☉ Play back, view, and delete data and files on iOS devices.
Step 1. Connect iPhone to Computer and Launch iTransfer
Connect iPhone with PC with proper USB cable and then launch iTransfer on your PC. Your iPhone information will show in the main interface.
Step 2. Select Songs You Want to Transfer
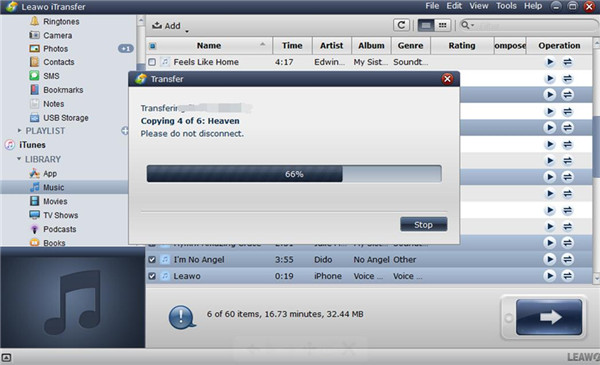
Navigate to “iTunes icon > LIBRARY > Music”. Your iTunes songs will show in the right side of the interface. Select the songs you want to transfer to iPhone by ticking the box next to the music names and then choose "Transfer to > iPhone".
Step 3. Start to Transfer Songs from iTunes to iPhone
A panel will pop up to instruct you to store the exported iTunes songs. Check the option of "Transfer to list : iPhone". After that, you need to tap "Transfer Now" to initiate the process to transfer music from iTunes to iPhone. When this procedure is over, the iTunes songs will be available on your iPhone.
This process is not hard to handle. When you encounter other transfer problems, you can also take advantage of iTransfer to help you. Its powerful functions will not let you down.


