
Most mobile devices nowadays, like the iPad, come with security features. Lock screen security is of vital importance to the protection of the personal data on your iPad. You can enable or disable this feature from the iPad settings. But after setting the security password, how do you use it to unlock your iPad? What if you forgot the pass code and get your iPad disabled? For some users, if you forget the password, then you would have no idea how to unlock iPad so as to get access to all the content on the device. Sometimes, you may encounter the screen showing that your iPhone is disabled if you have entered the wrong passwords too many times. Now, in this article, we would show more details on how to unlock disabled iPad and how to unlock iPad without password.
Method 1: Unlock your iPad with your iTunes backups
If you have ever made the backup of your iPad before, then the first solution provided for you is to unlock your iPad with iTunes backups. It is a good habit to have your iPad backed up regularly. In case of your iPad is locked, disabled or being stolen, you can easily recover your data from it. Otherwise, you’ll lose all the data. To unlock iPad screen without password or to unlock disabled iPad mean you have to remove your previous pass code and restore your iPad. But here you should also know that if you have never made a backup of your newest content on iPad, once the iTunes backup has been carried out, then all the latest content would lose from your iPad. But in order to unlock your iPad without the password, you can try to restore your iTunes. Now you can follow the steps below to unlock your iPad with your iTunes backups.
Step 1. Connect iPad to the computer you have synced with.
Step 2. Open iTunes on your computer and connect it with your iPad. If fortunate, you can enter the iTunes without password. But in most cases, there would be prompt asking for a pass code. Try another computer you’ve synced with, or use recovery mode. (The recovery mode will be mentioned below.)
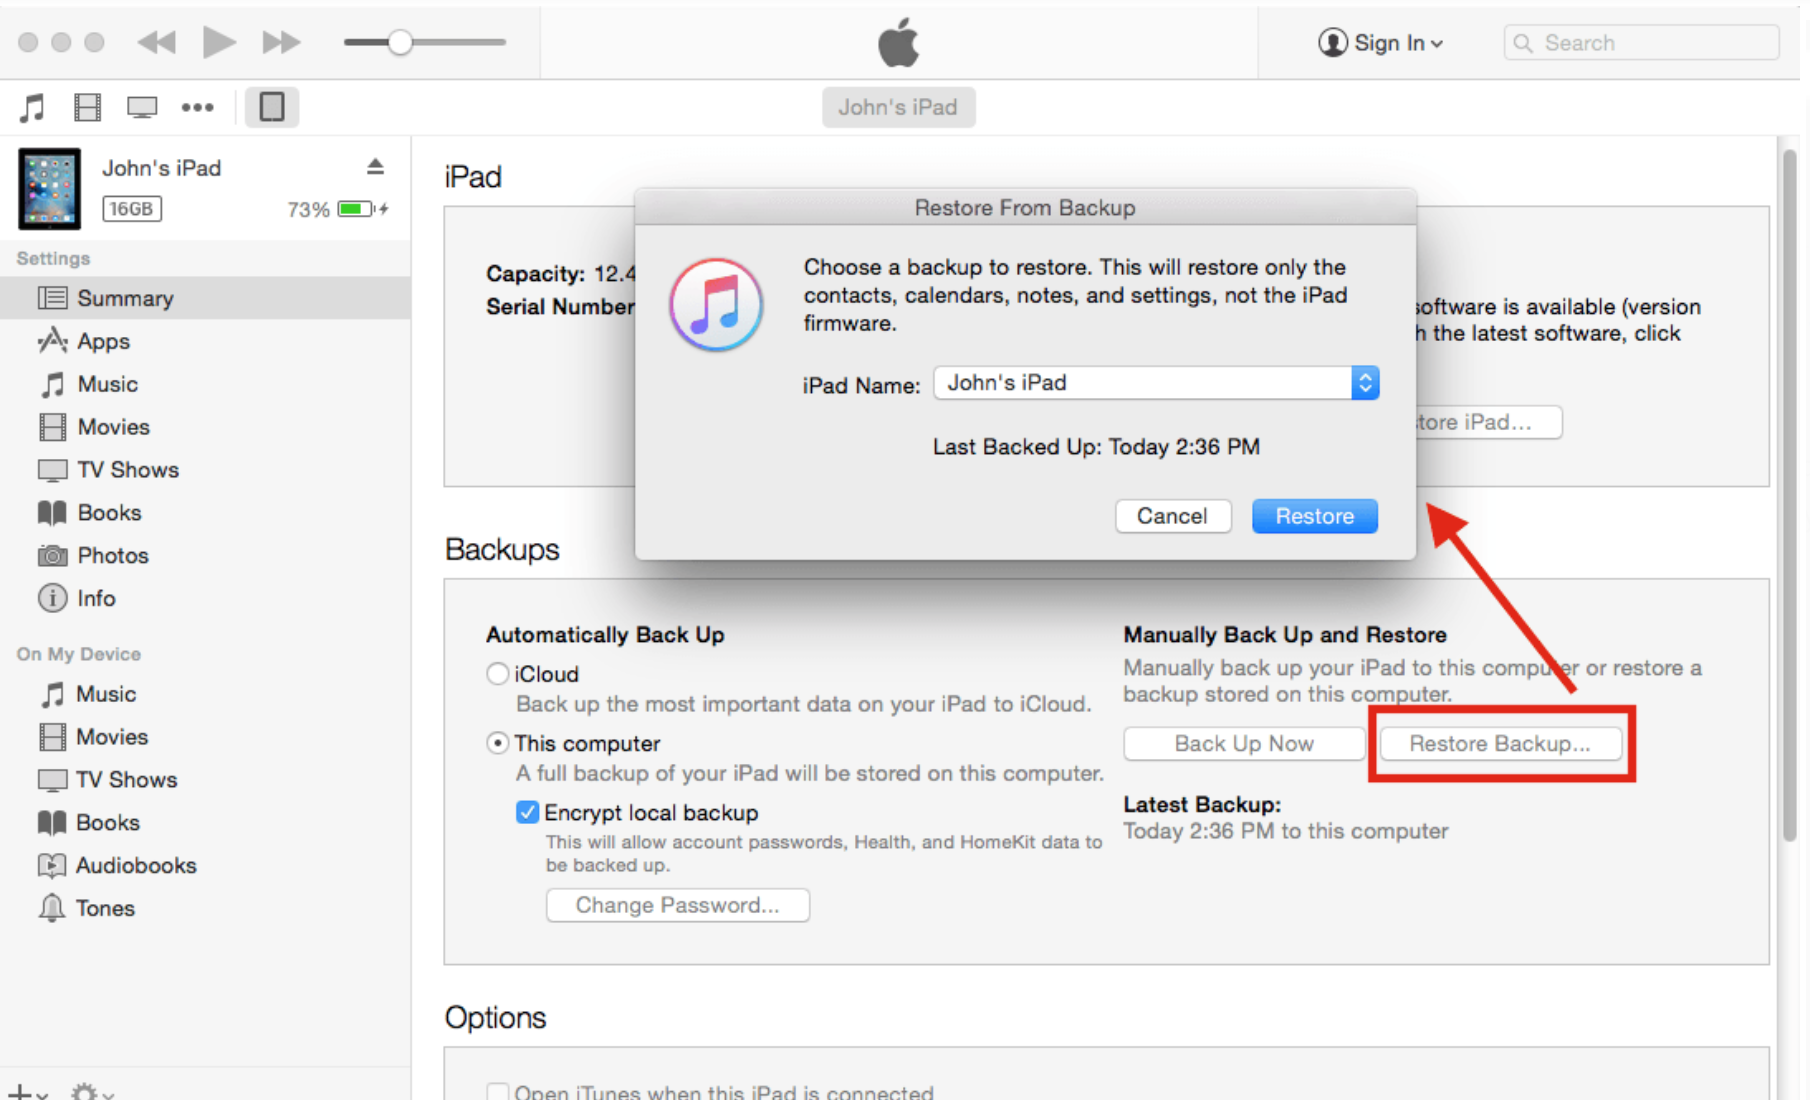
Step 3. Find your iPad in summary and make a manual backup. Once the backup have finished, click Restore your iPad with the most relevant back-up. Once the restoring process have been completed, then you can restart your iPad again, and all the settings have been restored to the very beginning which would not require you to enter the password.
Method 2: Unlock your iPad in recovery mode
If you’ve neither synced with iTunes nor set up Find My iPhone in iCloud, you’ll need to wipe your iPad to factory setting to remove the password, which means you’ll suffer losing all your data on iPad and get it as a new one. But just as mentioned above, once your iPad entered the recovery mode, all the data would lose immediately, but this would allow your iPad to be restored to the very beginning state which doesn’t need passwords any more. Please pay attention there is a slight difference in putting different models of iPad into recovery mode. Next, you can find the detailed steps to unlock your iPad in recovery mode for various modes of your devices.
◎ iPad Air
Step 1. Turn off your iPad Air, press and hold the Home button.
Step 2. While holding the Home key, connect the USB cable to the device. Wait until the Apple logo appears and keep holding the Home button for few more seconds.
Step 3. Continue holding the Home button until the iTunes logo appears.
◎ iPad mini/iPad pro
Step 1. Connect your iPad to your computer or laptop and open iTunes.
Step 2. While your device is connected, force to restart it.
Step 3. Press and hold the Sleep/Wake and Home buttons at the same time. Don’t release when you see the Apple logo. Keep holding both buttons until you see the recovery mode screen.
Now you have entered the recovery mode, and...
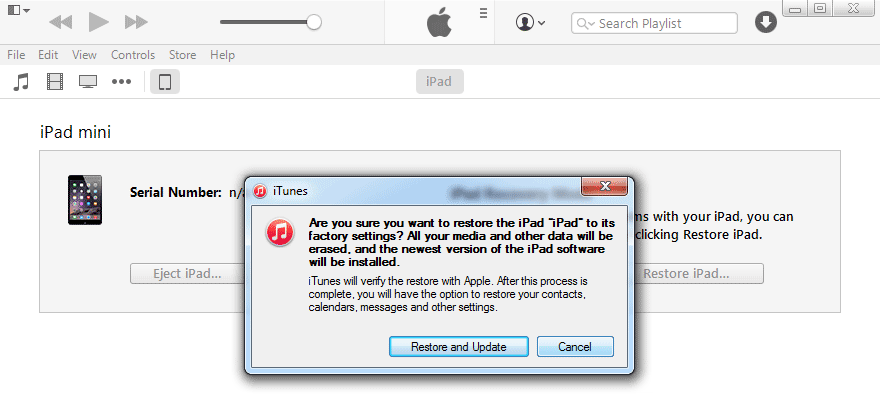
Step 1: When you see the option to Restore and Update, click it. Then it would take some time to verify the restore with Apple and once the process have been completed, then you can be able to restore your contacts, calendars, messages and other apps. Also, all the settings would be restored to the original state and no password would be needed to enter your iPad.
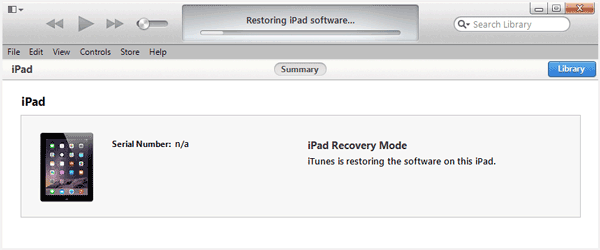
Step 2: Wait for the process to finish. Then you can set up and use your device. Now after the restoring iPad process, all of your iPad’s content could be viewed directly without any passwords. Now, you can have your new password settings.
Method 3: Remotely erase your iPad with iCloud
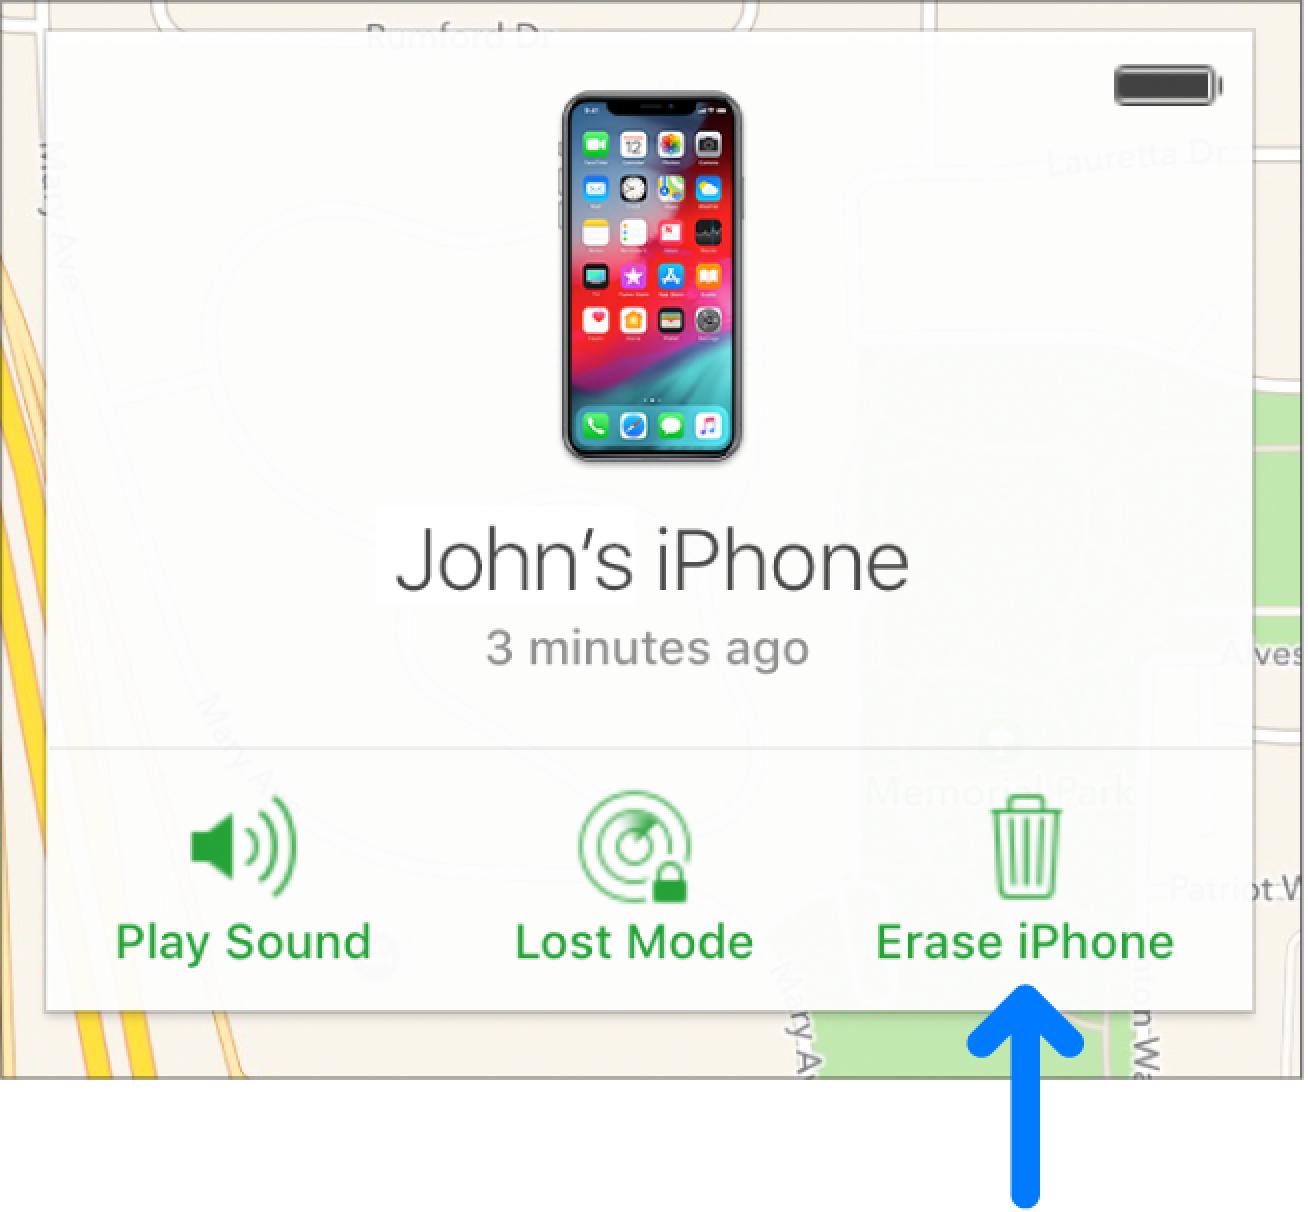
If, unluckily, you have lost your iPad and now you would like to remotely erase your iPad so that all the data could be protected, what should you do? Here, I will list the tutorial for you on how to remotely erase your iPad with iCould. But before erasing your iPad with iCloud remotely, you must make sure you have turned on “Find my devices” on your device. Then follow the steps below. If you did not turn on the “Find my devices” option on your iPad, I am afraid you could erase your iPad iCloud remotely. Anyway, remember to make the backup from now to then for further usages.
Step 1. Go to icloud.com website and you can see the Find my device option.
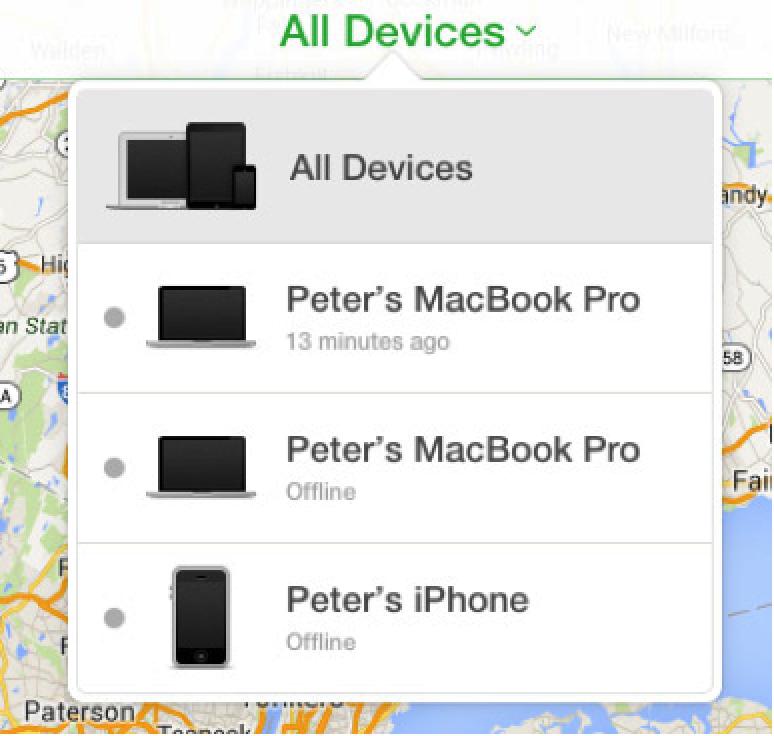
Step 2. Set up iCloud. Once you entered the icloud.com, you can see a lot of information, including Keynote, Settings and so on. You can set up iCloud on your iPad for many other features. By the way, click All Devices, and select the iPad you would like to erase. Finally in the Info window, click “Erase [device]”.
Step 3. Enter your Apple ID and password. Also, you can use your family member’s Apple ID password as well.
Bonus: What if your iPad data is lost
As we have mentioned you can recover data from itunes, there is another efficient way to recover data from Leawo iOS Data Recovery. Leawo iOS Data Recovery is the best data recovery software for iPhone, iPad & iPod. What’s more, as a useful to to recover your iPad if the data have been lost, Leawo iOS Data Recovery can be selected as your first choice. Leawo iOS Data Recovery can work on Windows and Mac, which enables you to retrieve data from iPad with or without backup. With just a few steps, this software can help you to recover deleted data and other message or chat history perfectly. Leawo iOS Data Recovery stands out for its great design and powerful functions. It allows you to preview and select the files that you want to recover, which can work easily to scan and search for files and data with very accurate results. It is compatible with all iOS devices and all versions of iOS. With Leawo iOS Data Recovery, all kinds of iPad app data could be recovered, including various app chat history as well as the program contents without losses. What’s more, this program can recover multiple deleted data directly from iPhone/iPad/iPod touch, back up 14 kinds of data on iOS devices to computer as well as recovering data lost due to jailbreaking, iOS upgrade, deletion, etc. Now please follow the steps below to recover your lost data on iPad.

-
Leawo iOS Data Recovery
- Recover multiple deleted data directly from iPhone/iPad/iPod touch
- Extract and export 12 types of files from previous iTunes&iCloud backup
- Back up 12 kinds of data on iOS devices to computer
- Recover data lost due to jailbreak, iOS upgrade, deletion, etc.
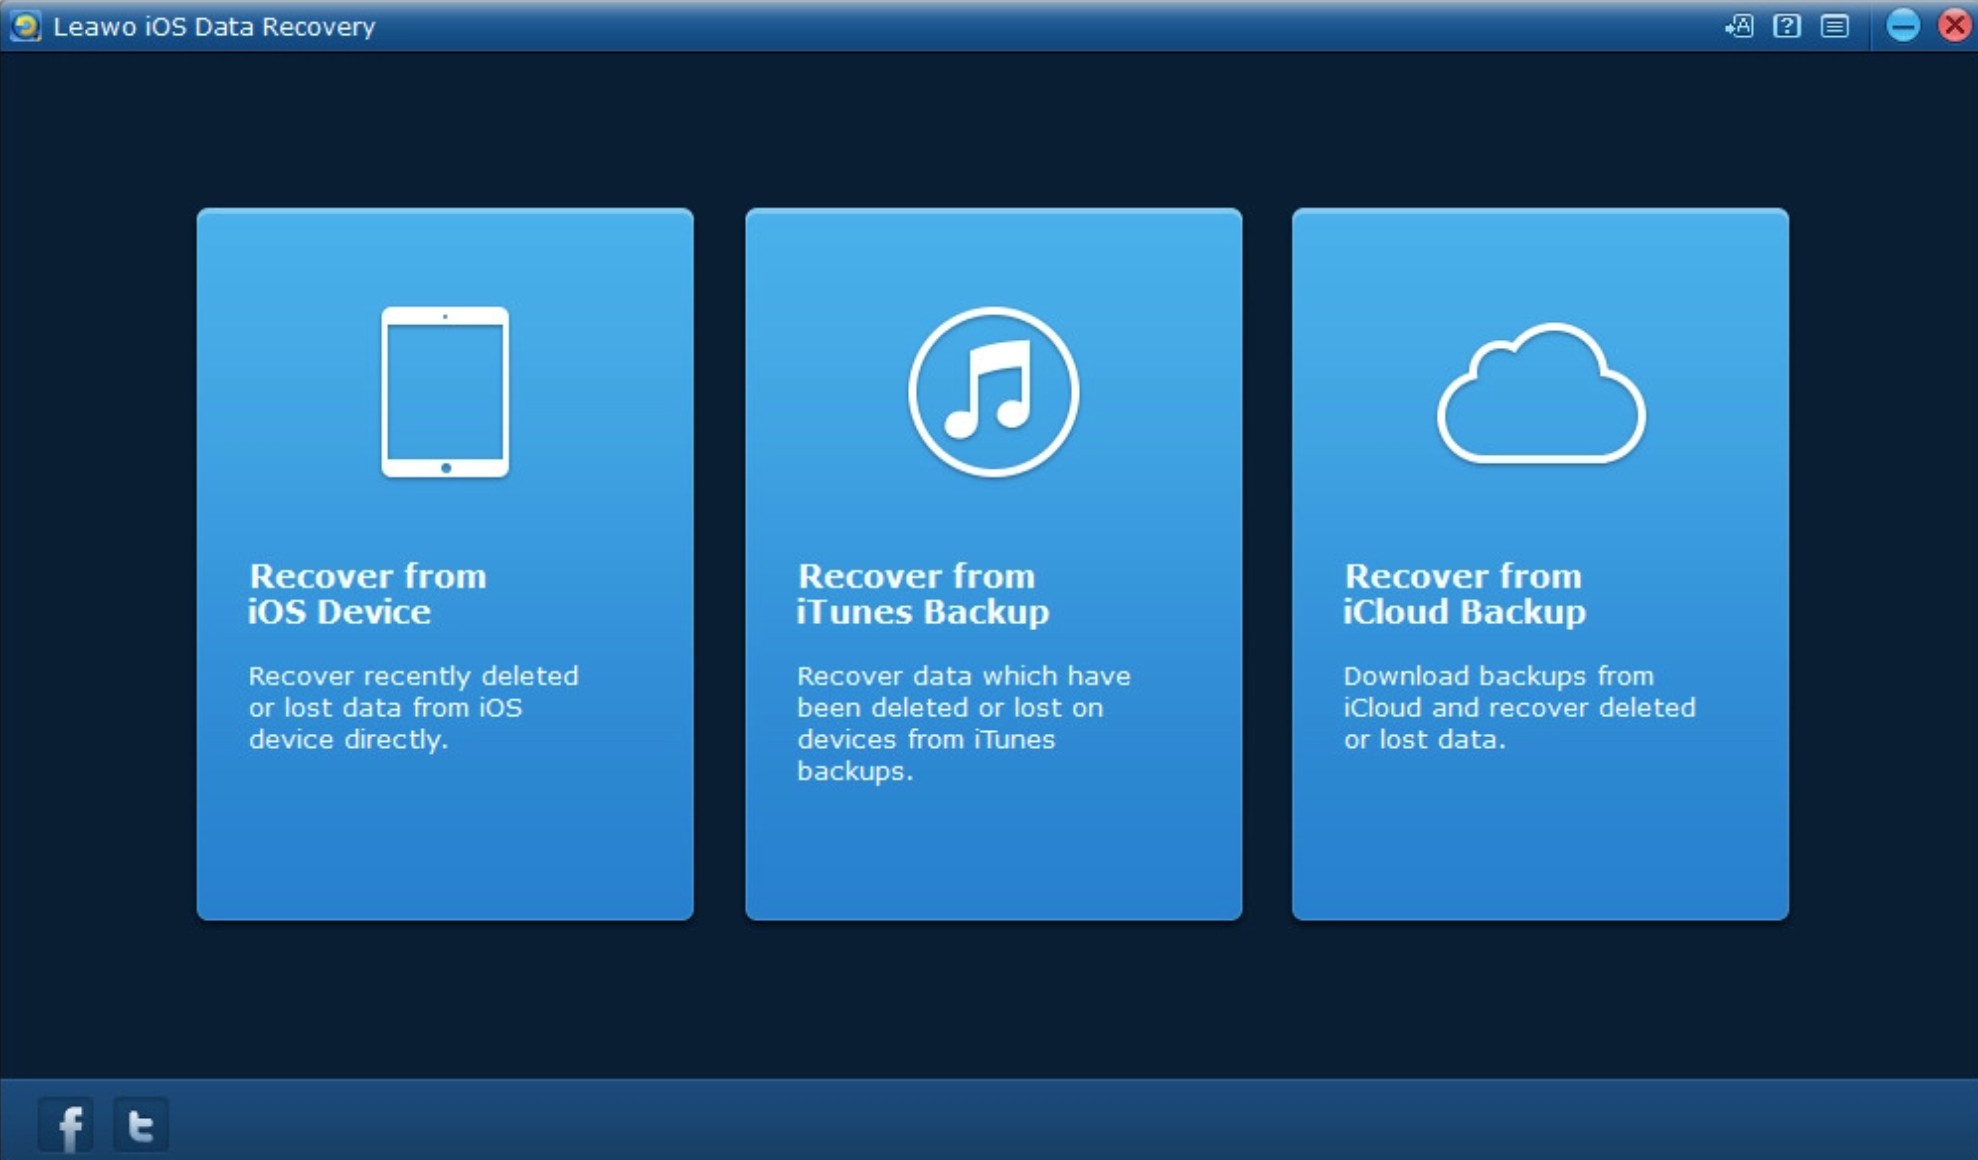
Step 1. Scan your device.
There are various kinds of devices for you to recover from. Choose recover from iOS device. Click “Start” button, the program will start to analyze and scan your device automatically.
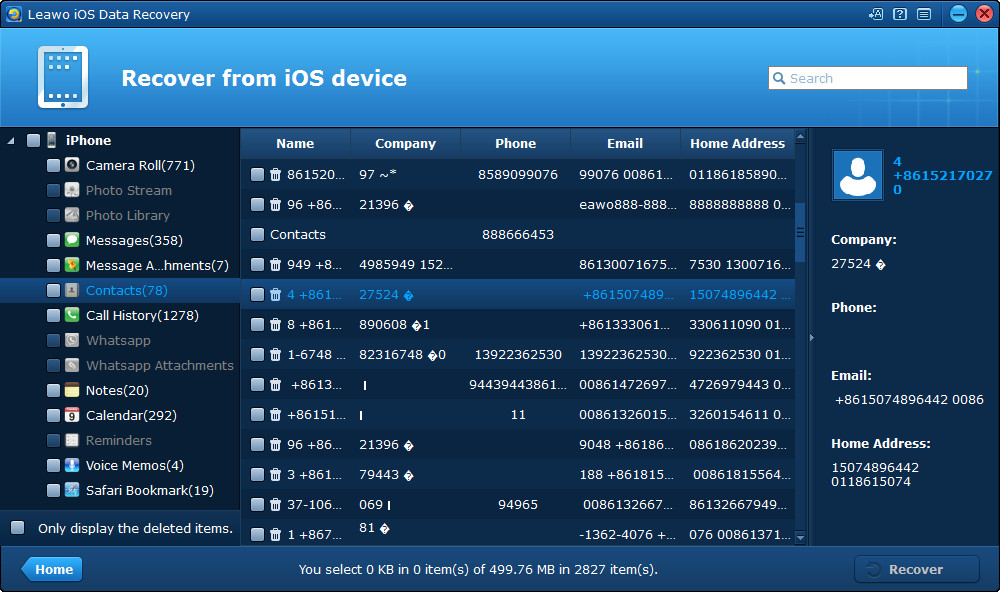
Step 2. Preview found data and select files to recover.
After scanning, all the data in your iPad (including the deleted data) will be listed on the left sidebar categorized by 12 file types: Camera Roll (photos & videos), Photo Stream, Photo Library, Contacts, Messages, Message Attachments (photos, videos, voice memos, contacts), Call History, Calendar, Notes, Reminders, Voice Memos, Safari Bookmarks. You can preview the data one by one and check the items you want to recover, or tick the bottom-left corner checkbox “Only display the deleted items” to only recover the deleted data from iPad.
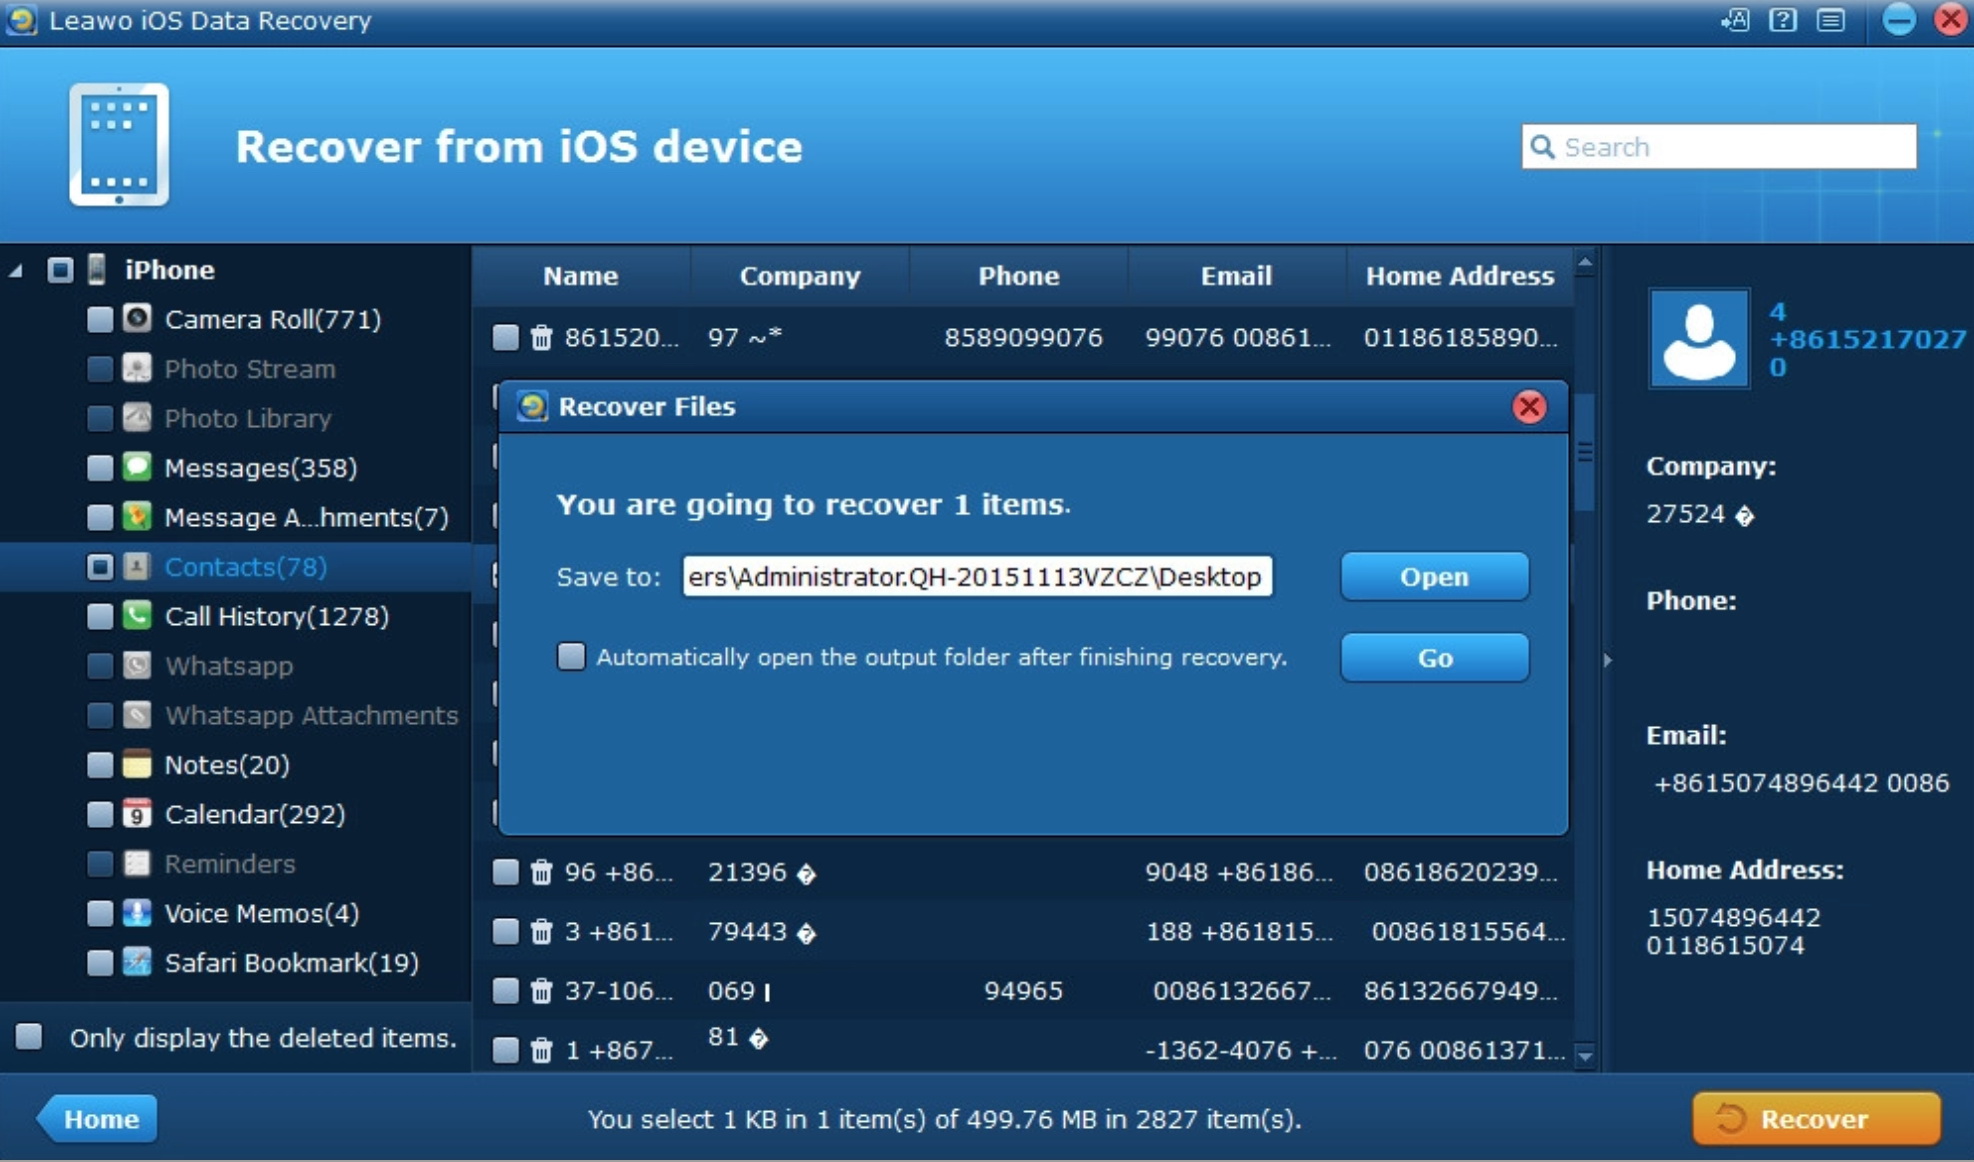
Step 3. Choose saving location.
After selecting files, click “Recover” button on the bottom-right corner of the interface to start data recovery from iPad. You can tick the checkbox to “Automatically open the output folder after finishing recovery”. In the pop-up dialogue, you need to click on "Open" button and then browse your computer to choose a proper location to save the exported files. After you set the target directory well, you can tap on the button of "Go" to start the process to recover files. In a few seconds, the data will be available in the folder.
 Mar. 30, 2017 by


 Prof. Media
 Blu-ray Ripper
 Blu-ray Copy
 iOS Data Recovery
 [12/29/23] MAX Downloader V15.0.0
 10,000,000 people are using Leawo!
 All Transactions are protected!
 30-Day Money Back Guarantee!