Photos always are the reflection of our daily life, for they record some critical moments we think highly of. Computers become the best photos storage tool because of its large capacity. However, it is not handy if you want to reminiscent of your old days by photos on your computer. What if you have photos to transfer from Windows PC to iPhone? It will be a terrific idea. How to transfer photos from Windows 10 to iPhone? Here I would like to show you step-by-step instructions. Let's read it now.
- Part 1: How to Transfer Photos from Windows 10 to iPhone via iTunes
- Part 2: How to Transfer Photos from Windows 10 to iPhone without iTunes but Google Drive
- Part 3: How to Transfer Photos from Windows 10 to iPhone without iTunes but iCloud official website
- Part 4: How to Transfer Photos from Windows 10 to iPhone without iTunes but Leawo iTransfer
Part 1: How to Transfer Photos from Windows 10 to iPhone via iTunes
iTunes is crowned as the most wonderful music app and iOS file management tool. It enjoys modern and straightforward interface and allows users to search for a wide range of music, movies, ebooks, etc. If you want to transfer photos from Windows PC to iPhone, why not give iTunes a shot?
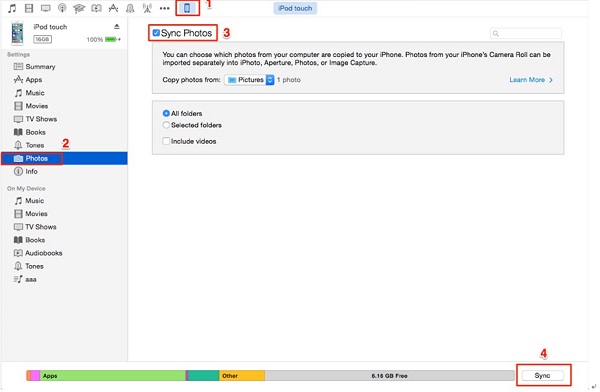
1. Launch the latest iTunes on your Windows 10. Plug iPhone to your computer and an iPhone image will show up in the top left corner.
2. Click on iPhone icon and navigate to "Settings > Photos" in the left sidebar. In the right interface, you should check "Sync Photos" under which you can choose either "All folders" or "Selected folders".
3. Now click on "Apply" at the bottom right corner. Now you import photos from Windows 10 to iPhone.
Part 2: How to Transfer Photos from Windows 10 to iPhone without iTunes but Google Drive
Somebody may say that he doesn't want to use iTunes. Is there any other way to transfer photos from Windows 10 to iPhone without iTunes? Of course there is. And it's super convienient for google users to accomplish transferring photos from Windows 10 to iPhone. In general, you could use Google Drive app or visit Google Drive on web browser directly. Here I will show you how to make it via Google Drive app on Windows 10.
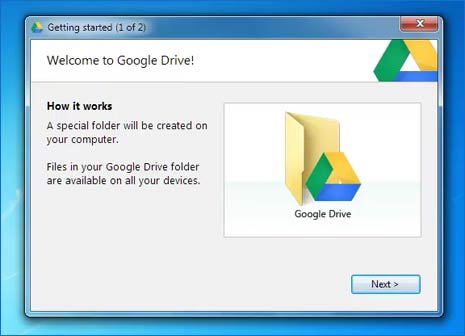
1. Firstly you need to download and install Google Drive on Windows 10 and then log into it with your personal Google account after the installation.
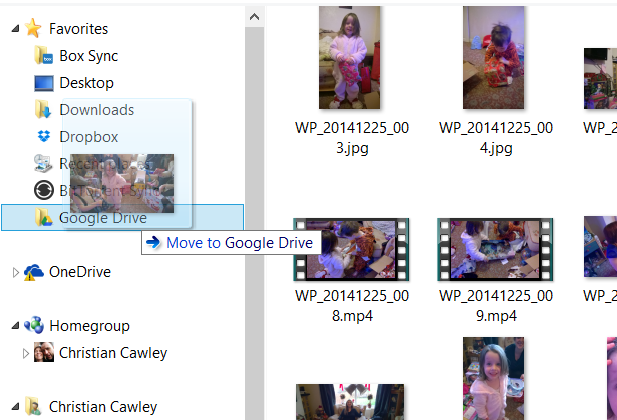
2. Move to Windows Explorer. Click Google Drive on quick access list on the left.
3. Copy and paste the photos you wish to upload to the folder of Google Drive. The photos will be immediately uploaded to Cloud. But remember the sync process requires good network connection.
Now you must have grasped the way to upload photos from Windows 10 to Google Drive. Next, I will show you how to downlaod photos from Google Drive on iPhone. Before that, please check the network conditions on your iPhone.
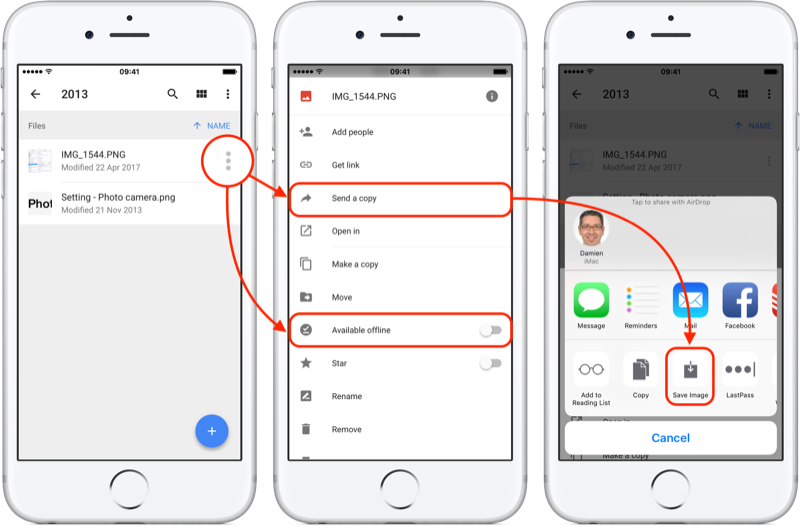
1. The first thing you need to do is also install Google Drive on your iPhone and login it via the same Google account.
2. Enter the photos folder in Google Drive.
3. Selet the photos you want to download and then tap the three dots on the right.
4. When the panel list turn up, tap on "Send a copy".
5. Finally choose "Save image" on the panel that rise from the bottom.
On the contray, if you want to move photos from iPhone to Windows 10, you could resort to other ways.
Part 3: How to Transfer Photos from Windows 10 to iPhone without iTunes but iCloud official website
iCloud official website is another alternative to import photos from Windows 10 to iPhone. It also supports to transfer photos, mails, calendars, contacts and so forth. It is safe and efficient without much efforts. Check the following steps to learn how to transfer photos from Windows 10 to iPhone without iTunes but iCloud official website.
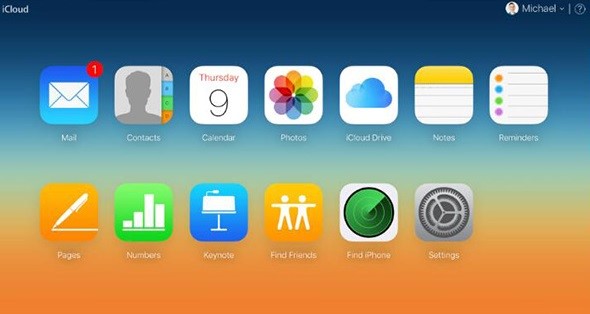
1. Log into iCloud official website via Apple ID and password. iPhone will receive a verification code. Input it to the login page and come to iCloud interface.
2. Click on "Photos" to switch into "Photos" panel. In the left sidebar, there are many different categories. Choose the category you want to transfer photos into. After that, click on the uploading icon to upload photos from Windows 10.
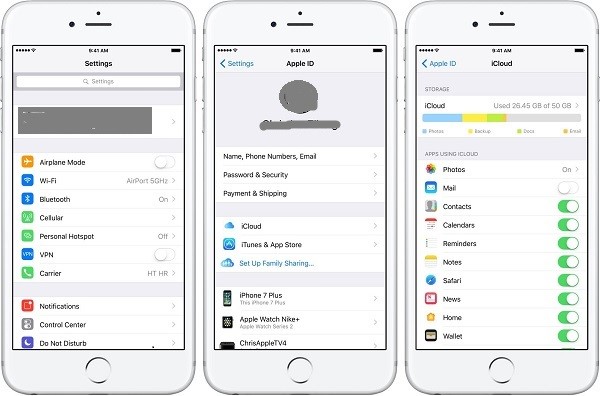
3. On your iPhone, go to "Settings > Apple ID > iCloud" and turn on "Photos". In this way, iCloud photos will be synced to iPhone. You import photos from Windows 10 to iPhone.
Part 4: How to Transfer Photos from Windows 10 to iPhone without iTunes but Leawo iTransfer
If you are trapped in daily tricky steps on transferring different types of files among iOS devices, iTunes and computers, you will definitely need an easy-to-use file management tool. At the moment, Leawo iTransfer will be a good helper for you. Without the need to download more software, you can realize all types of files transferring via Leawo iTransfer only. It is capable of transferring music, photos, SMS, TV shows, ebooks, messages and so on. Moreover, Leawo iTransfer enables you to transfer purchased and non-purchased items, which is superior to iTunes. Now let's see how to transfer photos from Windows PC to iPhone with Leawo iTransfer.
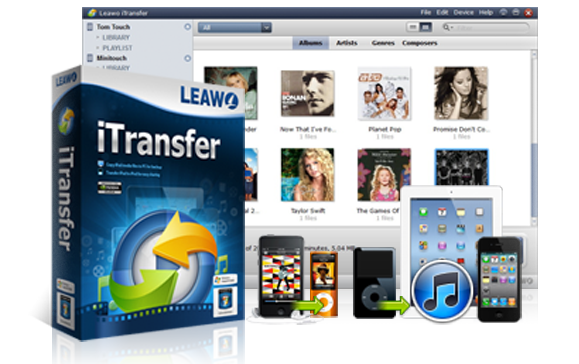
Leawo iTransfer
☉ Transfer files among iOS devices, iTunes and PCs with ease.
☉ Transfer up to 14 kinds of data and files without iTunes.
☉ Support the latest iOS devices like iPhone 7, iPhone 7 Plus, etc.
☉ Play back, view, and delete data and files on iOS devices.
1. Start Leawo iTransfer
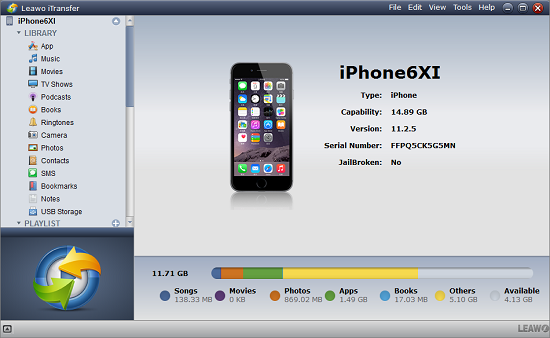
Connect iPhone to computer. Open Leawo iTransfer and then it will automatically scan iPhone and show iPhone library in the left sidebar. In the right area, type, capability, version and other information about iPhone will be shown. You could also insert your iPad to computer to transfer photos between iPad and computer.
2. Import photos from Windows 10 to iPhone
Go to "iPhone > LIBRARY > Photos" in the left sidebar and click "Add > Add File or Add Folder" at top middle. A window will pop out and you can choose photos on your computer and click on "Open". It will quickly import photos from Windows 10 to iPhone.

