When you buy a new iPhone, you may want to transfer your music from old iPhone to your new one. However, after you have a try, you may find it is not easy to make it, for you employ a new Apple ID on your new iPhone. If you are just wondering how to transfer music from one Apple ID to another, you can check out the following contents to help you to realize the goal.
Part 1: How to Switch Apple ID on iPhone 8
You know that your Apple ID connects you to all contents in the Apple ecosystem, including your Apple Music, apps, audiobooks, podcast subscriptions, and everything you store and back up in iCloud. In some cases, you may want to switch Apple ID on your iPhone, which means you need to sign out of one Apple ID and into another. If you really want to know how to change Apple ID on iPhone 8, you can check out the following steps to assist you to make it.
1.1 Sign Out of Your Current Apple ID
If you want to solve how to switch Apple ID on iPhone, first you need to sign out of your current Apple ID on iPhone. The detailed steps are as follows.
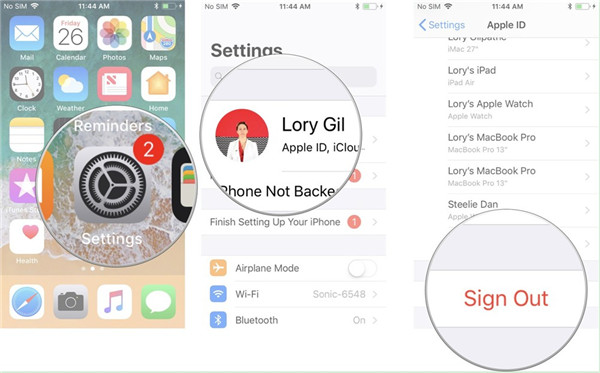
1. Navigate to “Settings > Apple ID > Sign Out”.
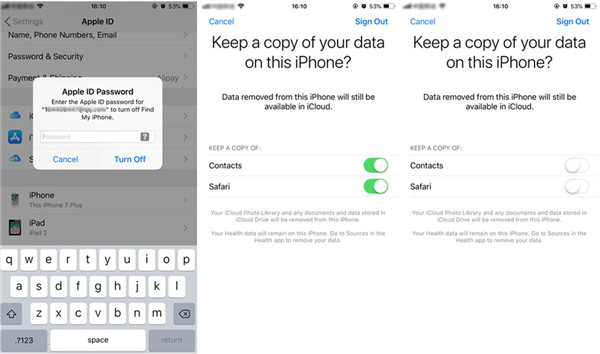
2. Afterwards, you need to fill in the password associated with your Apple ID and then click on “Turn Off” button. In the next interface, it will ask you whether you want to keep a copy of your data on this iPhone. If you do, you can turn on the option of “Contacts” and “Safari”. If you do not want to keep the previous data on iPhone, you can keep them on the off state. Here I recommend you keep a copy of your data in case you need in the future.
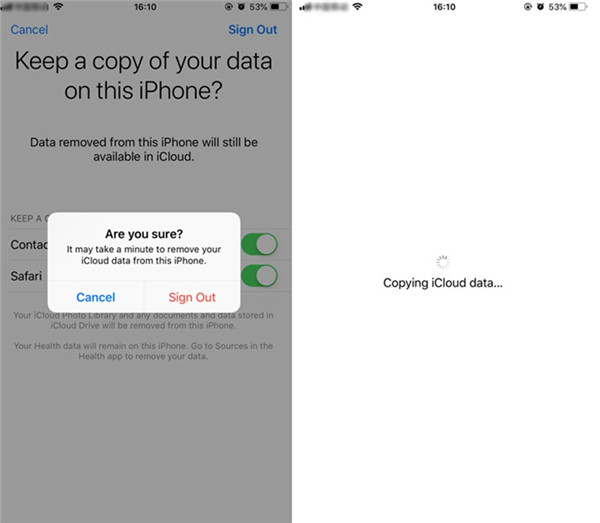
3. After you have turned on “Contacts” and “Safari” option, you need to click on the “Sign Our” button in the upper right corner of the screen. Click on the “Sign Out” button again in the pop-up panel. Then you will see the interface of “Copying iCloud Data”. Wait until this process is over, you will be able to sign out your current Apple ID successfully.
1.2 Sign In with Your New Apple ID
After you have signed out of your current Apple ID, you can continue to deal with how to switch Apple ID on iPhone by signing in with your new Apple ID.
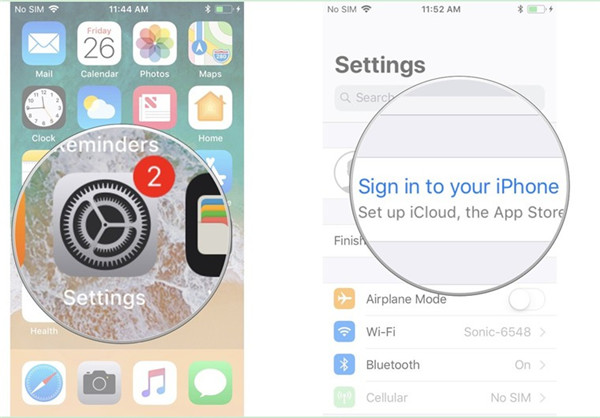
1. Go to “Settings > Sign in to your iPhone”.
2. Click on “Email” and then fill in the email address associated with the new Apple ID. Afterwards, fill in the password associated with the new Apple ID.
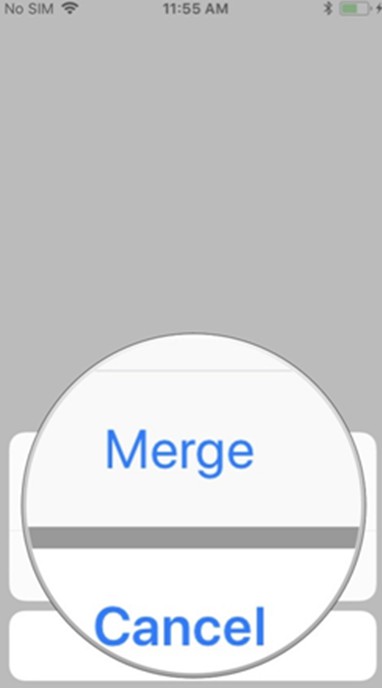
3. Click on the “Merge” button if you would like to merge the data on your iPhone with the iCloud account associated with the new Apple ID. If you are not willing to do so, you can click on “Don’t Merge”.
Thus, you can fix the issue of how to change Apple ID on iPhone 8. The steps are not hard to handle. You can now refer to the contents shown above to help you to make it.
By switching Apple Id, you could easily transfer picutures from one Apple id to another Apple id.
Part 2: How to Transfer Purchased Music from One Apple ID to Another on iPhone 8 via iTunes Store App
If you plan to transfer music from one Apple ID to another, you can take advantage of iTunes Store app to help you. This app can be used to purchase files from iTunes conveniently. If you have used one Apple ID to buy some songs, you can transfer to another Apple ID for backup or other intentions. The steps to realize this goal are shown below for you to refer to.
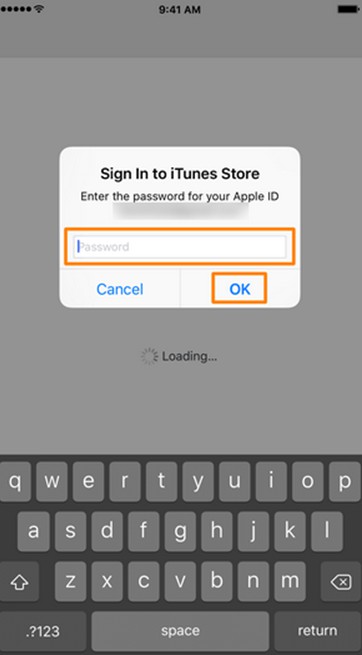
1. On iPhone, run iTunes Store app and then drag down to click on “Sign In”. Tap on “Use Existing Apple ID” and then fill in the Apple ID and password that you currently use. Click on the “OK” button to sign into iTunes Store. Thus, you will also sign into the Music, App Store, iBooks, and Podcasts apps on iPhone automatically.
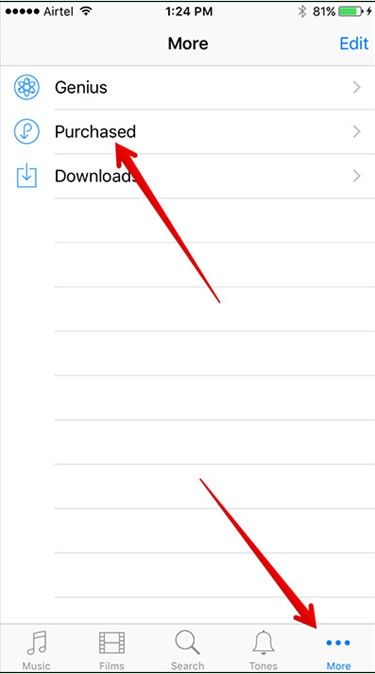
2. Click on “Purchased > More” button in order.
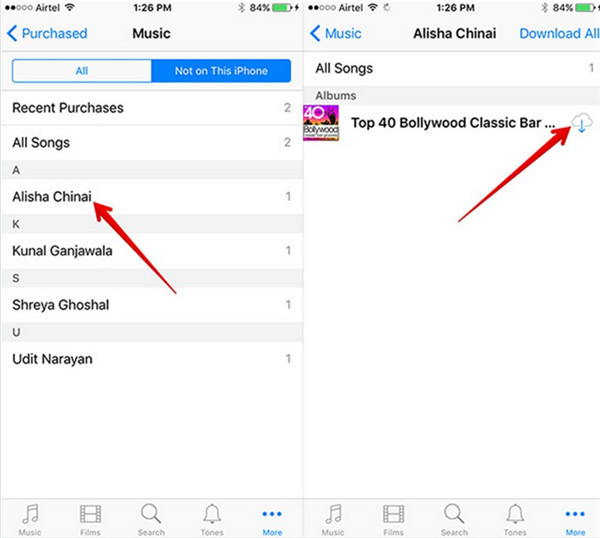
3. Tap on the option of “Music > Not On This iPhone”, and then you can click on the iCloud icon to download the music files you have bought in iTunes with your Apple ID to iPhone.
4. After that, you can refer to the steps in Part 2 to sign out of your current Apple ID on iPhone and then sign into your new Apple ID successively. However, you should click on “Merge” in the last step of Part 2 to transfer music from one Apple ID to another.
If you want to transfer purchases to new Apple ID, such as music, TV shows, and etc., you can refer to the steps shown above to make it. It is not so difficult to realize this aim. You can solve this problem of how to transfer purchases to another Apple ID only with a few clicks. However, if you want to deal with how to transfer non-purchased music to another Apple ID more professionally, you can resort to a third-party program to assist you.
Part 3: Transfer Non-purchased Music from One Apple ID to Another on iPhone 8 via Lawo iTransfer
If you want to solve how to transfer data from one Apple ID to another more completely, you can use Leawo iTransfer to help you. This software is very professional and can transfer both the purchased files and non-purchased contents, such as music, movies and so on among computers, iDevices and iTunes. As for how to transfer non-purchased music from one Apple ID to another on iPhone 8, you can also turn to this program for help. Now let’s check out the detailed steps to achieve your aim.
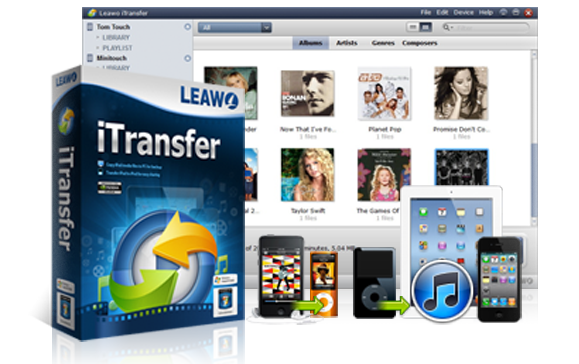
Leawo iTransfer
☉ Transfer files among iOS devices, iTunes and PCs with ease.
☉ Transfer up to 14 kinds of data and files without iTunes.
☉ Support the latest iOS devices like iPhone 7, iPhone 7 Plus, etc.
☉ Play back, view, and delete data and files on iOS devices.
3.1 Transfer Non-purchased Music from One Apple ID on iPhone to Computer
In order to solve transfer music from one Apple ID to another thoroughly, you first need to transfer the non-purchased songs to computer via iTransfer for later use.
Step 1. Launch Leawo iTransfer
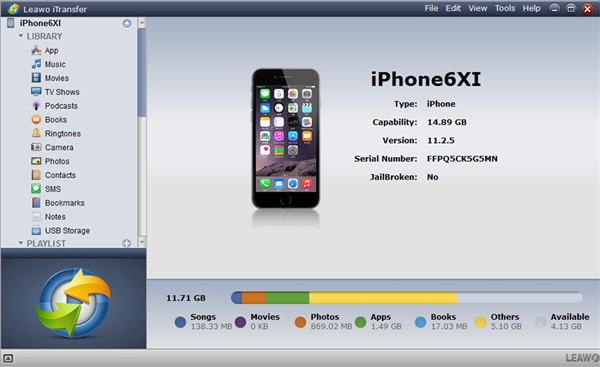
Connect your iPhone with computer and then launch the program. Leawo iTransfer will detect your iPhone automatically.
Step 2. Select Music to Export to Computer
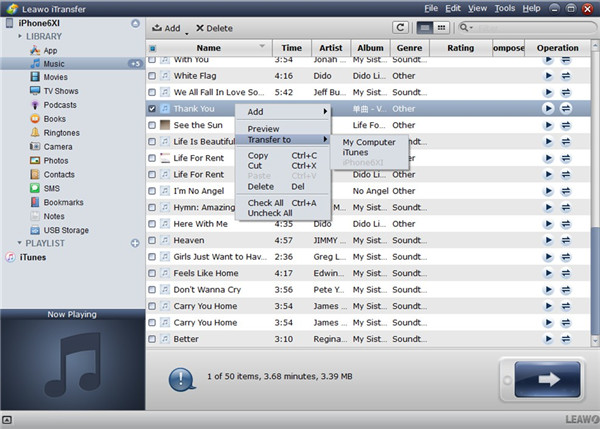
Click on the iPhone icon and then head to “LIBRARY > Music”. Select the non-purchased music files in the right part that you want to export to computer and then right click on one of them to choose “Transfer to > My Computer”. In the pop-up dialog, you need to choose an output directory on your computer to save the exported music by clicking the “Change” button. After that, you can click on “Transfer Now” to output the iPhone non-purchased music to computer.
When this process is finished, the iPhone non-purchased music files will be available on your computer folder.
3.2 Switch Apple ID on iPhone 8
After you have transferred the non-purchased music on iPhone 8 that has signed into your Apple ID, you need to refer to the contents in Part 1 to deal with how to switch Apple ID on iPhone 8 successfully. You could follow this ways to transfer other files like moving contacts from one Apple id to another Apple id.
3.3 Transfer Non-purchased Music from Computer to iPhone 8 via iTransfer
When your iPhone 8 has signed into the new Apple ID, you need to transfer the music from computer to iPhone via iTransfer to realize your goal perfectly. The detailed steps are displayed below.
Step 1. Click on Music Tab
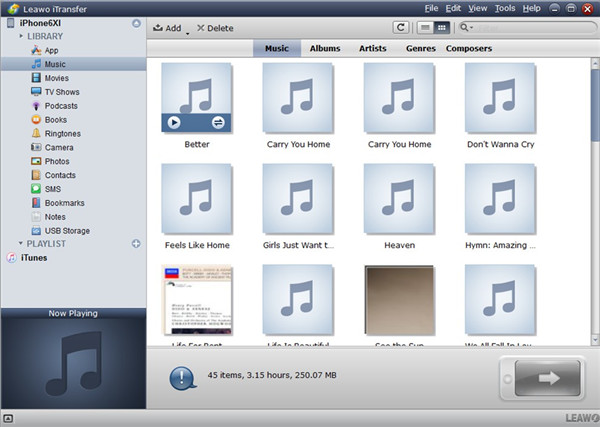
Click on the iPhone icon and then head to “LIBRARY > Music”. All your iPhone songs will show in the right side of the window.
Step 2. Add Music to iPhone
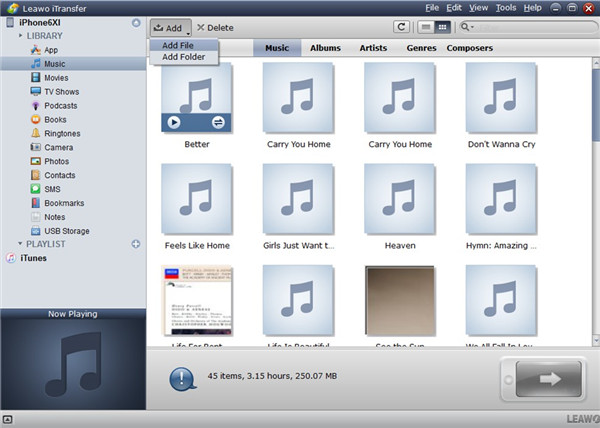
Tap the “Add” button to select “Add File” or “Add Folder” in the dropdown menu according to your needs. Locate the exported iPhone music files on your computer and then click on the button of “Open” to start transferring them to iPhone 8 signed into the new Apple ID. Wait until the process comes to an end.
With the assistance of Leawo iTransfer, you can settle how to transfer data from one Apple ID to another effectively and safely. Now you can download this program to have a try. Finally you will know how powerful this program is.

