As iPad becomes one of the most convenient devices today, we carry it with us daily and do many things with it, including the transferring of documents and photos via instant messengers such as Skype or WhatsApp. These files are usually stored in our iPad. Someone asks, "I want to transfer the data from my iPad to a USB flash drive to make it easier to carry or share. How to transfer data from iPad to flash drive? Don’t worry, in this guide, we are going to teach you how to transfer data from your iPad to flash drive.
To transfer data between iOS and external storage device, you can refer to:
How to Transfer Files Between iPhone and SD Card
3 Ways to Transfer Photos from SD Card to iPad
How to Transfer Photos from iPhone to SD Card
Part 1: How to Transfer Data from iPad to Flash Drive with iTunes
Since iTunes is the official tool of Apple and it has both Mac and PC version, it becomes the most widely used tool for transferring data from iPad to USB flash drive. People usually use it to back up data of their Apple devices, such as iPads and iPhones. As PCs are still most used, we are going to take transferring data from iPad to USB flash drive with a PC for example, below are the steps:
1. Install the latest iTunes to your PC.
2. Connect your iPad and flash drive to your PC.
3. You may see a prompt on your iPad asking you whether you trust this computer. Tap "Trust" to continue.
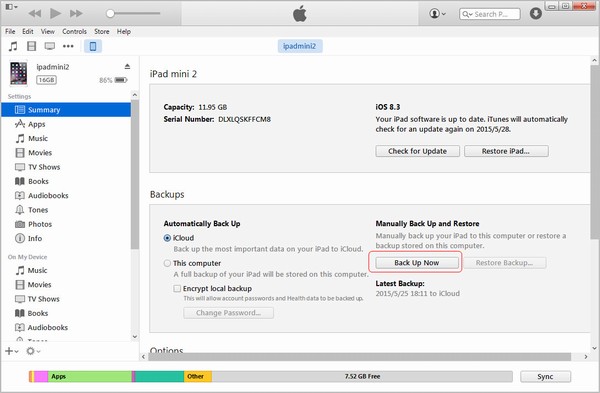
4. Simply click the "Back Up Now" button in iTunes to transfer the data (e.g. music, photos, and videos) from your iPad to your PC.
5. The data will be stored in the "Backup" folder of the Apple data backup folder in your PC, the path is "X:\User\Your username\AppData\Roaming\Apple Computer\MobileSync\Backup". “X” represents the drive which the Apple data backup folder located in.
6. Open the "Backup" folder and find the data you want by opening the sub-folders respectively, for example, photos are generally stored in the "DCIM" folder.
7. Select those files and press "Ctrl + C" to copy these files and open a destination folder on your USB flash drive to press "Ctrl + V". In this way, you complete transferring data from iPad to flash drive.
Part 2: How to Transfer Data from iPad to Flash Drive with Windows Explorer
Windows Explorer is pre-installed on the computer and you don't need to download and install it. It gives you access to iPad photos and videos. Let's see how to transfer data from iPad to USB drive.
1. Connect your iPad and flash drive to your computer.
2. You may see a prompt on your iPad asking you whether you trust this computer. Tap "Trust" to continue.
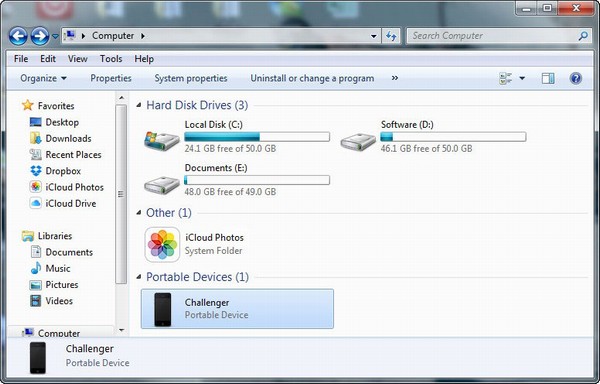
3. Open This PC or My computer, your iPad may be shown in it as a storage device. Go into it by double clicking the icon.
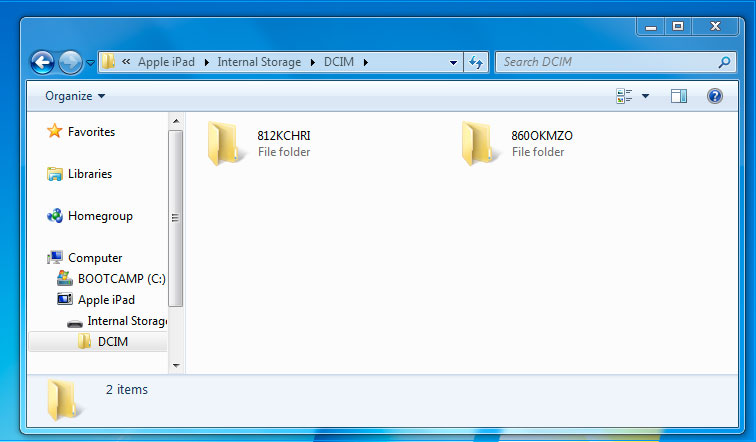
4. Visit "Internal Storage > DCIM Folder".
5. Select and copy all the photos you need from the DCIM folder and paste them to your USB flash drive.
Part 3: How to Transfer Data from iPad to Flash drive with Leawo iTransfer
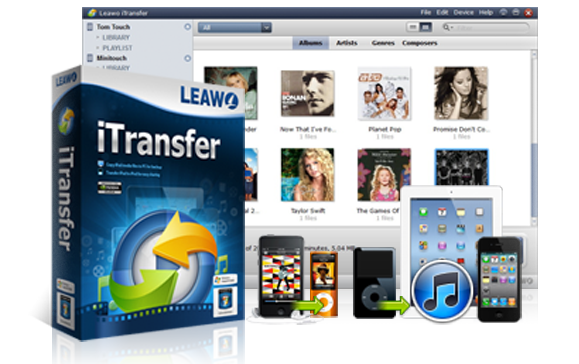
Though solutions mentioned above are practical, you can't access to all the data you need. Is there any easier and more comprehensive way to transfer data from iPad to USB flash drive? Of course, the answer is positive. With Leawo iTransfer, you could transfer not only photos, videos, music, but apps, TV shows, ringtones, ebooks and camera roll files, pretty much every kind of data between iPad, PC and USB flash drive conveniently. With this iPad to flash drive transfer tool, you could have the maximum control to your data in your iPad. You could also easily manage and organize the files in your iPad without the sync of iTunes, making your iPad as a flash disk. It fully supports the latest iOS version and devices. And it supports operation systems from the outdated windows XP to the latest windows 10. Instructions for transferring data from your iPad to USB flash drive are as follow.
Leawo iTransfer
☉ Transfer files among iOS devices, iTunes and PCs with ease.
☉ Transfer up to 14 kinds of data and files without iTunes.
☉ Support the latest iOS devices like iPhone 7, iPhone 7 Plus, etc.
☉ Play back, view, and delete data and files on iOS devices.
1. Connect iPad to iPad to flash drive transfer tool
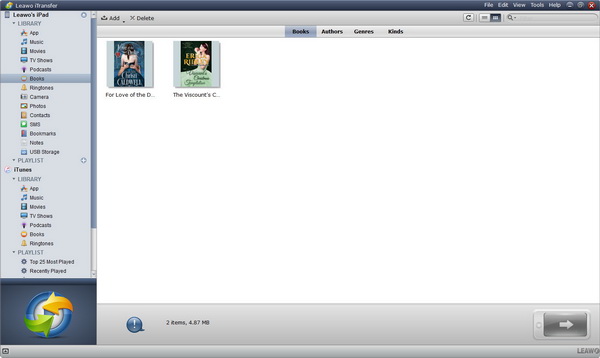
Connect your iPad and flash drive to your PC to activate this iPad to flash drive transfer tool. Once you run iTransfer, your iPad could be recognized automatically and displayed in the user interface.
2. Locate target files
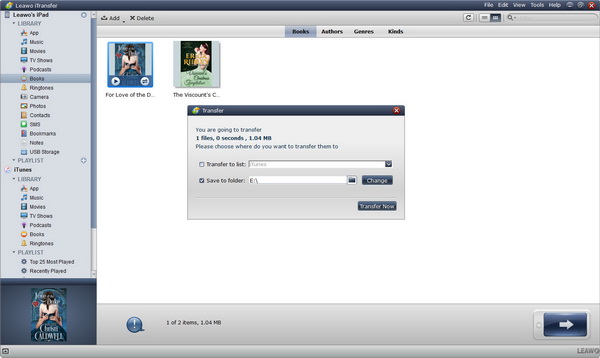
Select the files that you want to transfer from one of the columns listed on the left. You can choose any categories you want in the left sidebar. Here I would like to take books transferring as an example. Go to "iPad > LIBRARY > Books" in the left sidebar and you will see books in the right area. Select items by holding "Ctrl", then simply click the "Transfer" button at bottom right corner.
3. Transfer data from iPad to flash drive
A dialog box pops out in which you could modify the destination list name and select the destination drive and folder. Choose "Save to folder" and select the USB drive that you plug into your PC as a destination folder. Click "Transfer now" to transfer data via this iPad to flash drive transfer software.

