With iTunes, you can sync your music, movies, TV shows, photos and more. After you sync, the content on your iPad matches the content in your iTunes Library on your computer. Before syncing with iTunes, you can also consider using iCloud or similar services to keep your content automatically up to date on all of your devices. If you prefer to use iTunes to sync your content, follow the steps below to know how to sync iPad to iTunes. There are three ways available for you.
Part 1. How to Sync iPad to iTunes using USB
Before syncing iPad to iTunes using USB, you need to keep in mind that what you can sync with iTunes. Not all files can be synced to iTunes.
What You Can Sync with iTunes
Syncing your with your computer is really quite easy. Gather your iPad and its USB charging cable, and make sure you have installed the latest version of iTunes on PC/Mac. Plug in your device, and iTunes should launch, displaying your device's summary screen. The guidance below will show you the further steps.
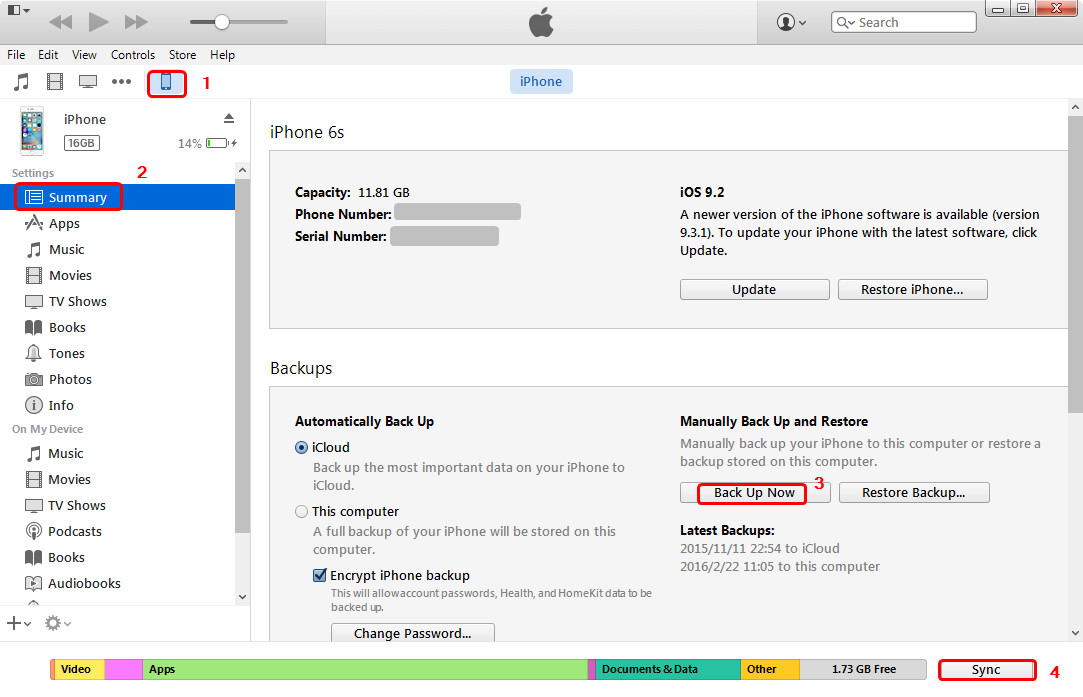
1. Open iTunes. Make sure that you have the latest version. Then connect your iPad with USB cable to your computer.
2. Click on your device. After clicking on your device, tabs appear on the left side of the iTunes window under Settings.
3. Turn on syncing. You can turn on syncing for Music, Movies, TV Shows, Podcasts, Books, Audiobooks, Tones, Photos, and Info.
4. Sync your content. Click the Sync button in the lower-right corner of the screen to sync your content.
Part 2. How to Sync iPad to iTunes using Wi-Fi
Besides syncing iPad to iTunes via USB cable, you can try another way: Syncing iPad to iTunes via Wi-Fi. Here's about how to do that.
1. Open iTunes. Make sure that you have the latest version. Use the USB cable that came with your iOS device to connect it to your computer.
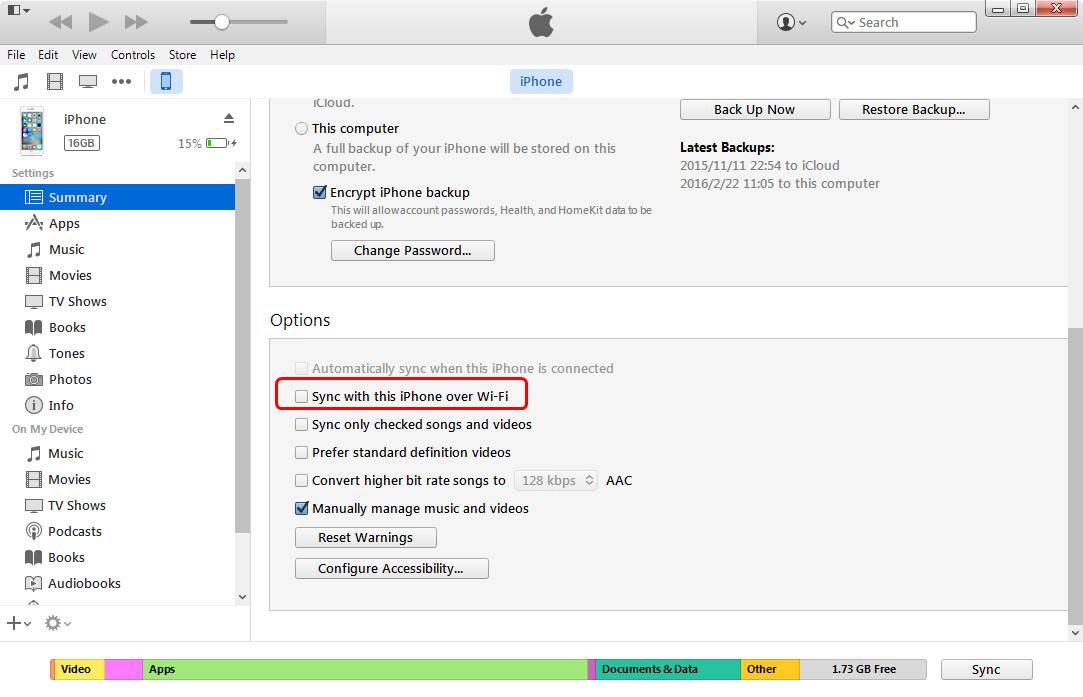
2. In iTunes, find and then click your iOS device. On the Summary tab, select "Sync with this [device] over Wi-Fi."
3. Click "Apply" button, then disconnect the USB cable. Choose which items you want to sync, then click sync.
Part 3. How to Sync iPad to iTunes with iPad Transfer Software
If you still have some non-purchased files in your iPad that is unavailable to sync them to iTunes, you will need the third-party software to sync non-purchased files from iPhone to iTunes. Leawo iTransfer can give you much help on this issue, which enables users to transfer various of files among iOS devices, iTunes and computers, like apps, music, movies, TV shows, ringtones, ebooks, photos, Camera Roll, contacts and text messages, etc. The following guidance will show you how to sync iPad to iTunes without erasing. You can free download the software then have a try.
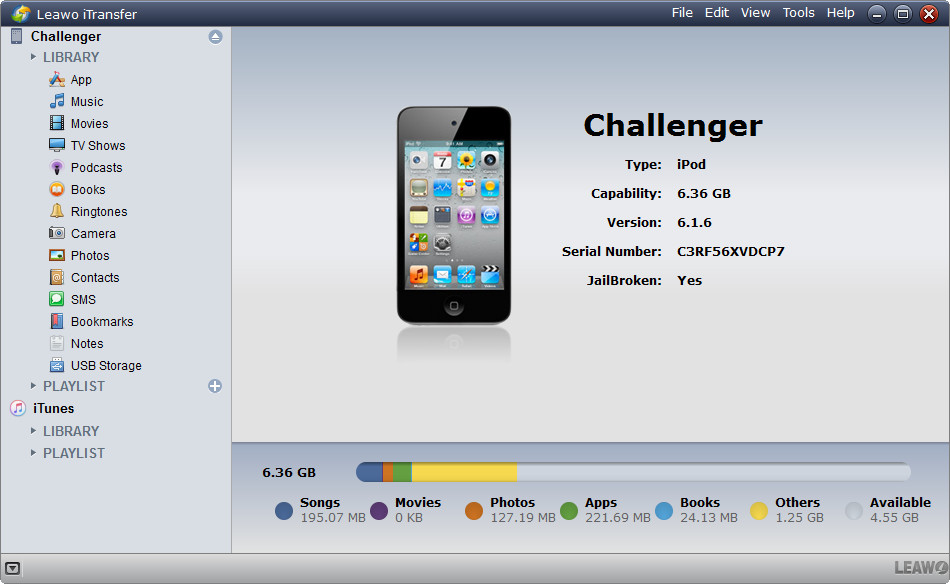
Step 1. Run Leawo iTransfer and connect iPad to computer with USB cable. The software will recognize your iPad automatically.
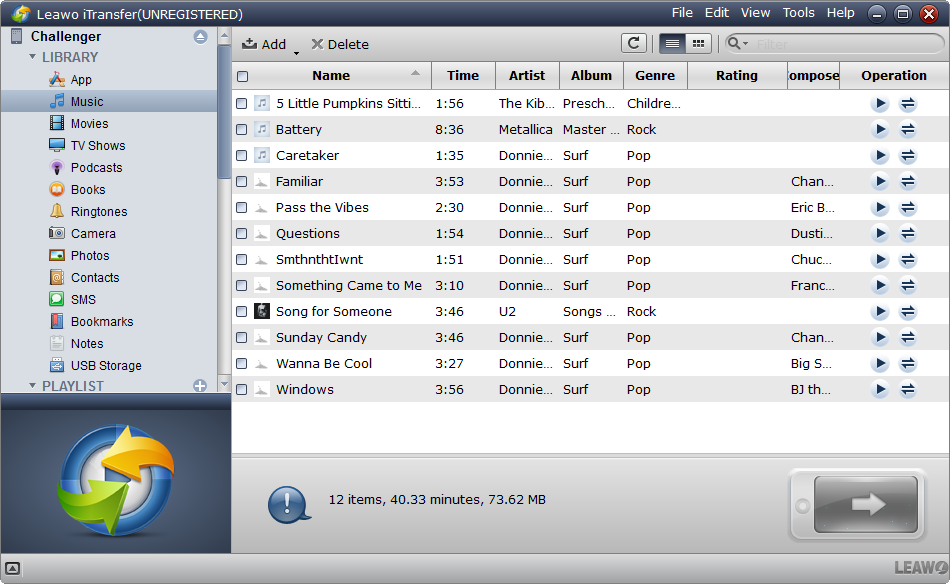
Step 2. Click the name of iPad and choose a library. The contents of this library will display in the right part of the window.
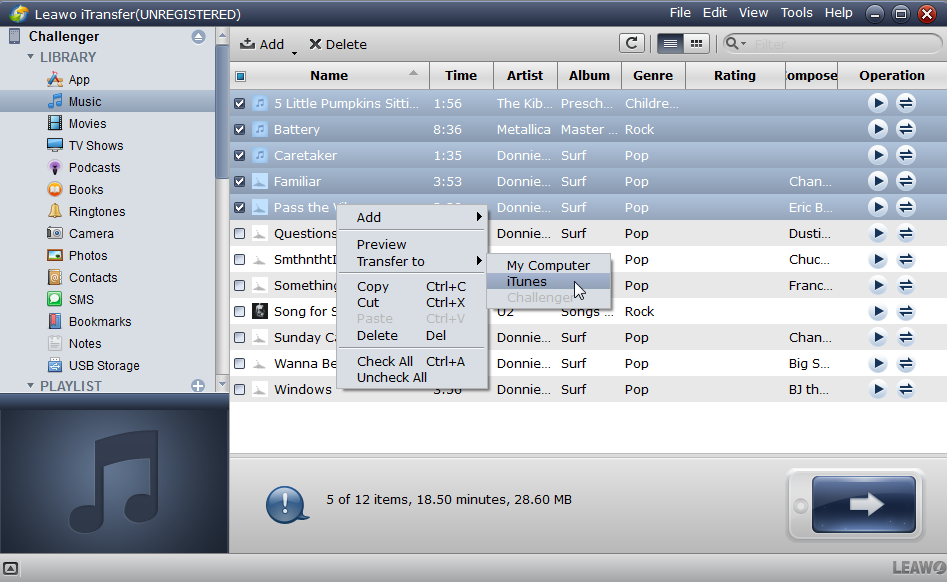
Step 3. Select the files you need by holding Ctrl/Shift key, and click the transfer button at the right bottom. Or right-click a selected file and choose Transfer to > iTunes.
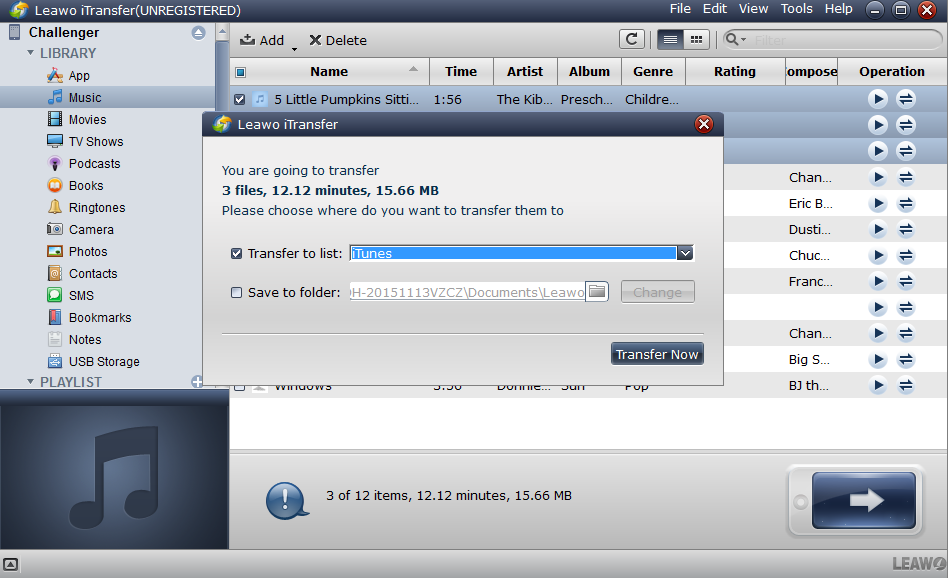
Step 4. After selecting files, you’ll see a pop-up dialog. Check Transfer to List and choose iTunes as a target. Then click Transfer Now to start syncing iPad to iTunes.
After the transfer finishes, Leawo iTransfer will successfully help you to sync iPad to iTunes without erasing. You can make use of iTunes to transfer purchases from iPhone to iTunes. And you can also take advantage of Leawo iTransfer to transfer both purchased items and non-purchased items from iPhone to iTunes without any loss of data. And you don’t need to worry about the erasing of data when you sync iPad to iTunes by using Leawo iTransfer. Also Leawo iTransfer allows users to copy various kinds of files from their devices to computer for backup. If you want to know how to backup iPhone, please check here.
Part 4. How to Fix iPad Not Syncing with iTunes
It is quite frustrating when you find that your iPad won't sync with iTunes normally. Don't worry. Here is what you can do to fix it and get the iPhone, iPod, or iPad syncing with iTunes on a Mac or PC again.

