
As an important tool to remind you of all kinds of significant events and dates, Google Calendar can be quite easy and convenient to use. What’s more, if you would like to combine Google Calendar with iPhone, now the newest iOS system could allow you to achieve the goal. If you want to sync your Google Calendar with your iPhone in order to have access all the time and on any device at your Events. You can use Google Calendar to have in one place all events and notices. If you don’t want to miss that noon get-together your friends set up in Google Apps, this article will show you how to sync Google Calendar with iPhone with a few short steps. Next, if you have the same needs, you can stop here for further information.
How to sync your Google Calendar with iPhone
First of all, you can make full use of your iPhone to sync your Google Calendar without any further tools. Here are the steps.
For iOS 7 or Later
If you are iOS users with iOS 7 system or later installed, you can follow the steps below to sync Google calendars with iPhone.
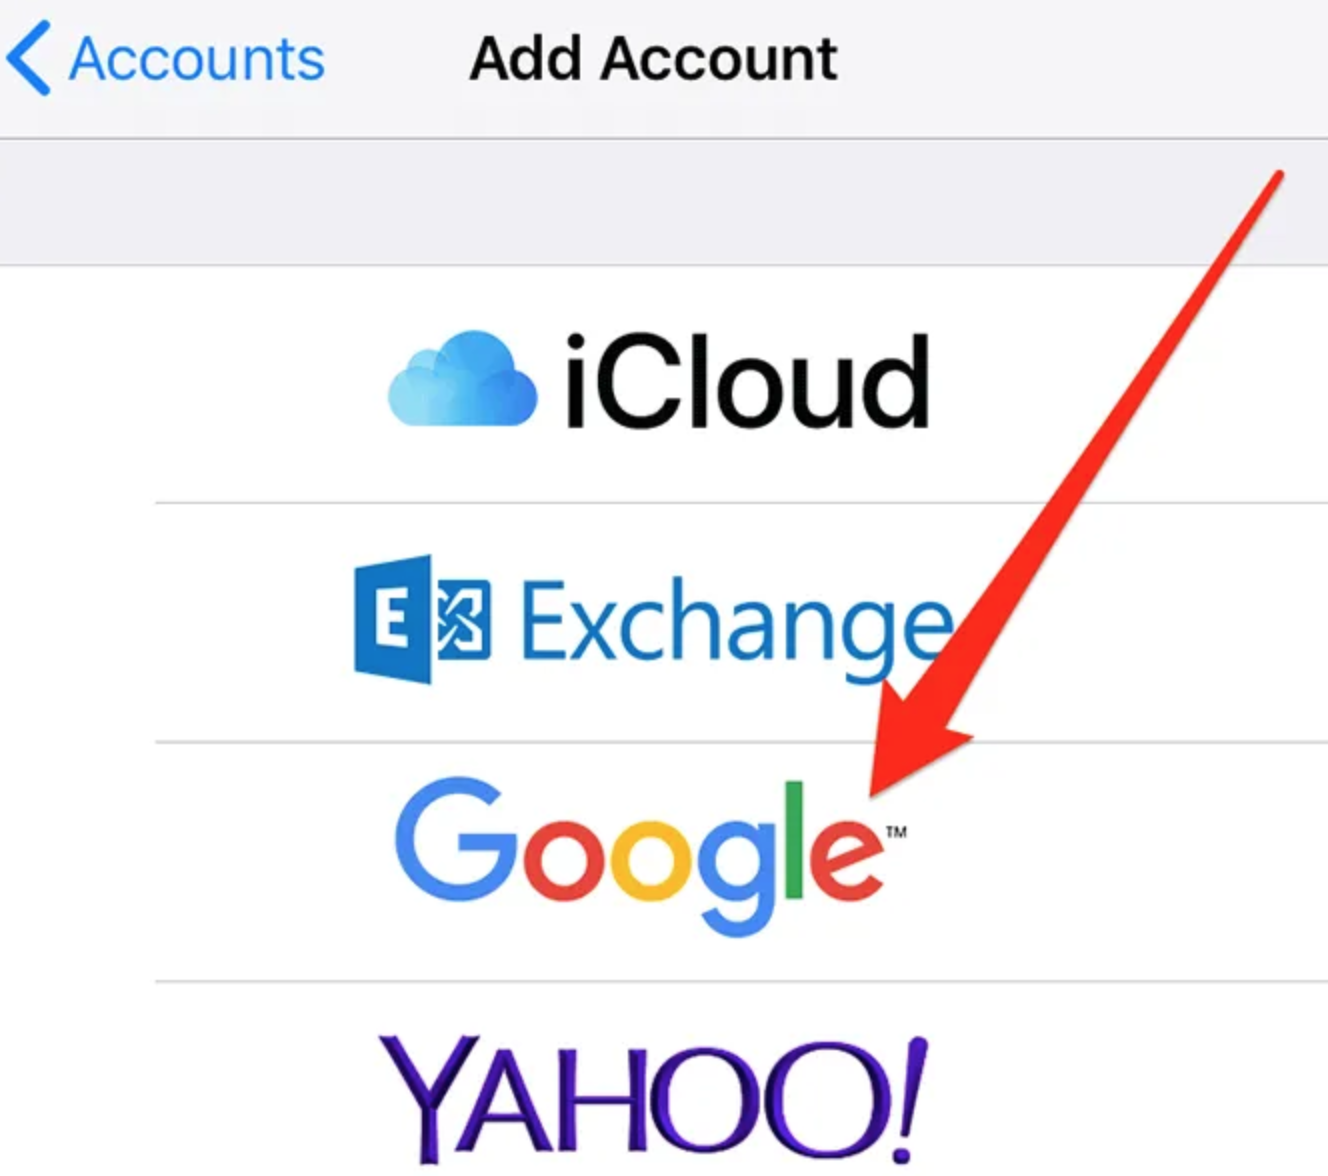
Step 1. Tap Settings > Mails, Contacts, Calendars > Add Account, select “Google”. Just enter your logins, your name, your Gmail address and your password. Click on “Next”.
Step 2. Then tap Calendars to ON and others to OFF. Go back to Home screen, and launch Calendars App, then the Google Calendars will be synced to your iPhone.
For iOS 5 or iOS 6
If you are still using iOS 5 or iOS 6, the following steps will show you how to do that.
Step 1. Tap Settings > Mail, Contacts, Calendars > Add Account > Other > Add CardDAV Account.
Step 2. Enter Server, User Name and Password in the fields.
Step 3. Under Advanced Settings, make sure that SSL is on and the port is 443, then tap Next.
Step 4. Go back to your Home screen and tap Calendars. Syncing should begin automatically.
What if your Google Calendar is not syncing
If you can follow the above steps to sync your Google Calendar successfully, then you don’t need to spend more time. But recently, a lot of users reflected that, in many cases, the Google Calendar could not be synced with iPhone smoothly and they have no idea how to deal with the problem. For your further information, next time if you have encountered the problem again, perhaps you can follow the steps below to further check your device.
1. Check your Google Calendar sync settings
First, you can check your Google Calendar sync settings. iPhone could allow you to sync your preferred contents from Google account to your iPhone. But before it can work properly, you have to make sure that your Google Calendar sync has been set correctly. If not, you need to update the Google Calendar on your iPhone to activate the app.
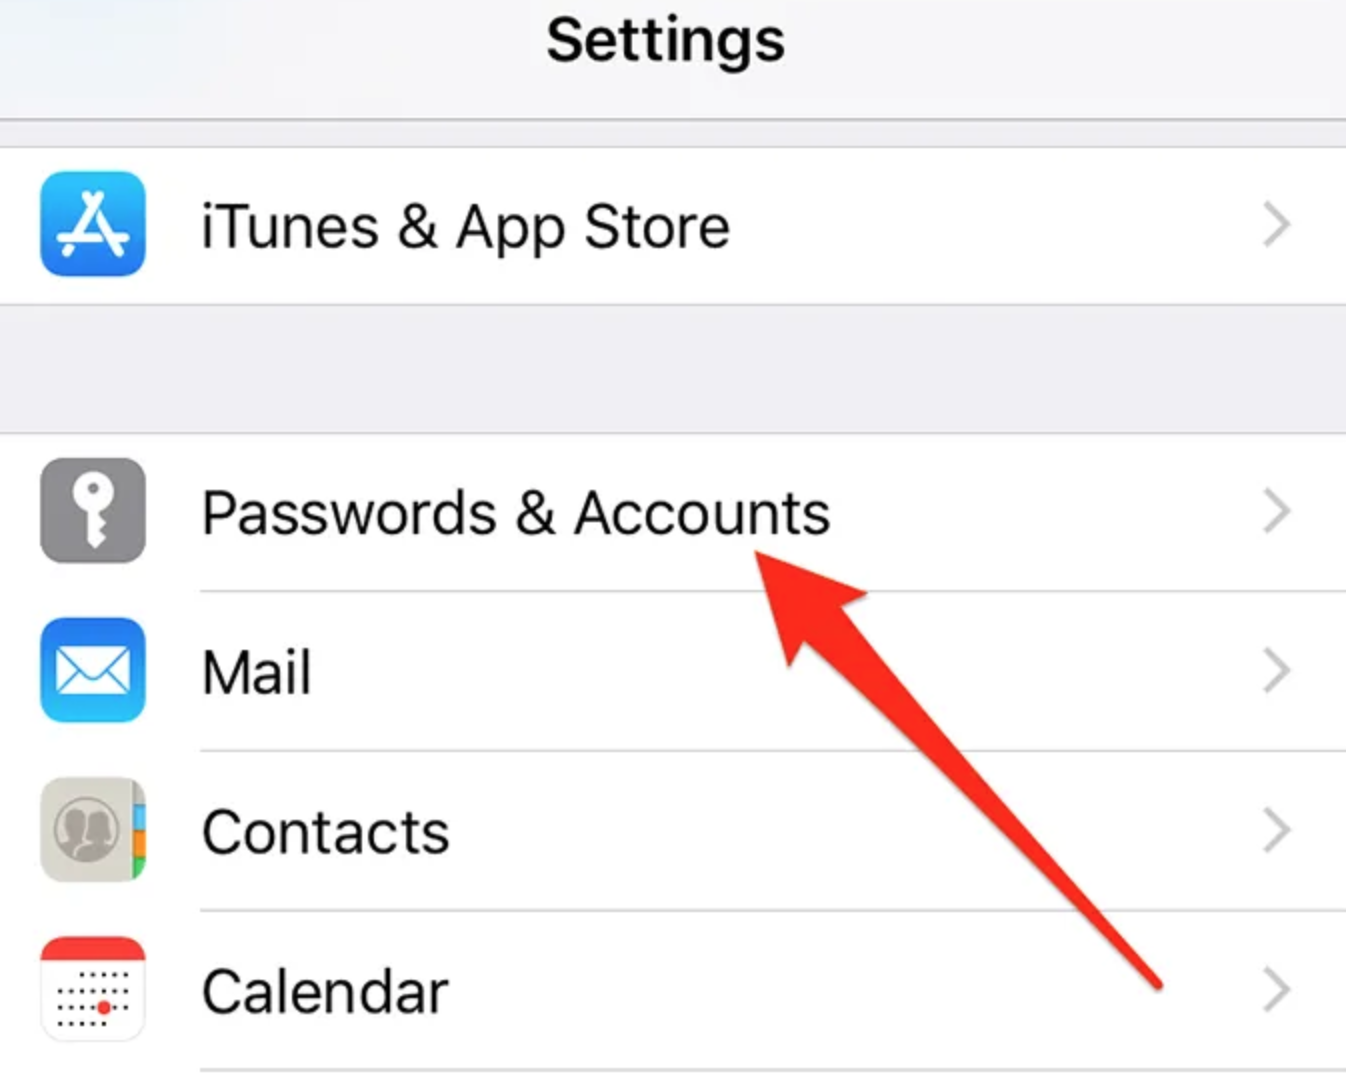
Step 1. Open iPhone and enter the Settings, then go to Password & Accounts option.
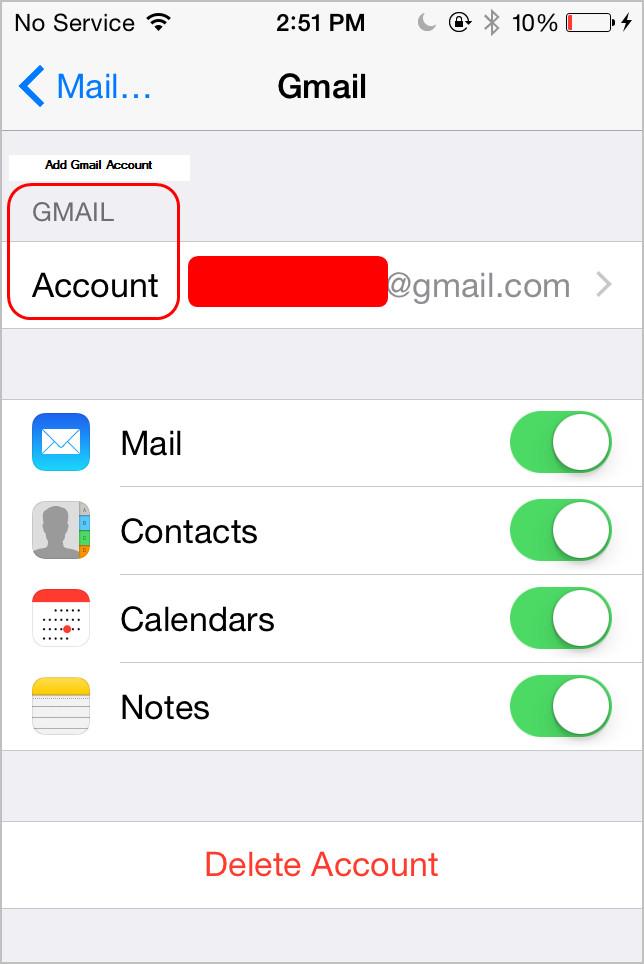
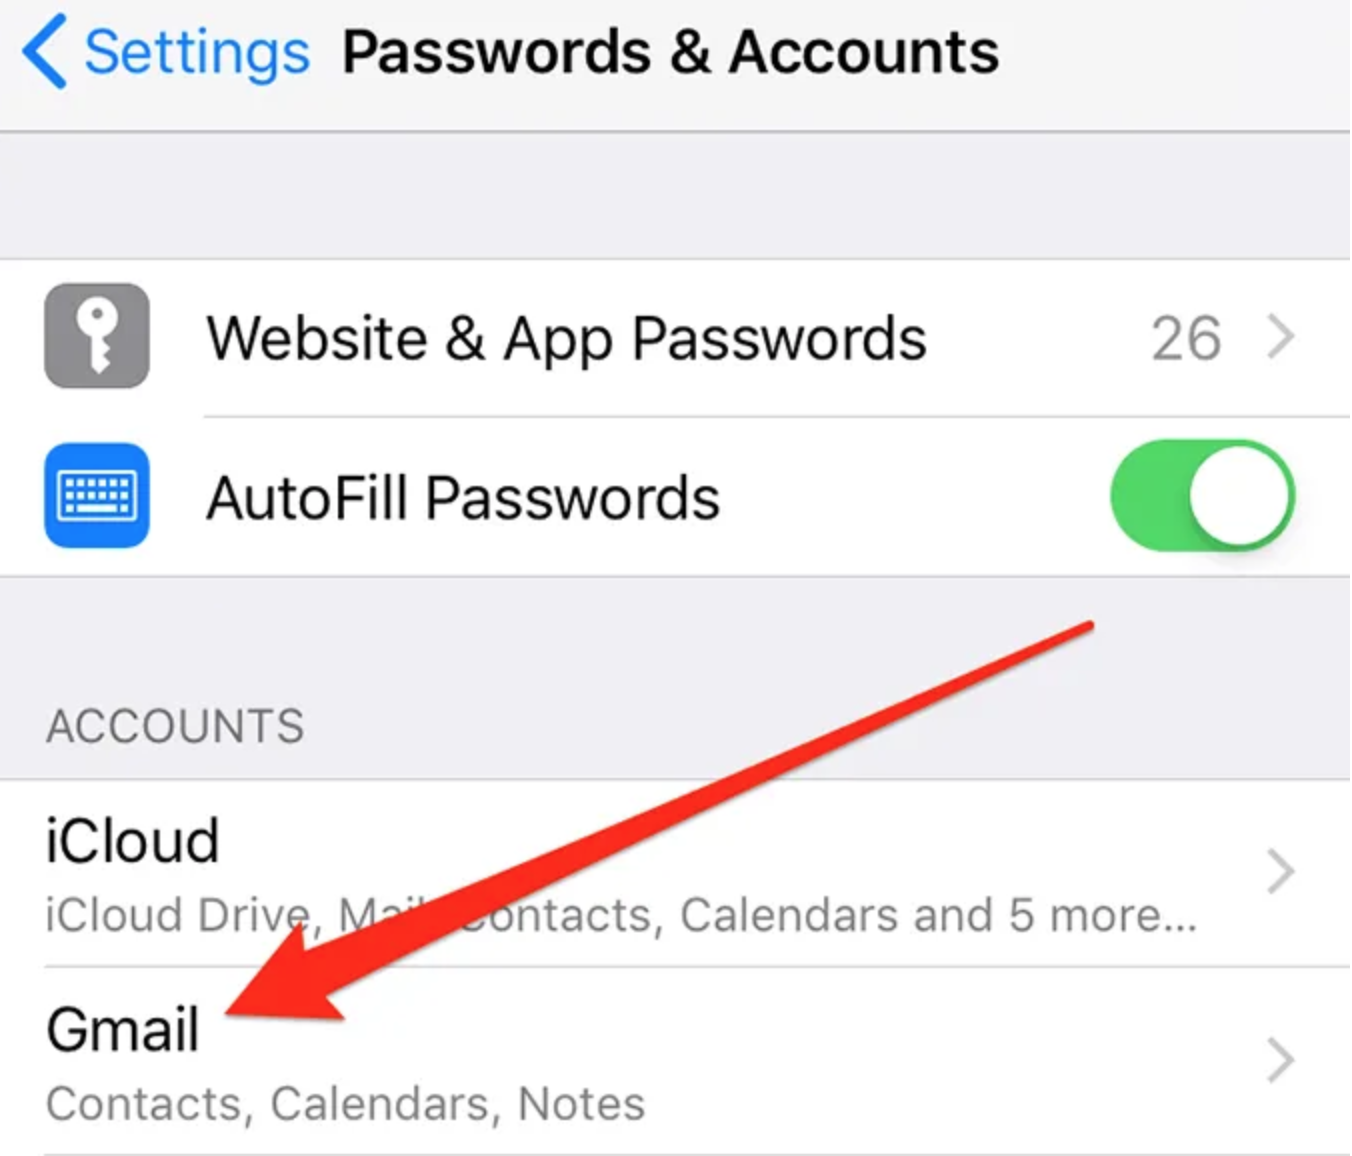
Step 2. Choose Gmail account in the list and enable this option.
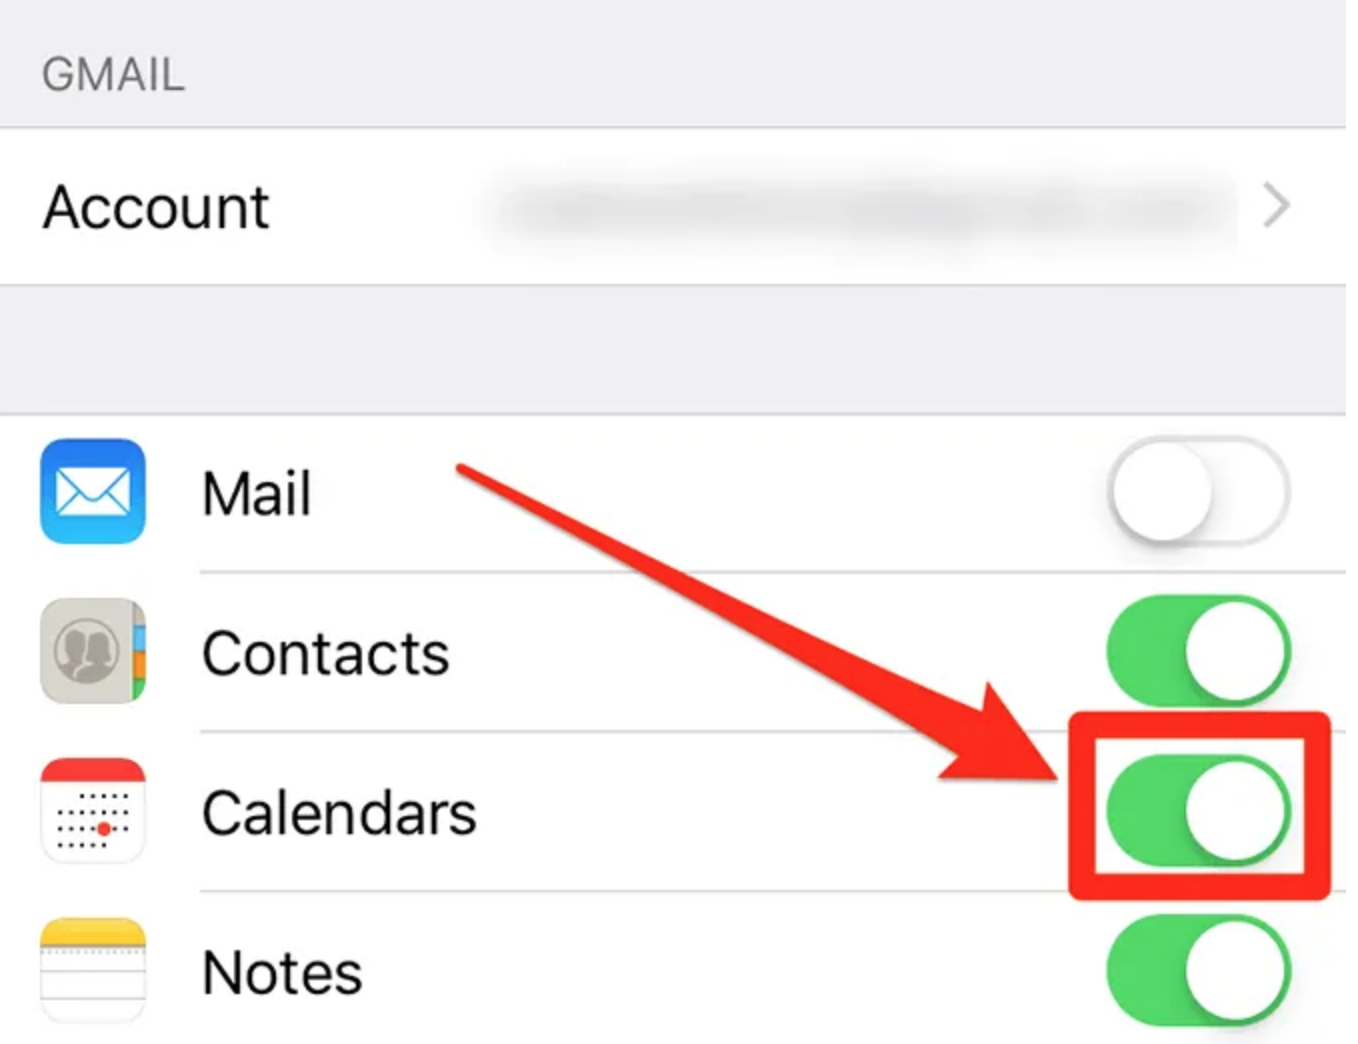
Step 3. Under Gmail account, you can see many options, including Mail, Calendars, Contacts and Notes. Here, please turn on the toggle next to Calendars. Then your Google Calendar would be activated and all the events would be synced to your iPhone. If this toggle is not no, please change it.
2. Check your iPhone network settings
The sync process could only be completed when your network is working properly. Next time if your Google Calendar could not be synced with your iPhone, then you can try to check your iPhone network settings. If something wrong related to iPhone network, then you have to fix the internet connection first. Then, how to check your iPhone network settings are all right? It is quite simple. You can verify your iPhone network by logging in to some websites or using some apps. If these web browsers could be opened, then your network can work correctly. If not, there might be some issues related to your network settings.
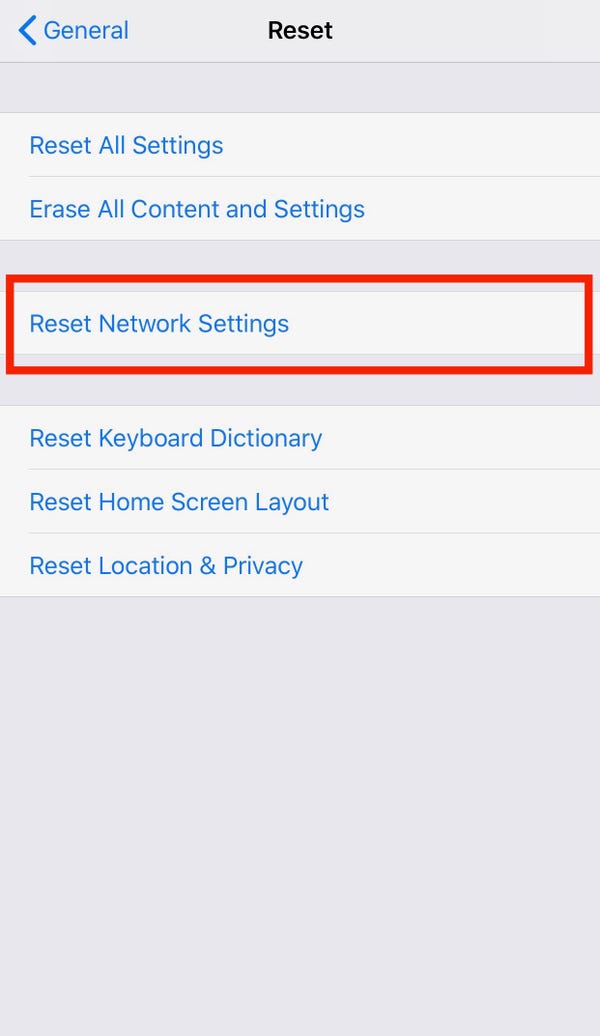
How to fix your network setting problems? You may try to switch off your connection first, and then switch it on to have another try. If it doesn’t work still, then you can reset your iPhone network connection. If it is not resolved still, then you may need to contact your Internet Service Provider.
3. Fetch data from Google Calendar
Next, you can try to fetch data from Google Calendar as the alternative way. Actually, Google allows you several ways to sync with your account, including fetching data from Google Calendar directly. Changing to this way may resolve the sync issues then. Here are the steps.
Step 1. Go to Settings on your iPhone. Then, click the Passwords & Accounts option.
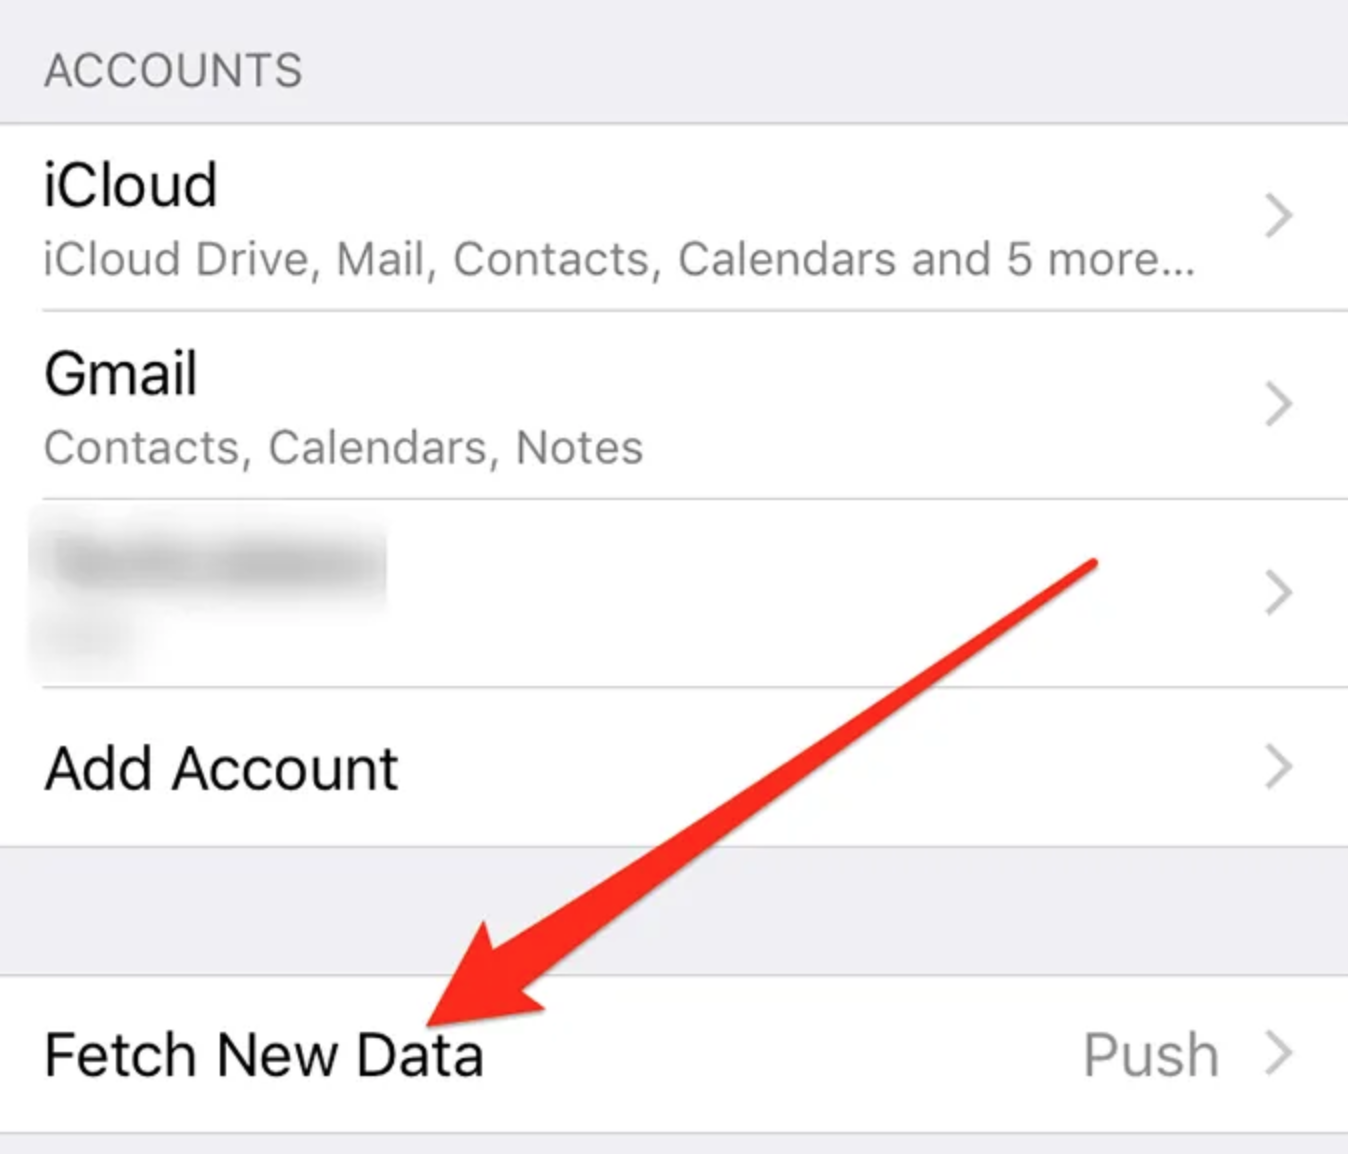
Step 2. Scroll down to the bottom and you can find Fetch New Data option. Click it.
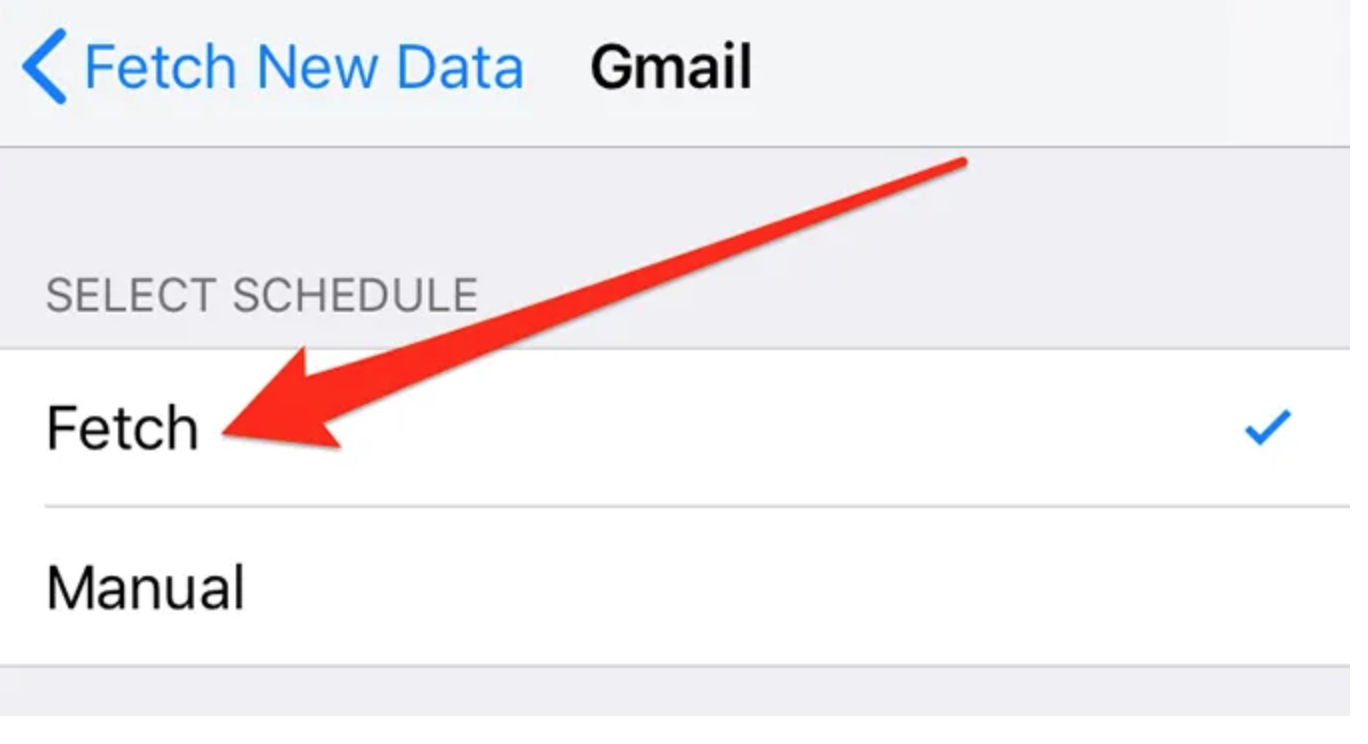
Step 3. Select your Gmail account in the list and tap on Fetch.
4. Delete and re-add your Google account
Sometimes, you may find that the Google Calendar would not be synced correctly without any apparent reasons. In such a case, if you can remove your Google account from your iPhone and then re-add it, the problem would be resolved then. Here are the steps for you.
Step 1. Open the Settings app on your iPhone and then click Passwords & Accounts option.
Step 2. Select Gmail account in the list and then you can tap on Delete Account when you scroll down to the very bottom of the screen.
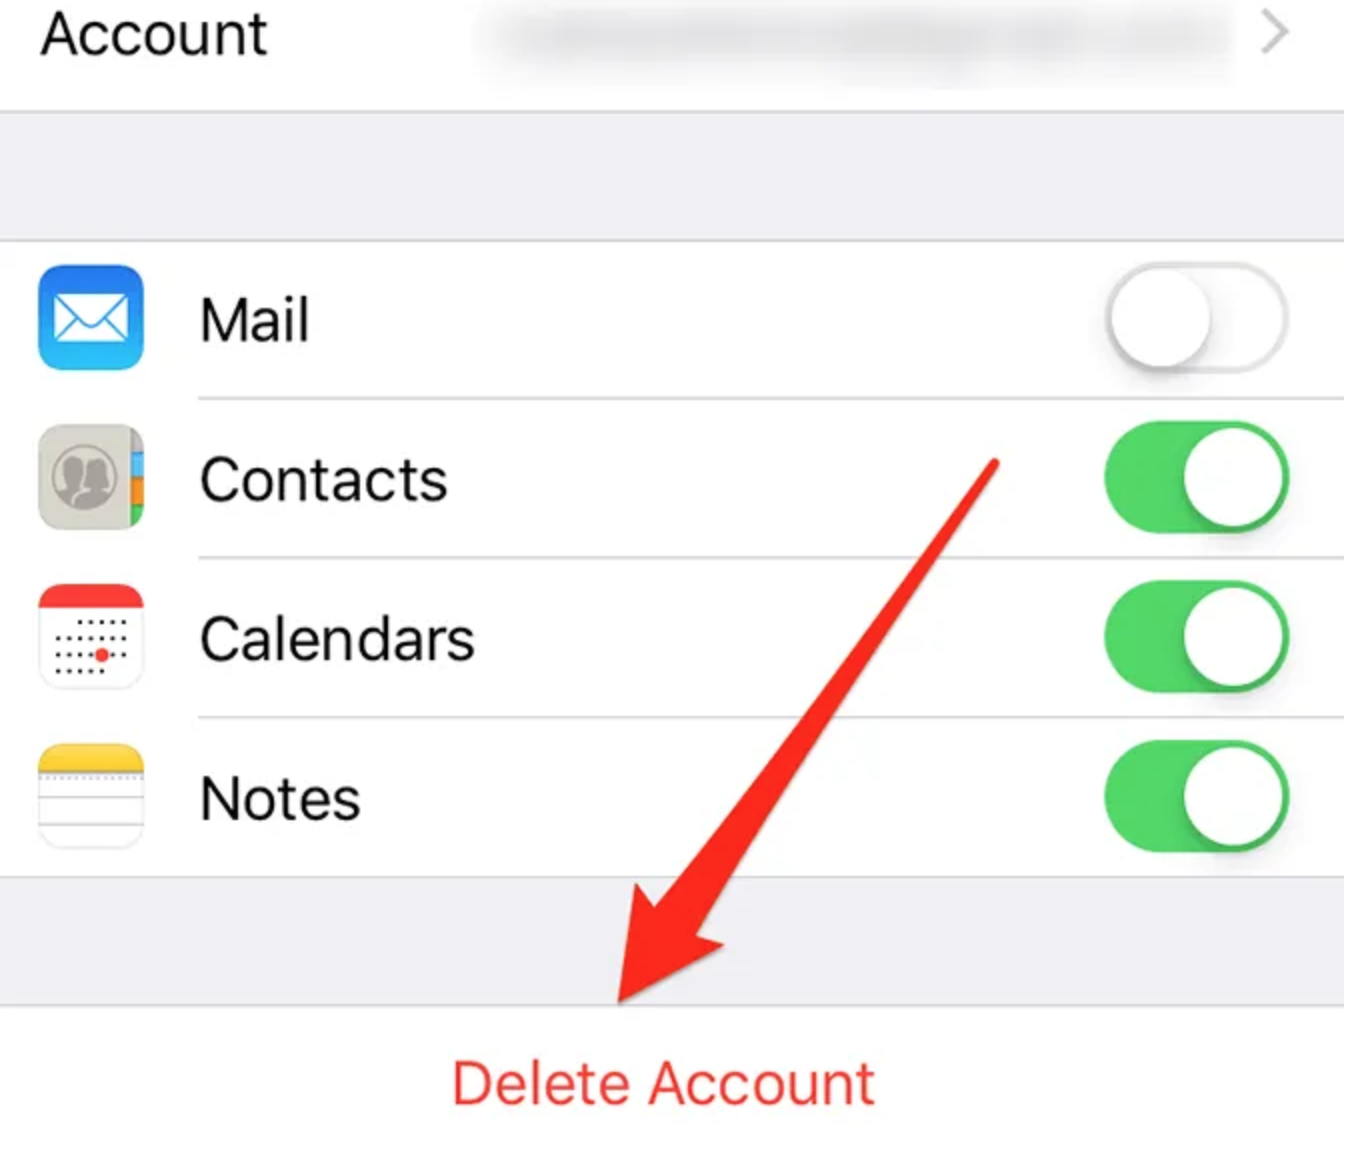
Step 3. Then tap on Delete from My iPhone option. Once it is done, then the Google Account has been removed from your iPhone. Now what you need to do is to re-add account.

Step 4. Head back to the option of Passwords & Accounts, then click on Add Account option and now you can find Google from the list. Now, please enter the Google login user name and password to add the account to your iPhone.
Bonus tip: How to transfer the calendar data on your iPhone
Besides, for your further information, if you also would like to transfer the calendar on your iPhone, then you can adopt Leawo iTransfer as your firm choice to complete the transferring process. Leawo iTransfer’s main function is to transfer data among iPod, iPad and iPhone devices. Also, it could provide exact solutions for the transfer issues among these devices, including Quick Start not working issues and so on. It also can be capable of transferring 12 kinds of files among Apple devices, including photos, music, videos, SMS, contacts and so on. As an excellent music manager which can manage the playlists of iOS devices and iTunes easily, Leawo iTransfer could help users to make full use and take full control of the media files on the iOS devices. By the way, Leawo iTransfer is quite fast in the running speed and could transfer all the data safely. No matter you are transferring music, videos, photos, SMS, this tool could transfer these data between computer and iOS devices seamlessly. What’s more, Leawo iTransfer is quite excellent in other bonus features. Asides from the key functions, it is also quite splendid in its interface design and simple operation process. You don’t have to grasp more complicated skills to handle with this tool. Now, here are the specific steps on how to transfer the calendar data on your iPhone.

-
Leawo iTransfer
- Transfer files among iOS devices, iTunes and PCs with ease.
- Transfer up to 14 kinds of data and files without iTunes.
- Support the latest iOS devices like iPhone X, iPhone XR, etc.
- Play back, view, and delete data and files on iOS devices.
Step 1. Download and install Leawo iTransfer on your computer.
Step 2. Prepare your iPhone and other devices. You can transfer the data from one iPhone to another iPhone. Also, you can transfer the data in your iPhone to the computer with the USB cables. Then open Leawo iTransfer and run the software.
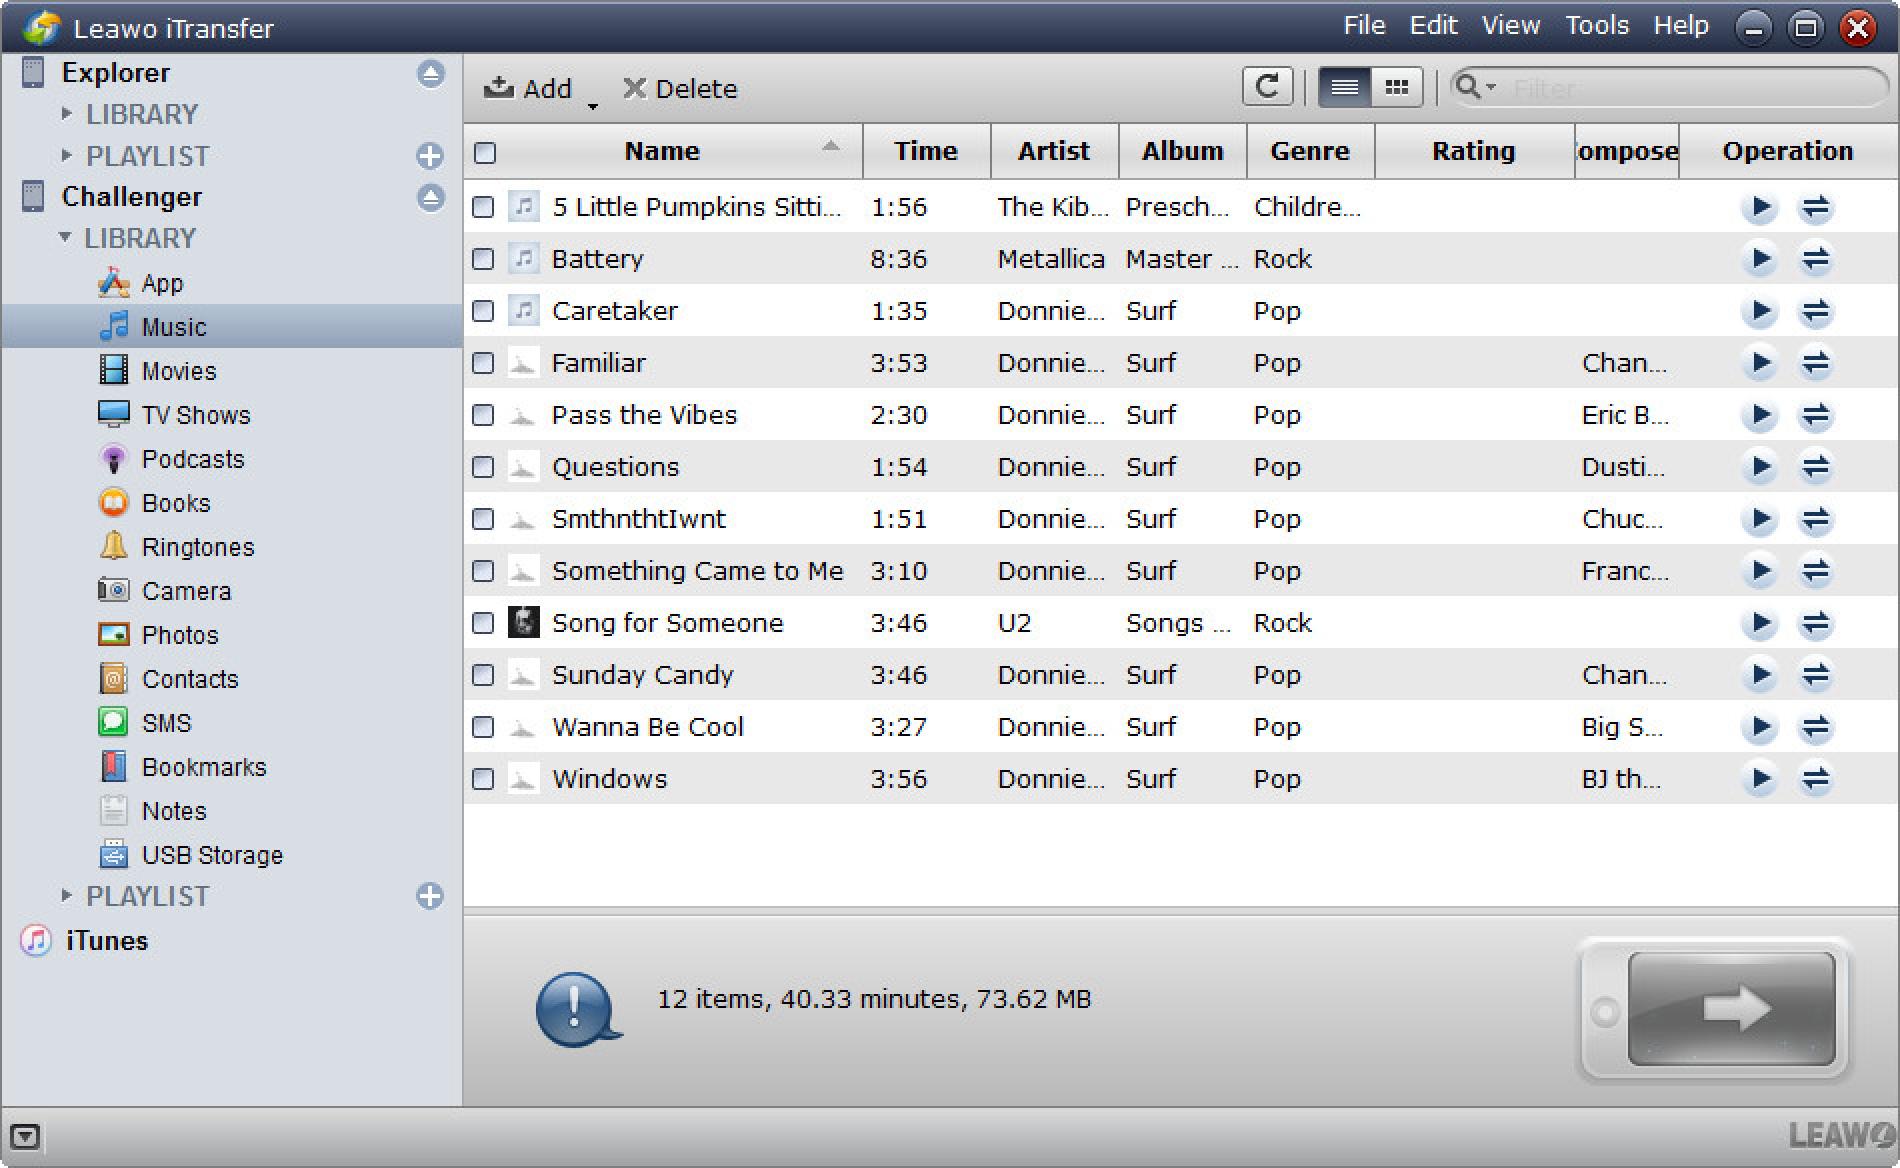
Step 3. Detect all the contents on your devices. Once your iPhone has been connected to your computer, this software would detect the data automatically and then all the libraries in these two devices would be showed. Then, select the content or the library you would like to transfer between these devices.
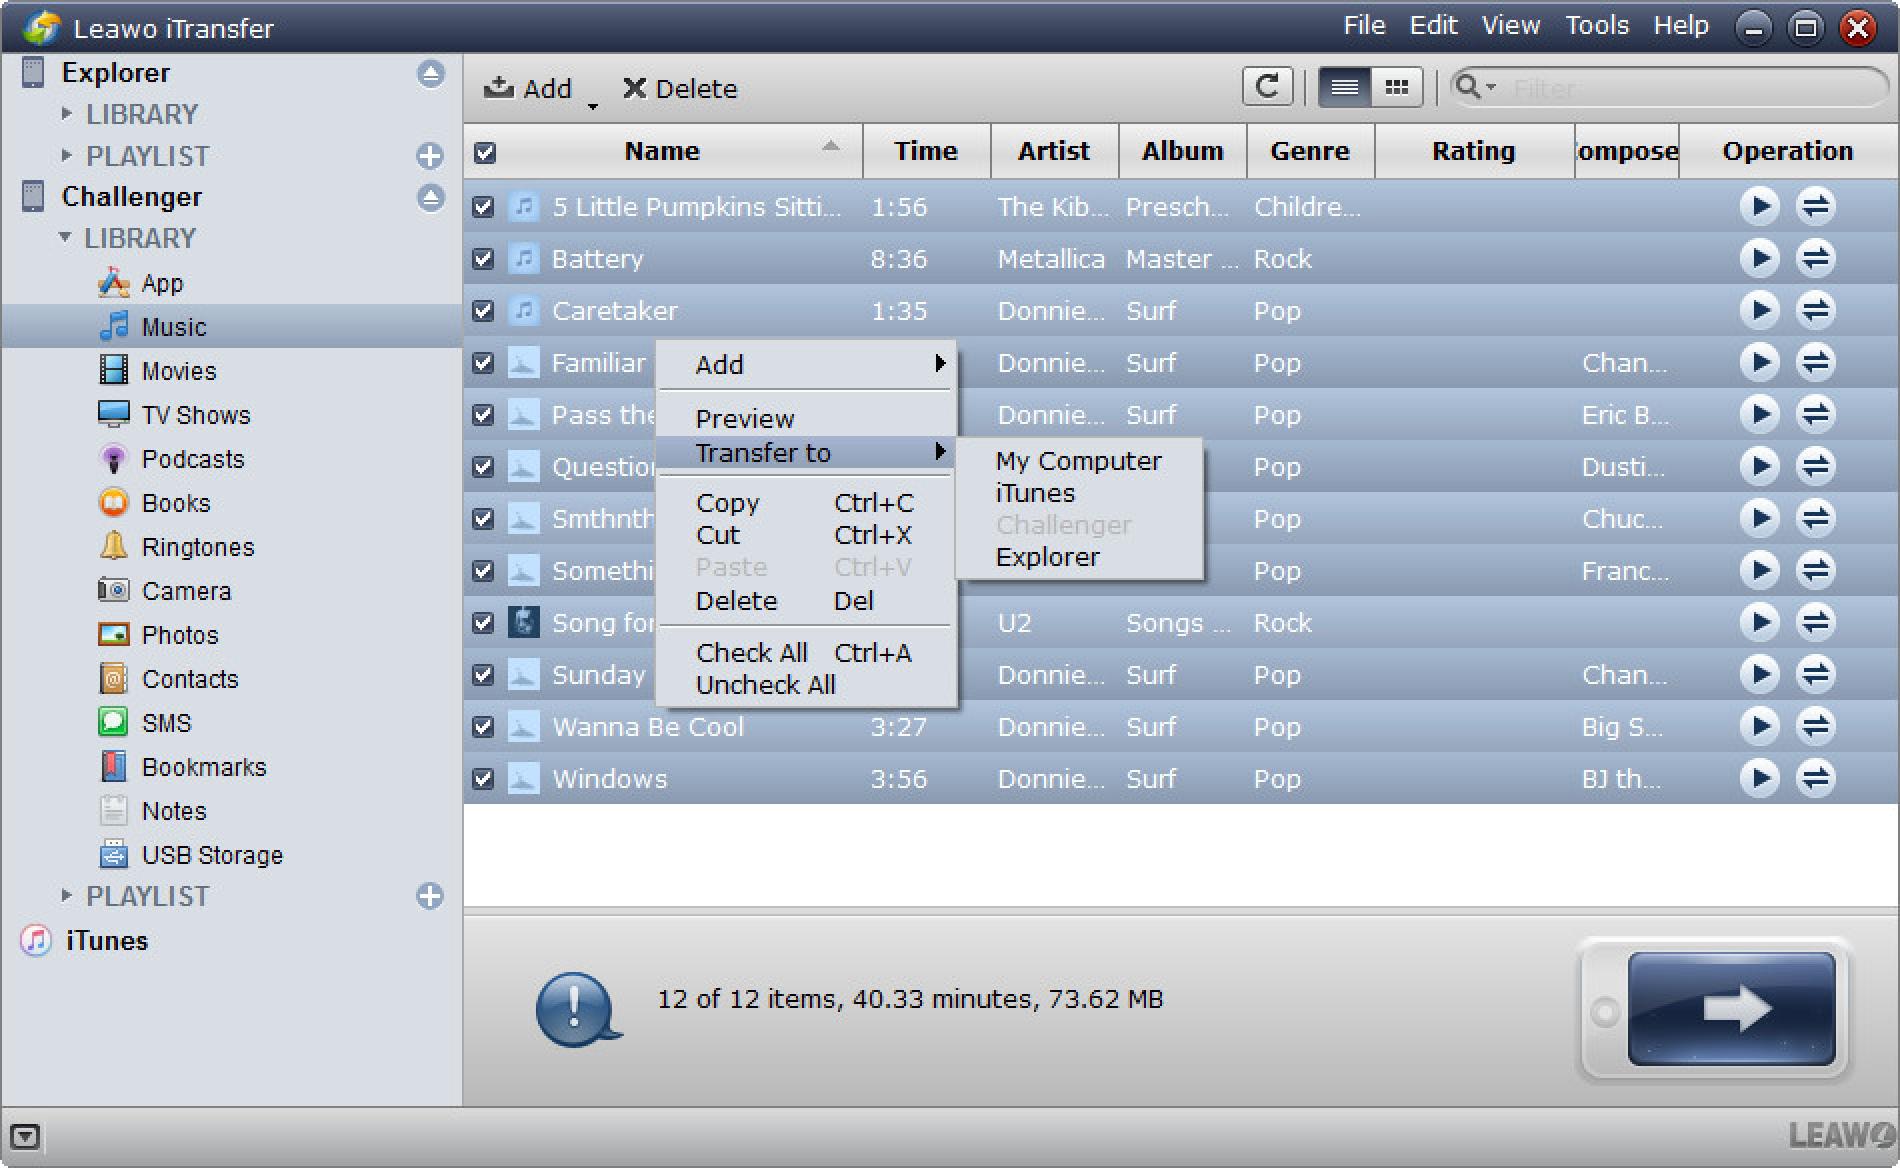
Step 4. Select Files to Transfer. After viewing the targeted files, then you can choose them by choosing the proper files on the list. Once confirmed, you can simply click the transfer button. Here you can right-click on the selected files and choose Transfer to >> iPhone. When the transferring process have been finished, then you can view the data on the other device.
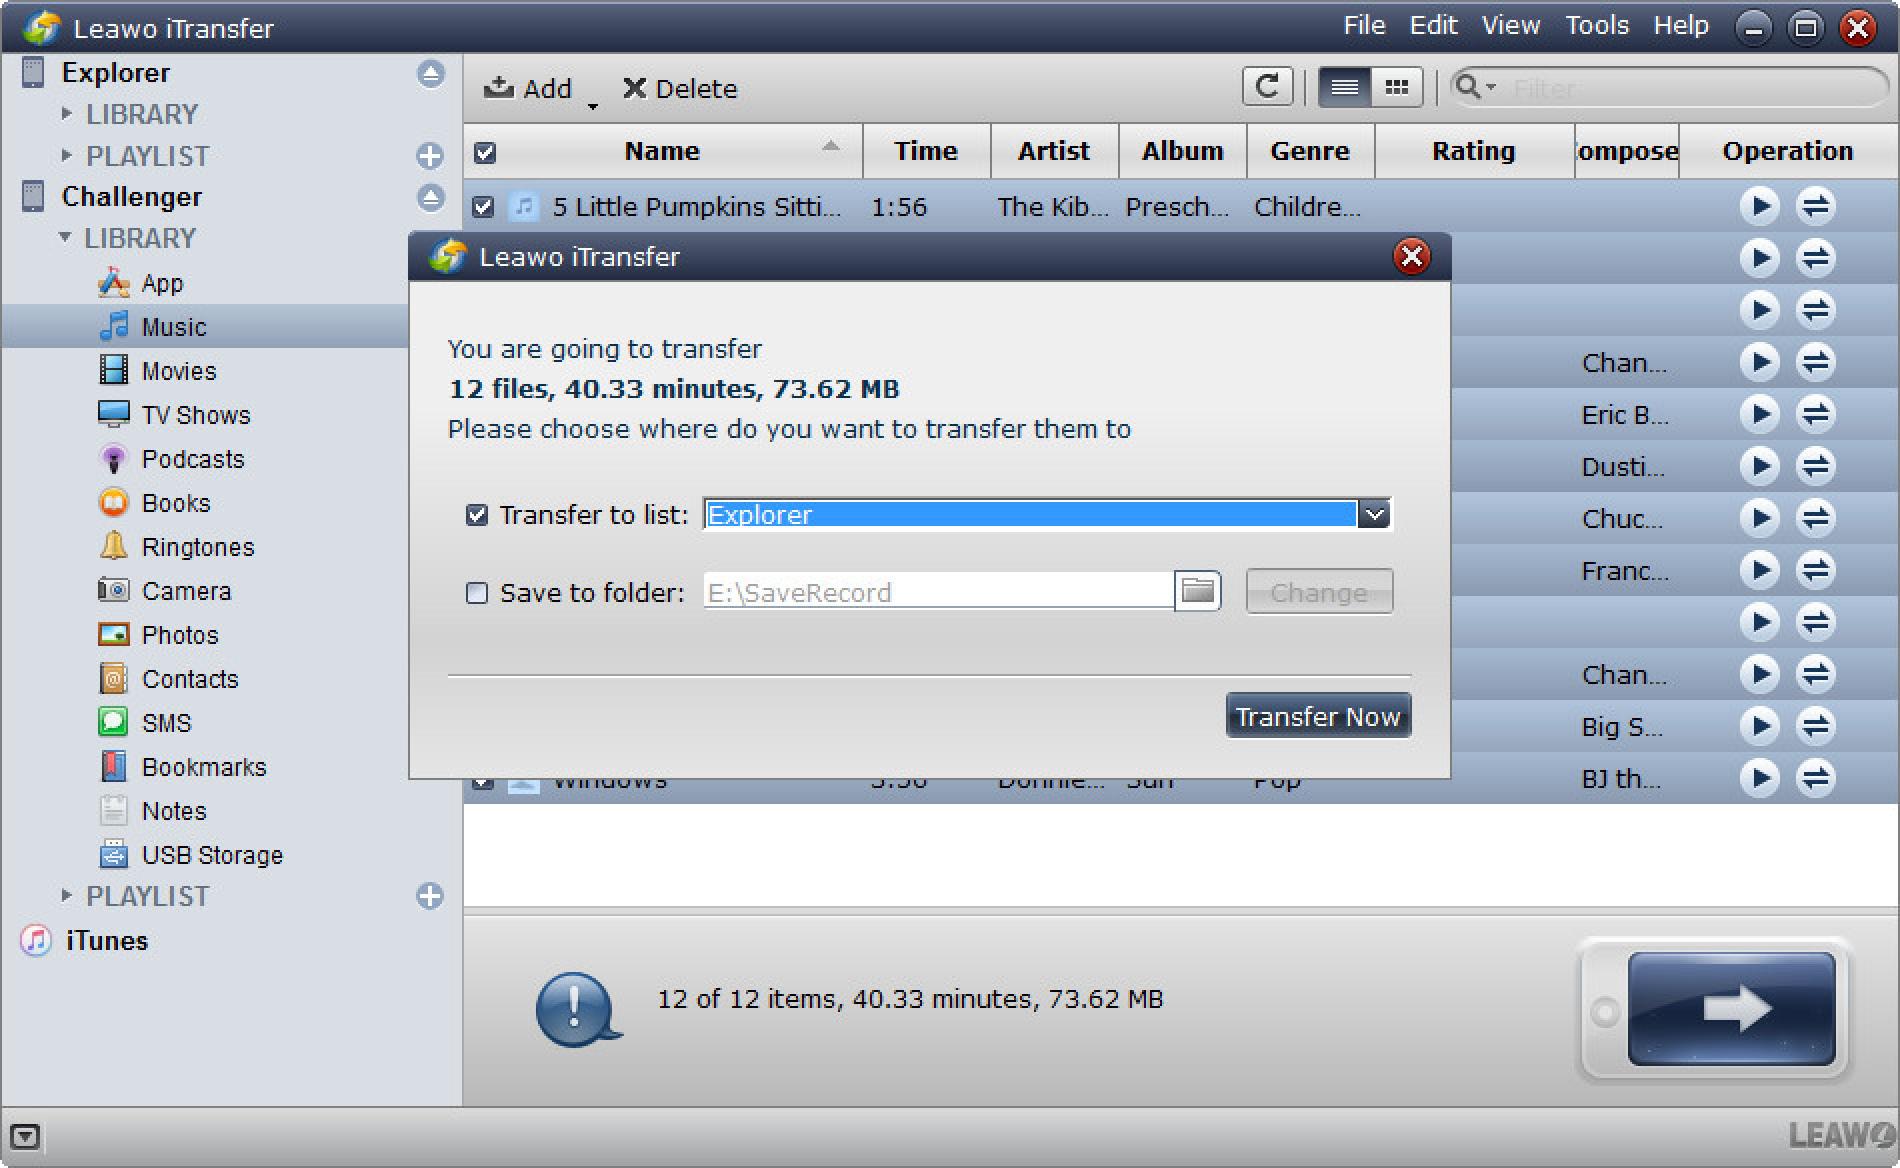
Step 5. Set more parameters related to the transferring. First, you can add a new folder to store the transferred files. When you start to transfer the files, then you can see the dialog of transfer settings pop-up on the screen. Then you would be required to select a target device where you would like to transfer these content to. Besides, you need to confirm the Save to folder. When all of them have been set, then click Transfer Now button to start transferring the files between the two devices.
 Feb. 13, 2017 by


 Prof. Media
 Blu-ray Ripper
 Blu-ray Copy
 iOS Data Recovery
 [12/29/23] MAX Downloader V15.0.0
 10,000,000 people are using Leawo!
 All Transactions are protected!
 30-Day Money Back Guarantee!