For many iPhone users, some default applications on iPhone are considered useless, so they always ignore those apps and choose to install their preferred apps as alternatives. Although there are some apps that can be helpless in daily use for many people, there is still one app contains great practical functions both for daily use and work use. Yes, you may have realized that the app we are talking about is Calendar. The Calendar on your iPhone is a utility tool which can be used for a lot more than meets the eye. For instance, if you want to rely on fewer apps for common tasks, you can use the Calendar instead of the Reminders app. If you need to set schedule alerts, Calendar can also be a good substitute for the Clock app. It can also be synced with calendars that you use on the computer to keep your entire schedule in one place. Thus, if you how to sync calendars on iPhone, you don’t have to pay attention to different calendars. Here are two ways to sync calendar with iPhone.
As for how to sync calendar to iPad, read the article below:
How to Sync calendar to iPad
Part 1: How to Sync Calendars on iPhone via Settings
To sync calendar with iPhone, you can realize it simply via Settings on your iPhone. Now, learn how to sync iPhone calendar by following these instructions, here we take Outlook for example.
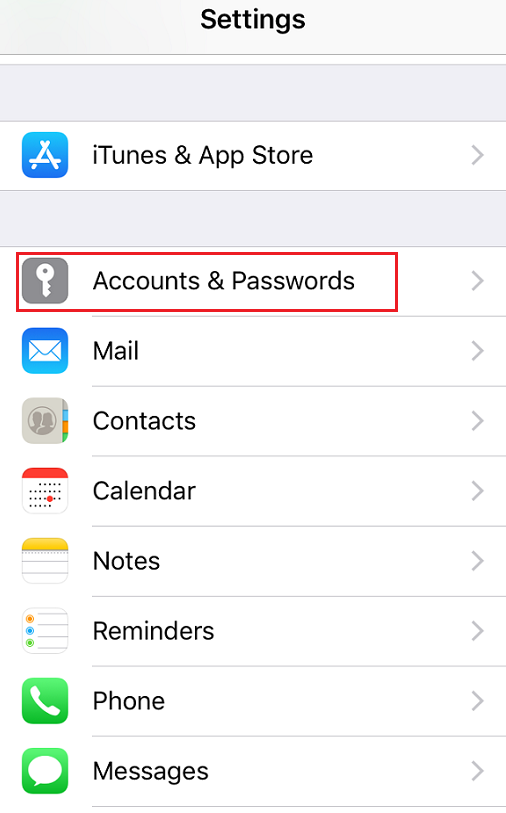
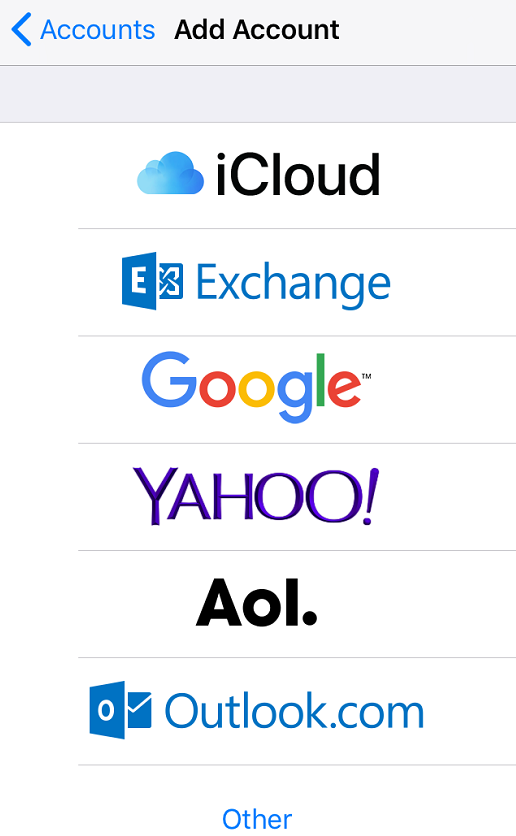
Step1. From the home screen, select “Settings”, and then choose “Accounts & Passwords”>“Add Account”. If you’ve already added your Outlook account, then instead of tapping “Add Account”, choose Outlook account from the resulting list.
Step2. Select “Outlook.com”, and sign in your Outlook email address and password in the “Email” and “Password” fields.
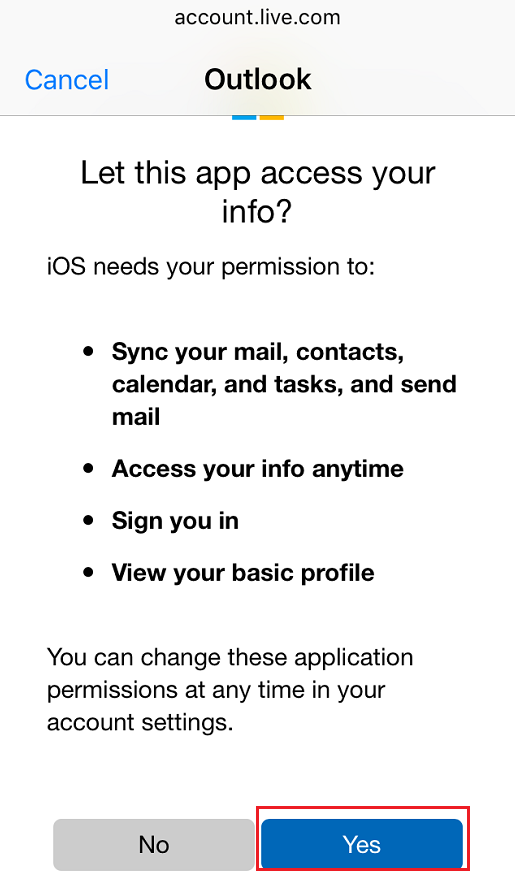
Step3. After you add the outlook account, you need to allow your iPhone to access the Outlook info, of course calendar is included.
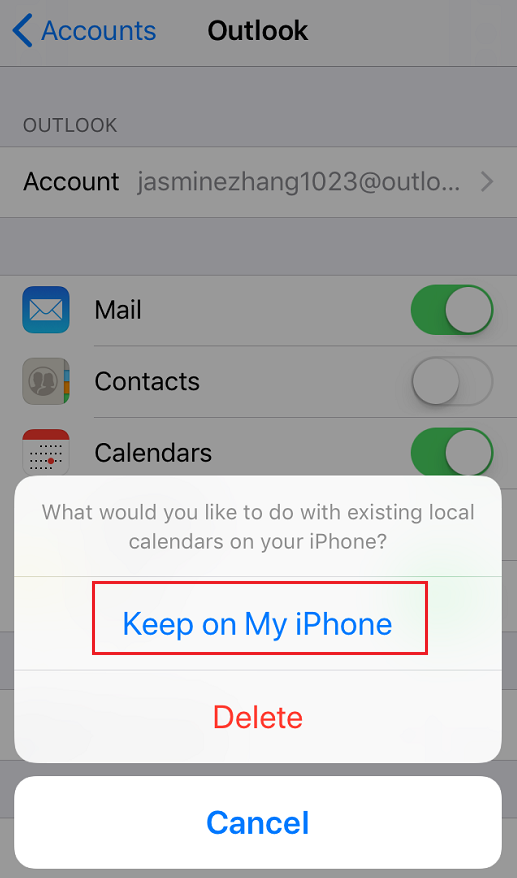
Step4. To keep existing local calendars on your iPhone’s Calendar app, you should turn on Calendars option.
See, it is simple and fast to learn how to sync iPhone calendar via Settings on iPhone. After all these steps, you can know how to sync calendar with iPhone. When you go to the Calendar app on your iPhone, you should have all the necessary information synced.
Part 2: How to Sync Calendars to iPhone via iTunes
ITunes also enable you to sync calendar with iPhone. If you wonder how to sync calendar with iPhone, just make sure you have installed the latest version of iTunes on your computer, moreover, Microsoft Outlook must be installed on your computer if you would like to learn how to sync iPhone calendar.
Step1. Connect your iPhone to your computer with a USB cable, and launch iTunes also.
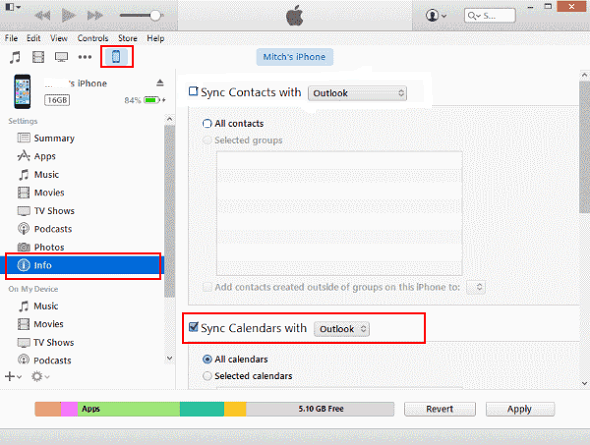
Step2. Select the icon of your iPhone and then tap the “Info” selection at the left pane. Then click “Sync Calendars with” at the right part of the interface, here you need to choose Outlook if you need to sync Outlook calendars.
By clicking “Apply” at the bottom of iTunes interface, you can successfully sync calendars on iPhone with iTunes.
See, it is so convenient if you know how to sync iPhone calendar. With the two ways above, you would learn how to sync calendar with iPhone easily. Afterward, open the Calendar app on your iPhone and wait for it to sync. That’s it! All your calendars should be ready and waiting for you.
Part 3: How to Transfer iPhone Data with Leawo iTransfer
For iPhone users, if we need to sync data and files on iPhone from computer or external storage devices, we can use iTunes. But, if we need to transfer data and files from iPhone to computer, what is the best way to choose? At this time, a professional and reliable iOS device manager can help a lot, and Leawo iTransfer is such a good helper. Leawo iTransfer is a powerful iPhone data backup tool which will help you transfer iPhone data easily to computer. Backing up iPhone data on a regular basis allows you to retain access to iPhone songs, photos, contacts and more other files from computer. Leawo iTransfer offers us a perfect way to transfer 12 kinds of files, like apps, photos, music, videos, SMS, contacts, and so on between iPhone and PCs.
The below guidance will show you how to transfer photos from your iPhone to computer with iTransfer.
Leawo iTransfer
☉ Transfer files among iOS devices, iTunes and PCs with ease.
☉ Transfer up to 14 kinds of data and files without iTunes.
☉ Support the latest iOS devices like iPhone 7, iPhone 7 Plus, etc.
☉ Play back, view, and delete data and files on iOS devices.
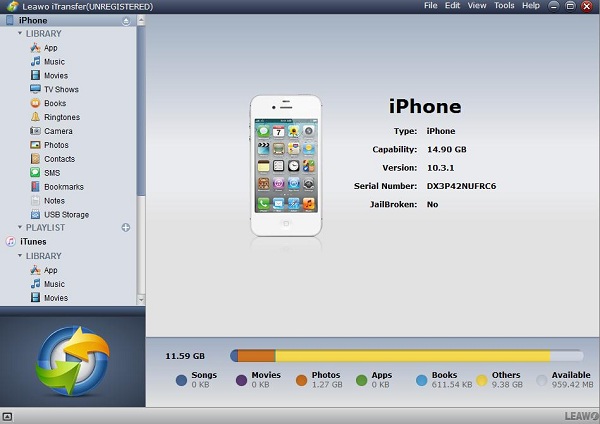
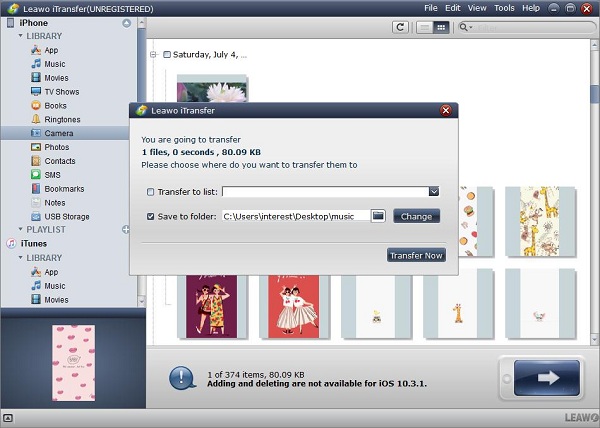
Step1. Firstly, download Leawo iTransfer and launch it on your computer. Connect iPhone to computer using a USB cable.
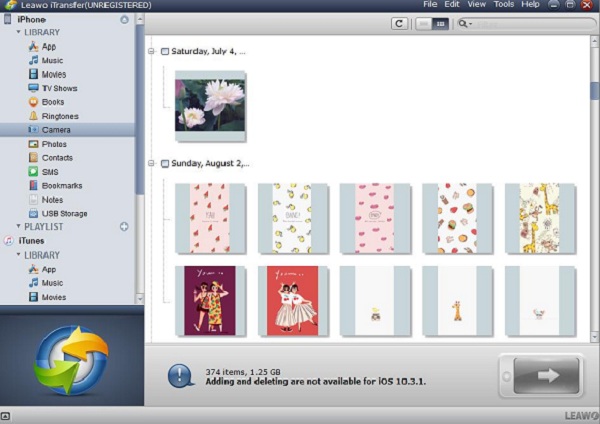
Step2. After your iPhone is completely detected, go to “iPhone”>”LIBRARY” to choose the files you want to transfer to computer in the left sidebar. Then the detailed contents will show up at the right part.
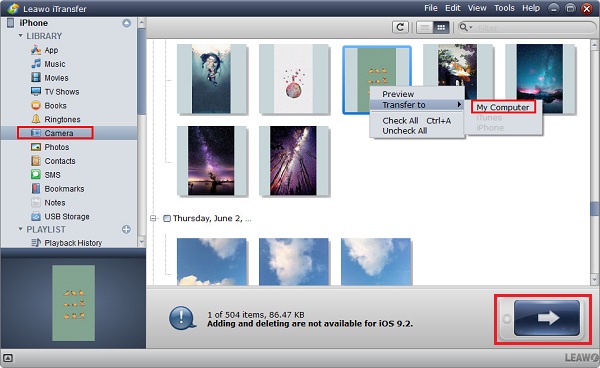
Step3. Choose certain files, and then click the transfer button in the right bottom of the interface to begin transferring the files. Or you can also give a right-click of the files that you would like to transfer, and choose “Transfer to” > “My Computer”.
Step4. In the pop-up window of transfer settings, choose the output location on the computer to save files. Click “Save to Folder” and tap “Change” to choose the target folder. Now you can start iPhone data transfer by simply clicking “Transfer Now”.

