As the price of smartphones keeps going down, even little kids would use a smartphone. And as one of the popular smartphones in the world, iPhone has been a common “toy” for kids. A lot of parents would get their kids an iPhone to stay in touch with them when they are out. And iPhone is capable of doing a lot of things with all kinds of apps on the App Store. Sometimes kids are not able to control themselves and tend to get addicted to stuff like games on iPhone. So some parents want to get situations like this under control. And Apple does throw in a feature called Restrictions (aka, Parental Control) in iOS to help parents restrict what their kids can do on their iPhone. If you are one of those parents who are seeking ways to set parental control on iPhone, this post would be what you are looking for. Check out the content below about the iPhone Parental Control feature mentioned above and how to set it up on iPhone.
Part 1: Setting Parental Controls on iPhone
As is mentioned above, this iPhone parental control feature is called Restrictions. And it’s a feature that’s buried in the system settings. The content below are instructions for setting parental controls on iPhone.
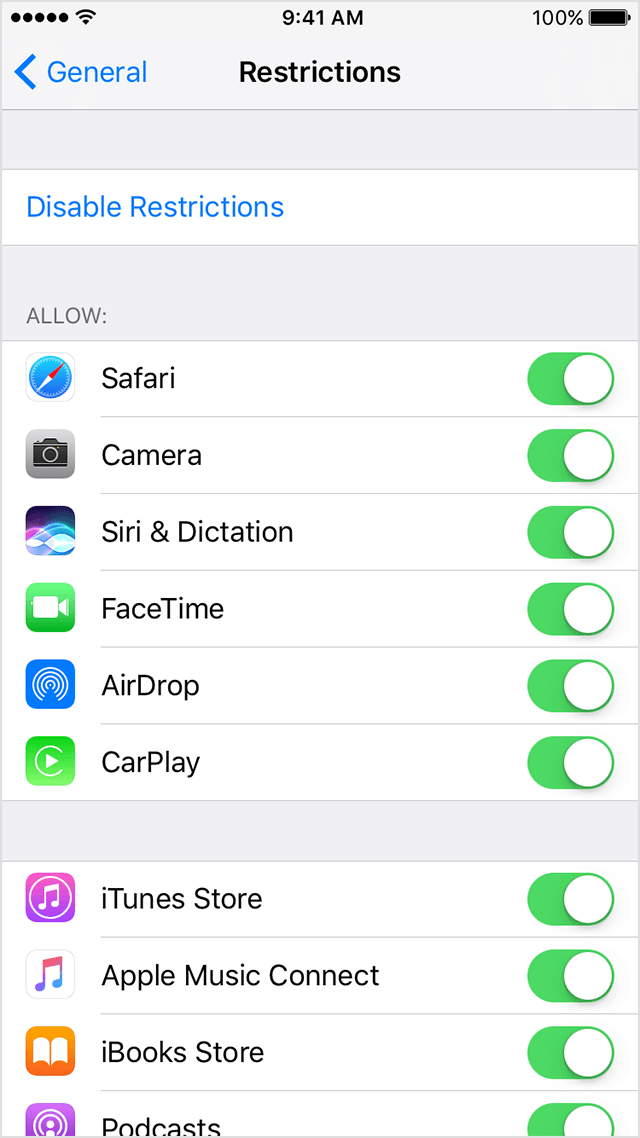
1. From the Home screen of your iPhone, navigate to Settings>General>Restrictions, and then tap on Enable Restrictions.
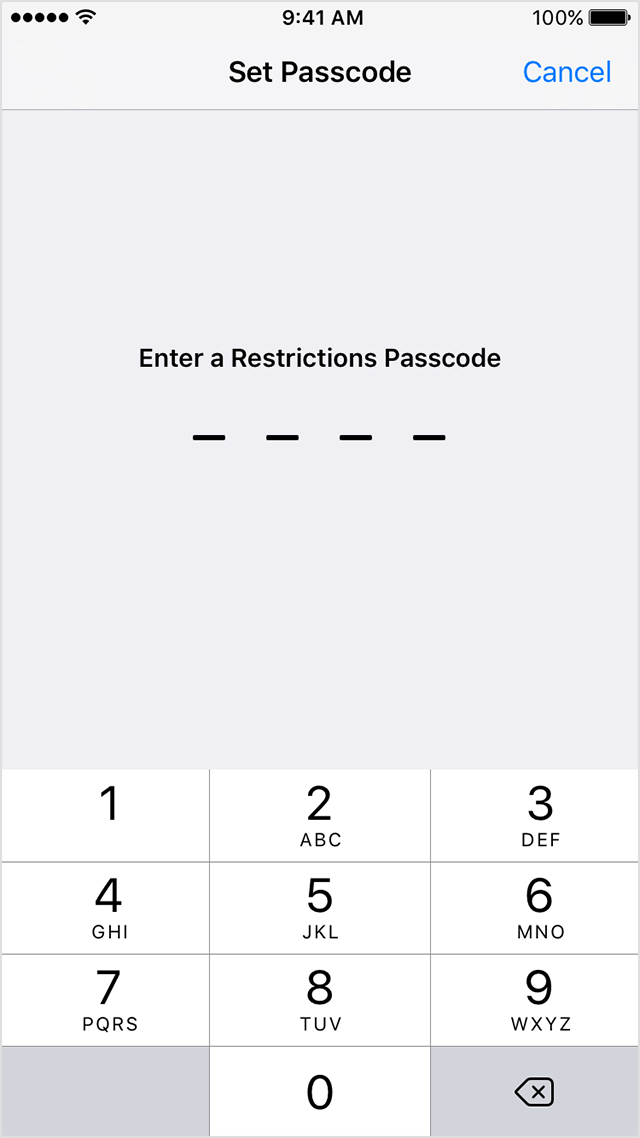
2. You will need to create a Restrictions Passcode. This passcode will be needed later when you want to change the settings or disable Restrictions. (You should write down the passcode or use one that’s easy to remember because when you forget it, you will have to restore your iPhone to factory settings if you want to disable Restrctions.)
3. After creating a passcode, you will see a list of Apps and features on the iPhone that you can disable. Tap on the app and features you don’t want your kids to use to disable them and the app or the shortcut to the disabled feature would disappear from the interface of your kid’s iPhone. To enable them again, just go back to this page and toggle them on again.
That’s the instructions for setting parental controls on iPhone. If your kids are losing their mind over games on their iPhone, maybe it’s the right thing to do to put a stop on that. And by using this iPhone parental control setting, you can easily limit what they can do on their iPhone.
Part 2: How to Back Up iPhone In Case You Forget The Restrictions Passcode
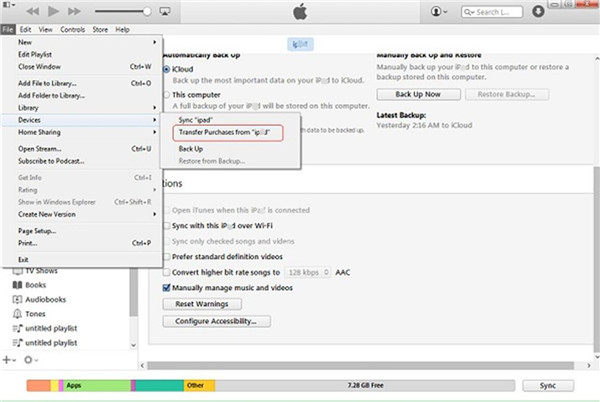
As is mentioned above, if you forget the Restrictions Passcode, you will have to erase your iPhone in order to remove the Restrictions passcode from your kid’s iPhone. And if you haven’t back up their iPhone in advance, all their personal data would be gone, so I would suggest that you back up your kid’s iPhone with iTunes before you set up Restrictions on their iPhone so that when you do forget the passcode, you can still have their data restored back on their iPhone after their device is erased. Here’s how you can back up your kid’s iPhone using iTunes.
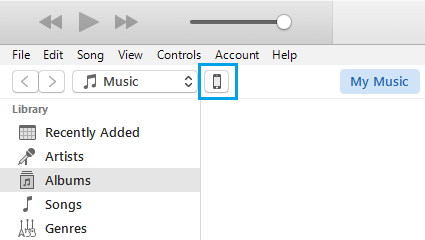
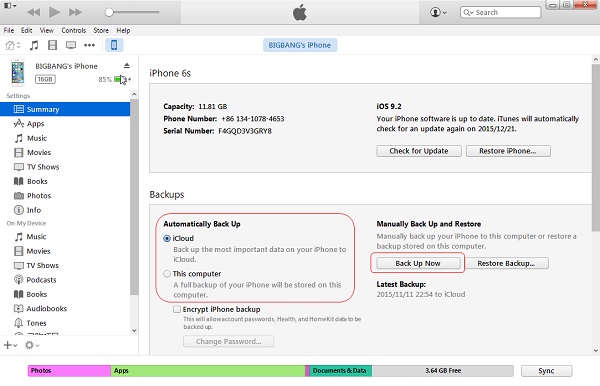
1. Use a USB cable to connect iPhone to your computer, the USB(Lightning) cable that comes with the iPhone is preferred. And then launch iTunes. Click on the iPhone icon in the upper left area of the iTunes interface to open Summary.
2. Click on that Back Up Now button in the Backups section to back up iPhone. if you like, you can also encrypt the backup by selecting Encrypt iPhone Backup on the left.
In Leawo.org, there are some guides introduce how to backup iPhone SE/8/X in detail you can have a look at them.
Part 3: How to Extract Data from iTunes Backup
Chances are your kids might get things like photos deleted on their iPhone by mistake. If something like that happen, you can choose to restore his/her iPhone from the iTunes backup. But that will erase the new data on their iPhone and you will have to set parental controls on iPhone again. The better option here would be use an iPhone backup extractor to extract the data they need from the backup. This way you won’t have to go through a series of complicated settings.

iOS Data Recovery
☉ Recover multiple deleted data directly from iPhone/iPad/iPod touch
☉ Extract and export 12 types of files from previous iTunes&iCloud backup
☉ Back up 12 kinds of data on iOS devices to computer
☉ Recover data lost due to jailbreak, iOS upgrade, deletion, etc.
☉ Support iPhone 6s/6s plus, iOS 9.3.2, iTunes 12.4 & Win10
Here’s one iPhone backup extractor you can use: Leawo iOS Data Recovery. It can extract data like messages, notes, photos, safari bookmarks, call history, contacts, Whatsapp messages and more from the iTunes backup. Here’s how to extract data from iTunes backup using this program.
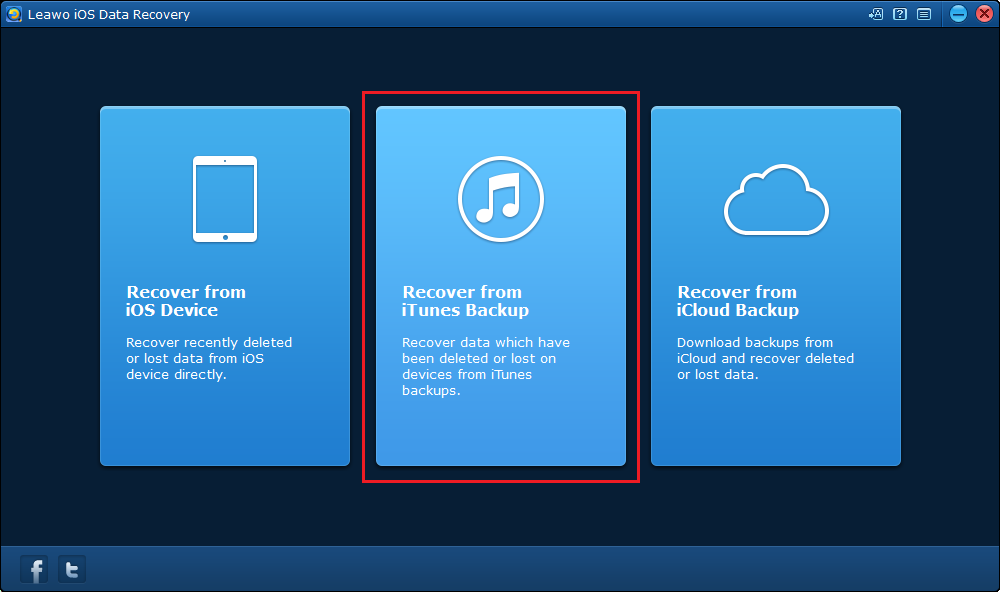
1. Open this iPhone backup extractor on your computer and then from the 3 options on the interface, select the one in the middle: Recover data from iTunes Backup.
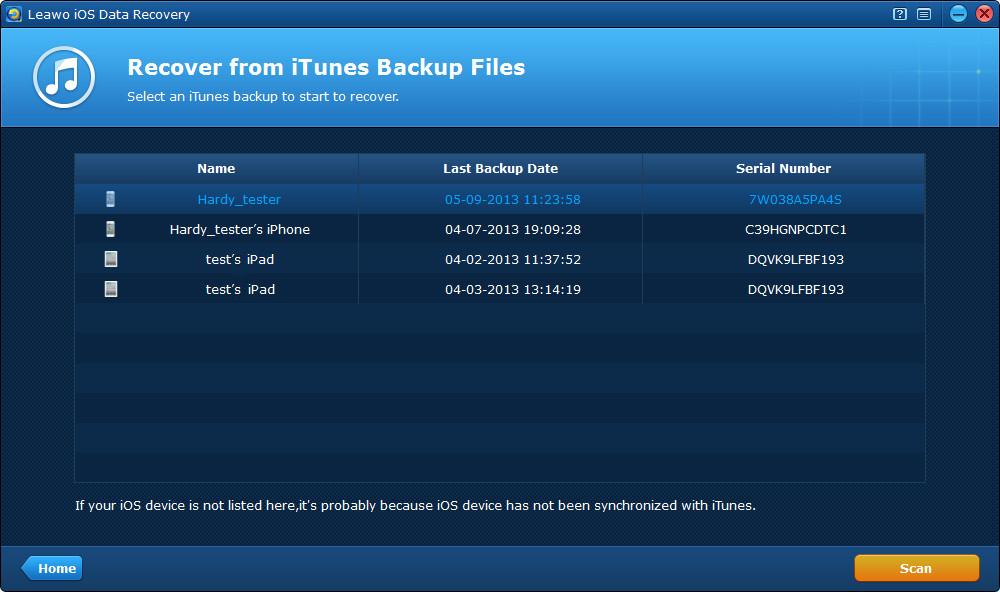
2. The program will show you a list of all the backups you’ve created with iTunes on this computer. Select the one that contains the data you want to extract and then click on the Scan button from below the backup list.
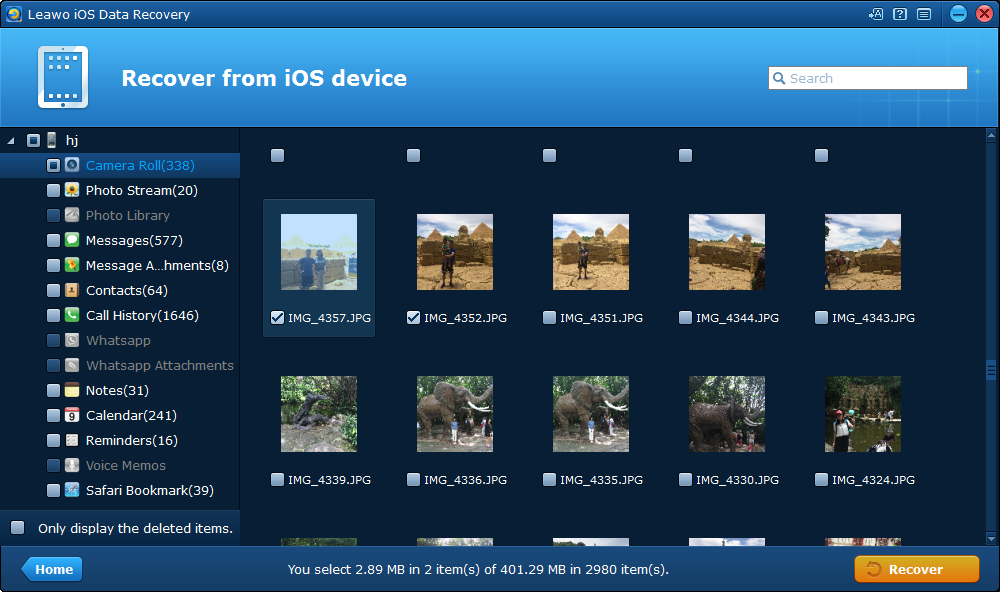
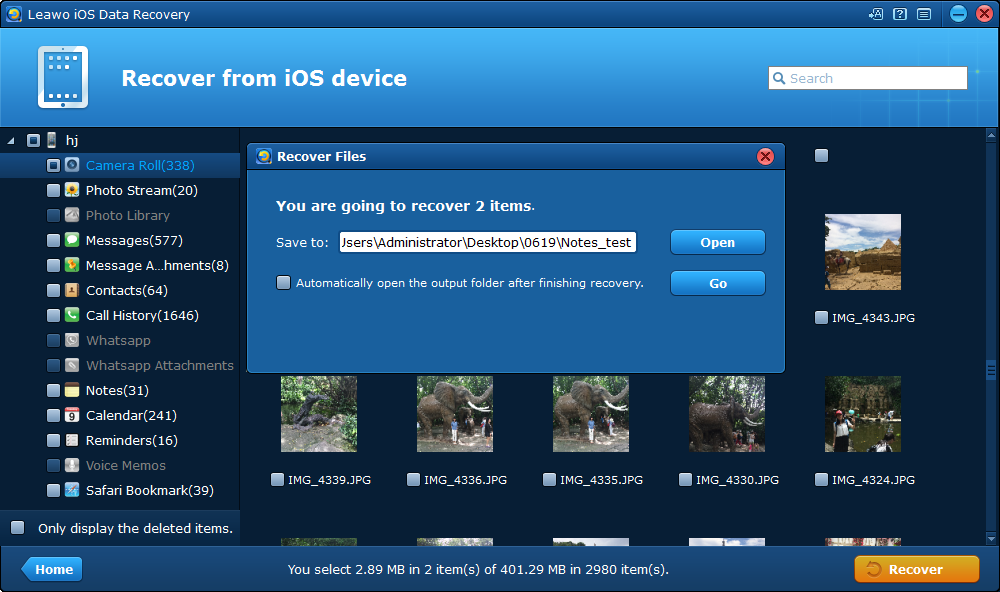
3. After it finishes scanning the backup you’ve chosen, you can check out the data in the backup. Click on the type of data on the left sidebar to check out the related data. Let’s take photos as an example. If you want to extract photos from the backup, click on Camera Roll on the left sidebar and you will see all the photos in the backup. Select the ones you need and then click on the Recover button.
4. A window would appear for you to select a folder to store the photos you are extracting. Click on the Open button to set the folder and then click on Go and the program will start extracting the photos to the folder you chose.
On iPhone parental control (aka Restrictions) could be a useful feature for a lot of parents. It’s a good way to prevent kids from getting hooked on video games on iPhone.

