Now it is a great time to make sure you and your family have ICE info (ICE stands for "in case of emergency") on their phone. But where is your ICE info? One of the most convenient places to keep emergency information is on your iPhone, the Medical ID, which provides medical information about you that may be important in an emergency, like allergies and medical conditions as well as who to contact in case of an emergency. For people who don’t know how to set emergency contact on iPhone, check out the content below. In this article, I’ll show you how to set up emergency contact on iPhone.
How to set emergency contact on iPhone?
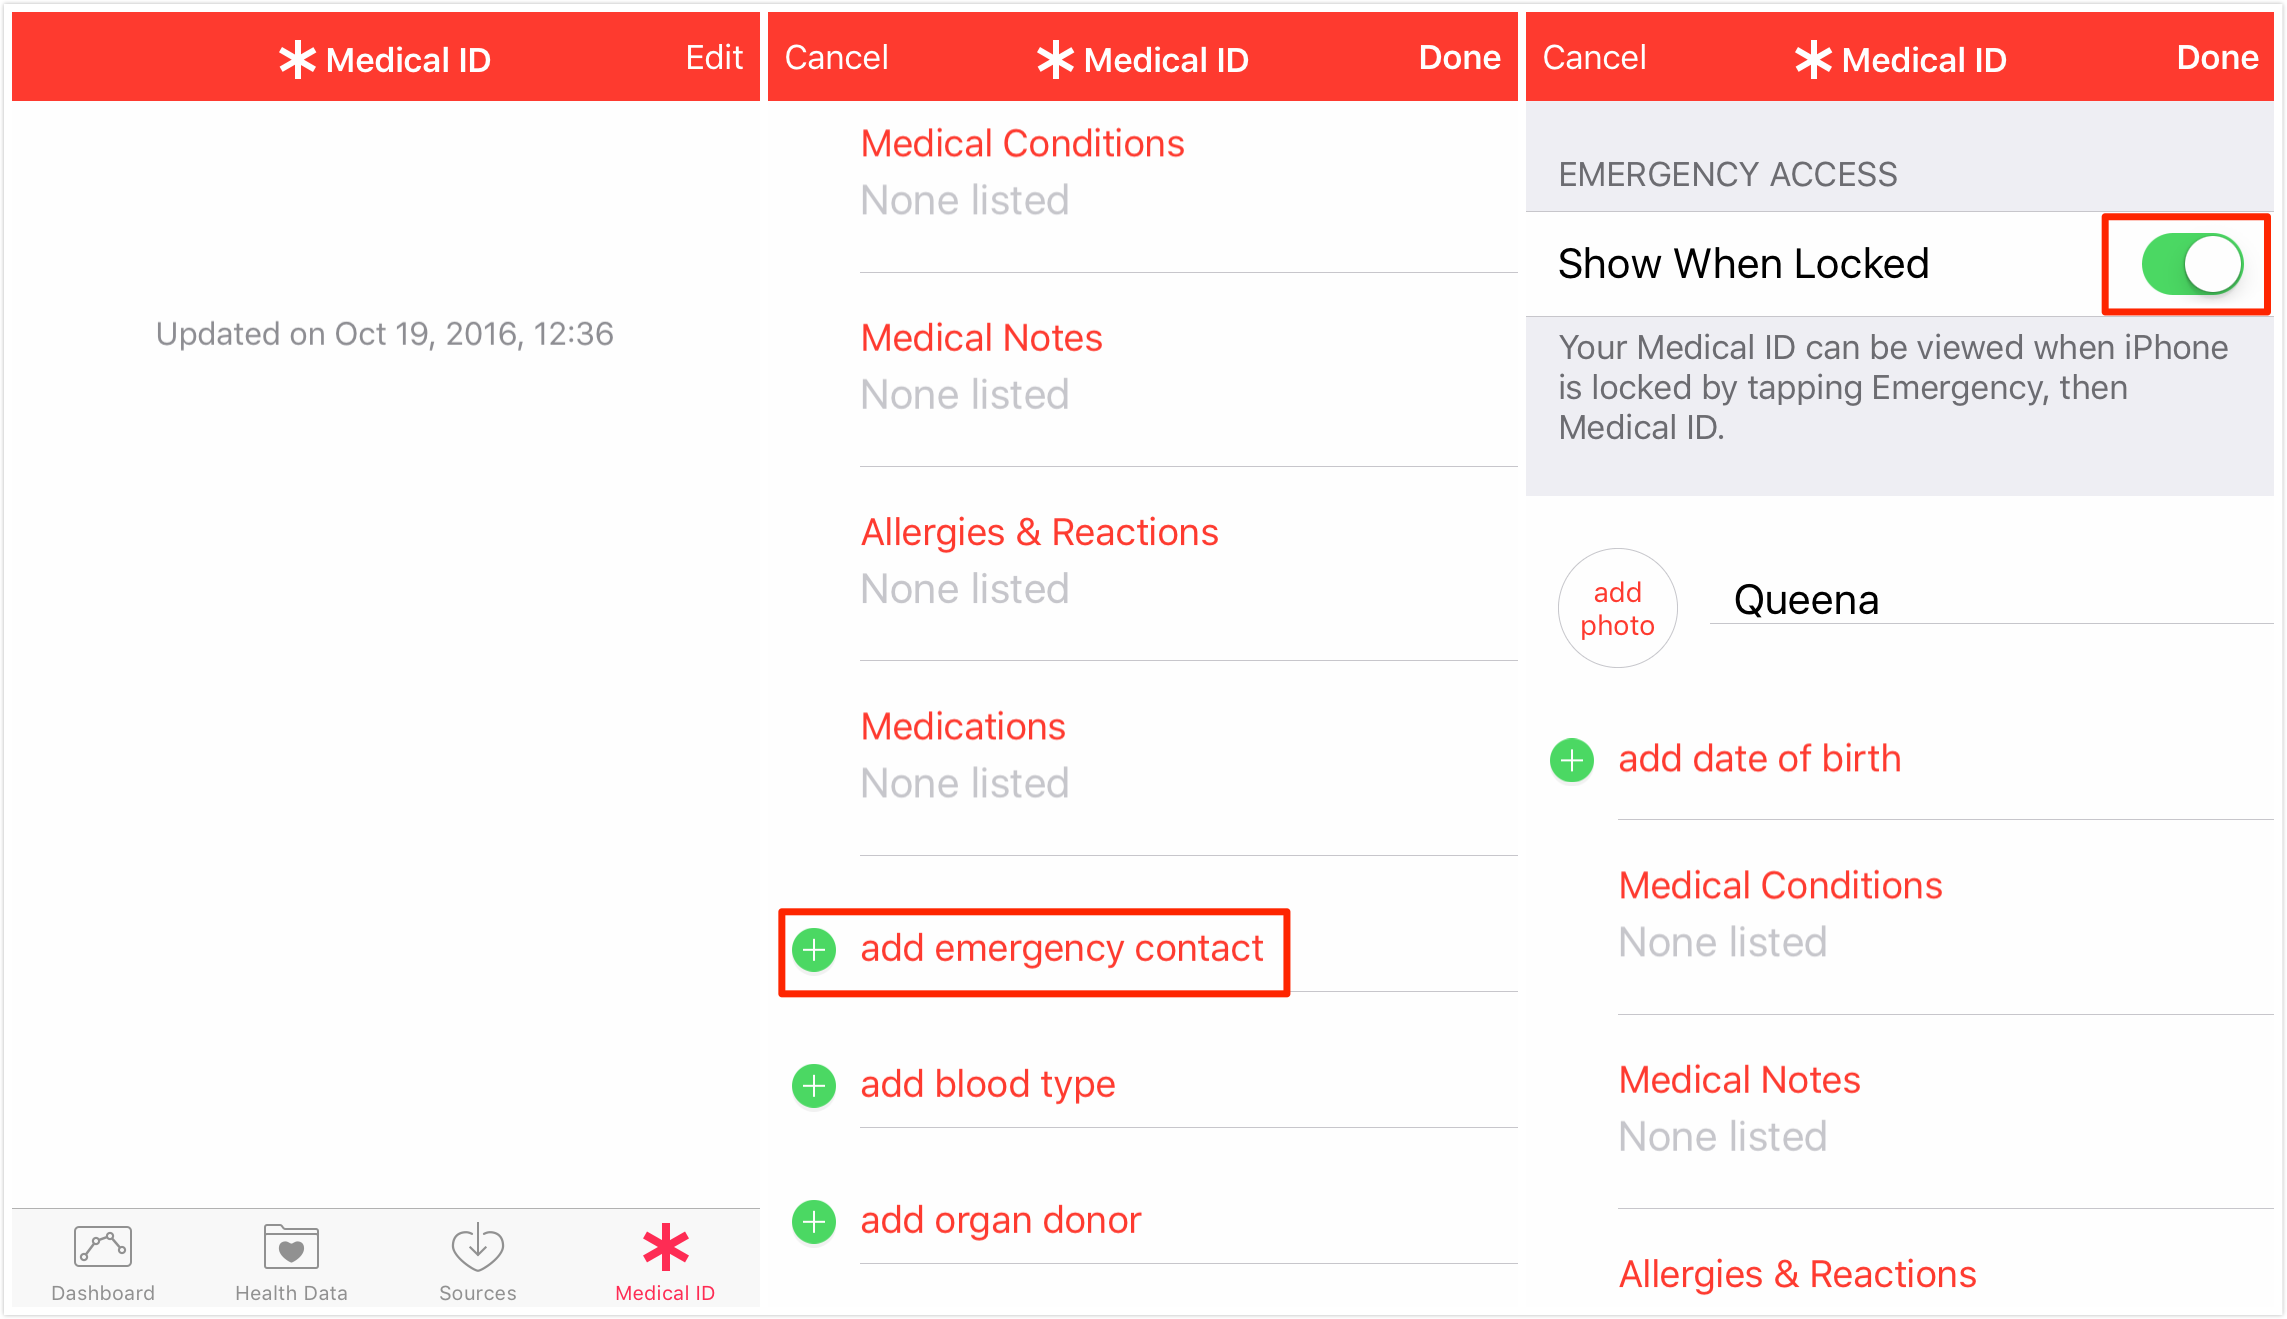
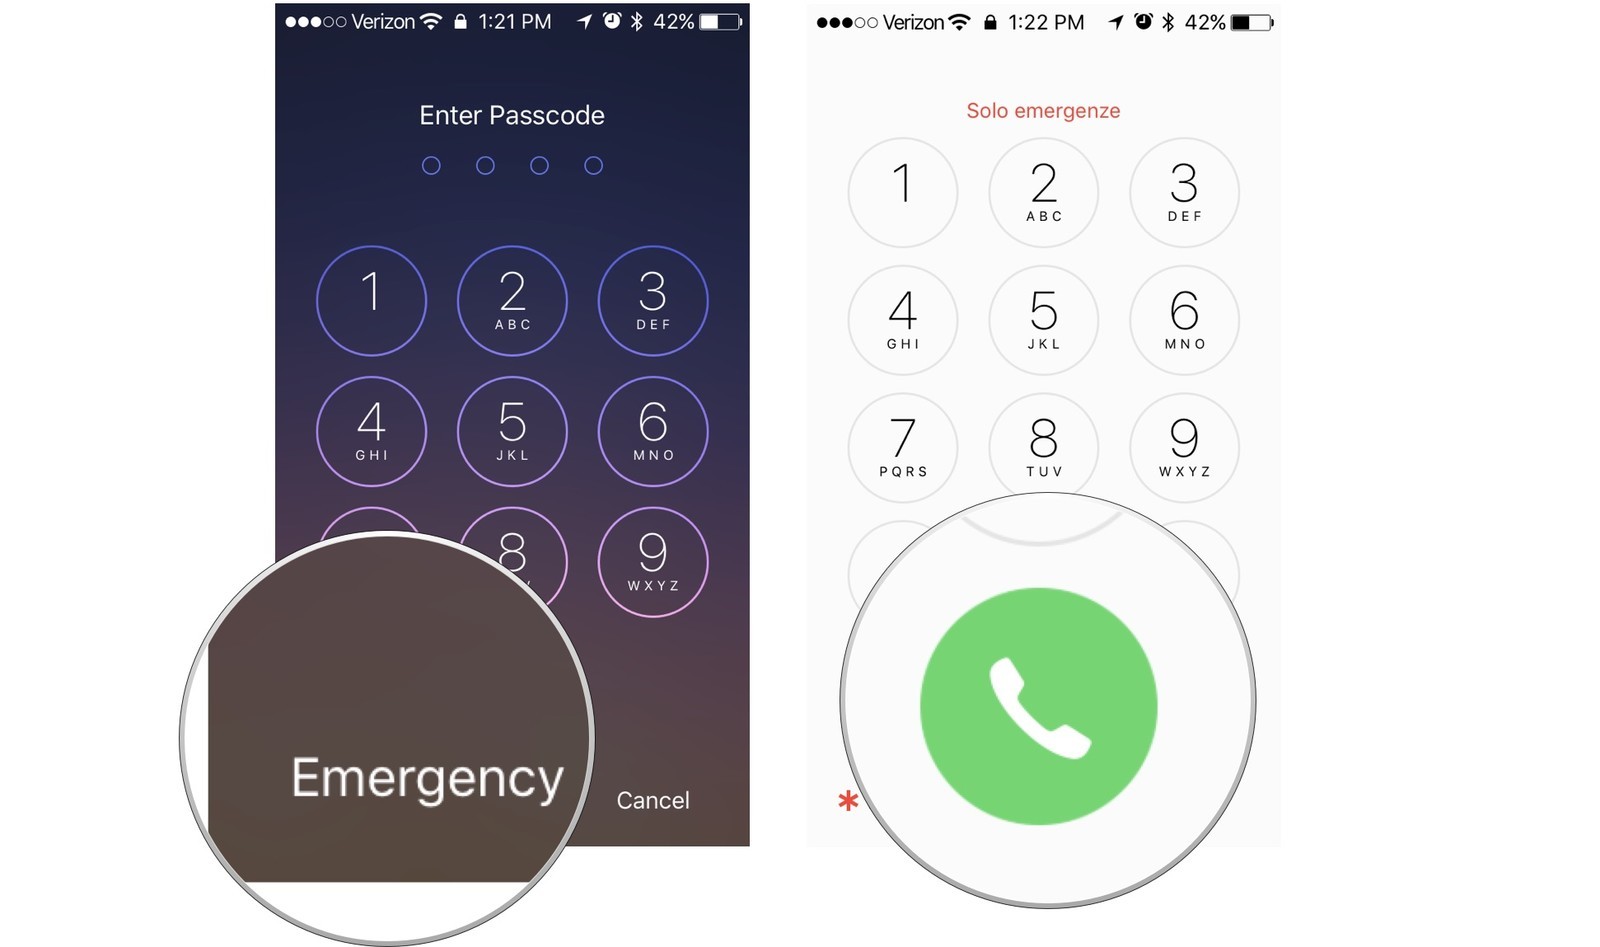
The feature is available on the Lock screen of every iPhone. When you press the Home button to trigger the passcode screen, you can bypass the lock for two purposes: making an emergency call and accessing someone's Medical ID information. It may just save someone's life someday after you know how to set emergency contact on iPhone. To set up emergency contact on iPhone, follow the steps below.
- 1. Open the Apple Health app that has been installed on all iOS devices running iOS 8 and later.
- 2. Tap Medical ID at the bottom right corner.
- 3. Tap Create Medical ID.
- 4. Scroll up, there is an option of Show When Locked, enable Show When Locked.
- 5. Fill in as much information as is relevant to you.
- 6. Then scroll down and tap the green plus button next to add emergency contact. A list of your contacts will appear on your iPhone’s display.
- 7. Tap the name of the contact you want to make an emergency contact.
- 8. Select that person’s relationship to you. The contact will be added as an emergency contact and appear under your list of Emergency Contacts.
- 9. Hit Done to save.
Then you have successfully set emergency contact on iPhone.
Note:
a. Make sure you have assigned at least one person as your emergency contact person. You must save that person's name and phone number in your Contacts app for the Health app to be able to include it.
b. If you change your mind about Medical ID, the Edit screen includes a Delete Medical ID option at the very bottom.
Since the contact person has been so important to us as they can save our lives in the emergency situation. Do you dare to think that what if our important contact details disappear on our iPhone due to the accidental deletion? That seems to be a horrible nightmare for all of us if we cannot find the contact information when we are in urgent needs. There are lots of reasons that may cause the contacts to get lost, such as mistakenly installing, wrong clicking, device formatting and so on. Therefore, learning how to retrieve all the lost contacts is also a survival skill to our life. Here a great third-party too Leawo iOS Data Recovery is highly recommended to you and help you get back your deleted contacts from your iPhone with an effortless way.
Now let’s move on and have a look at how to recover the deleted contacts from your iPhone in the specific steps as below:
Step 1. Run Leawo iOS Data Recovery on your computer, then choose the first selection “Recover from iOS device” on the main interface of the software to recover deleted contacts under Normal mode.
Step 2. Plug your iPhone to computer via the USB cable and then choose your iPhone model from the bottom device list. Afterward, hit on “Start” button to begin scanning your iPhone.
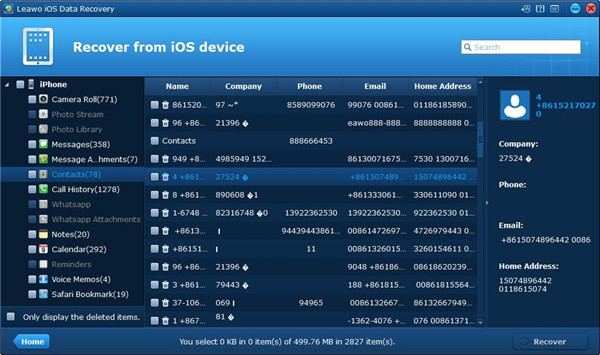
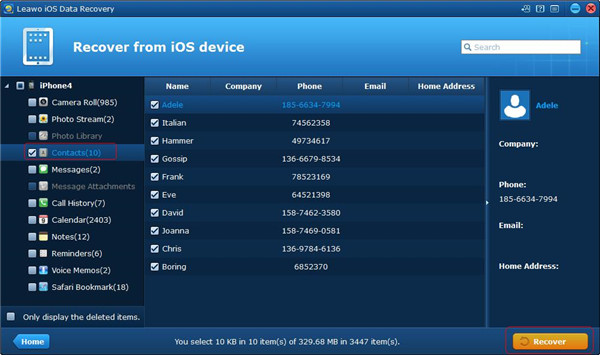
Step 3. Once the scanning process is completed, all the data from your iPhone will be listed on the left sidebar of the window. Then you can choose the option “Only display the deleted items” to browse the deleted data only. When you click on the tab “Contacts” in the left column, the specific contacts data will be displayed on the right part accordingly.
Step 4. Check the contacts that you would like to recover and then hit on the button “Recover” from the right corner bottom.
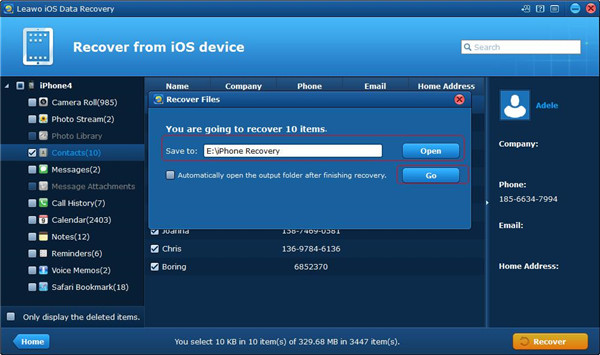
Step 5. A dialog will pop up and you will see the option “Save to” which requires you to choose a location for saving the contacts to your computer. Hit on the “Open” button to choose an output folder to save the recovered contacts files. Besides, you can choose the option “Automatically open the output folder after finishing recover” to let the output folder open once the recovery is completed. Finally, press on “Go” button to begin recovering contacts to your computer.
How to make an emergency phone call without unlocking your iPhone?
After you know how to set emergency call on iPhone, you can learn how to make an emergency phone call without unlocking your iPhone.
- 1. Press the Home button on the iPhone.
- 2. Go to passcode screen.
- 3. Call emergency services in your area.
Note:
You can only call emergency services like 911, 999, or 180. It will not allow you to call a private number.
How to sign up as an organ donor from the Health app on your iPhone?
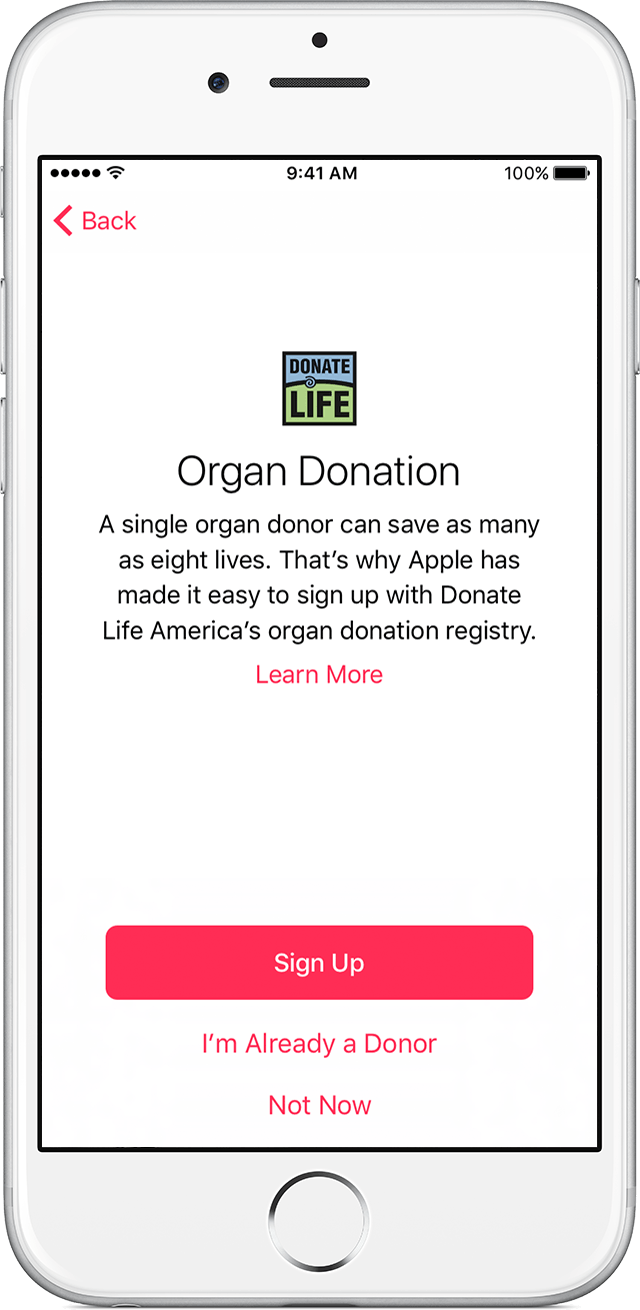
If you do know how to set up emergency contact on iPhone, then you should also know you can use your iPhone’s Health app to sign up as an organ donor. To get started, follow these steps:
- 1. Launch the Health app on your iPhone.
- 2. Open the Medical ID tab.
- 3. Scroll all the way down until you see the Organ Donation section and tap on the red Sign Up with Donate Life button.
- 4. Fill out the form with your valid information.
- 5. Tap on the red Continue button at the bottom of the form.
- 6. Then you will be asked to confirm your registration. To follow through with your signup, tap on the red Complete Registration with Donate Life button.
Note:
You can tap on the red “Done” button to dismiss the message and you can even share your decision with friends and family using the button below it.
This is an example of how to set up emergency contacts on iPhone. Knowing how to set emergency contact on iPhone is pretty vital in our life. I hope you can make good use of it and do get help after having a full understanding of how to set up emergency contacts on iPhone.
If you are planning on upgrading your iPhone to a newer model, remember to backup your currently one so that you can have your old data transferred to the new phone and you don't have set up the emergency contact or other things on your new phone again. Use iTunes to backup your iPhone and your app data on your old iPhone will also be backed up. Check out this link to see how to backup iPhone with iTunes.

