"Hi, I have some problems on managing photos on my iPhone. I have taken a lot of photos with my iPhone and the storage seems to be not enough. But all these photos are very precious for me and I don't want to delete them. Have you any idea on how to manage photos on iPhone to keep all these photos and at the same time make them occupy less space? Thanks for any advice in advance."
Most iPhone users would meet such kind of problems, especially for those low-storage iPhone owners like the 16GB, 32GB iPhone model owners. iPhone photos, including Camera Roll photos and synced photos, can be viewed in iPhone Photos app easily. Many iPhone users may wonder how they can manage photos on iPhone, because they find it difficult to take control of their photos. Don't worry, the following post will introduce how to manage photos on iPhone to all users.
Part 1: Manage Photos on iPhone with Photos app
We all know that all photos, either we take with iPhone camera or we download from the Internet, instant messaging apps, social networking media, etc., will be saved in the Photos app on iPhone. iPhone has smartly categorized our photos into different albums, and allows us to create custom albums as well for manual management. To release iPhone space and reduce the storage pressure, we could do the following things to manage photos within iPhone's Photos app.
Section 1: Delete Photos
We could directly delete photos we no longer need to preserve or we have already made a backup on our computer or other drives from Photos app on iPhone. It's quite easy to delete photos and even albums from Photos app on iPhone:
1. On your iPhone, open Photos apps. Photos will be displayed in different tabs: Photos, For You, Album. Head into Album tab.
2. To delete a whole album, on the Album tab, click "Select All" on the top-right corner and then click "Edit" button on the top-right of the follow-up interface, then click the red minus button to remove a whole album.
3. To delete specific photo one by one, open the "Camera Roll" or the album your photos are saved in, navigate to the picture and click it, click the trash icon at the bottom right corner.
4. To delete specific photos in batch, open the "Camera Roll" or the album your photos are saved in, tap the "Select" button on the top-right corner, and then tap the photos you want to delete, finally click the "Trash" icon at the bottom right corner to delete them.
5. The deleted photos will be added into trash folder called "Recently Deleted". If you want to totally remove them, go to "Albums" tab at the bottom and hit "Recently Deleted" album. Tab "Select" button at the top right corner and choose " Delete All" at the bottom left corner.
Section 2: Compress photos
Sometimes, you could compress photos to mail them to your computer or other places for saving, and then delete original photo files to release space on your iPhone.
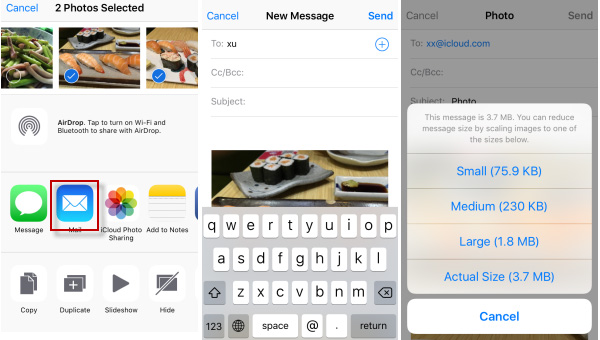
1. Head into Photos on your iPhone. Click the "Select" button to select some photos and hit "Action" button at the bottom left corner, and tab "Mail" option.
2. It will turn to "Mail" app. Fill in "To" and "Subject". Tab "Send" button at the top right corner.
3. Choose the size that suits what you need most. Compressed photos will be sent to your email.
Section 3: Transfer photos to PC for backup
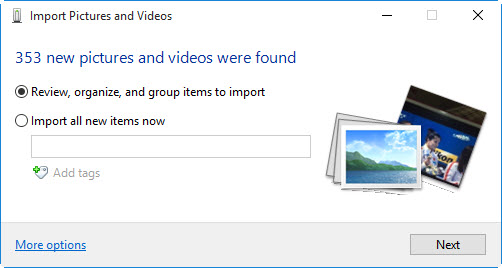
On Windows computer, you could directly import photos and videos from your iPhone to computer for backup via Windows Explorer.
1. Simply connect your iPhone to PC, and "Autoplay" windows will pop up.
2. Select "Import Pictures and Videos" option.
3. Browse through your files to select photos. Then tab "Import" option to transfer photos to your PC.
All these 3 methods could help you directly release space from Photos app. The 3rd solution is highly recommended. However, you need to know that you could only import the whole pictures and video library into computer via Windows Explorer. If you want to selectively import pictures and videos from iPhone to computer for space releasing, check the below content.
Part 2: Manage Synced Photos on iPhone
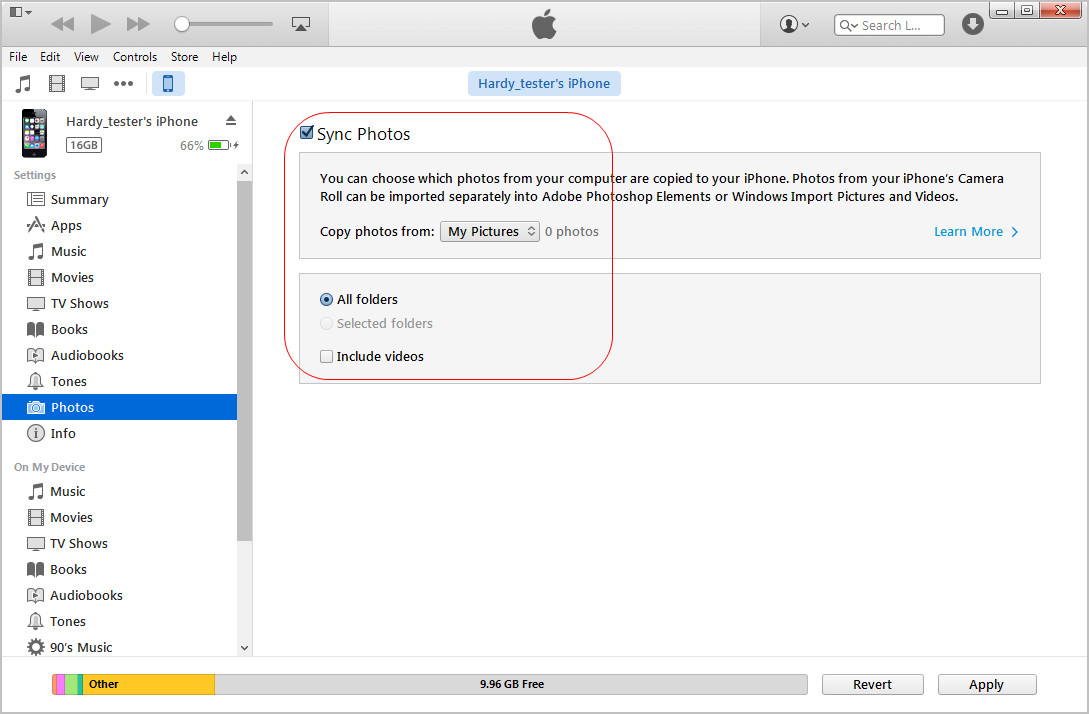
You can use iTunes to sync photos from computer to iPhone for enjoyment, and you can also take advantage of the application to manage iPhone photos. Every time you sync photos to iPhone with iTunes, you need to collect the photos in one folder and then sync them. Therefore, if you want to manage iPhone photos with iTunes, you should take full advantage of the folder on your computer. For example, when you are going to delete photos from iPhone, you can firstly delete photos in the folder, and then sync it to your iPhone with iTunes. Managing photos on iPhone with iTunes is not fast, but it may be the only official way for you to finish the task.
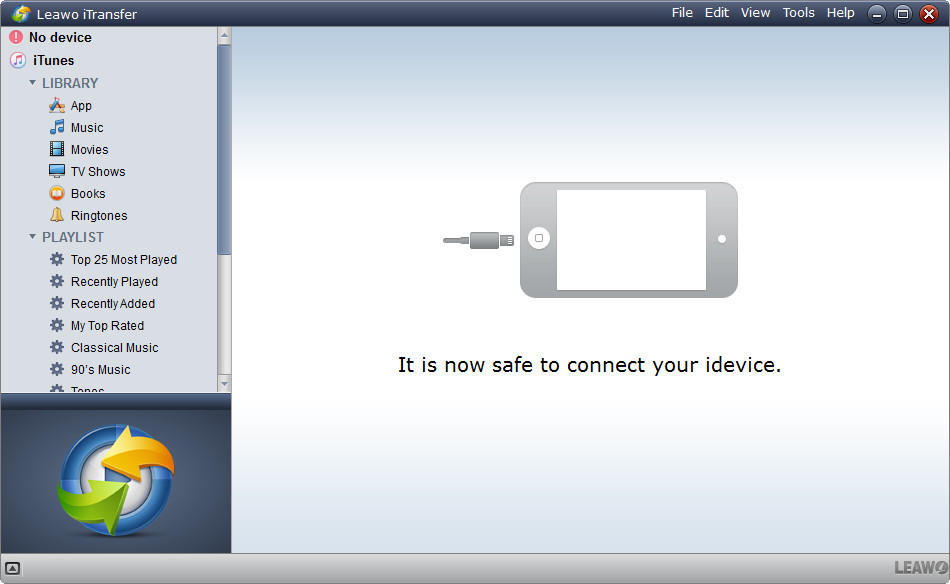
If you don't want to use iTunes, you can give the third-party iPhone file manager a try. Leawo iTransfer is regarded as the best of these iPhone managing and transferring programs, and it helps users manage their iPhone, iPad and iPod files without using iTunes. This software also enables users to transfer files among iOS devices, iTunes and computers without the sync of iTunes. The following guidance will show you how to manage photos on iPhone, and you can free download the software to have a try.
Step 1. Run Leawo iTransfer and connect iPhone to computer with USB cable. The software will recognize your iPhone.
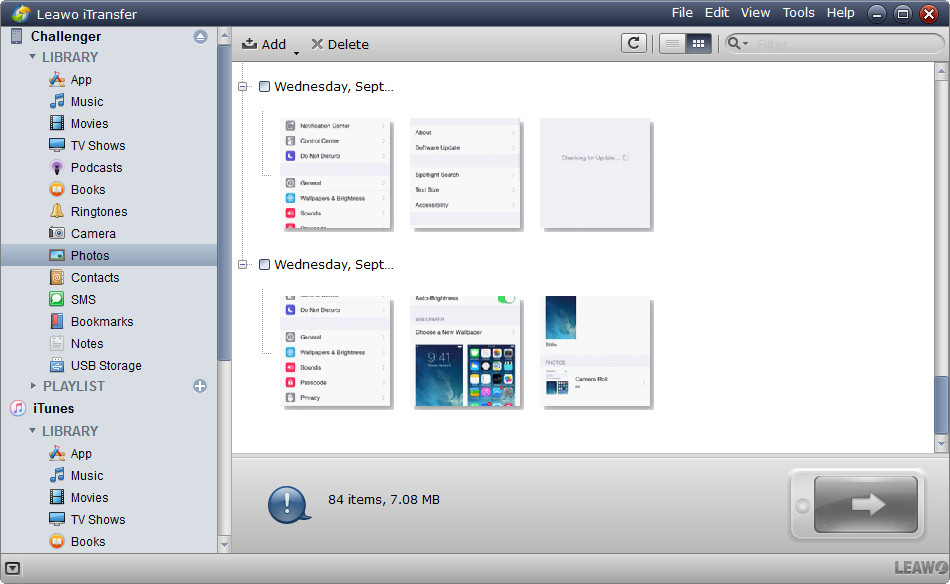
Step 2. Click the name of iPhone and choose Photos in the left sidebar. The iPhone photos will display in the right part.
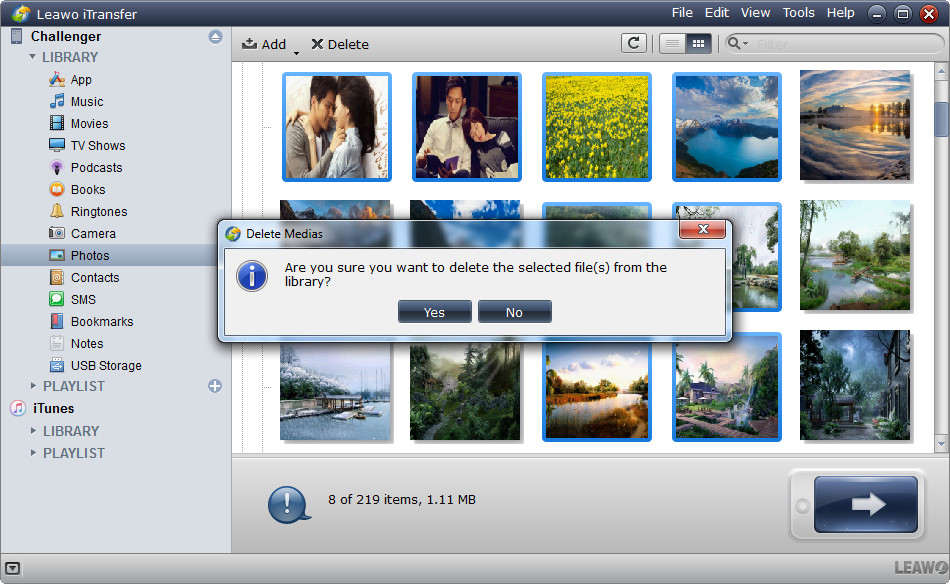
Step 3. Hold Ctrl/Shift key and select the photos you need, and hit the Delete button at the top middle. Then click Yes in the pop-up dialog to start deleting photos from iPhone.
Leawo iTransfer will finish the process in very short time. You can also take advantage of this software to transfer photos from iPhone to iPad for enjoyment, so you will see that iPhone transfer software helps to manage iPhone photos in multiple ways.
Part 3: Manage Camera Roll Photos on iPhone
The photos saved in iPhone Camera Roll are shot with iPhone camera, or downloaded from the Internet directly. Managing iPhone Camera Roll photos is easy with your computer. When you connect iPhone to computer with USB cable, you can get access to the Camera Roll folder easily. Then you can copy the photos to your computer.
Besides the method, Leawo iTransfer can also help you manage Camera Roll photos on iPhone. As introduced in first part, Leawo iTransfer is regarded as one of the best iPhone file managers, and enables users to manage their iPhone files with ease. The following guidance will show you how to manage Camera Roll photos on iPhone.
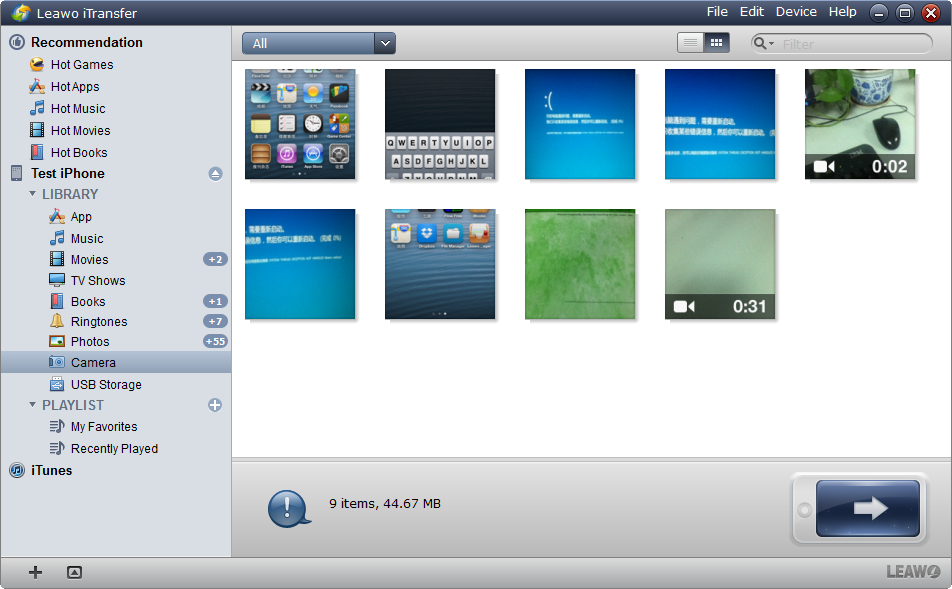
Step 1. Run Leawo iTransfer and connect iPhone to computer with USB cable. Click the name of iPhone and choose Camera after the software recognized your iPhone. The photos will show up in the right part.
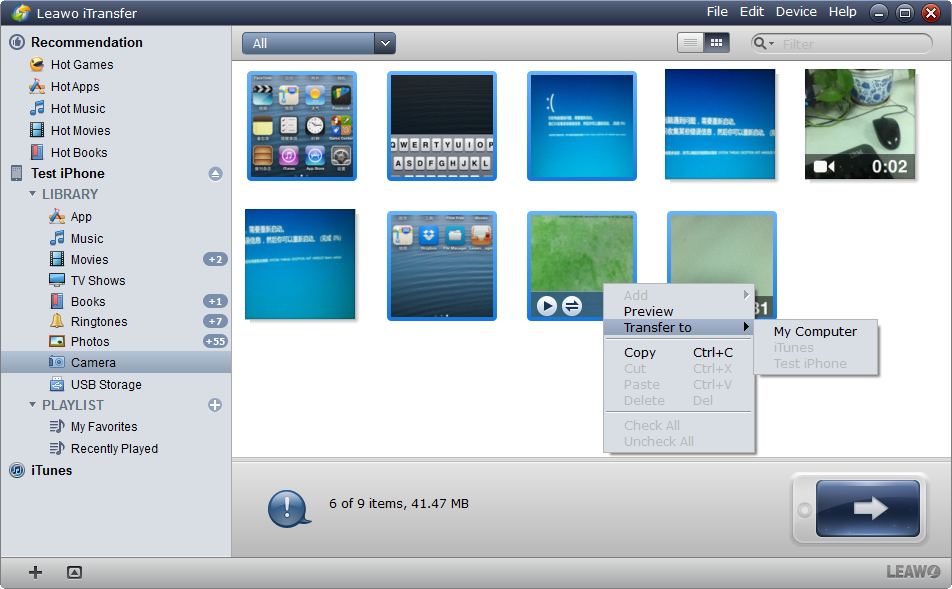
Step 2. Hold Ctrl/Shift key to select photos you want to transfer, and right-click a selected photo and choose Transfer to > My Computer. Or check the square checkbox beside the date to select the photos of certain time, and click the transfer button at the right bottom.
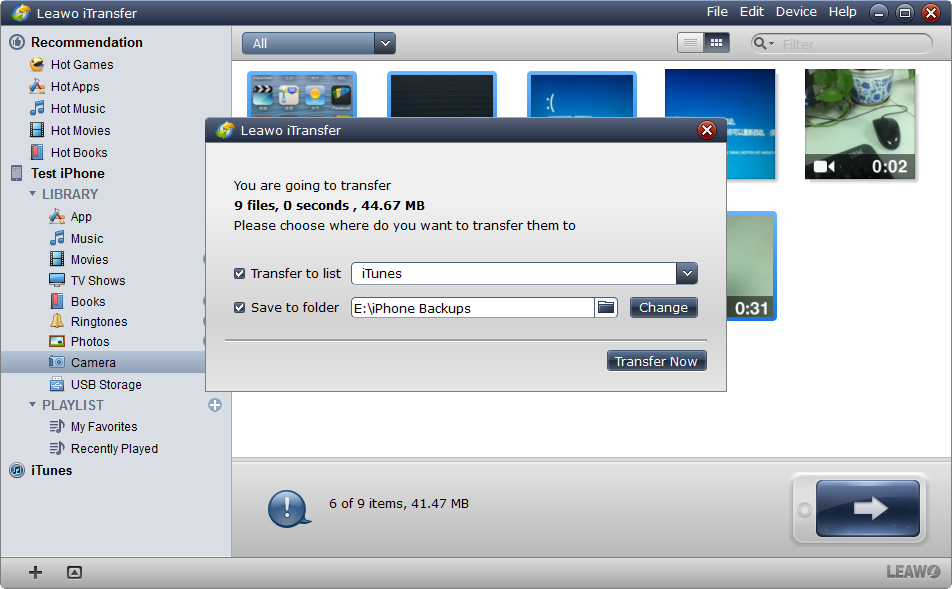
Step 3. You'll see a pop-up dialog after selecting photos. Check Save to Folder and click Change to select a folder on computer to save the photos. Then click Transfer Now to start transferring iPhone photos to computer.
When the transfer is done, you'll get the photos in target. With Leawo iTransfer, you are able to manage iPhone photos with no efforts. If you are interested in this software, just check it out.
Bonus: 3 Best Apps for Managing Photos on iPhone
As a bonus, we would like to share 3 best photo management apps for iPhone users to directly manage photos on iPhone. Of course, plus iPhone's Photos app, there would be 4 best photo management apps for iPhone mentioned in this page.
MyPics
MyPics is the best free iPhone/iPad photo managing app developed by AppStair, Inc. that allows you to organize the photos as well as videos on your iPhone and iPad. This powerful photo editing application has been the most popular photo apps and attracted more than 2.5 million users worldwide.
Google Photos
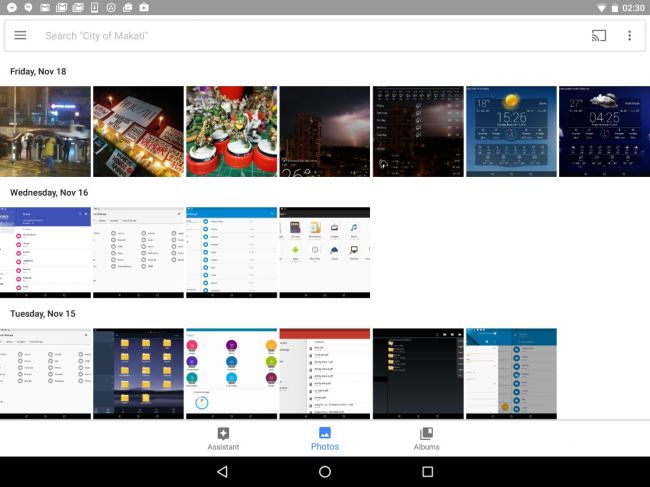
Google Photos boasts unlimited cloud storage space and cross-device syncing for your photos (with minimal compression), as well as the option to store original quality photos in your Drive space. The app can be set to automatically back up and sync your photos so that your snaps are always safe, and the app displays it all by date. A smart Assistant feature can help you set up albums, collages, grouped photo stories and animated photos. There's even a powerful "visual search" feature that works even on untagged, unlabeled photos. Google is continually refining the mix with additions like new editing tools and refinements to the Assistant.
Flickr
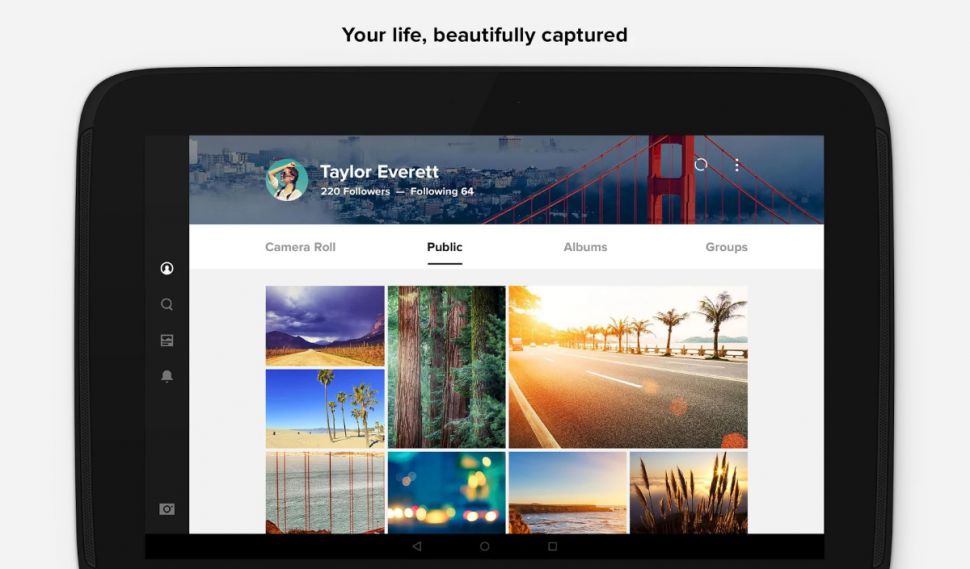
Flickr (Android, iOS) still offers a good deal in the online photo storage business. Previously offering users 1 terabyte of free cloud storage, the photo management app will slash that to a limit of 1,000 photos stored online for free. Flickr includes automatic uploading, as well as smart search features. That means that organization isn't as dependent on users manually tagging each photo. The default Camera Roll groups your photos by date, and social features let you share your photos as well as keep track of images shared by your friends and other users.


