iTunes which is owned by Apple is one of the biggest media player, media library and online digital media store. CDs used to be the main way people listened to music in the past, but with the internet explosion, the world saw a spike in illegal music downloads. Apple curbed that dilemma when they introduced iTunes, which was and is still one of the legitimate ways to purchase digital music and other media. Apple eventually launched Apple Music, a music and video in 2015. To date, Apple has millions of music, music videos, movies, and TV shows in its iTunes Store and Apple Music service. If you subscribe or buy music and video files from those two Apple services, they may still protect the files with the DRM system. In some cases, this means you cannot watch or listen to that media on any device except the ones which the purchaser’s account is assigned to. M4V video files are also protected by the DRM system and are specifically designed for the Apple ecosystem. WMA or Windows Media Audio is an audio file extension that is used with Windows Media Player. What we want is for you to enjoy your media files anywhere and? on any device of your choice, and we will guide you on how to remove DRM from your M4V video files and convert them to WMA audio or any other file type of your choice to meet your needs.
Part 1: How to remove iTunes M4V DRM with Leawo Prof. DRM
The first step is to remove DRM. Leawo Prof. DRM, formerly known as TunesCopy, is an all-in-one DRM removal and converter software suite used to bypass the DRM protection imposed on all iTunes media files, in this case M4V video files. It also bypasses DRM protection on Spotify audio files and eBooks (from Kindle, Kobo and Adobe). This software suite is available for download on both Windows and Mac OS systems. The steps below apply for Windows and Mac OS.
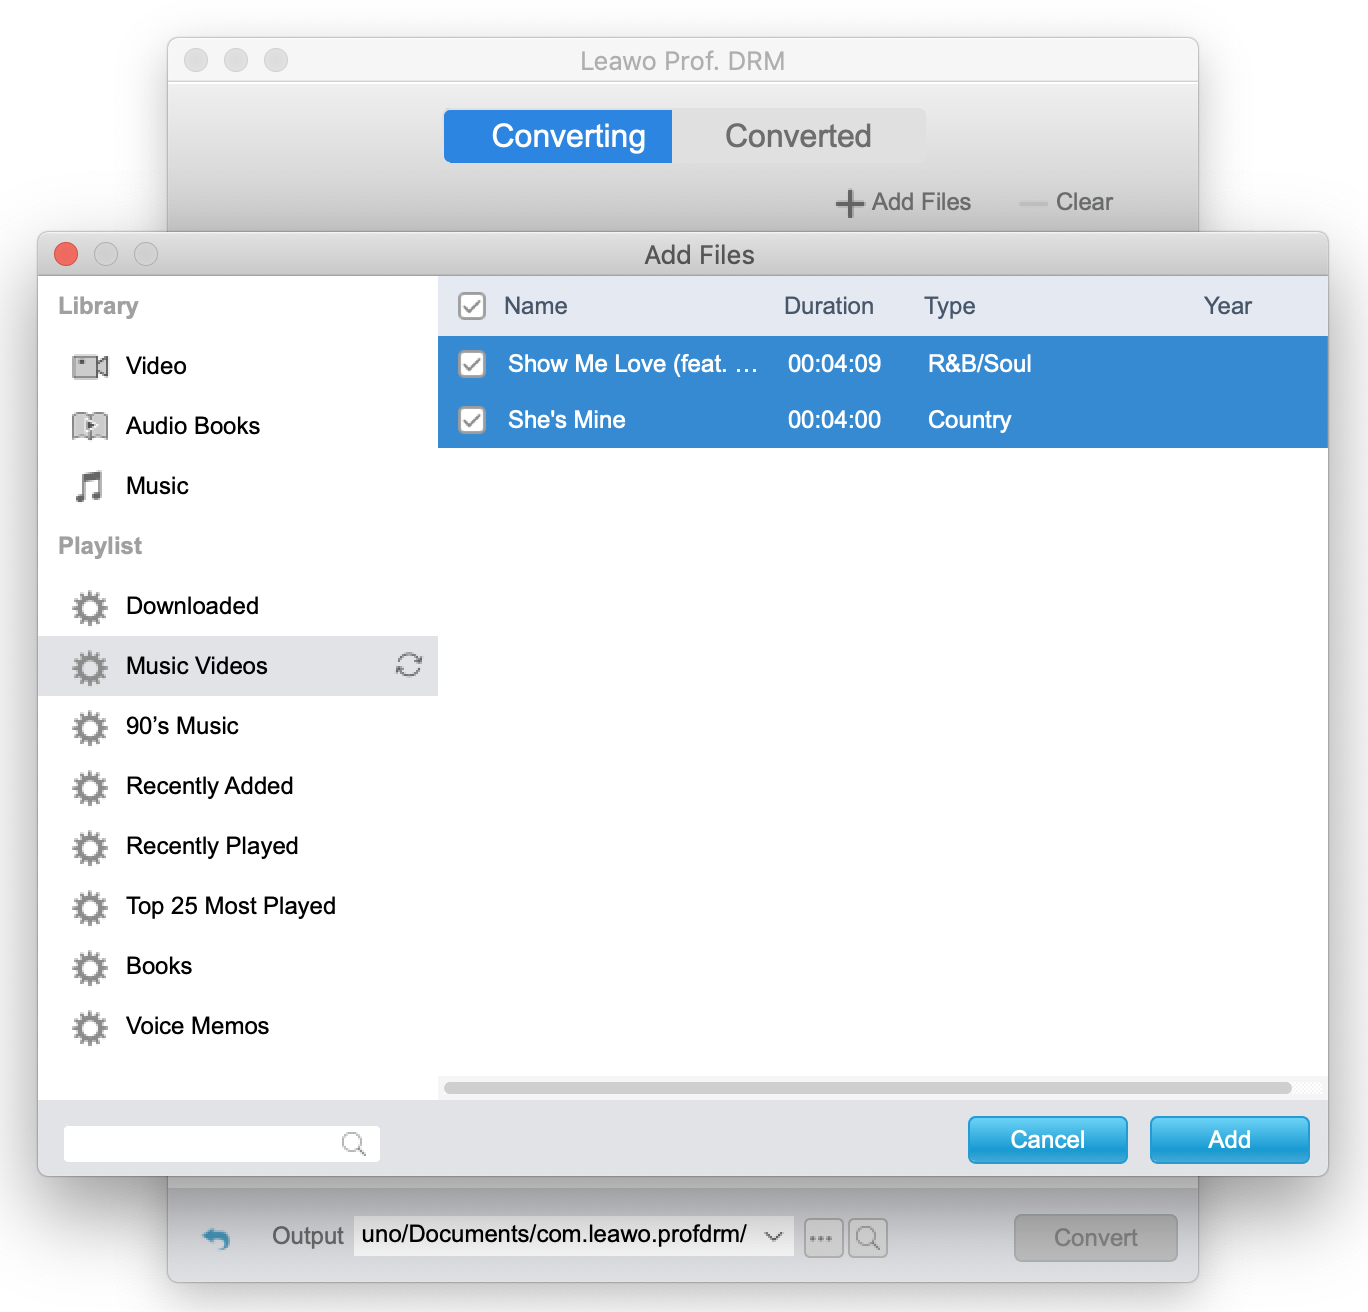
Step 1: Import your files. Launching the program will show you the main interface which is clean and super easy to use, and what you want to do now is to click “Add Files” on the menu bar. To make it easier for you, this program will automatically search and find your iTunes M4V video files which are not always easy to find especially on Mac OS systems. You can select individual files or simply click “Add All” for the corresponding option.
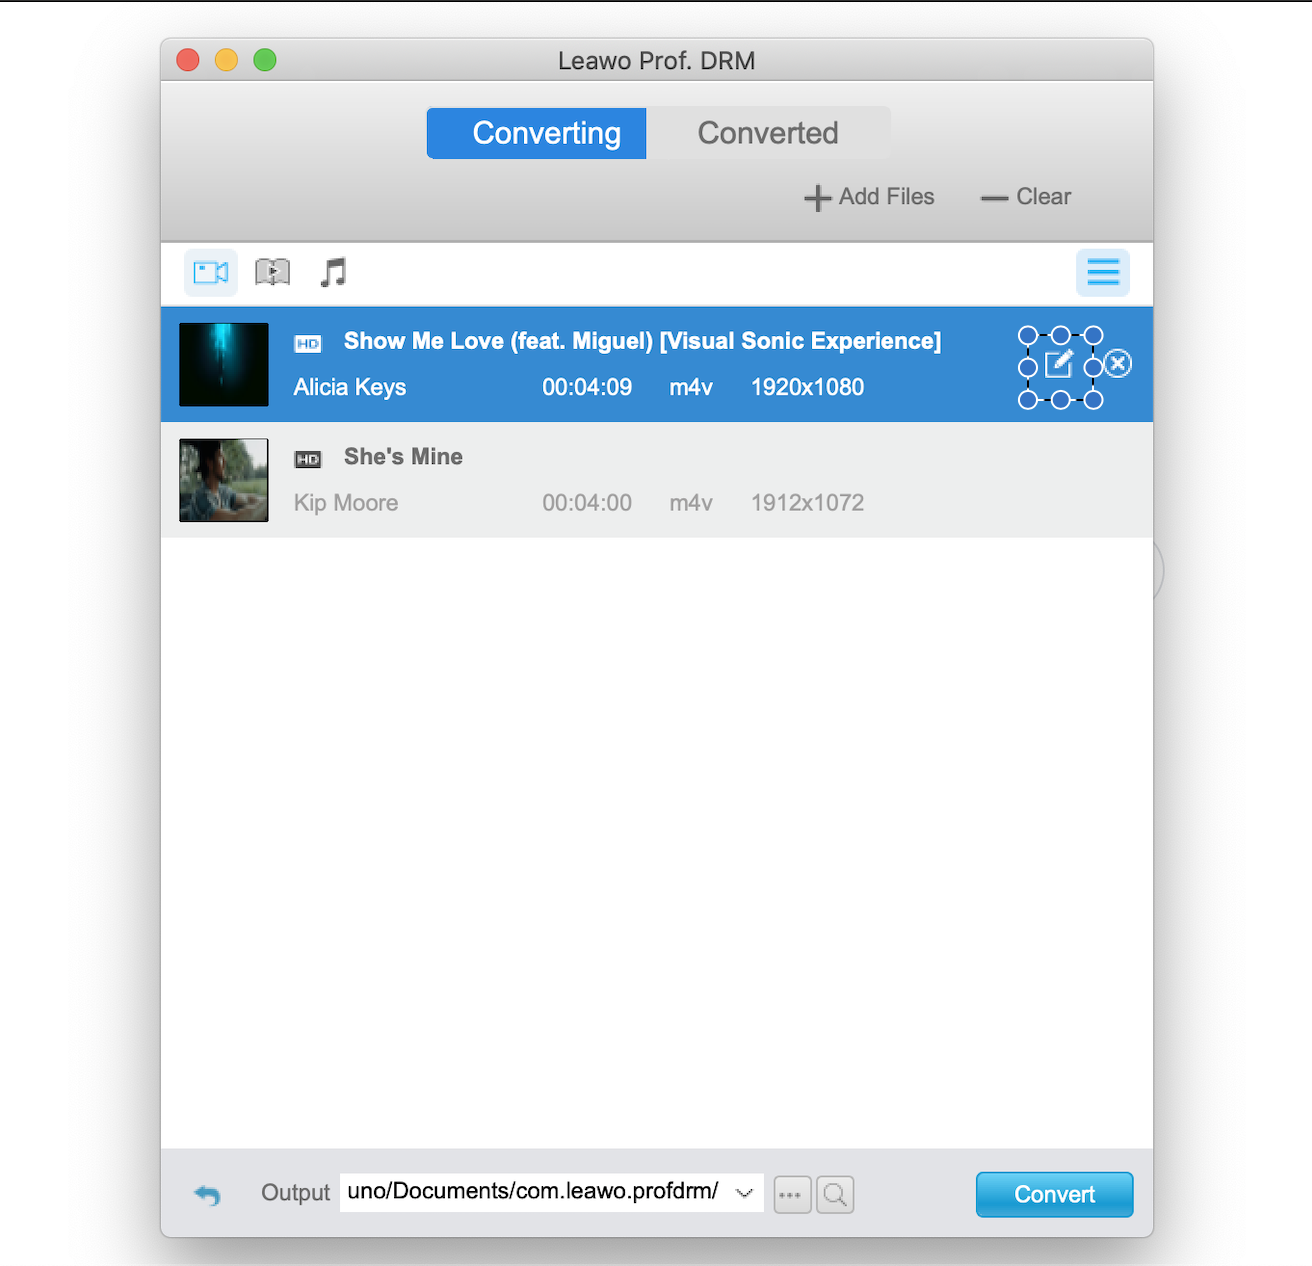
Step 2: Choose audio tracks or subtitles. Your imported files will now show on the program. Click the edit icon at the right side of each file to select the audio track and the subtitles of your choice. The subtitles can be used if you wish to convert to video.
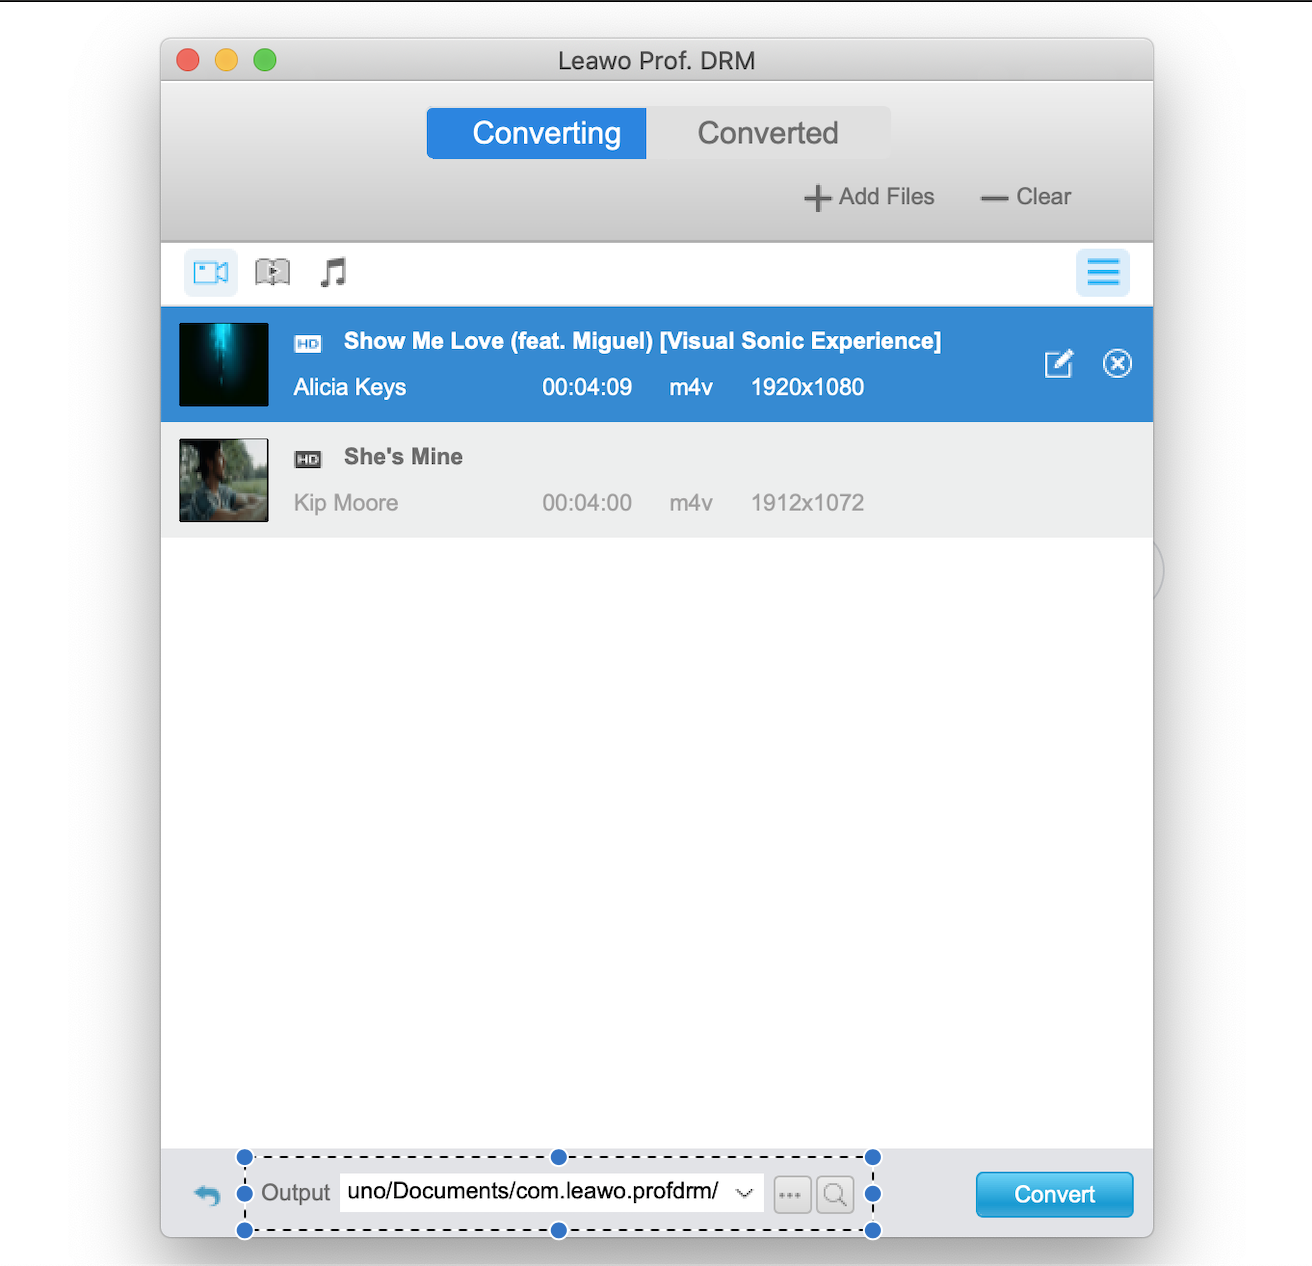
Step 3: Set your output folder. By default, Leawo Prof. DRM will output the files to its installation directory, which will not be convenient for you when you want to locate your converted files. Click the browse icon, next to the “Output” text-box. If you are a computer wizard, you can even type the directory in the text-box by yourself.
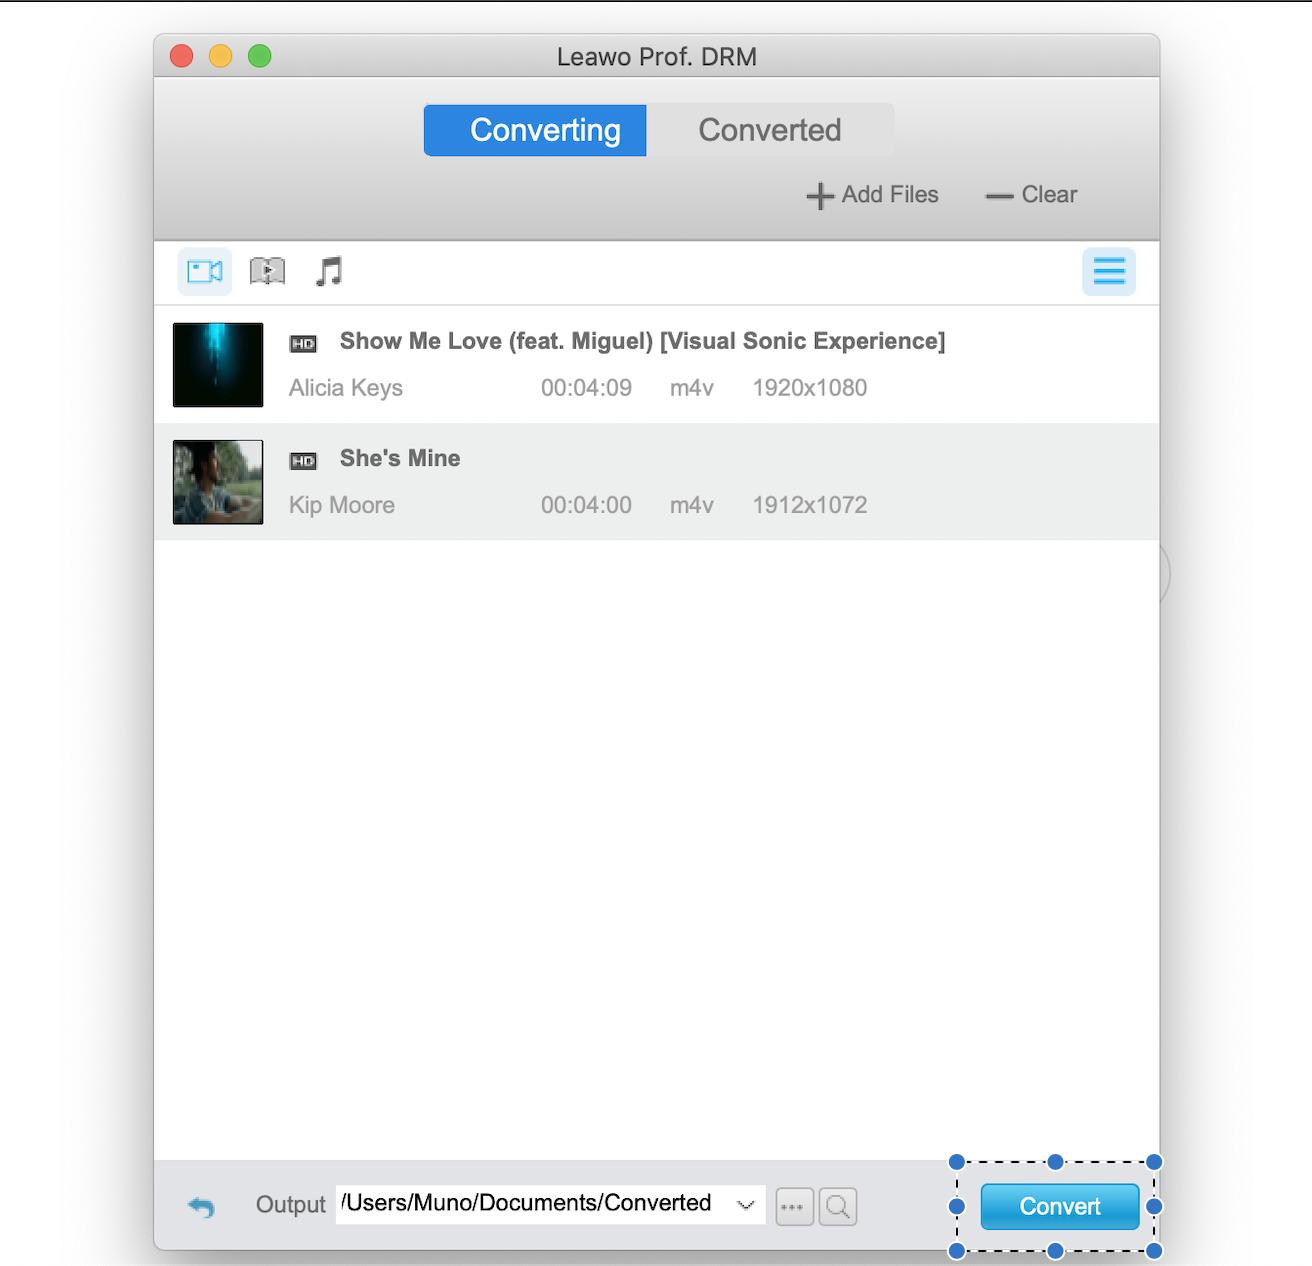
Step 4: Conversion. Once you have finished setting your output directory, click “convert” at the bottom. There are two tabs, that is “Converting” and “Converted”. You can see the converted files under the correspond tab, and you can conveniently open the directory to locate your converted and DRM free MP4 video files.
Part 2: How to convert iTunes M4V to WMA with Zamzar
Zamzar is an online file converter that supports documents, images, videos and audio. The advantage of this service is that you will not need to install any software on your hard disk, but you will need an internet connection that is fast and reliable for a reliable conversion. For free users have limits, and each file to be uploaded should not exceed 30MB. Free user limits also extend to the number of files, that is five per day. Zamzar supports iTunes M4V video, but only if they do not have DRM protection. Zamzar will also not convert to WMA audio, but you have other audio formats to choose from. To start, visit the Zamzar website.
Step 1: The first step is to log in or sign up for this service if you wish to increase your file size and number limits. If you wish to use the free service, you can skip this step.
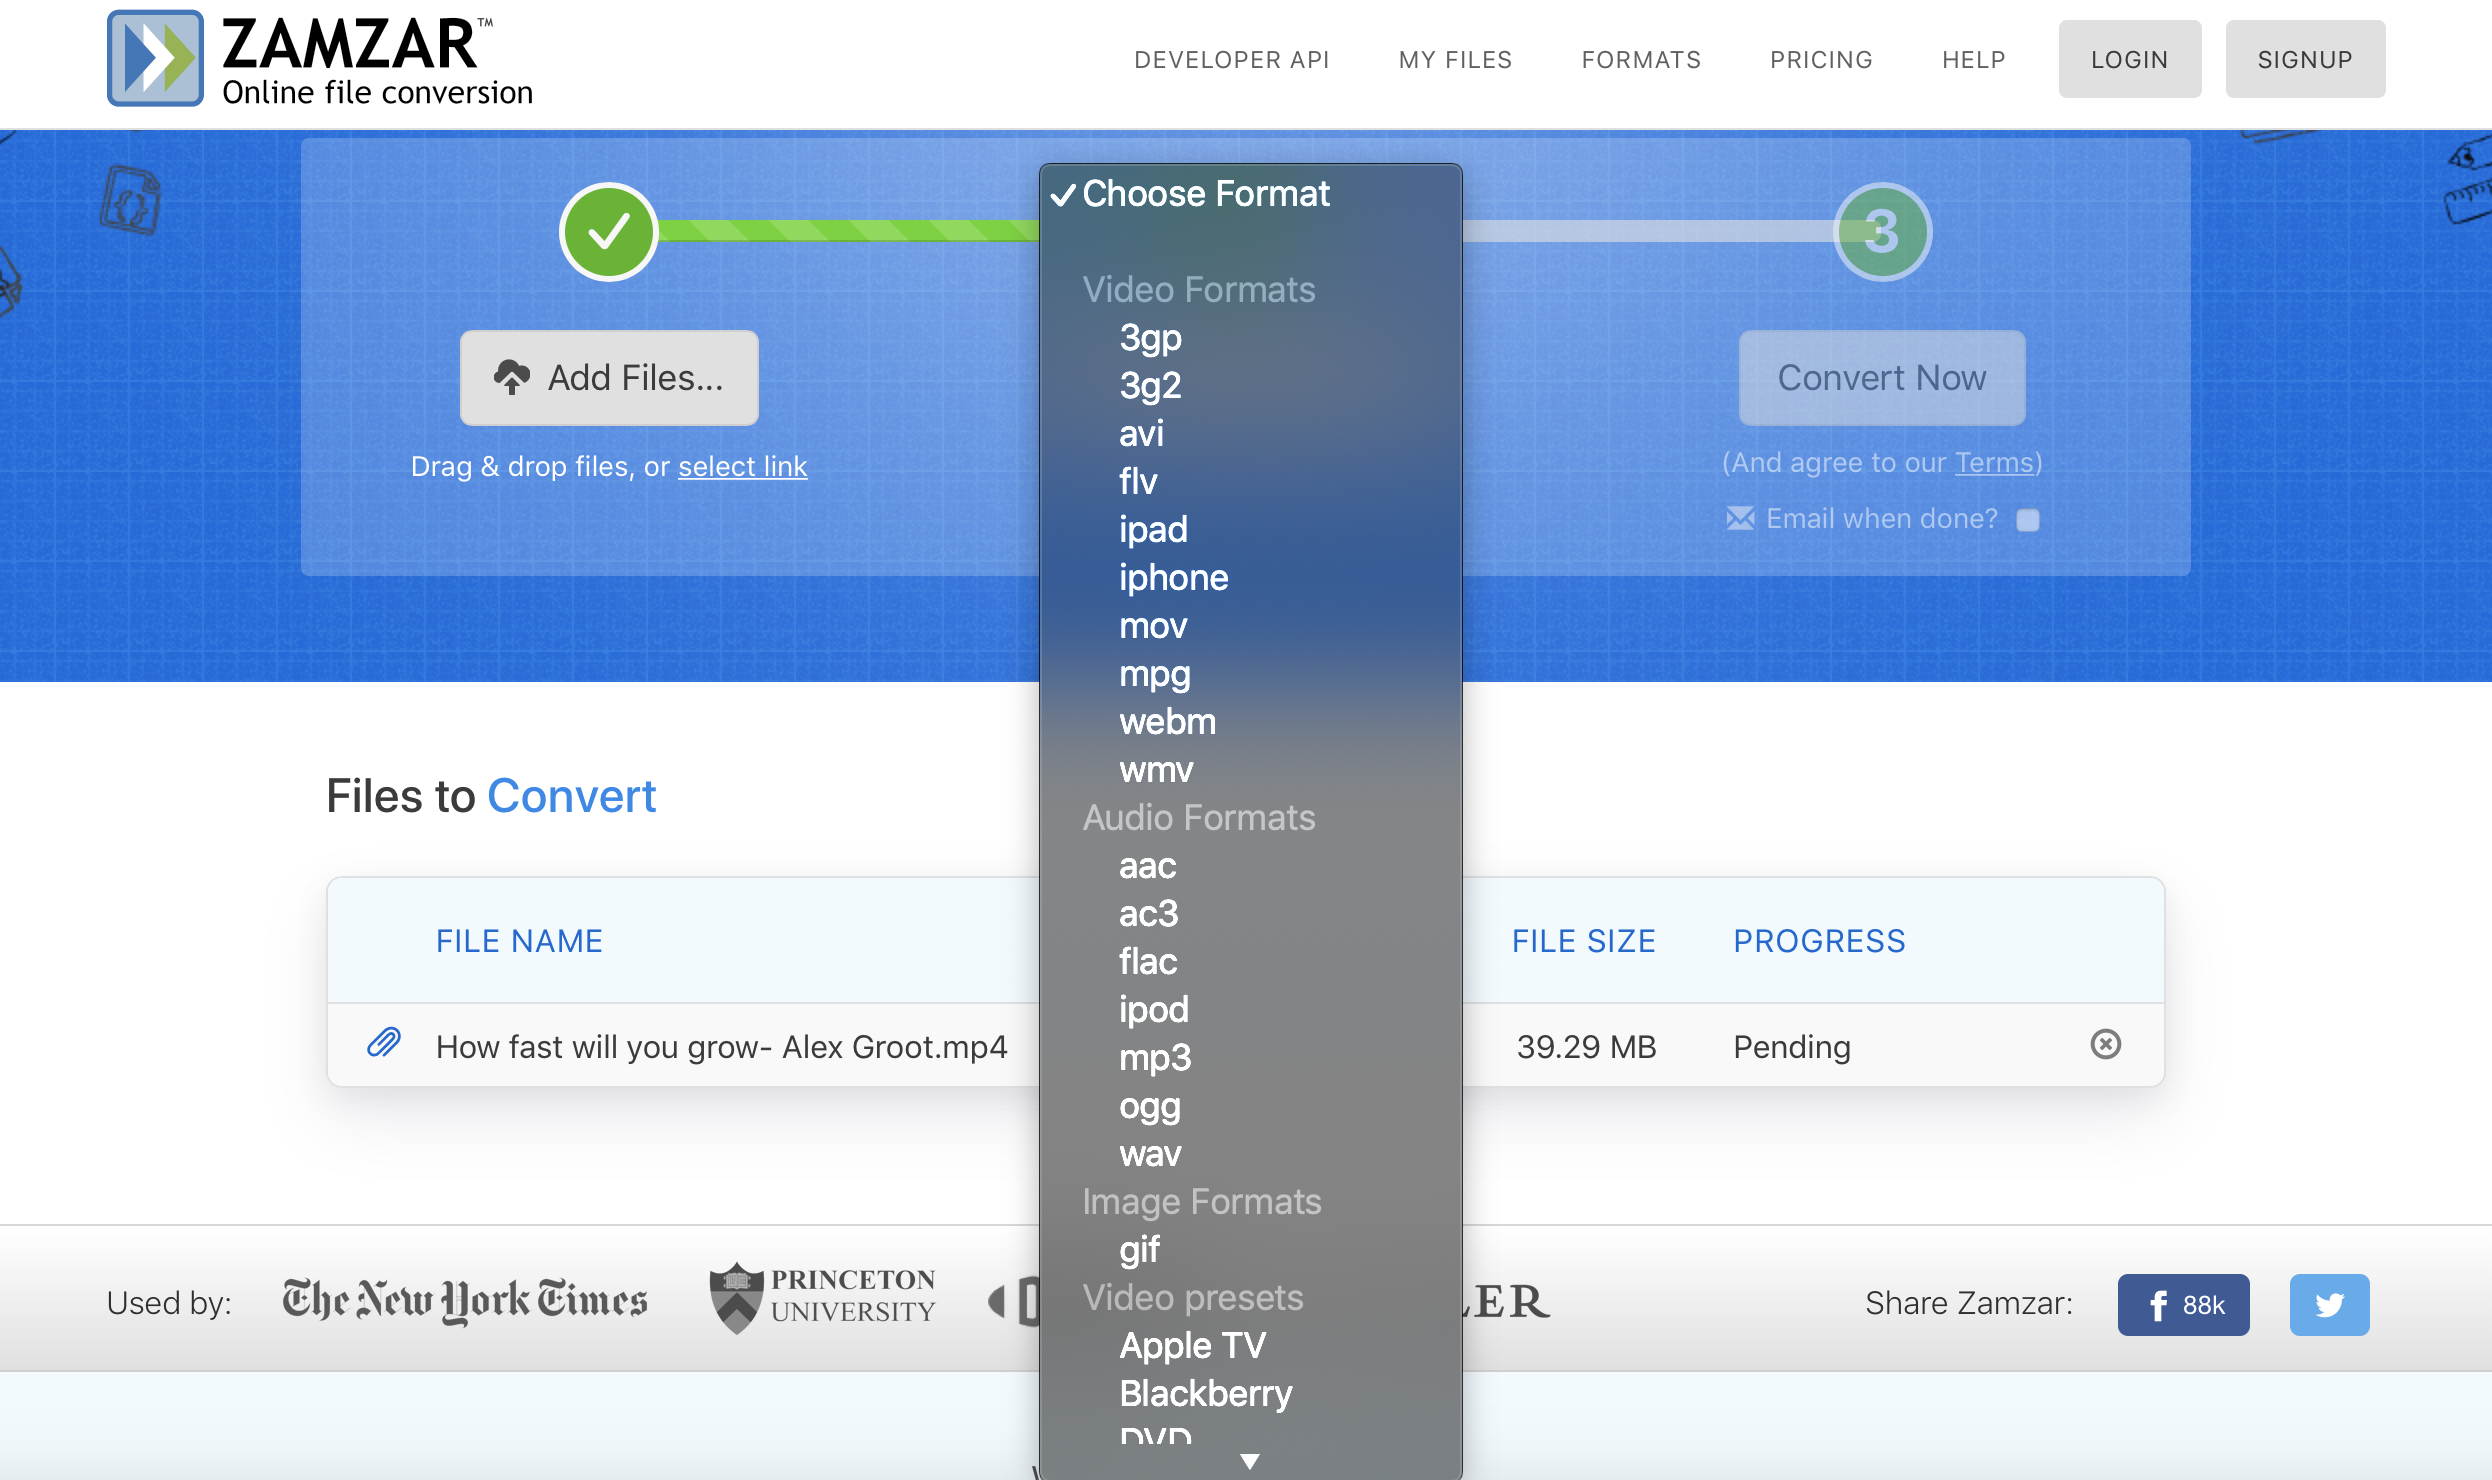
Step 2: Uploading your file. On the main homepage, Click “Add Files…”? which will open a window from where you can locate your M4V video file. Keep in mind that the M4V video file should not have DRM protection. In case you removed DRM using Leawo Prof. DRM, upload the MP4 video file.
Step 3: Select your output audio profile. When you select your video file, click “Choose Format…” and select one from the available audio profiles for conversion, WMA audio is not available.
Step 4: Wait patiently for your file to convert. When you finish selecting your audio profile, click “Convert Now”. The website will simultaneously upload and convert your file, and this will take a little bit of time. When done, the download link will appear and click it for the corresponding action.
Part 3: How to convert iTunes M4V to WMA with CloudConvert
CloudConvert is also internet conversion like Zamzar. It supports a host of many video file types including M4V video, only when it does not have DRM. The free plan will give users 25 conversion minutes per day. You can purchase more minutes from this service if you need them. To start, visit their website and follow the steps below.
Step 1: Click the “Select Files” button. This will open a window from where you can conveniently locate the file(s).
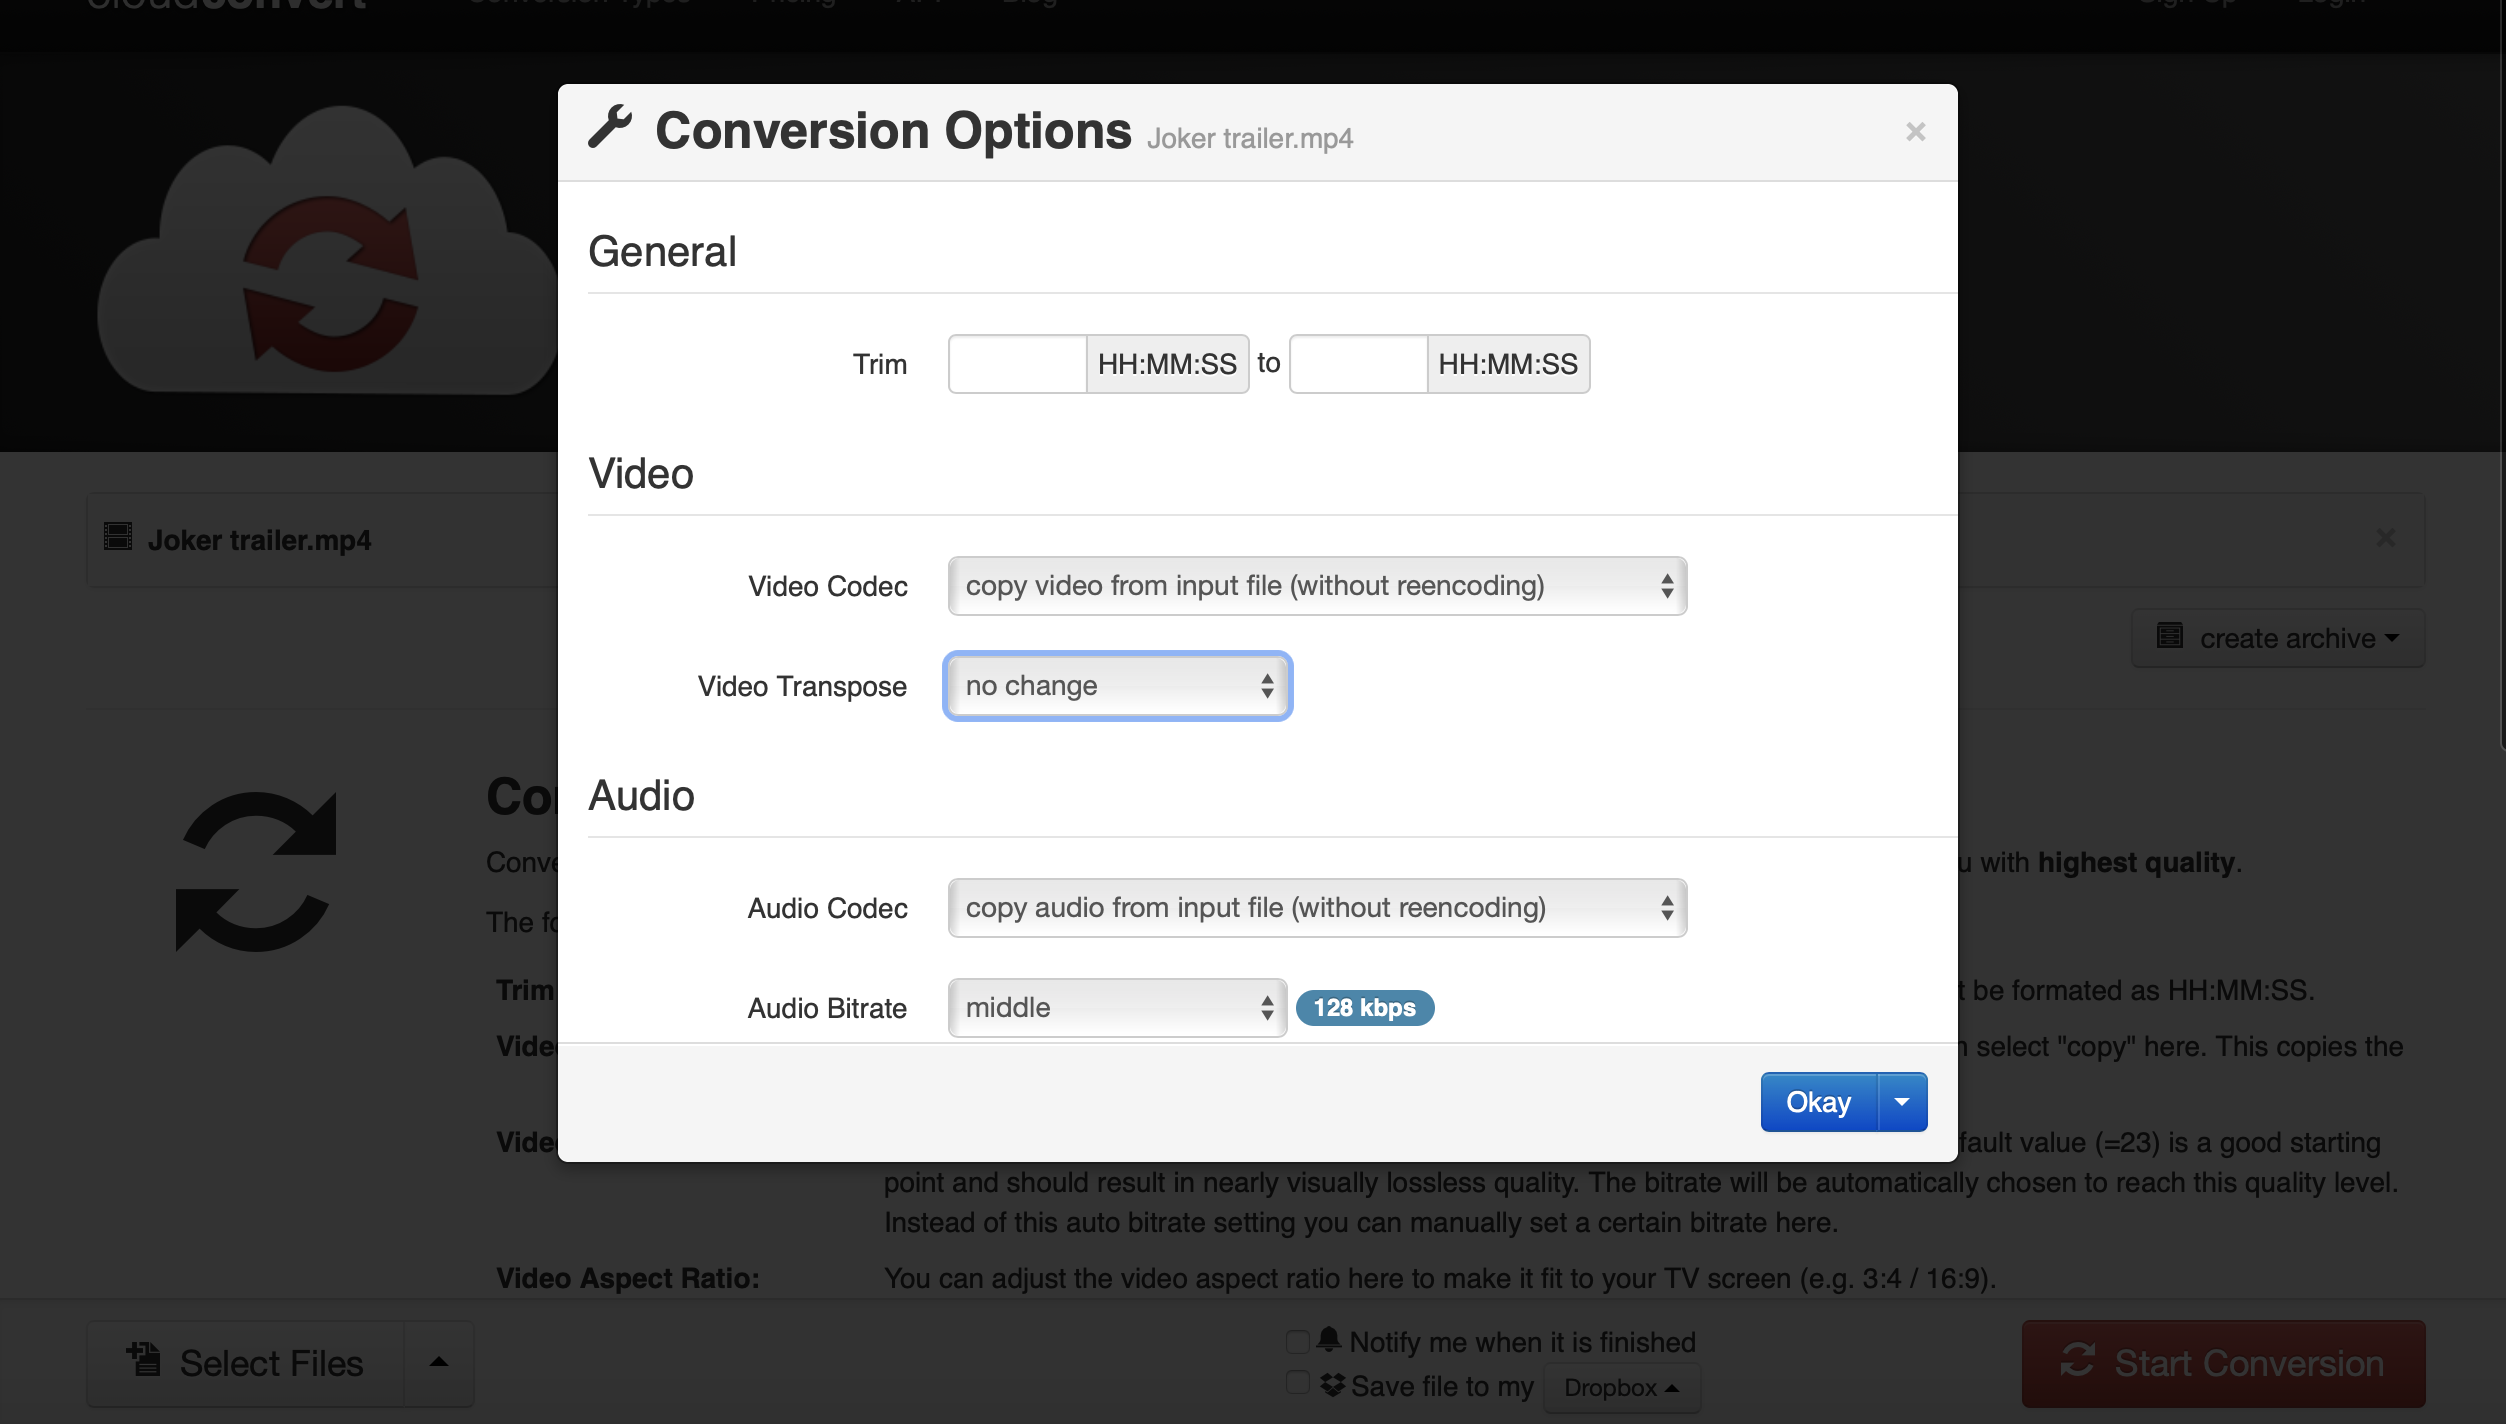
Step 2: Once you have uploaded your video, click the spanner icon to set your conversion options. This includes video codec and transpose, audio codec and bitrate, subtitles and more options. When you have finished, click “Okay”.
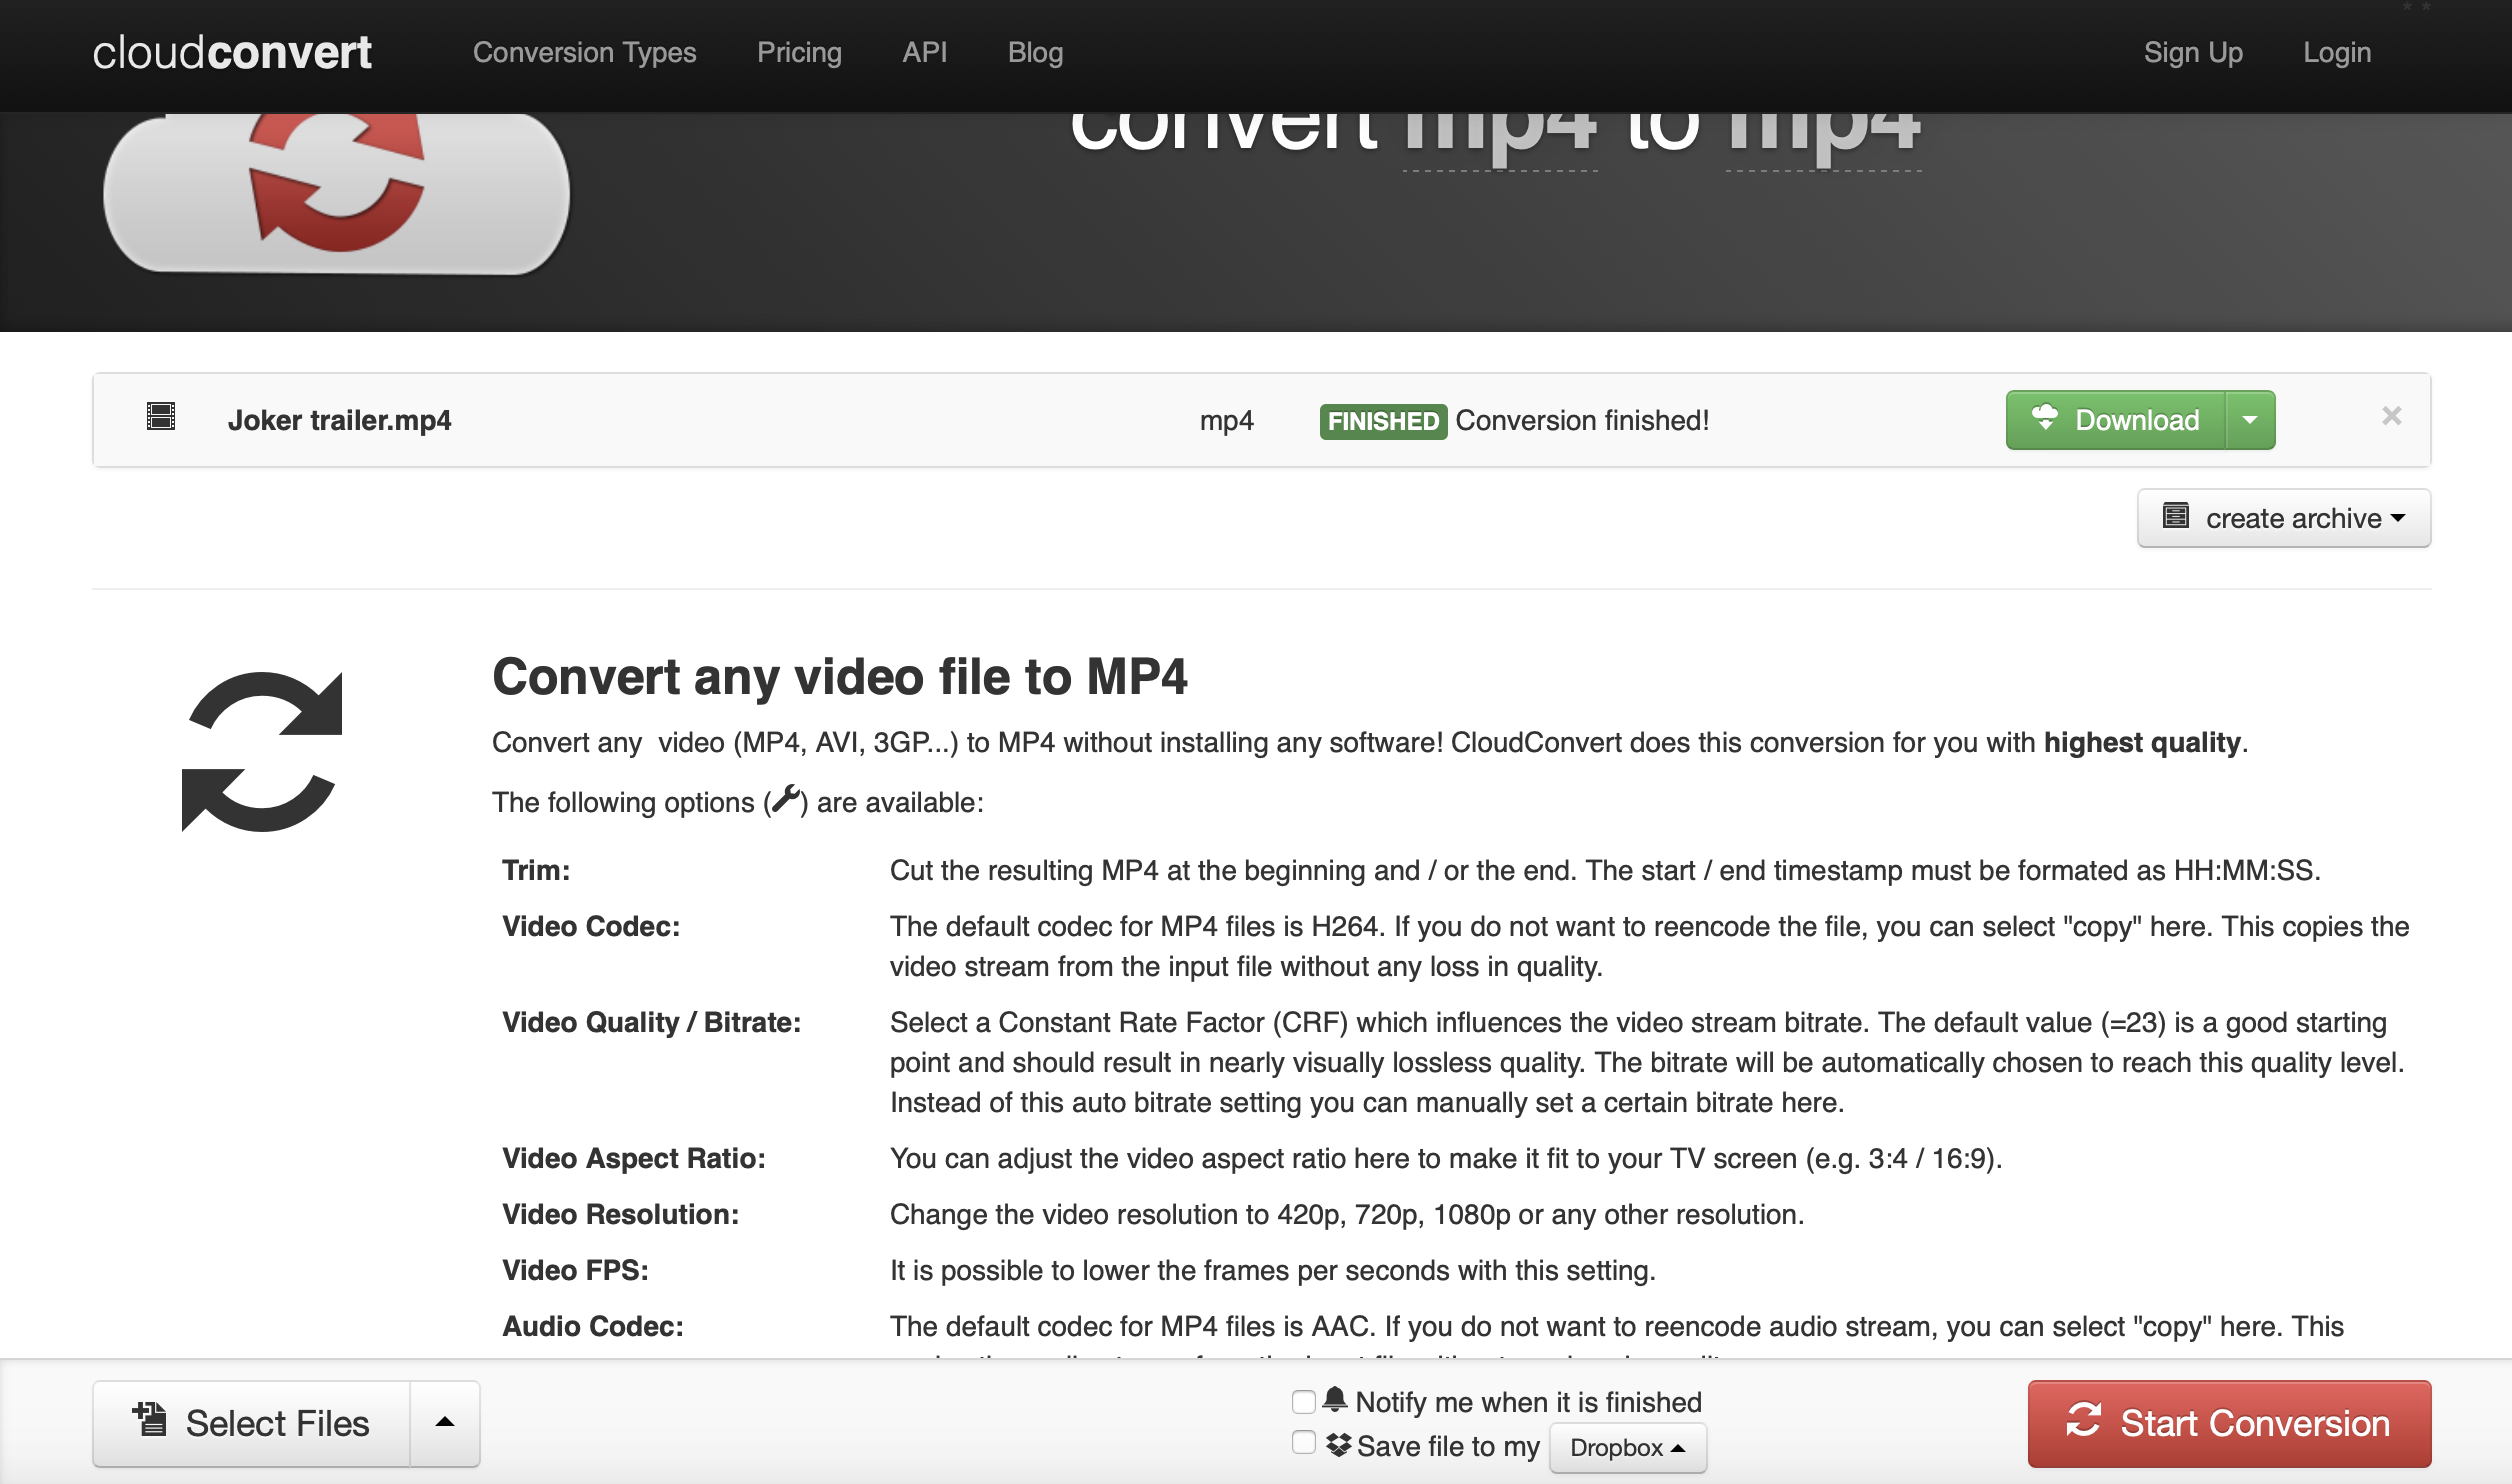
Step 3: Once you have finished step 2, click “Start Conversion” which will begin uploading your video file(s). When it has finished it will convert automatically and you can click the green “Download” button to save the file(s) to your hard drive.
Part 4: How to convert DRM-Free M4V to WMA with Leawo Video Converter.
Leawo Video Converter is the most popular video and audio converter program that works with files of any kind, to be precise 180+ formats. To make it easier for our users, they can directly set an output profile based on devices of their choice. Quality is very important when converting your audios and videos, and you can retain 100% of the original quality when converting. When you finish removing DRM from the M4V video files which will become MP4 video files, launch Leawo Video Converter if you already have the program installed on your computer. If not, download and install the program which is available for both Windows and Mac OS. The steps below apply for both Windows and Mac OS.
Step 1: Import your MP4 video files. From the main interface of the program (on both Windows and Mac OS), click “Video Converter”. This program easily allows you to drag files into it, and you can do so with your MP4 or any other video files. You can also click “Add Video” to import your video. When you click this button, a window will open and you can conveniently browse for the video files, in this case the output directory you set when you removed DRM and converted the iTunes M4V video files.
Step 2: Language, audio track and subtitle options. Since we want to convert the MP4 video files to WMA audio, click “Audio” which will allow you to select an audio track. In case you want to convert to video, clicking “Subtitles” will allow you select the subtitle (by clicking the corresponding available tick box) or import the subtitle (usually with .srt file extension).
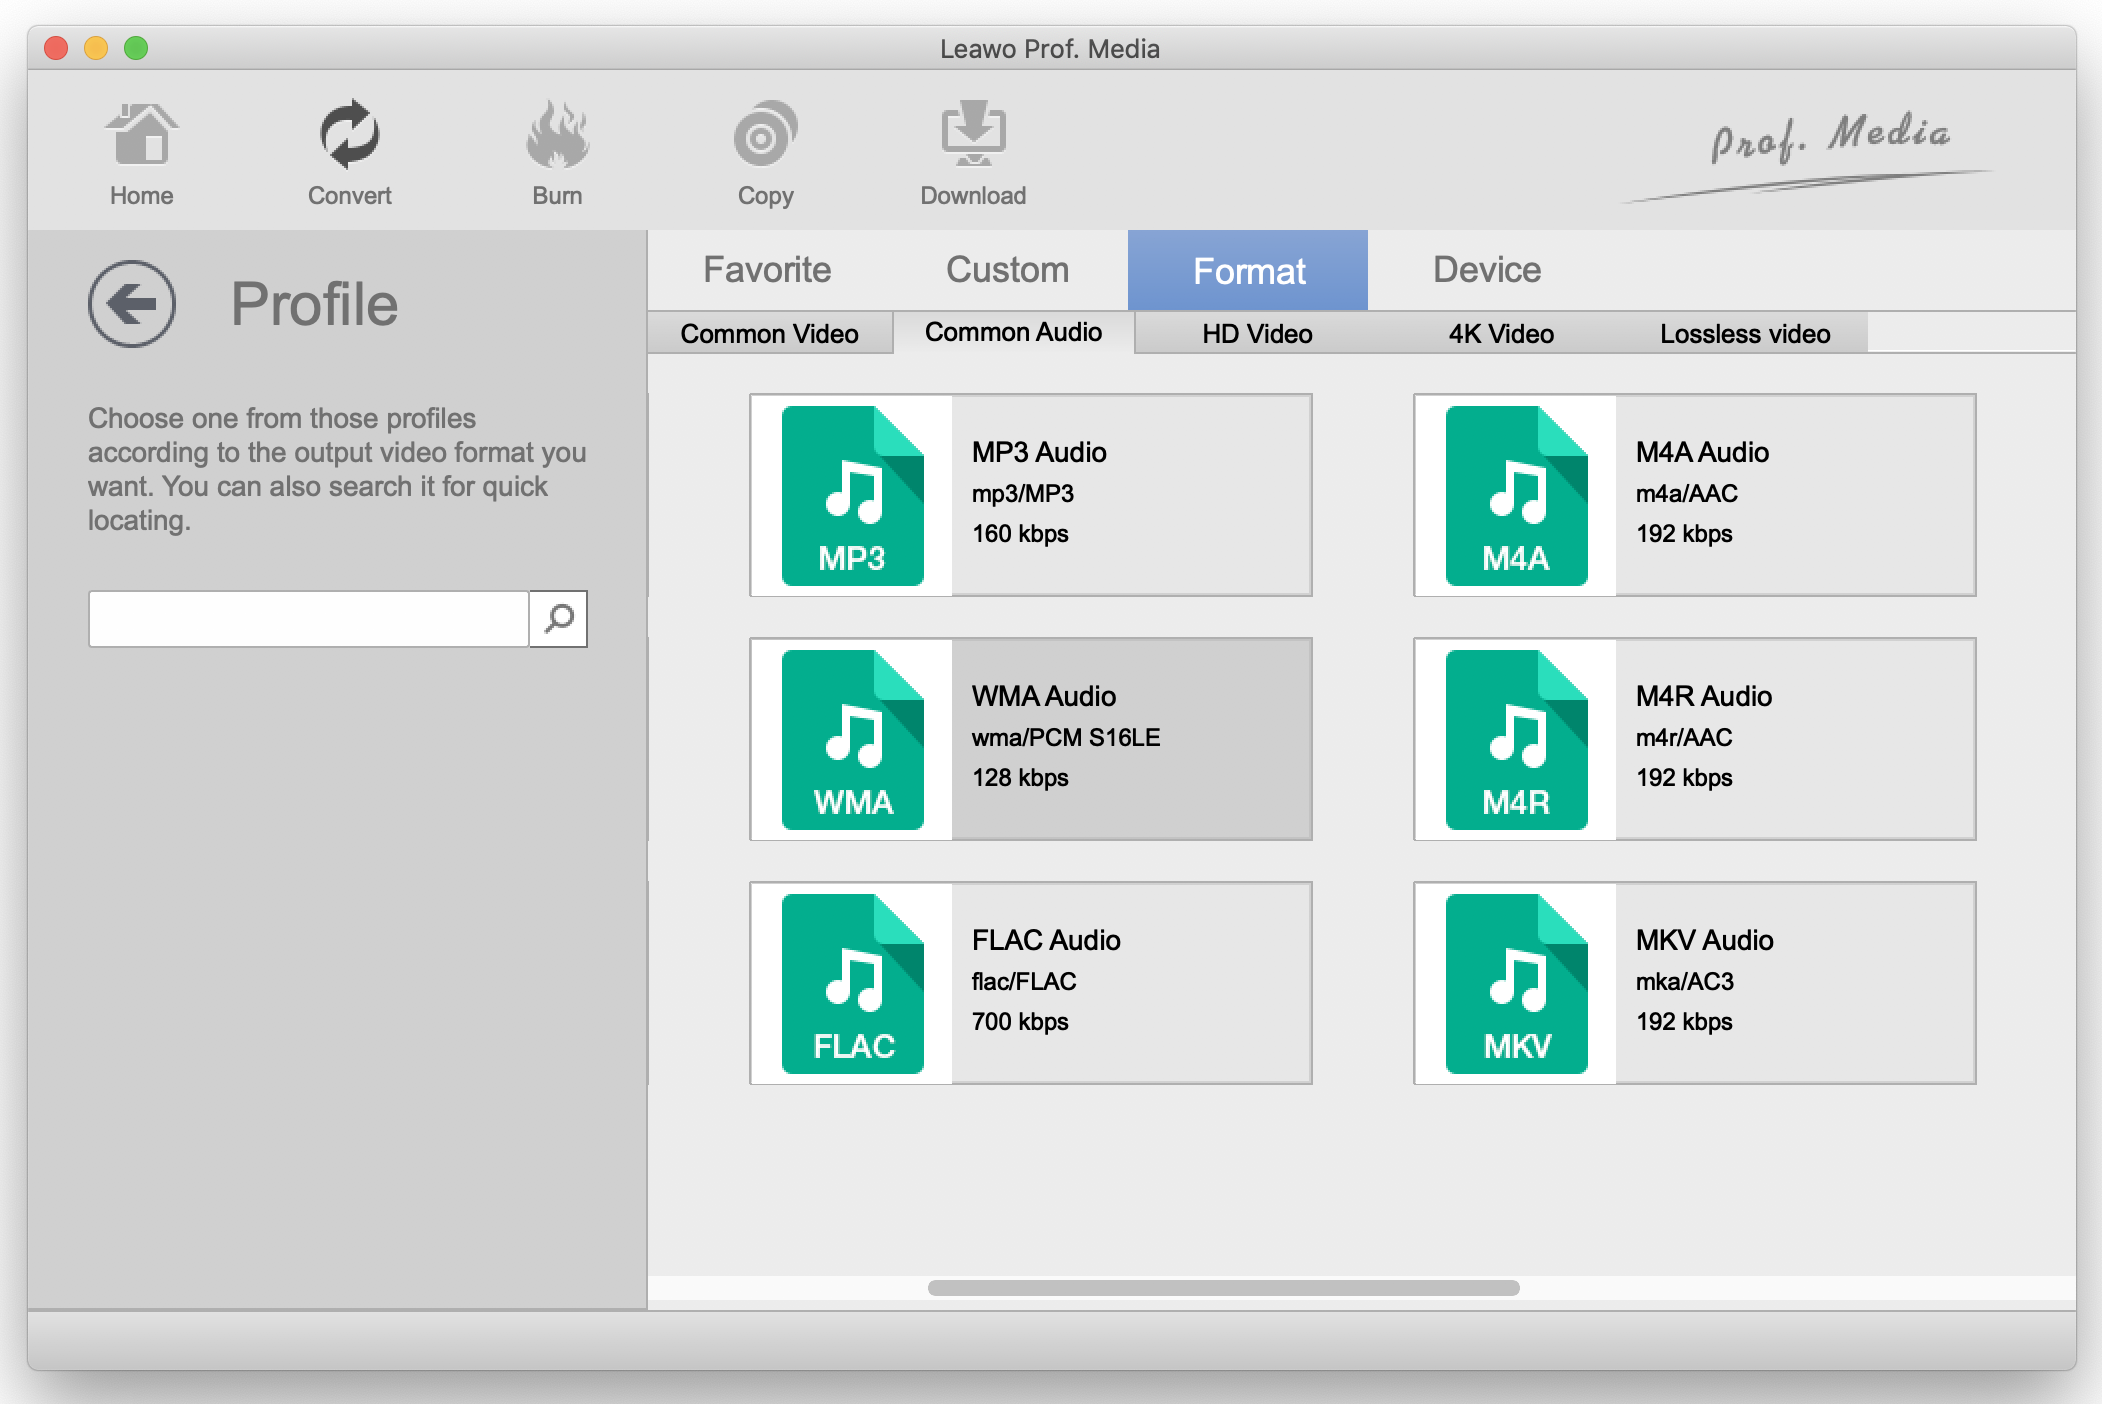
Step 3: Setting the output profile. To do this, click “MP4 Video”. You have 2 options from the pop-up menu to change the settings. If you click “Change” it will show you pre-made profile settings for different device types under “Device”, and several other video format options under “Format”. In this case, click “Format” followed by “Common Audio” and then select WMA audio. If you click “Edit” from the pop-up menu, you can manually change your audio options, like setting the audio bitrate etc.
Step 4: Converting your MP4 videos to WMA audios. When you have finished with your settings, click the green “Convert” button to start converting your video. Once clicked, a small sidebar will pop up. You can set a directory under “Save to” box for the output files, in this case a WMA audio file. Click the “Convert” button at the bottom of sidebar, which is shown below, to start conversion process. In case you have multiple files. you can also convert them simultaneously.

